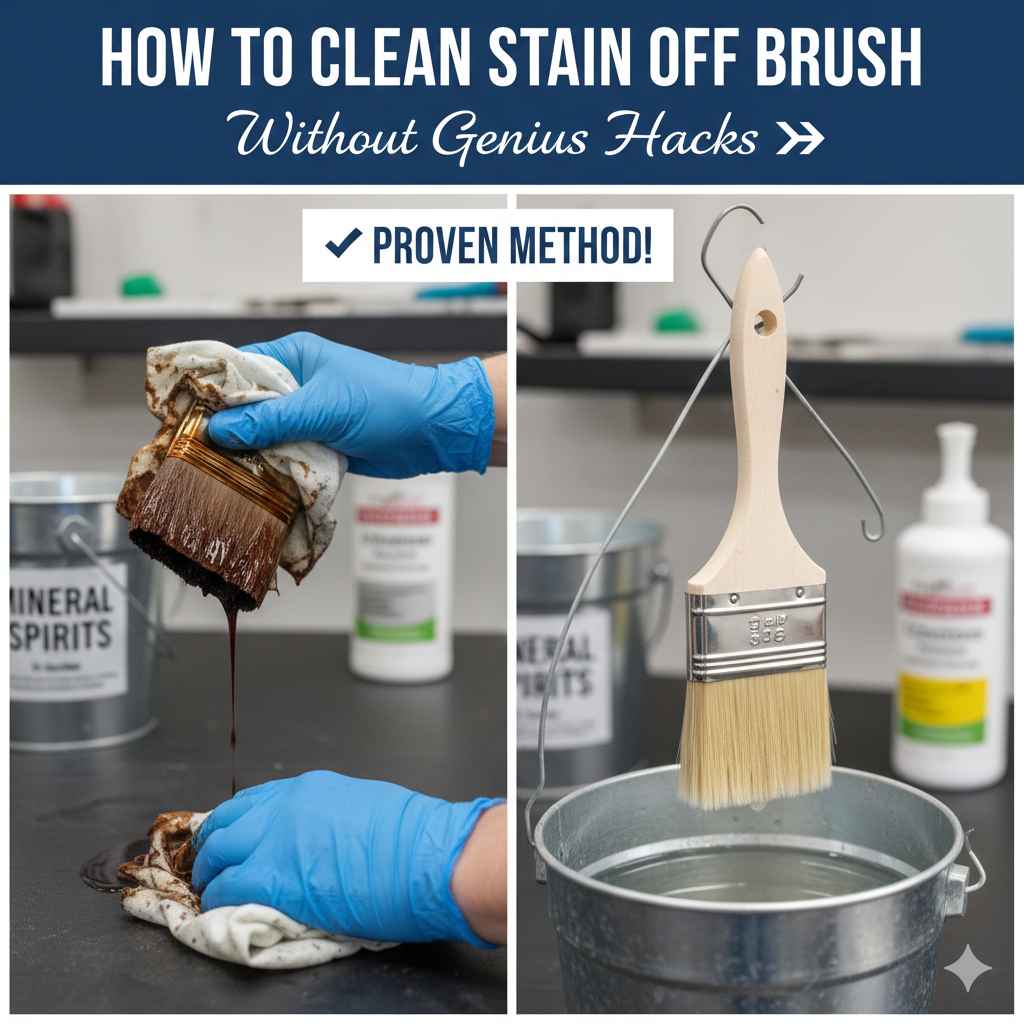
How To Clean Stain Off Brush Without Genius Hacks
To clean stains off your paintbrushes without harsh chemicals like mineral spirits, soak the brush in warm water mixed with mild dish soap. Gently work the soap through the bristles using your fingers or a wide-toothed comb, rinse thoroughly under running water until the water runs clear, and reshape the bristles before allowing them to air dry completely.
We’ve all been there. You finish a weekend painting project, eager to clean up, only to find that stubborn stain—maybe dried latex, oil paint residue, or varnish—just won’t budge. Trying to scrub these tough messes out can be frustrating, and often, the advice we get involves harsh, smelly solvents that aren’t great for your tools or your workspace. You don’t need complicated “genius hacks” to restore your brushes to like-new condition. With a few simple household items and some patience, you can safely and effectively remove tough stains and keep your favorite brushes soft and ready for the next job. Let’s get those bristles looking beautiful again, step by step!
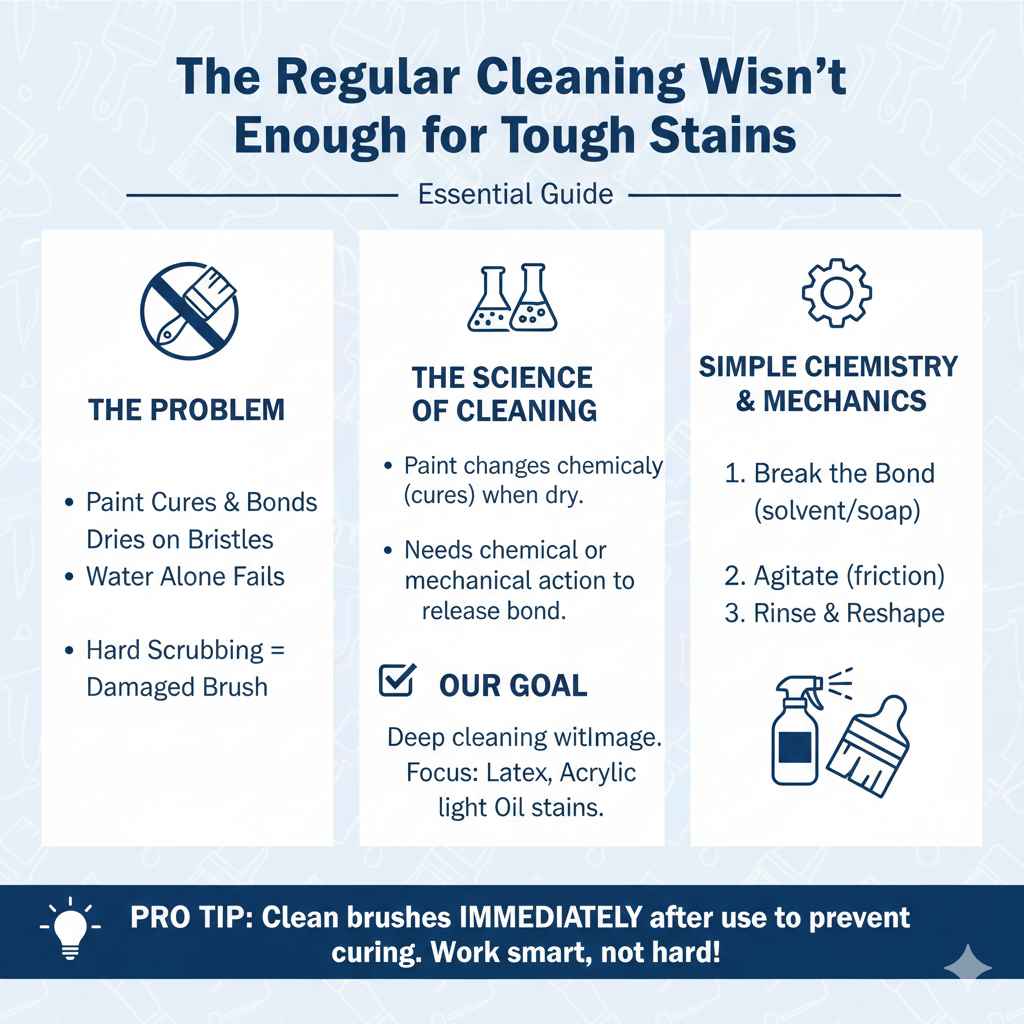
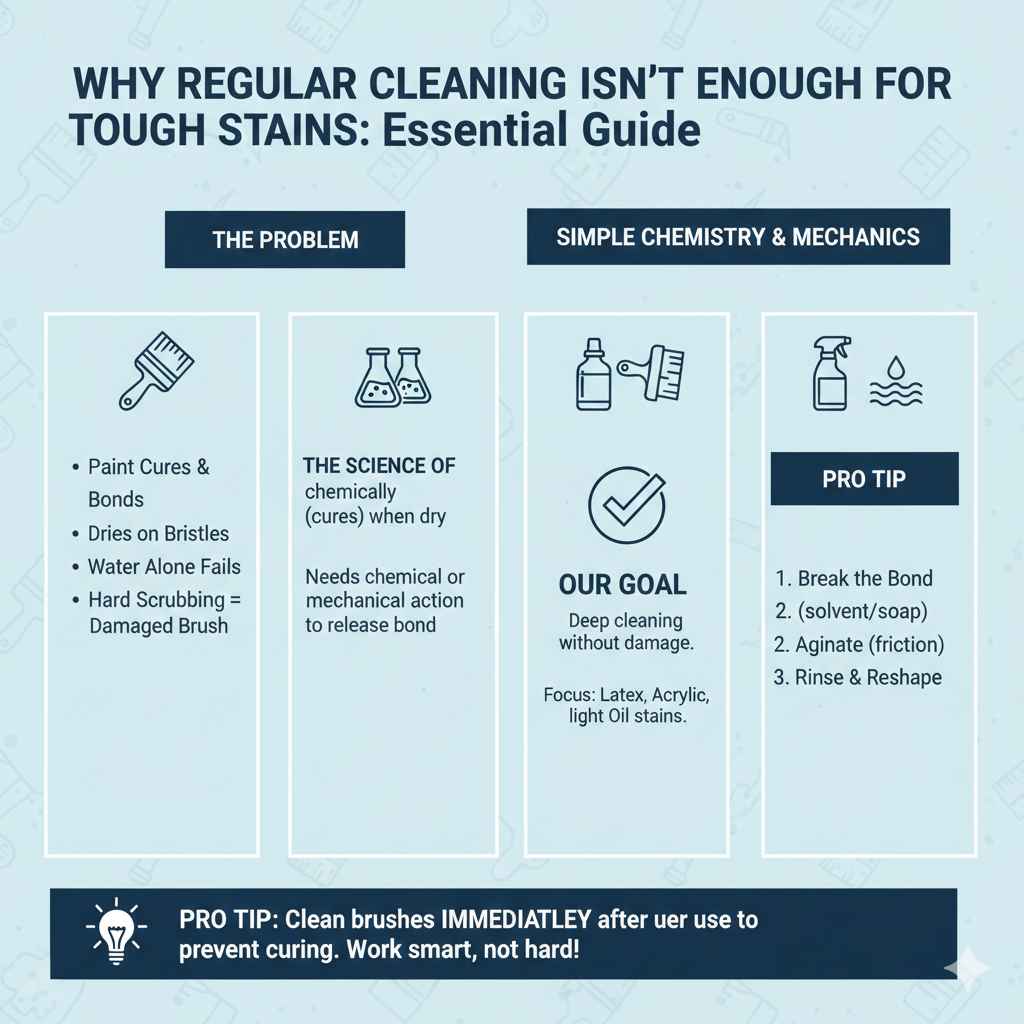
Why Regular Cleaning Isn’t Enough for Tough Stains
Most everyday paint cleanup is simple: rinse out the excess paint while it’s still wet. However, when paint dries, it cures. This chemical change bonds the pigment and binder to the tiny surfaces of the bristles. This is especially true for oil-based paints or thick enamels.
If you just use water, the stain remains. If you scrub too hard, you might permanently damage the delicate synthetic or natural fibers, leading to splayed, stiff brushes that apply paint poorly. The goal here is deep cleaning without damage. We are focusing on methods that work well for common stains like latex, acrylic, and some light oil stains, relying on simple chemistry and mechanics rather than industrial solvents.
Tools and Supplies You Already Have
The beauty of this approach is that you likely have everything you need sitting under your sink or in your garage right now. Avoid reaching for those industrial thinners when these gentle alternatives work just as well for most home projects.
Essential Cleaning Arsenal:
- Warm Water (The hotter the water, the better the lift, but be mindful of very hot water on plastic handles.)
- Mild Dish Soap (A good grease-cutting variety works best.)
- White Vinegar (For cutting through residue and neutralizing odors.)
- A Wide-Toothed Comb or Brush Cleaning Tool (Optional, but very helpful for separating deep bristles.)
- Paper Towels or Rags (For initial blotting.)
- A Container or Bucket (Wide enough to submerge the bristles.)
Step-by-Step Guide: How to Clean Stains Without Mineral Spirits
This process works best when tackled shortly after you notice the stain, but it can often revive brushes that have been sitting for a day or two. Remember, the key is patience—letting the solution work its magic is more effective than aggressive scrubbing.
Phase 1: Initial Removal and Soaking
We must first remove any loose surface paint before tackling the embedded stains. This prevents you from just dissolving the surface paint into the rest of your cleaning solution.
- Scrape Off Excess: Hold the brush and use the edge of a paint can, a putty knife, or even your fingers to gently scrape away as much loose, dried paint from the bristles as possible. Don’t pull hard; just clear the bulk.
- Prepare the Soak Bath: Fill a clean bucket or container with about four inches of very warm (not scalding hot) water. Add a generous squirt of dish soap—about two tablespoons for a small bucket. Stir it up to create suds.
- The Initial Soak: Submerge just the bristles of the brush into the soapy water. Let the brush soak for at least 30 minutes. For stubborn, thick stains, you might soak it for up to an hour. The warm, soapy water starts to soften the dried paint binder.
Phase 2: Working Out the Stain
Now that the paint is softened, it’s time to agitate the bristles gently to release the stain deep within.
- Work the Soap In: After the soak, remove the brush. With your gloved hands (if you prefer), gently massage the soapy bristles. Try bending the brush back and forth while running your fingers from the heel (where bristles meet the ferrule) down to the tip.
- Rinse and Repeat: Rinse the brush under warm, running tap water. You will likely see cloudy, colored water. Dip the brush back into the fresh, soapy water and repeat step 4. You might need to do this two or three times until the rinse water starts looking mostly clear.
- Use a Comb (If Needed): If you notice paint lines or clumping near the ferrule, use your wide-toothed comb. Hold the brush handle securely and gently comb through the bristles from the heel outward. Work slowly, rinsing the comb under running water frequently. This helps untangle and separate paint particles trapped deep inside.
Phase 3: The Vinegar Boost (For Extra Residue)
If you are dealing with latex paint or some water-based acrylics, sometimes a mild acid like white vinegar helps break down the final adhesion without the harshness of mineral spirits. Vinegar is particularly good if the bristles feel slightly stiff after the soap treatment.
Note: Do not use vinegar on oil-based paint residue; it won’t be effective there. This step is primarily for latex/water-based issues.
- Create a Vinegar Solution: In a clean bowl, mix one part white vinegar with three parts warm water.
- Short Dip: Dip the stained bristles into this solution for only about 10 minutes. This is not a long soak.
- Final Rinse: Remove the brush and rinse it thoroughly under cool running water. Be sure all traces of soap and vinegar are gone, as residues can affect future paint jobs.
Phase 4: Reshaping and Drying (Crucial for Longevity)
The cleaning job isn’t done until the brush is dry and properly shaped. Improper drying ruins more brushes than any cleaning method!
- Squeeze Out Water: Gently squeeze out as much excess water as possible using a clean rag or paper towels. Avoid wringing or twisting the bristles.
- Reshape the Brush: Use your fingers to push the bristles back into their original, intended shape (chisel edge, flag tip, etc.). The brush should look neat and uniform.
- Proper Drying Position: Never dry a brush bristle-down in water or lay it flat where water can seep into the ferrule (the metal part). Water trapped there causes the glue holding the bristles to dissolve, leading to shedding and ruin.
- Air Dry Horizontally or Hanging: The best way to air dry is to lay the brush flat on a surface, elevated slightly so air can circulate underneath, or use a specialized brush holder to hang it so the bristles point downward. Allow plenty of time—often 12 to 24 hours, depending on humidity.
Cleaning Oil Paint Stains: A Special Consideration
If you are working with oil-based paints, you might encounter stains that resist the dish soap method almost completely. While this guide focuses on avoiding mineral spirits, for true oil-based stains, you need a gentle oil solvent. If the soap method fails, consider these alternatives before jumping to industrial thinners.
For minor oil residue, citrus-based degreasers or specialized brush restorers (often sold at hardware stores) can break down the oil more effectively than plain soap, yet they are generally less aggressive than paint thinner. Always test these on a small patch of bristles first.
For reference, many professionals often turn to solvents like mineral spirits for heavy oil cleanup. While we are avoiding them here, it’s helpful to know their purpose. The U.S. Environmental Protection Agency (EPA) often recommends responsible disposal for petroleum-based solvents when they are used, highlighting why finding alternatives is beneficial for the home user.
Comparing Gentle vs. Harsh Cleaners for Brushes
Choosing the right cleaner affects the lifespan and performance of your tools. Here is a quick comparison:
| Cleaning Agent | Best For | Pros | Cons (Why We Avoided It Here) |
|---|---|---|---|
| Dish Soap & Warm Water | Latex, Acrylic, Minor Residue | Safe, cheap, readily available, non-toxic. | Ineffective on heavy oil or varnish stains. |
| White Vinegar Solution | Latex Haze, Odor Neutralizing | Mildly acidic, good for final rinse, safe. | No effect on true oil-based paint. |
| Citrus Degreaser/Brush Restorer | Light Oil Residue, Thick Latex | Stronger cleaning power, often biodegradable. | More expensive than soap, still requires thorough rinsing. |
| Mineral Spirits/Paint Thinner | Heavy Oil, Varnish, Shellac | Highly effective and fast solvent action. | Fumes are hazardous, dries out bristles, costly, requires careful disposal. |
Maintenance Tips to Prevent Future Stains
The best way to deal with a tough stain is to prevent it from ever setting deeply in the first place! Good maintenance routines mean less intensive cleaning sessions later on.
Daily Brush Care Routine:
- Clean Immediately: As soon as you are done painting, wipe off the bulk of the paint using a rag or by scraping against the can edge. Never let paint dry on the brush overnight.
- Condition After Cleaning: After drying a brush completely, apply a small amount of specialized brush conditioner or even a tiny bit of hair conditioner to the bristles. This replaces natural oils lost during washing and keeps them supple.
- Storage Matters: Store brushes bristle-up in a dry, dedicated container. Keep them away from excessive moisture or extreme heat, which can affect the glue in the ferrule.
- Use Quality Brushes: Investing in high-quality synthetic or natural-fiber brushes often means they handle solvents and cleaning better over time without losing their shape. Reputable manufacturers follow standards set by organizations like the American Society for Testing and Materials (ASTM) regarding fiber integrity.
Troubleshooting Common Cleaning Snags
Even following the steps perfectly, sometimes a stubborn patch remains. Here’s what to do when you hit a wall.
Scenario 1: The Bristles Feel Stiff or Waxy
This usually means some binder or residue hasn’t been fully lifted, often because the water wasn’t warm enough, or the soap didn’t penetrate. Try repeating Phase 2, ensuring you massage the bristles hard enough to work the soap deep down.
Scenario 2: The Paint is a Dark Color (Like Black or Red)
Dark pigments often leave a “ghost stain” even after all the binder is gone. The bristles might look dark, but if they feel soft and flexible when dry, the brush is clean enough to use. Don’t confuse a permanent pigment stain with actual dried paint residue.
Scenario 3: The Ferrule Smells Musty
This indicates that water seeped into the handle connection and hasn’t dried properly, leading to potential mildew. Immediately place the brush in a warm, dry area with excellent airflow, pointing the bristles down, until it is bone dry. You may need to perform a quick, 5-minute soak in a very weak solution of water and hydrogen peroxide (wear gloves) to sanitize, followed by an immediate, full freshwater rinse.
FAQ: Keeping Your Brushes Clean and Ready
Q1: Can I use fabric softener instead of dish soap?
A: Fabric softener can work well as a conditioning step after the paint is mostly gone, especially for natural bristles, because it helps restore softness. However, mild dish soap is better for the initial lifting of the paint binder.
Q2: How do I clean a brush used with shellac or lacquer?
A: Shellac and lacquer require alcohol-based thinners, which are very harsh. If you must clean these without strong solvents, look for specialized brush restorer liquids containing acetone alternatives. You must be extremely quick with rinsing, as prolonged contact will melt synthetic bristles.
Q3: Is it safe to use my fingernails to clean paint out of the heel?
A: Gentle scraping with your fingernails is okay to loosen surface dried paint, but avoid aggressive prying near the ferrule. Too much force can permanently damage the bristle knot structure.
Q4: How long should I soak a brush before giving up?
A: For latex paint stains using the warm soap method, soaking up to an hour is usually the maximum beneficial time. If it’s still heavily stained after an hour of soaking and agitation, it may require a specialized brush restorer or a one-time solvent dip, followed by a very thorough conditioning.
Q5: Why is shaping the brush so important?
A: Shaping ensures the bristles dry tightly together. If they dry splayed out, they will hold their shape awkwardly, resulting in uneven paint application on your next project. Reshaping keeps your brush performing like new.
Q6: Can I use a washing machine or dishwasher for brushes?
A: Absolutely not. The high heat and agitation from dishwashers or washing machines will destroy the glue in the ferrule, causing the bristles to fall out completely. Always clean them by hand.
Conclusion: Confident Cleaning, Lasting Tools
Cleaning your paintbrushes doesn’t require complex chemistry or dangerous chemicals. By sticking to warm water, mild dish soap, a bit of patience, and proper drying techniques, you empower yourself to keep your tools in fantastic shape. You’ve seen that the simple, accessible methods are often the most effective for the everyday stains that frustrate us most. Remember to always rinse well and reshape carefully; these steps are your insurance policy for years of smooth, beautiful painting ahead. With this knowledge, you can confidently tackle any project, knowing cleanup is straightforward and safe.