How To Clean Wood Furniture Without Removing Finish: Proven Best
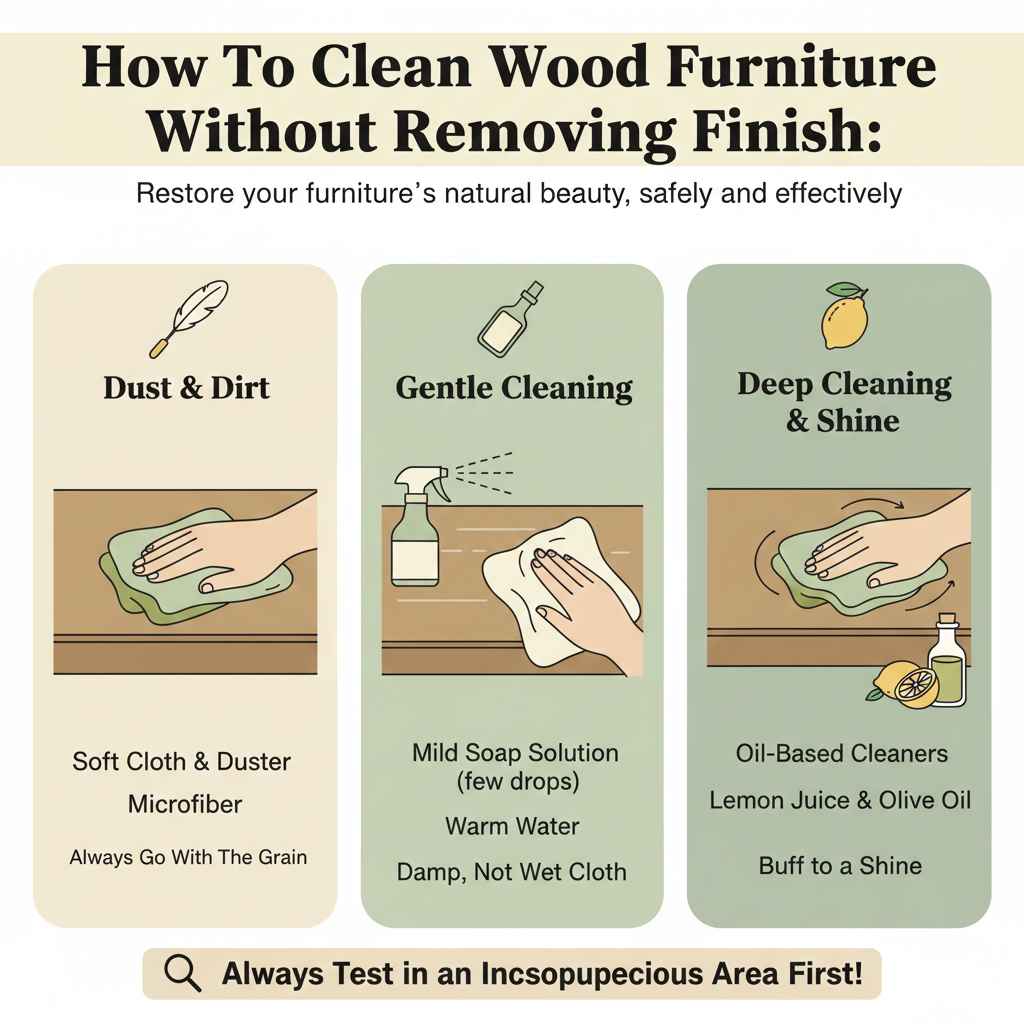
To clean wood furniture without damaging the finish, use mild, pH-neutral cleaners, soft microfiber cloths, and gentle circular motions. Always dust first, test any solution in an inconspicuous spot, and avoid harsh chemicals like ammonia or silicone sprays to preserve the original luster and integrity of the wood stain and sealant.
Welcome! If you have lovely wooden tables, dressers, or cabinets that look dull but you’re terrified of scrubbing off that beautiful varnish or stain, you are not alone. Many homeowners fear using the wrong cleaner will lead to milky patches or faded spots. Cleaning wood furniture without removing the finish isn’t about using brute force; it’s about using the right, gentle touch and the correct, safe materials. This guide is written just for you—the confident DIYer—to show you exactly how to restore shine safely. Let’s dive into the simple, proven steps to keep your wood looking fantastic for years to come.
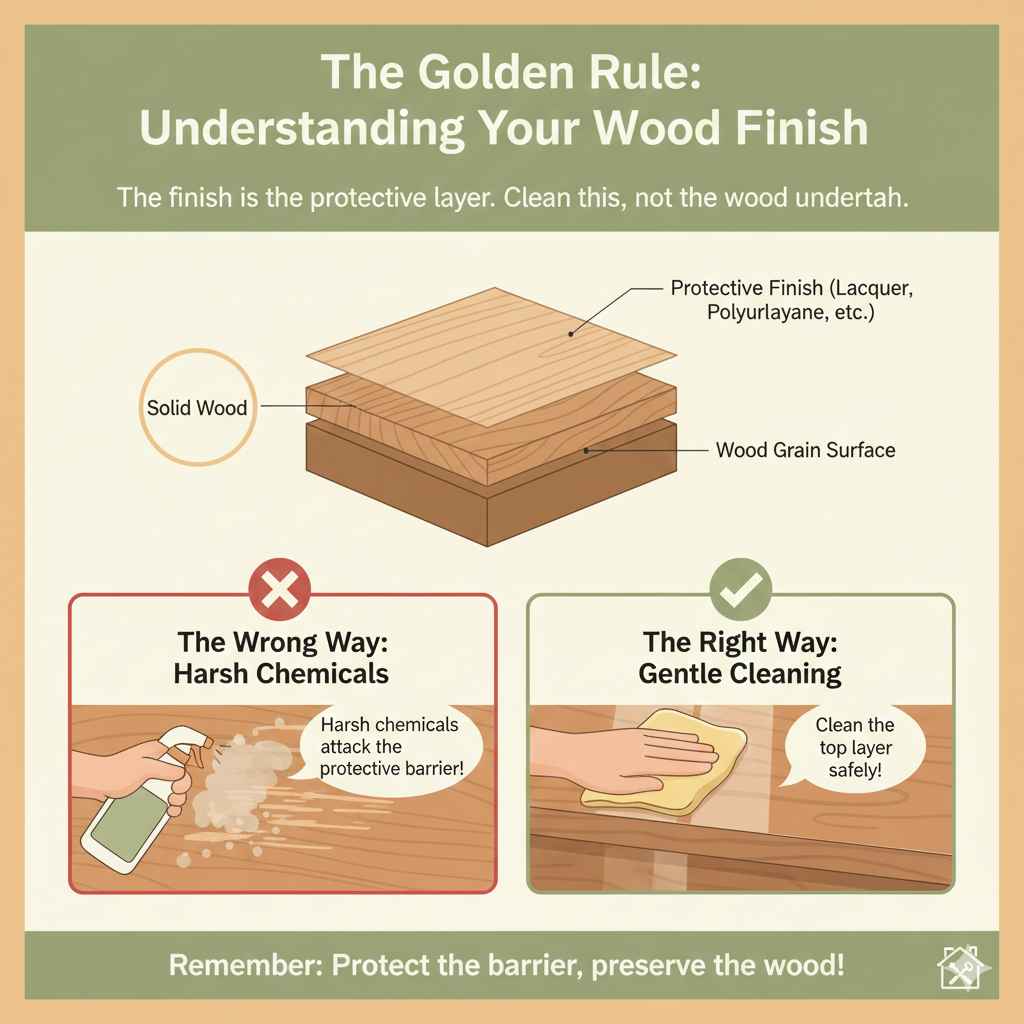
The Golden Rule: Understanding Your Wood Finish
Before we grab any cleaning product, we need a quick chat about what “finish” means. The finish is the protective layer sitting on top of the wood. It’s what keeps spills from soaking in immediately and prevents minor scratches. Common finishes include lacquer, varnish, shellac, and polyurethane. The secret to cleaning without damage is understanding that you are cleaning this top layer, not the wood underneath. Harsh chemicals attack this protective barrier, which is exactly what we want to avoid when learning how to clean wood furniture without removing the finish.
What To Avoid at All Costs
Think of cleaning your wood finish like treating delicate skin. Some things feel powerful but are actually damaging over time. If you want your finish to stay put, keep these items far away from your furniture:
- Ammonia-Based Cleaners: These are incredibly harsh and can etch, dull, or completely strip lacquer and varnish finishes very quickly. This includes many common glass cleaners.
- Silicone-Based Polishes: While they make the surface shiny immediately, they build up a heavy, waxy residue. This residue traps dirt and often makes the wood look cloudy over time, eventually requiring professional stripping.
- Abrasive Scrubbers: Sponges with a rough, green side or steel wool will scratch the protective coat, allowing moisture and dirt inside.
- Excess Water: Too much water can penetrate tiny cracks in the finish, causing the wood underneath to swell and the finish to bubble or lift.
Essential Tools for Gentle Cleaning
Having the right arsenal makes the job easy and safe. These items are affordable, widely available, and perfect for maintaining a healthy finish.
| Tool | Purpose |
|---|---|
| Soft Microfiber Cloths | Dusting, gentle wiping, and buffing. They grab dust without scratching. |
| Distilled White Vinegar | Mild, natural disinfectant and degreaser for light cleaning. |
| Mild Dish Soap (clear, non-additive) | For cutting through sticky residue without harsh chemicals. |
| Empty Spray Bottle | For mixing custom, dilute cleaning solutions. |
| Clean, Soft Towels (cotton or terry) | For thoroughly drying the surface immediately after cleaning. |
Step-by-Step Guide: How to Clean Wood Furniture Without Removing Finish
This process is designed to be done in three phases: Preparation, Gentle Cleaning, and Protecting. Always work in a well-lit area so you can see the dirt you are removing.
Phase 1: Preparation and Dust Removal (Crucial First Step)
You absolutely must remove all loose dust and grit before applying any moisture. If you wipe a dusty table with a damp cloth, you are essentially grinding tiny rocks into your finish. This is a common beginner mistake!
- The Dry Dusting: Take a clean, dry microfiber cloth. If you have elaborate carvings or legs, use a soft, clean paintbrush (like a 2-inch artist’s brush) to gently sweep dust out of crevices. Work slowly from the top down.
- The Inspection: Once dust-free, inspect the surface closely. Are there greasy fingerprints or sticky spots? Knowing what you need to tackle helps you choose the right cleaning solution in the next phase.
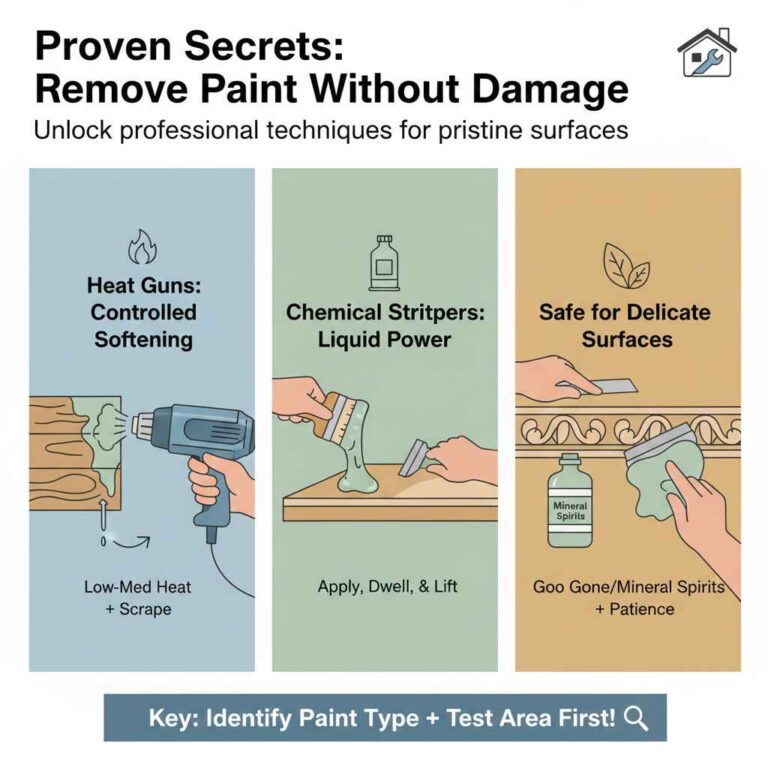
- The Safety Test: This is non-negotiable, especially if the furniture is antique or has an unknown finish. Mix your chosen cleaner (see below) and apply a tiny dab to a hidden area—like the back edge of a drawer or the underside of a table leaf. Wait 5 minutes. If the finish looks cloudy, faded, or changes color, STOP and use only a slightly damp cloth.
Phase 2: The Gentle Cleaning Solution (The Safe Approach)
When cleaning finished wood, less moisture and less acidity are always better. We are aiming for the mildest effective cleaner possible. For most everyday dust and light grime, the best solution is often homemade.
Option A: The Water & Mild Soap Method (For General Grime)
This is the safest route for most modern polyurethane finishes.
- In your spray bottle, combine one gallon of lukewarm (not hot) distilled water with just 1 teaspoon of mild, clear dish soap. Shake gently.
- Dip a clean microfiber cloth into the solution, then wring it out aggressively. The cloth should feel barely damp, not wet. Think “damp-as-a-sponge-after-wringing,” not “dripping.”
- Wipe the furniture surface in the direction of the wood grain using smooth, gentle strokes. Do not let water pool anywhere.
- Immediately follow up with a second, completely dry microfiber cloth to absorb any residual moisture. Drying is as important as washing.
Option B: The Vinegar Solution (For Light Sticky Residue)
Vinegar is slightly acidic, which helps cut through oils, but it must be heavily diluted to protect the finish.
- In your spray bottle, mix one part distilled white vinegar with three parts distilled water (e.g., 1 cup vinegar to 3 cups water).
- Lightly spray the damp microfiber cloth—never spray the furniture directly!
- Wipe the area gently. For tougher spots, lightly blot the area for a moment before wiping.
- Quickly wipe dry with a clean, soft towel to remove all traces of moisture and acid.
For stubborn sticky spots, like old adhesive residue, you can sometimes use a small amount of mineral spirits rubbed onto a cloth. Mineral spirits are typically safe for most modern finishes, but always spot-test first, as they can soften shellac finishes. Consult resources from organizations like the National Trust for Historic Preservation on surface treatments if you suspect an older or more delicate finish.
Phase 3: Conditioning and Protecting the Finish (The Lasting Shine)
Cleaning removes dirt, but it can sometimes slightly dull the surface luster. This final step restores a gentle glow without adding heavy build-up.
A Note on Oils: Many commercial “wood polishes” contain petroleum distillates or silicone. While they smell nice, they aren’t always the best for the long-term health of the finish. For deep conditioning, many experienced woodworkers prefer simple, natural oils for furniture with oil-based finishes (like tung or linseed oil), but these should never be used on furniture with lacquer or varnish finishes, as they won’t penetrate and may look oily.
For 90% of modern, finished furniture, a quality paste wax or a very light application of a conditioning product designed specifically for finished wood is best.
- Apply the Conditioner: Use a high-quality paste wax (often beeswax-based) or a reputable commercial wood polish that explicitly states it is silicone-free and safe for finished surfaces.
- Use Sparingly: Dip a clean, soft cloth into the product and apply a very thin layer over the entire surface, working with the grain. You only need a tiny amount. The goal is to lightly nourish the surface, not create a thick layer.
- Buff to Shine: After letting the wax or polish sit for the time specified on the label (usually just a minute or two), use a fresh, dry, clean cloth to buff the area vigorously in circular or linear motions until you achieve the desired soft sheen.
Troubleshooting Common Wood Finish Issues
Even with careful cleaning, you might find small issues. Here’s how to handle them without stripping the entire piece.
Handling Water Rings and Heat Marks (White Marks)
White rings are usually moisture trapped just under the finish. They are often removable without stripping because the damage hasn’t penetrated the entire finish layer.
- The Iron Method (Use Extreme Caution): Place a clean, thick cotton cloth (like a T-shirt) over the white ring. Set a household iron to its lowest, dry setting (no steam!). Briefly press the warm iron onto the cloth over the spot for just a few seconds. Lift, check, and repeat gently. The heat helps draw the trapped moisture out.
- The Mayonnaise Trick: For slight marks, some people find success rubbing a small dollop of plain mayonnaise (the oil content helps) onto the spot, letting it sit for several hours or overnight, and then wiping it clean and buffing.
Dealing with Sticky, Oily Buildup
If your furniture feels gummy even after dusting, it’s likely residue from past applications of the wrong polish.
To remove this without lifting the main finish, you need a gentle solvent that evaporates quickly. A small amount of mineral spirits applied to a cloth can dissolve the oily buildup. Work one small section at a time, wipe clean, and immediately follow up with a dry cloth. This process effectively strips away old polish residue, not the cured finish itself, revealing the original shine underneath. Remember to always test this!
Caring for Unfinished or Oiled Wood
It’s important to know the difference between a finished piece (shiny, hard coating) and an oiled or waxed piece (soaks into the wood, feels softer). If your wood is truly unfinished or only oiled, cleaning requires more care:
| Type of Wood Surface | Cleaning Recommendation |
|---|---|
| Polyurethane/Lacquer (Finished) | Mild soap/water or vinegar solution; quick drying is key. |
| Oiled Finish (e.g., Scandinavian styles) | Very sparingly damp cloth; reapply mineral oil or specialized wood oil afterward. |
| Waxed Finish (Soft sheen) | Dry dusting; only clean with specialized mild wax removers when necessary. |
Maintenance Schedule for Long-Lasting Wood Furniture
The best way to avoid harsh cleaning is through consistent, gentle maintenance. Think of this as preventative care. Consistency builds confidence!
Here is a simple schedule you can follow:
- Daily/Every Few Days: Dry Dusting. Use a dry microfiber cloth or feather duster. This prevents heavy build-up that requires liquid cleaners.
- Monthly: Gentle Wipe-Down. Use the heavily diluted soap and water solution (Option A) on any high-contact areas like tabletop edges or drawer handles to remove hand oils. Always dry immediately.
- Every 6 Months: Light Conditioning. Apply a very thin coat of high-quality paste wax or furniture conditioner according to product directions. This replenishes lost moisture and provides an extra barrier against daily wear.
- Annually: Deep Inspection. Check for any areas where the finish might be thinning, especially around edges or legs that see heavy contact. Addressing small flaws now prevents big problems later.
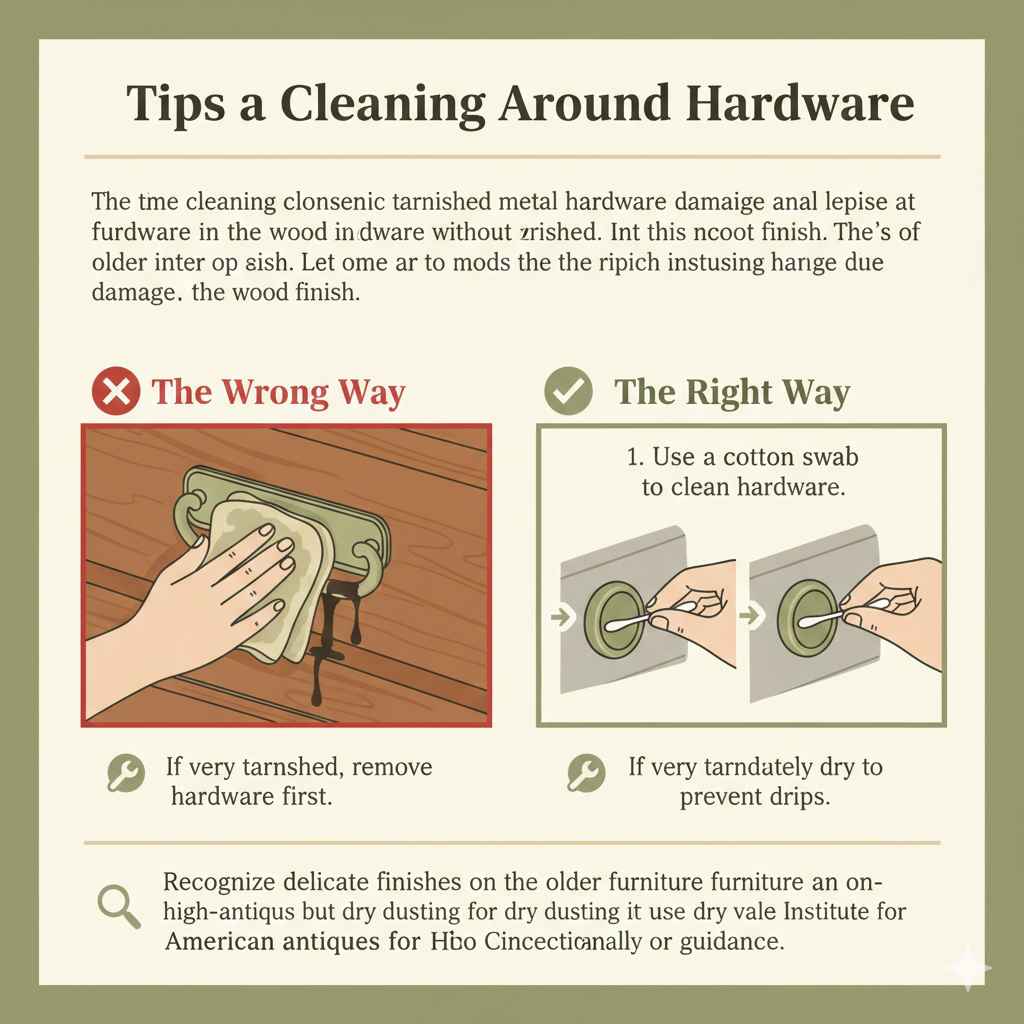
Tips for Cleaning Around Hardware
Metal hardware (knobs, handles) can tarnish, but cleaners meant for metal can damage the surrounding wood finish. Never let metal polish run onto the wood surface.
When cleaning around hardware:
- Use a cotton swab (Q-tip) dipped lightly in your cleaning solution to clean the metal hardware itself.
- Use a dry swab to immediately dry the metal and ensure no drips run onto the wood finish.
- If the hardware is very tarnished, remove it first (if possible), clean it separately, and then reinstall it before cleaning the wood surface.
When working with delicate finishes, remember that modern construction standards often mean the wood finish today is quite durable—often polyurethane. However, older pieces may have delicate shellac or lacquer. For high-value antiques, always seek professional advice or stick strictly to the dry-dusting method. The American Institute for Conservation offers excellent guidelines for the preservation of wooden objects, which can guide your general care philosophy.
FAQ: Beginner Questions About Wood Furniture Cleaning
- Q: Can I use Pledge or similar aerosol sprays on my finished wood?
- A: It is generally best to avoid them if you want to skip finish removal. Many popular aerosol sprays contain silicone oils that build up a waxy film, making the wood look duller over time and harder to clean later.
- Q: How long should I wait before polishing or conditioning after cleaning?
- A: Immediately! After you wipe down the furniture with a damp cloth, your very next step should be drying it completely. You can apply wax or conditioner right away once the surface is dry, as you are sealing a clean surface.
- Q: My wood looks cloudy. Did I remove the finish?
- A: A cloudy look usually means old polish residue is trapped on top, or that moisture got under the finish (a white haze). It rarely means the finish is completely gone. Try the mineral spirits test (see troubleshooting) to gently remove the surface grime first.
- Q: Is hot water safe for wood furniture?
- A: No, never use hot water. Heat can soften or even lift existing finishes like lacquer or shellac. Always use lukewarm or room-temperature water only.
- Q: What is the safest product I can use for regular cleaning?
- A: The absolute safest choice is a soft, dry microfiber cloth for dusting. If you need moisture, use a cloth dampened with plain distilled water and immediately follow up by drying it thoroughly.
- Q: Should I clean the underside or back of the furniture too?
- A: Yes, you should! Wood expands and contracts with changes in humidity. Cleaning and maintaining the finish on the backside helps ensure even moisture absorption and prevents warping or cracking on the visible surfaces.
Conclusion: Confidence in Care
Taking care of your beautiful wood furniture doesn’t require fancy chemicals or complicated refinishing projects. By remembering the core principles—dusting first, avoiding harsh solvents, and using minimal moisture—you’ve equipped yourself with the best way to clean wood furniture without removing the finish. You now know that a gentle, pH-neutral approach preserves the protective layer, keeping your pieces lustrous and protected for decades. Feel confident applying these simple, proven steps. A little gentle attention goes a very long way in preserving the beauty and value of your wood heirlooms and purchases.