How to Cut a Groove in Wood by Hand: Mastering the Craft
To cut a groove in wood by hand, you can use a chisel and a mallet. First, mark the groove’s outline, then use the chisel and mallet to carefully chip away the wood along the marked lines until the desired depth is reached.
Cutting a groove in wood by hand allows for a personal touch and precision that power tools may not achieve. By following a few simple steps and using the right tools, you can create a clean and precise groove in your woodwork.
Whether you’re a seasoned craftsman or a DIY enthusiast, mastering hand tools like the chisel and mallet can give your woodworking projects a unique and professional finish. In this guide, we’ll walk you through the process of cutting a groove in wood by hand and provide tips for achieving the best results.
The Basics Of Wood Grooving
Wood grooving is an essential skill for any woodworker, allowing you to create decorative or functional details in your woodworking projects. Whether you’re looking to add decorative edges to a tabletop or create a dado joint for a cabinet, understanding how to cut a groove in wood by hand is a fundamental skill.
Understanding Wood Grain And Grooving Techniques
Before you start cutting a groove in wood, it’s important to understand the direction of the wood grain. Wood grain refers to the pattern of wood fibers, and it plays a crucial role in the success of your grooving. When cutting a groove, it’s important to work with the wood grain to prevent tear-out and achieve clean, precise cuts.
When it comes to grooving techniques, there are several methods you can use, including using a chisel and mallet, a router plane, or a plow plane. Each technique requires different skills and tools, and it’s essential to choose the right method based on the specific requirements of your woodworking project.
Choosing The Right Tools For Hand Grooving
When it comes to hand grooving, choosing the right tools is crucial for achieving precise and clean cuts. Chisels, router planes, and plow planes are commonly used tools for cutting grooves in wood. The type of tool you choose will depend on the size and depth of the groove you need to create, as well as your personal preference and skill level.
Here’s a quick overview of the tools commonly used for hand grooving:
| Tool | Application |
|---|---|
| Chisels | Ideal for cutting grooves with straight edges and can be used to create custom-sized grooves. |
| Router Planes | Great for creating precise, flat-bottomed grooves and can be adjusted for different groove widths. |
| Plow Planes | Specialized planes designed specifically for cutting grooves, particularly for creating grooves with varying depths. |
Essential Tools For Hand Grooving
Hand grooving wood requires specific tools and techniques to achieve precise and clean results. Each tool serves a crucial role in the process, from shaping the initial groove to refining the details. Understanding the essential tools and their functions is paramount to mastering the art of hand grooving wood.
Exploring Different Wood Chisels
Mastering Hand Grooving Techniques
Precision Marking And Measurement
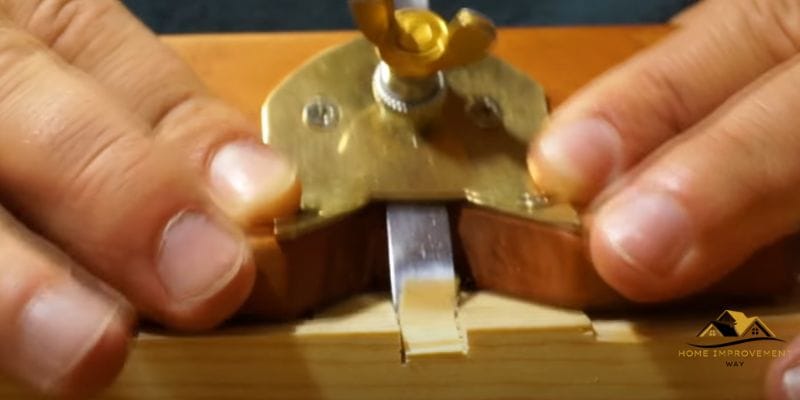
Before you begin grooving, precision marking and measurement are crucial. Use a sharp pencil or a marking knife to mark the groove’s path accurately. Take the time to measure and mark the exact location of the groove to ensure a clean and accurate cut. Utilize a combination square or a marking gauge to make sure your lines are straight and parallel with the wood grain.
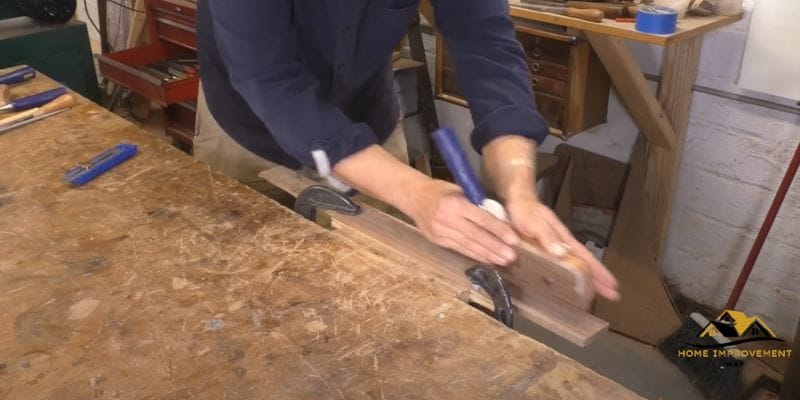
Proper Hand Saw Usage For Grooving
When using a hand saw for grooving, it’s essential to choose the appropriate saw for the job. Choose a fine-toothed saw for a cleaner and more accurate cut. Remember to start with a shallow cut and gradually deepen it, ensuring the saw remains aligned with the marked lines. Maintaining a steady pace and applying consistent pressure will result in a smoother and straighter groove.
Chisel Techniques For Clean Grooves
Chisels are indispensable for achieving clean and precise grooves. Start by creating a series of small cuts along the groove line, gradually increasing the depth. This will make the removal of waste wood more manageable. Utilize sharp chisels and maintain a steady hand to avoid chipping or tearing the wood fibers. Light taps with a mallet should be used to drive the chisel, ensuring a gradual and controlled removal of wood for a clean and accurate groove.
Safety Measures And Best Practices
If you are into woodworking, learning how to cut a groove in wood by hand is an essential skill. However, bear in mind that safety should always be your priority. When implementing safety precautions and best practices, you can ensure both your well-being and the quality of your work. Let’s delve into the safety measures and best practices to follow when cutting a groove in wood by hand.
Implementing Safety Precautions
Before starting the groove-cutting process, it’s crucial to consider several safety precautions to prevent accidents and injuries. Here are some key safety measures to integrate into your woodworking routine:
- Wear Proper Protective Gear: Always wear safety goggles to protect your eyes from flying wood particles. Additionally, don a dust mask to prevent inhaling wood dust and use ear protection if working with loud tools.
- Secure the Workpiece: Use clamps or a vise to secure the wood firmly in place, ensuring it doesn’t move during the cutting process to avoid slipping or kickbacks.
- Sharp Tool Inspection: Before commencing the task, ensure that your cutting tools, such as chisels or hand planes, are sharp and in optimal condition. Dull tools can lead to accidents and decrease the quality of the groove.
- Proper Body Positioning: Maintain a stable stance and posture while cutting the groove to have better control over your tools and avoid strain or injury.
- Clean Work Area: Keep your workspace clean and organized to minimize the risk of tripping over tools or debris while working.
Tips For Maintaining Sharp Tools
Now that you know how to implement safety precautions, it’s equally important to maintain sharp tools for efficient and safe groove cutting. Consider the following tips for keeping your tools sharp:
- Regular Sharpening: Develop a routine for sharpening your cutting tools to ensure they are always in optimal condition for precise and safe cutting.
- Proper Storage: Store your tools in a dry area to prevent rusting, and use protective covers to shield them from damage.
- Correct Tool Handling: Handle your tools with care to avoid dings and dents, which can affect their sharpness and performance.
- Use Sharpening Guides: Consider using sharpening guides to maintain consistent bevel angles on your cutting tools for precise cuts.
Finishing Touches For Perfect Grooves
When it comes to achieving the perfect groove in wood, the finishing touches are crucial for achieving a professional and polished result. After cutting a groove by hand, it’s essential to focus on the finer details to ensure a smooth and flawless finish. By incorporating the following steps for smoothing, sanding, and applying finishing treatments, you can elevate the overall quality of your woodworking project.
Smoothing And Sanding The Groove
Once the groove is cut in the wood, the next step is to smooth out any rough edges and surfaces. This can be achieved by using sandpaper or a fine-grit sanding block. Take care to sand along the length of the groove to avoid creating any additional imperfections. Ensure that the groove is uniform and free from any rough patches or splinters.
Applying Finishing Treatments To Wood
After smoothing and sanding the groove, it’s time to apply a finishing treatment to the wood to enhance its appearance and durability. This can involve applying wood stain to add color and depth to the groove, followed by the application of a clear sealant to protect the wood from moisture and wear. Additionally, wax and polish can be used to further refine the appearance of the groove, providing a smooth and lustrous finish.
Troubleshooting And Error Correction
DIY woodworking can be extremely rewarding, but it’s common to encounter glitches and imperfections when cutting grooves by hand. Understanding how to troubleshoot and correct errors will enable you to salvage your project and achieve professional-looking results. Below are some common issues and their solutions:
Dealing With Uneven Or Off-centered Grooves
If you find that the groove you’ve cut is uneven or off-centered, don’t panic. Here are a few steps you can take to rectify the issue:
- Re-evaluate the Setup: Double-check the placement of the wood and the cutting guide to ensure they are properly aligned.
- Adjust the Cutting Depth: If possible, adjust the cutting depth on your saw to even out the groove.
- Use a Chisel: If the groove is slightly off-centered, you can carefully use a chisel to remove excess material and create an even appearance.
Fixing Splintered Or Rough Edges In The Groove
Splintered or rough edges can detract from the overall quality of your groove. Follow these steps to address this problem:
- Use Sandpaper: Gently sand the edges of the groove to smooth out any splinters or rough areas.
- Trim with a Chisel: Carefully trim any splintered or rough sections using a sharp chisel to create clean, smooth edges.
- Adjust Cutting Speed: If using a hand tool, slow down your cutting speed to minimize the risk of splintering.
Advanced Tips For Professional Results
When it comes to woodworking, cutting a groove in wood by hand can be both challenging and rewarding. To achieve professional results, it’s important to focus on advanced techniques and precision. Here are some tips for professional woodworkers looking to elevate their craft and achieve pristine results when cutting grooves by hand.
Customizing Grooves For Various Woodworking Projects
Crafting custom grooves allows woodworkers to tailor their work to the specific requirements of each project. By adjusting the width, depth, and spacing of the groove, professionals can ensure that it perfectly accommodates the intended elements. Whether creating a joint, housing panel, or decorative trim, the ability to customize grooves is essential for achieving high-quality, professional results.
Incorporating Decorative Elements Into Grooves
Adding decorative elements to grooves can elevate the visual appeal of a wood piece. This can be achieved through the use of special hand tools, such as router planes or specialized chisels, to create intricate patterns or designs within the groove. By incorporating decorative elements, woodworkers can transform a simple groove into a visually striking feature, adding value and uniqueness to their woodworking projects.
Frequently Asked Questions On How To Cut A Groove In Wood By Hand
What Are The Essential Tools For Hand-cutting Wood Grooves?
To cut a groove in wood by hand, you’ll need a combination of tools such as a marking gauge, chisels, and a hand saw. These tools are crucial for marking, scoring, and cutting the wood to achieve the perfect groove.
What Techniques Can I Use To Ensure A Precise Wood Groove Cut?
Achieving a precise wood groove cut by hand requires techniques such as proper marking and scoring, using sharp chisels, and employing a steady hand to control the cutting depth. These techniques ensure a clean and accurate groove in the wood.
How Can I Ensure The Safety Of Hand-cutting Wood Grooves?
Safety is paramount when hand-cutting wood grooves. Always wear protective gear, work in a well-lit area, use sharp tools, and maintain proper hand positioning to avoid accidents. It’s important to prioritize safety at all times during the cutting process.
What Are The Common Mistakes To Avoid When Hand-cutting Wood Grooves?
When hand-cutting wood grooves, avoid common mistakes such as using dull tools, inaccurate marking, or rushing the process. Take your time, use precise measurements, and ensure proper tool maintenance to achieve clean and accurate wood grooves.
Conclusion
Cutting a groove in wood by hand requires precision and patience. By using the right tools and techniques, you can achieve a professional-looking result. Whether you are a seasoned woodworker or a novice, this skill is a valuable addition to your repertoire.
Keep practicing and perfecting your technique to achieve the best results.