How to Disassemble Bathtub Drain: Step-by-Step Guide
Are you struggling with a clogged bathtub drain that just won’t clear? You’re not alone.
Many homeowners face this frustrating issue, often feeling helpless as water stubbornly pools at their feet. The good news is, you don’t have to be a plumbing expert to tackle this problem. By learning how to disassemble your bathtub drain, you can easily clear away blockages and restore your tub to its former glory.
Imagine the satisfaction of a smoothly draining bathtub, free from standing water and unpleasant odors. Ready to get started? Let’s dive into this straightforward process that will have your bathtub functioning perfectly in no time.
Tools Needed
Gather all tools first. You will need a screwdriver. Keep a drain wrenchhandy. A plumber’s puttyis useful. Get a bucketfor water. Bring a flashlight. Use a pair of gloves. Have a clean clothnearby. A hack sawmay be needed. Don’t forget pliers. A drain snakeis helpful. Ensure all tools are near.
Work safely. Check tools before starting. Make sure they are in good condition. It helps to have a friend. They can assist when needed. Double check everything. This makes the task easier. Be prepared for surprises. Always stay careful.
Credit: www.homedepot.com
Safety Precautions
Wearing gloves is important to protect your hands. Use safety goggles to shield your eyes. Tools can slip and cause injury. Keep a first-aid kit nearby just in case. Make sure the bathroom floor is dry. Wet floors can be slippery and dangerous. Turn off the water supply before starting. This avoids any accidental water flow. Use a flashlight for better visibility. Good light helps in seeing small parts. Always read the tool instructions. Knowing how to use them is crucial.
Locating The Drain Assembly
First, find the drain stopper. It’s usually in the middle of the tub. Look for a small lever or knob. This part controls the water flow. You might need to twist or pull it. Next, spot the overflow plate. It’s on the tub wall, near the top. This plate has screws holding it. Use a screwdriver to take them out. Keep the screws safe. You will need them later. Under the overflow plate, there’s a linkage system. This system connects to the drain. Carefully pull it out. Now, you can see the whole drain assembly. Understanding these parts is important. It helps in disassembling the drain.

Credit: www.youtube.com
Removing The Drain Stopper
Disassembling a bathtub drain involves removing the stopper. Start by locating the stopper mechanism, often found near the drain. Gently twist or unscrew it to detach and clean.
Twist-and-pull Stopper
First, grip the stopper’s top. Twist it to the left. Keep twisting until it stops moving. Gently pull the stopper up. Check for any debris or hair. Clean it before reassembly. If it feels stuck, use a cloth for a better grip. Be careful not to break it. The stopper should come out easily. If not, twist again and pull. Ensure the area is dry to prevent slipping.
Lever-operated Stopper
Start by locating the lever on the tub wall. Lift the lever to an open position. This action releases the stopper. Gently pull the stopper out. Sometimes, it may stick. Use a cloth for more grip if needed. Clean any hair or soap scum. Ensure the lever moves freely. Test the lever after cleaning. If it feels tight, check the linkage. Adjust if necessary. Reassemble carefully to avoid damage.
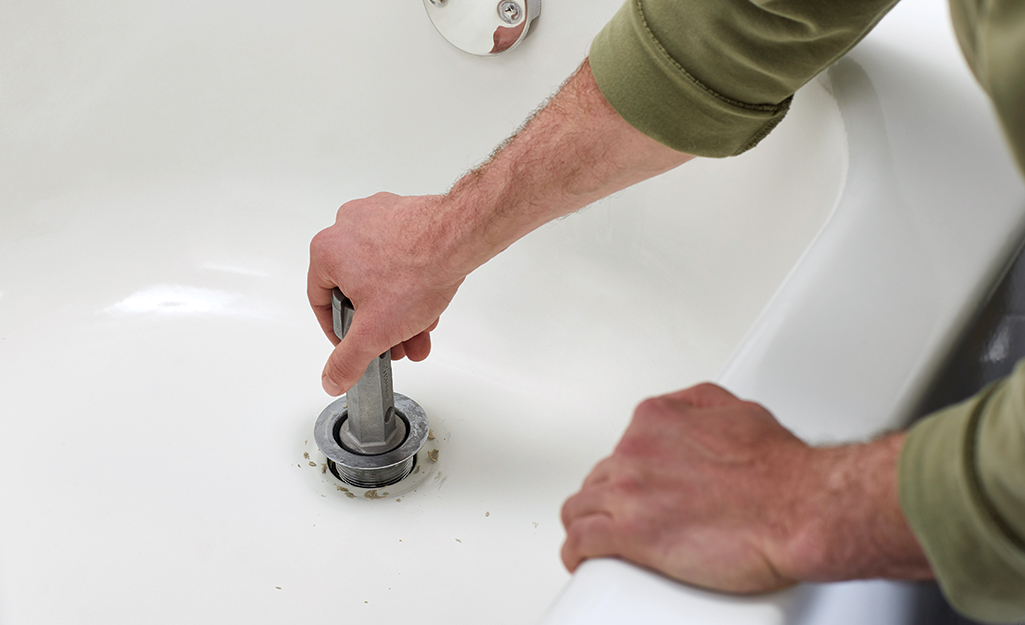
Unscrewing The Drain Flange
Start by locatingthe drain flange in the bathtub. Use a drain keyto unscrew the flange. Insert the drain key into the flange. Turn it counterclockwise. Slowly, but surely. The flange should loosen. If stuck, apply some lubricant. This helps reduce friction. Keep turning until it comes off.
Using A Drain Key
Drain keys are special tools. They fit into the drain flange. They provide grip. Easy to use. Perfect for this task. They come in various sizes. Choose the right one. It makes the job easier. Quick and efficient.
Alternative Tools
Not everyone hasa drain key. Use alternative tools. A pair of plierscan help. They grip the flange edges. Turn counterclockwise. A screwdriverworks too. Insert into flange slots. Twist gently. Always be careful. Don’t damage the drain.
Cleaning The Drain Area
Remove all items near the bathtub. This gives you space to work. Safety first. Wear gloves to protect your hands. Use a cloth to wipe dirt away. Check for any visible debris around the drain. Make sure the area is dry. This helps in avoiding slips. Tools needed: a screwdriver and pliers. Unscrew the drain cover using the screwdriver. Place screws in a safe spot. Handle the cover gently to avoid damage. If you see rust, clean it with a brush. Keep your movements slow and steady. Inspect the drain for any blockages.
Inspecting Drain Components
Start by removing the stopper from the drain. Check if the stopper is clean. Dirt or hair can block it. Use a flashlight to see inside the drain. Look for any signs of rust or damage. Rust can weaken the drain. Damaged parts might need replacing.
Next, examine the drain flange. The flange holds the drain in place. Make sure it is not cracked. Cracks can lead to leaks. Tighten any loose screws around the flange. Loose screws can cause wobbling.
Finally, inspect the drain basket. The basket catches debris. Ensure it is not clogged. A clogged basket stops water flow. Clean it with a brush if needed. A clean basket ensures smooth drainage.
Credit: www.youtube.com
Reassembly Tips
Start by gathering all the parts of the drain. Ensure each piece is clean and free of dirt. Check if the screws and rubber gaskets are in good condition. Replace any damaged parts before reassembly. Carefully align the drain pieces. Position the rubber gasket securely in place. Insert the screws and tighten them gently. Make sure every part is connected firmly. Test the drain for leaks after assembly. A small drip might mean a loose connection. Tighten screws a bit more if needed.
Frequently Asked Questions
How Do I Remove A Bathtub Drain Stopper?
To remove a bathtub drain stopper, first unscrew the knob on top. Then, twist the stopper counterclockwise and pull it out. For some models, you might need pliers to grip and turn the stopper. Ensure you clean any debris before reassembling.
What Tools Are Needed To Disassemble A Drain?
You’ll need basic tools like a screwdriver, pliers, and possibly a wrench. These help in loosening and removing the drain components. A flashlight can assist in seeing the inside parts. Having a bucket nearby is useful for catching any residual water.
Can I Disassemble A Drain Without Professional Help?
Yes, you can disassemble a drain without professional help. Follow guides and videos for step-by-step instructions. Ensure you have the necessary tools and take precautionary measures. If you face challenges, consider consulting a professional for advice or assistance.
What Safety Precautions Should I Take?
Ensure the water supply is turned off before beginning. Use gloves to protect your hands from sharp edges. Be cautious of slippery surfaces and potential debris. Properly dispose of any waste materials. Keep children and pets away from the work area.
Conclusion
Disassembling a bathtub drain can seem tricky. But it’s doable with patience. Follow each step carefully for the best results. Gather all necessary tools before starting. Safety is important, so wear gloves and goggles. Take your time to avoid damage.
If unsure, consult a professional. Practice makes perfect, so don’t worry about mistakes. Eventually, you’ll find the process easier. Your efforts will pay off with a smoothly running drain. Keep learning and improving your DIY skills. Tackle future plumbing tasks with confidence.
Enjoy the satisfaction of a job well done!