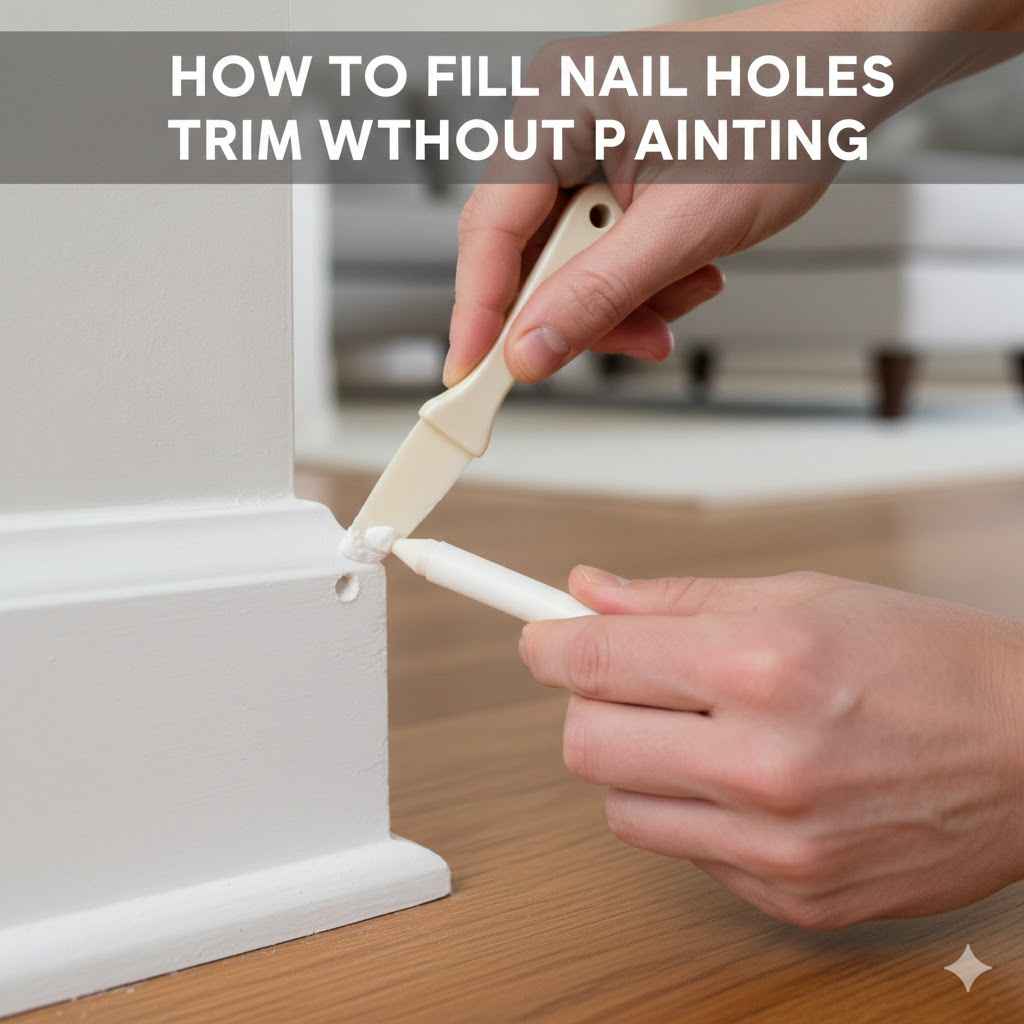
How to Fill Nail Holes in Trim Without Painting
Filling small holes in trim can seem tricky, especially when you want to avoid a repaint. Many people wonder how to fill nail holes in trim without painting. It’s a common question for DIYers and homeowners who want a quick fix.
Don’t worry, it’s easier than you think! This guide will walk you through simple steps to make those holes disappear. Get ready to learn a fast and effective way to keep your trim looking great.
Filling Nail Holes in Trim Without Paint
This section explains the primary methods for patching nail holes in wood trim without needing a full repaint. It covers why this is a desirable outcome for many and outlines the general approach. We will explore various materials and techniques that blend seamlessly with existing finishes, saving time and effort.
This method is perfect for touching up small imperfections or after removing old hardware. The goal is to achieve a smooth, almost invisible repair.
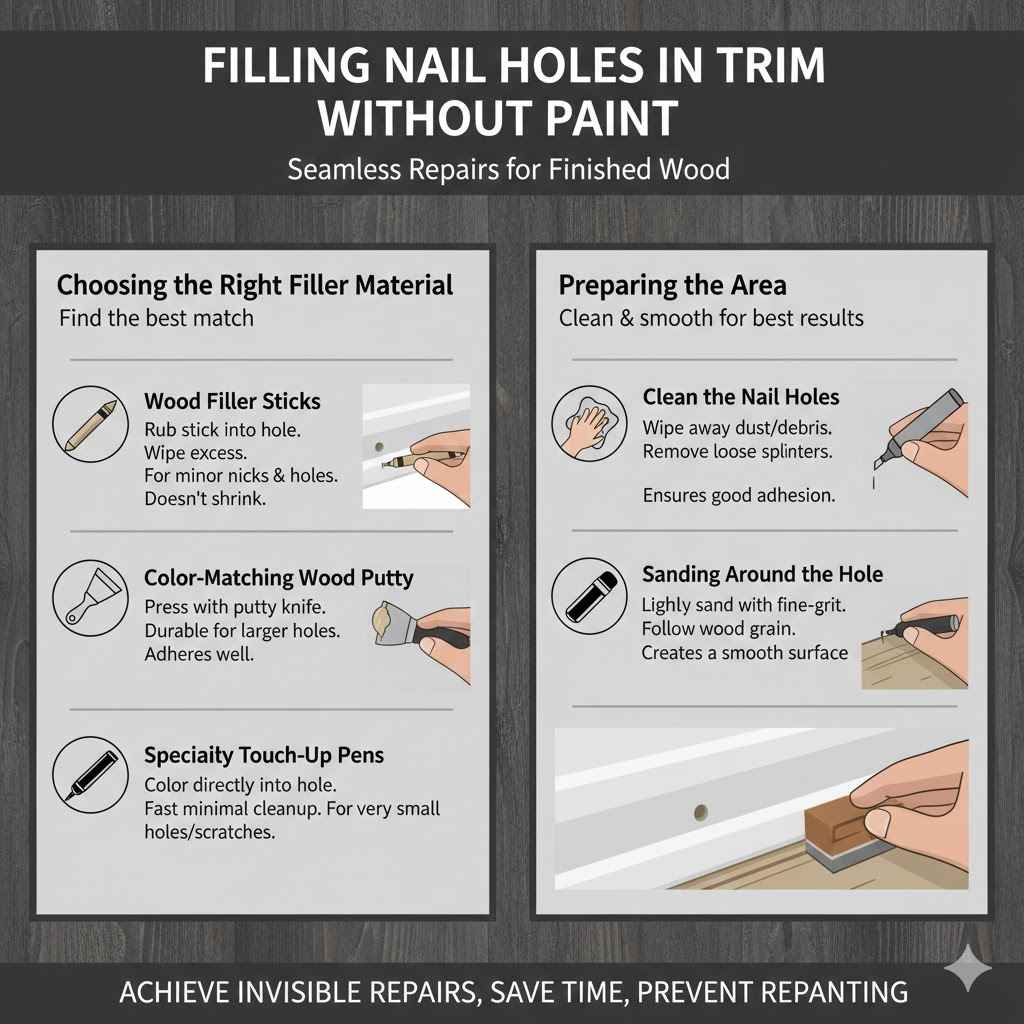
Choosing the Right Filler Material
Selecting the correct filler is key to a successful repair that matches your trim’s finish. Different types of fillers offer unique benefits and are suited for various situations. For instance, some are designed to be stainable, while others come pre-colored to match common wood tones.
Understanding these differences helps you pick the best option for your specific trim.
Wood Filler Sticks or Crayons
Wood filler sticks, often called wood repair crayons or sticks, are incredibly user-friendly. They come in a wide range of wood colors, allowing you to find a near-perfect match for your trim. To use one, you simply rub the stick directly into the nail hole.
The waxy material fills the void, and any excess can be wiped away with a soft cloth. These are great for minor nicks and holes on finished wood. They don’t shrink or crack like some other fillers.
Color-Matching Wood Putty
Wood putty is another excellent choice for filling nail holes without repainting. Like filler sticks, wood putty is available in many shades. It’s a softer, pliable material that you press into the hole with a putty knife.
Once the hole is filled, you smooth the surface flat. Putty is slightly more durable than a wax stick and is good for slightly larger holes. It adheres well and can create a very smooth finish.
Specialty Touch-Up Pens
Touch-up pens are like markers but contain stain or paint designed for wood. They are ideal for very small holes or scratches. You simply color directly into the hole.
This method is fast and requires minimal cleanup. The ink or stain within the pen dries quickly. For best results, choose a pen that closely matches your trim’s color.
Some pens have a fine tip for precise application.
Preparing the Area
Before you start filling, proper preparation ensures the filler adheres well and the repair looks seamless. This involves cleaning the area and making sure it’s smooth. Small steps here make a big difference in the final look.
Clean the Nail Holes
Use a soft, dry cloth to wipe away any dust or debris from the nail holes. If there’s any loose paint or wood splintering around the edge of the hole, gently remove it with a utility knife or a fine-grit sandpaper. This ensures the filler makes good contact with the wood.
A clean surface is crucial for the filler to stick properly.
Sanding Around the Hole
If the area around the nail hole is slightly raised or rough, a light sanding might be necessary. Use a very fine-grit sandpaper, like 220-grit or higher. Sand in the direction of the wood grain.
The goal is to create a smooth surface for the filler, not to remove existing finish. Be careful not to sand too aggressively, as this can create a noticeable smooth spot.
Applying Wood Filler
This part focuses on the actual process of applying the filler material into the nail holes. It breaks down the steps for using different types of fillers and achieving a smooth, professional finish. We’ll cover techniques for making the repair blend in so well that it’s hard to spot.
Using Wood Filler Sticks or Crayons
Wood filler sticks are a fantastic solution for quick touch-ups. Their ease of use makes them a favorite among DIYers. Here’s how to get the best results.
- Select the Correct ColorMatch the stick’s color to your trim as closely as possible. If you have stained trim, try to find a stick that matches the stain color. For painted trim, look for a shade that complements the paint, or one that will be less noticeable if a tiny bit shows through.
Test the color on an inconspicuous area if you’re unsure.
- Rub the Stick into the HoleHold the filler stick at an angle and press it firmly into the nail hole. Rub it back and forth, allowing the waxy material to fill the void completely. Work until the hole is slightly overfilled.
This helps account for any settling as it dries.
- Wipe Away ExcessUse a clean, soft cloth to gently wipe away any excess filler that’s on the surface of the trim. Wipe in the direction of the wood grain. The goal is to leave the filler only inside the hole.
- Buff the SurfaceIf needed, you can gently buff the area with a clean part of the cloth. This helps blend the filler into the surrounding finish. For most filler sticks, no further drying or sanding is required.
Using Wood Putty
Wood putty is a bit more traditional but very effective for filling nail holes. It requires a little more attention to detail to achieve a smooth finish.
Choose Your Putty
Select a wood putty that matches your trim’s color or can be tinted to match. Some putties are natural wood colors, while others are clear and meant to be stained. For a no-paint finish, a pre-colored putty is usually best.
Apply the Putty
Use a small putty knife to scoop a small amount of putty. Press the putty firmly into the nail hole. Overfill it slightly to ensure the hole is completely filled.
Smooth the putty down with the putty knife so it’s flush with the trim surface. Work in the direction of the wood grain.
Remove Excess
Carefully scrape away any excess putty from the surrounding trim with your putty knife. Be gentle to avoid disturbing the newly filled hole.
Allow to Dry
Let the putty dry completely according to the manufacturer’s instructions. Drying times can vary. Some putties might require a light sanding after they dry, while others can be smoothed with a damp cloth.
Using Touch-Up Pens or Markers
For the smallest holes and when you need a super fast solution, touch-up pens are a great option.
Select the Right Pen
Find a touch-up pen that matches your trim color. These pens are often available in common wood tones and paint colors. A close match is important for a seamless look.
Apply Directly to the Hole
Gently apply the pen’s tip directly into the nail hole. Follow the grain of the wood if possible. The ink or stain will fill the hole.
For very small holes, this might be all you need to do.
Wipe Away Smudges
If any color gets onto the surrounding trim, wipe it away immediately with a soft, dry cloth. The color from these pens usually dries very quickly.
Achieving a Seamless Finish
This section covers the final touches to make sure the filled nail holes are virtually invisible. It’s about blending the repair so it looks like it was never there. We will discuss gentle smoothing techniques and how to make sure the color and texture match the rest of the trim.
Gentle Smoothing and Blending
Once the filler is dry, the next step is to ensure the surface is smooth and matches the surrounding trim. This is where attention to detail pays off.
Light Sanding (If Needed)
If your chosen filler requires it, or if there are slight imperfections, a very light sanding might be needed. Use an ultra-fine grit sandpaper, like 320-grit or higher, or a fine sanding sponge. Sand only the filled area and in the direction of the wood grain.
The goal is to knock down any high spots or rough edges. Avoid over-sanding, which can create a noticeable patch.
Buffing and Polishing
After any light sanding, or if no sanding was required, you can gently buff the area. Use a clean, soft cloth to lightly rub the filled spot. This helps to blend the sheen of the filler with the surrounding trim.
For some finishes, a touch of furniture polish can further enhance the blend.
Matching Existing Finishes
The trick to making filled nail holes disappear is to match the existing finish as closely as possible. This involves color and texture.
Color Matching Accuracy
The most critical factor is the color match. Whether you use a pre-colored filler stick, putty, or touch-up pen, choose the shade that most closely resembles your trim. If your trim has a complex grain or multiple colors, consider using a neutral-colored filler and then carefully applying a touch-up pen or stain to mimic the variation.
Mimicking Wood Grain
For stained trim, you can sometimes use a fine-tipped artist’s brush and a matching stain to lightly draw in wood grain lines over the filled area. This is an advanced technique that requires a steady hand and practice. Often, a good color match is enough to make the holes unnoticeable.
Surface Sheen
Pay attention to the sheen of your trim. If your trim has a high gloss, a matte filler will stand out. Try to use products that have a similar sheen or can be adjusted with a light buffing or a clear topcoat (if appropriate for the filler).
Troubleshooting Common Issues
Even with the best intentions, sometimes things don’t go perfectly. This section addresses common problems you might encounter when filling nail holes and offers simple solutions. We aim to help you fix any mistakes and achieve a flawless result.
When the Color Doesn’t Match
Color matching is often the trickiest part of repairing trim without painting. If your initial choice isn’t quite right, there are ways to adjust.
Using Multiple Fillers
If a single filler stick or putty doesn’t match, you can sometimes layer or mix fillers. For example, you might use a neutral wood putty and then apply a slightly darker or lighter colored filler stick over it to achieve the desired tone. It requires careful application and blending.
Applying Touch-Up Pens Over Filler
Once the primary filler is dry and smooth, you can use a touch-up pen or marker to add color. A light color can be darkened by adding more layers of a colored pen, or a dark color can be lightened by buffing it gently. Always test on scrap wood first.
Filler Shrinks or Cracks
Some fillers can shrink as they dry, leaving a small indentation, or crack over time. This is more common with some types of spackling compounds than with wood-specific fillers.
Overfilling Slightly
When applying filler, always aim to overfill the hole slightly. This provides extra material that can settle as it dries. If it still shrinks, you can add another thin layer of filler and let it dry again.
Using Quality Wood Fillers
Ensure you are using products specifically designed for wood, like wood filler sticks, putty, or epoxy fillers. These are formulated to be stable and resist shrinking or cracking. Avoid using standard wall spackle for wood trim if possible, as it can be prone to these issues.
Accidental Over-Application
Sometimes, you might apply too much filler or get it on areas where it doesn’t belong.
Wiping Away Excess Immediately
The best defense against over-application is to wipe away excess filler as you apply it. Have a clean, damp cloth ready. For putty, a putty knife can scrape away bulk.
For filler sticks, a dry cloth works well.
Gentle Scraping
If the filler has dried on the surface, you can often gently scrape it off with a putty knife held at a low angle. Be very careful not to scratch the surrounding trim. For stubborn bits, a very light sanding might be required.
Real-Life Example: Kitchen Cabinet Trim Repair
Sarah was renovating her kitchen and noticed several small nail holes on the decorative trim around her cabinets. She didn’t want to repaint all the trim, so she looked for a way to fix them without paint. She chose a set of wood filler sticks in various wood tones.
She found a shade that closely matched her oak cabinets. Sarah cleaned the holes, then pressed the brown filler stick into each one, rubbing until it was full. She wiped away the excess with a soft cloth.
The holes were immediately less visible. The repair took less than an hour and saved her the time and expense of repainting. The finished look was smooth and blended well with the natural wood grain.
This quick fix made a noticeable improvement to her cabinets.
Sample Scenario: Fixing Trim After Artwork Removal
John recently took down some old pictures from his living room wall. The nails had left small holes in the painted trim below the wallpaper. He wanted to fill these holes without having to repaint the entire wall or trim section.
He used a small putty knife to apply a white wood putty into each hole. He smoothed it flush with the trim. Once dry, he lightly sanded the filled spots.
He then used a white touch-up paint pen to dab a bit of color into each filled hole, ensuring it matched the trim’s paint. The result was that the small holes became nearly invisible. The entire process took him about 30 minutes and preserved the existing paint finish on his trim.
Benefits of Filling Holes Without Painting
This section explores why homeowners and DIY enthusiasts prefer to fill nail holes without painting. It highlights the advantages in terms of time, cost, and effort. The focus is on the practical benefits and the satisfaction of achieving a professional look with simple methods.
Saves Time
Repainting trim can be a lengthy process. It often involves multiple coats, drying time between them, and careful masking to protect adjacent surfaces. Filling nail holes using specific fillers and touch-up products can be accomplished in a fraction of the time.
This allows you to complete your home improvement tasks much faster. For instance, filling a few dozen small holes might take an hour or two with the right methods, compared to a full day or more for painting.
Cost-Effective Solution
Paint, primer, brushes, rollers, and masking tape all add up in cost. When you only need to repair small imperfections, buying a full can of paint might be overkill. Wood filler sticks, putty, and touch-up pens are relatively inexpensive and can often be purchased for just a few dollars.
This makes it a budget-friendly way to maintain your home’s appearance. A single wood filler stick can fix dozens of nail holes, offering excellent value.
Preserves Existing Finish
The beauty of your trim often lies in its original finish, whether it’s a natural wood stain or a specific paint color. Repainting can sometimes alter this finish, especially if the new paint doesn’t perfectly match or if the original finish was more delicate. By filling holes without painting, you preserve the existing aesthetics of your trim.
This is particularly important for antique furniture, historic homes, or when trying to maintain a consistent look throughout a room.
Easy for Beginners
Many homeowners are not professional painters or woodworkers. The techniques for filling nail holes without painting are generally straightforward and do not require specialized skills. With simple tools and products, even someone with little DIY experience can achieve satisfactory results.
This accessibility empowers more people to tackle minor home repairs confidently.
Statistics on Home Improvement DIY
Recent surveys indicate a significant increase in DIY home improvement projects. According to a 2023 report by , approximately 58% of homeowners undertook at least one DIY project in the past year. A substantial portion of these projects involved interior renovations and repairs, where cosmetic fixes like filling nail holes are common.
Another study by found that over 70% of homeowners prefer to repair minor damage rather than replace entire sections of trim or molding. This trend highlights the demand for simple, effective solutions for common issues.

Frequently Asked Questions
Question: Can I use regular spackle to fill nail holes in trim
Answer: While regular spackle can fill holes, it’s not ideal for trim you don’t plan to paint. Wood fillers or putties are formulated to match wood’s properties, resist shrinking, and are often color-matched, providing a much better, paint-free finish.
Question: How do I match the color of my trim if it’s a unique shade
Answer: For unique trim colors, try using a neutral-colored wood putty or filler and then carefully applying a touch-up pen or artist’s paint in a matching shade. It might take a little experimentation to get the perfect blend.
Question: What is the best filler for dark-stained trim
Answer: For dark-stained trim, look for wood filler sticks or putties specifically labeled for dark woods or choose a product that can be stained. You can also use a dark-colored touch-up pen over a neutral filler.
Question: How long does it take for wood filler to dry
Answer: Drying times vary by product. Wood filler sticks and crayons are usually ready to go immediately. Wood putties can take anywhere from 15 minutes to a few hours to dry, depending on the depth of the hole and humidity.
Always check the product packaging.
Question: Can I fill holes in trim that has a gloss finish
Answer: Yes, you can fill holes in gloss-finish trim. Use a filler or putty that dries to a smooth finish. After filling and drying, you might need to very lightly buff the area to match the gloss level or use a clear gloss sealant over the filled spot if necessary.
Wrap Up
Fixing nail holes in trim without painting is a simple task. You can easily make these small imperfections disappear. Choose the right filler, prepare the area, and apply it carefully.
Then, gently smooth and blend. This method saves time, money, and keeps your trim looking its best.