How to Fix Curb Rash: The Ultimate Guide to Restoring Your Vehicle
To fix curb rash, clean the affected area and use a touch-up paint or hire a professional repair service. Curb rash is an unsightly and frustrating problem that can occur when your car’s wheels scrape against a curb.
It can leave behind scratches or even chunks of metal missing from the wheel. However, there are simple solutions to fix curb rash and restore your wheels to their original condition. We will guide you through the steps to fix curb rash and provide helpful tips to ensure a successful repair.
Whether you decide to tackle the repair yourself or seek professional help, you’ll be back on the road with wheels that are free of curb rash in no time. So let’s dive in and get those wheels looking as good as new!
1. Understanding Curb Rash
Understanding curb rash is essential to preserving the appearance and functionality of your vehicle. Curb rash refers to the damage caused to your car’s wheels when they come into contact with curbs or other hard objects. It can happen to any type of vehicle, regardless of size or model. In this section, we will explore what curb rash is, how it happens, and the impact it can have on your vehicle.
1.1 What Is Curb Rash?
Curb rash is the term used to describe the scuffs, scratches, and dings that appear on a car’s wheels as a result of coming into contact with curbs. These damages are usually most visible on the outer edge of the rim, where they can be easily seen. Curb rash can range from minor, superficial scratches to deeper gouges that affect the structural integrity of the wheel.
1.2 How Does Curb Rash Happen?
Curb rash can occur when you misjudge a parking maneuver, make a tight turn, or accidentally hit a curb while driving. It is often an unfortunate consequence of parallel parking or navigating through narrow spaces. Even a small brush against a curb can leave noticeable marks on your wheels.
To understand how curb rash happens, imagine the wheels of your car rubbing against the harsh surface of the curb. The friction created between the curb and the wheel causes the rim to get scratched, chipped, or even cracked in extreme cases. The severity of the damage depends on the force of impact and the angle at which it occurs.
1.3 The Impact Of Curb Rash On Your Vehicle
The impact of curb rash extends beyond the mere cosmetic appearance of your wheels. If left untreated, curb rash can lead to more serious problems. Here are a few reasons why prompt repair is necessary:
- Curb rash compromises the protective coating on the rim, making it vulnerable to corrosion and rust.
- Deep scratches or gouges in the wheel can weaken its structural integrity, posing a safety risk.
- Unrepaired curb rash reduces the resale value of your vehicle, making it less appealing to potential buyers.
- Curbed wheels can affect the balance and alignment of your car, leading to uneven tire wear and poor handling.
It is important to address curb rash as soon as it occurs to prevent further damage and maintain the overall condition of your vehicle. In the following sections, we will discuss various methods to fix curb rash and restore your wheels to their former glory.
2. Assessing The Damage
Once the unfortunate incident of curb rash occurs, it’s crucial to promptly assess the damage to prevent further complications. By thoroughly evaluating the extent of the damage, you can determine the necessary steps to fix curb rash effectively. In this section, we will guide you through the process of assessing the damage by identifying curb rash, evaluating the severity of the damage, and inspecting for any hidden issues.
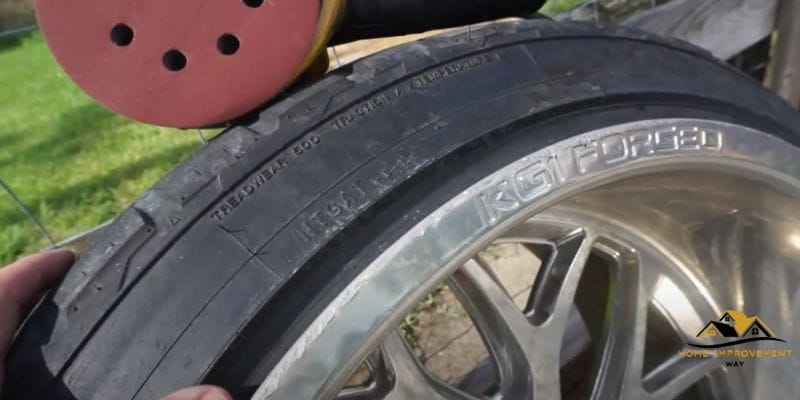
2.1 Identifying Curb Rash
The first step in assessing the damage is to identify curb rash. Curb rash refers to the scuffs, scratches, or abrasions on your wheel rims caused by contact with a curb or other hard surfaces. To identify curb rash, follow these steps:
- Thoroughly examine the wheel rims for any visible signs of damage.
- Look for scrapes, scratches, or black marks on the rim’s surface.
- Pay attention to any uneven or rough areas that indicate the presence of curb rash.
By carefully identifying curb rash, you can gain a better understanding of the damage’s extent and prepare for the subsequent steps.
2.2 Evaluating The Severity Of The Damage
After identifying curb rash, the next step is to evaluate the severity of the damage. This assessment will help you determine whether the curb rash can be fixed through simple DIY methods or if professional intervention is required. Here’s how you can evaluate the severity of the damage:
- Assess the depth of the scratches or scrapes on the wheel rims.
- Measure the length and width of the affected area using a ruler or measuring tape.
- Compare the damage to a severity chart or consult a professional for guidance.
By evaluating the severity of the damage, you can make an informed decision about the appropriate course of action required to fix the curb rash.
2.3 Inspecting For Hidden Damage
In addition to visible curb rash, there may be hidden damage that needs to be addressed. Inspecting for hidden damage is a crucial step to ensure the overall health and functionality of your wheel rims. To identify any hidden issues, follow these steps:
| 1. | Thoroughly clean the affected area to remove any dirt or debris that might be concealing hidden damage. |
| 2. | Run your finger along the damaged area, feeling for any abnormalities or rough spots that could indicate hidden damage. |
| 3. | Inspect the sidewalls and spokes of the wheel for any signs of structural damage. |
By conducting a comprehensive inspection for hidden damage, you can ensure that all potential issues are addressed during the repair process, preventing future complications.
3. Fixing Curb Rash
Seeing that unsightly curb rash on your beloved car can be a real downer, but fear not! There are effective ways to fix curb rash and restore your wheels’ pristine appearance. In this section, we will explore different methods for repairing curb rash, from DIY solutions for minor damage to seeking professional help for extensive repairs.
3.1 Diy Methods For Minor Curb Rash
If you notice minor curb rash on your wheels, there are several simple do-it-yourself methods you can try before resorting to professional assistance.
- 1. Sanding and Filling: Start by sanding the damaged area using fine-grit sandpaper to smooth out any jagged edges or rough spots. Then, apply a wheel repair putty or epoxy filler to fill in the affected area. Smooth the filler evenly and let it dry before moving on to the next step.
- 2. Priming: After the filler has dried, use a wheel primer to ensure proper adhesion of the paint. Apply the primer to the repaired area using smooth, even strokes and allow it to dry completely.
- 3. Painting: Once the primer has dried, it’s time to apply a matching automotive paint. Use spray paint specially formulated for wheels in the color that matches your wheels. Apply multiple thin coats for even coverage and allow each coat to dry before applying the next.
- 4. Clear Coating: To protect the newly painted area and give it a glossy finish, apply a clear coat over the paint. This will provide additional durability and prevent the paint from chipping or fading over time. Apply the clear coat according to the manufacturer’s instructions and allow it to dry completely.
3.2 Seeking Professional Help For Extensive Damage
If the curb rash on your wheels is extensive or you don’t feel confident in your DIY abilities, it is best to seek professional assistance. Professional wheel repair specialists have the expertise and proper tools to tackle more severe damage.
By entrusting the repair to professionals, you can ensure a high-quality finish that matches the original appearance of your wheels. They can also diagnose any underlying issues that may have caused the curb rash and prevent future damage.
3.3 Steps For Repairing Curb Rash
No matter which method you choose to fix curb rash, following these essential steps will help you achieve the best possible results:
- Assess the damage: Carefully examine the affected area to determine the extent of the curb rash and identify any underlying issues.
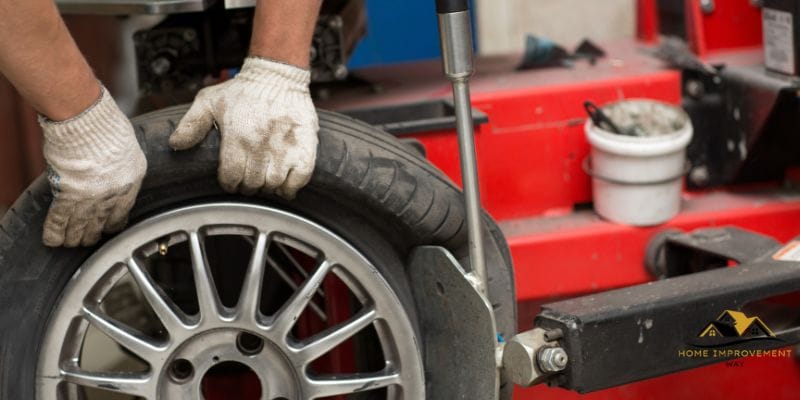
- Clean the wheels: Thoroughly clean the damaged area and surrounding wheel surface to remove any dirt, debris, or brake dust that may interfere with the repair process.
- Prepare the surface: Use sandpaper to smooth out the damaged area and create a clean, even surface for the filler, primer, and paint to adhere to.
- Apply the repair method: Depending on the severity of the curb rash, choose either a DIY method or take your wheels to a professional for repair.
- Protect the repair: After the repair is complete, consider applying a wheel sealant or wax to protect the newly repaired area and keep your wheels looking their best.
By following these steps and choosing the most suitable method for your situation, you can restore your wheels to their former glory and eliminate that eyesore of curb rash once and for all.
Conclusion
To wrap up, fixing curb rash is an essential task to maintain the appearance and value of your vehicle. By following the simple steps outlined in this blog post, you can effectively repair minor damages and restore your wheels to their former glory.
Remember to prioritize safety and use the appropriate tools and techniques. With a little time and effort, you’ll be able to achieve professional-looking results that will leave your car looking sleek and well-maintained. Keep your wheels curbrash-free and enjoy a smooth and stylish ride!