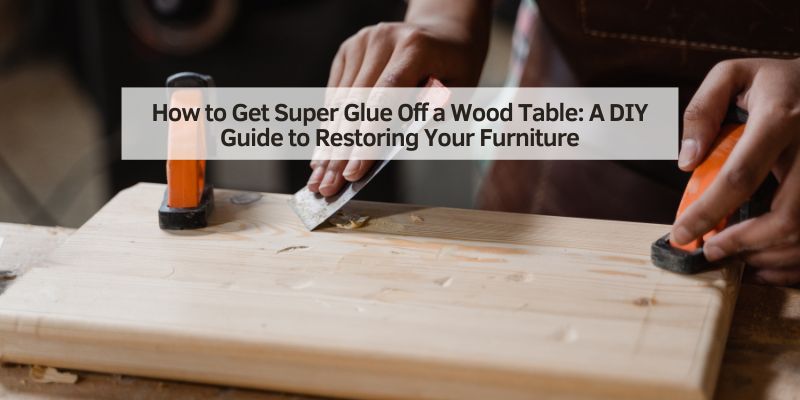
How to Get Super Glue Off a Wood Table: A DIY Guide to Restoring Your Furniture
Hey there! So, you’ve got some super glue stuck on your wood table, and you’re wondering how to get it off without ruining that beautiful finish? I feel you! A while back, I was working on a craft project at my dining table, and a blob of super glue landed right on the wood. I panicked, thinking I’d scarred my favorite piece of furniture forever.
But after some trial and error, a bit of research, and a few tricks up my sleeve, I got that glue off and made my table look good as new. I’m thrilled to share everything I’ve learned with you! This guide is perfect for anyone in the USA looking to tackle super glue mishaps on their wood table. I’ll keep it simple, fun, and easy to follow, so grab a cloth, and let’s save your table together!
Why Super Glue on a Wood Table Is a Big Deal
Let’s talk about why super glue is such a headache. Super glue, or cyanoacrylate, bonds fast and strongly. I learned this the hard way when it dried in seconds on my oak table. It can stick to the wood’s surface or seep into the grain, making removal tricky.
If you don’t remove it carefully, you risk scratching the wood or stripping the finish. My table has a glossy varnish, and I was terrified of dulling it. Fixing it yourself saves money—professional refinishing can cost $100-$500. Plus, it’s satisfying to restore your furniture. Let’s figure out what you’re dealing with first.
Understanding Your Wood Table’s Finish
Before you start scrubbing, you need to know your table’s finish. I made the mistake of using a harsh cleaner that dulled my table’s shine. Here’s what I learned about wood finishes:
- Varnish or polyurethane: Shiny and durable, common on dining tables. My table has this.
- Lacquer: Smooth and glossy, often on older furniture. My mom’s antique table is lacquered.
- Shellac: Warm-toned, found on vintage pieces. I saw this on a friend’s side table.
- Wax: Soft and matte, used on rustic tables. My patio table has a wax finish.
- Unfinished wood: Raw wood with no coating. I have an unfinished workbench like this.
Test the finish by rubbing a hidden spot with a cloth dampened in soapy water. If it dulls, it’s wax or shellac; if it holds up, it’s likely varnish or lacquer. I checked under my table to be safe. Knowing this helps you pick the right removal method. Let’s gather your tools.
Tools and Materials You’ll Need
Having the right supplies makes this job easier. I tried using a kitchen sponge at first—big mistake! Here’s what I use now:
- Acetone (nail polish remover): Breaks down super glue. I got a $3 bottle.
- Cotton balls or soft cloths: For applying liquids. I used old T-shirt scraps.
- Plastic scraper: To gently lift glue. I bought a $2 pack.
- Mild dish soap: For cleaning residue. I had Dawn in my kitchen.
- Warm water: To mix with soap. Free from the tap!
- Olive oil or mineral oil: To polish the wood. I used $5 olive oil.
- Sandpaper (fine, 400-grit): For stubborn glue on unfinished wood. I spent $3.
- Rubbing alcohol: For delicate finishes. I had a $2 bottle.
- Gloves: To protect your hands. I got $1 disposable gloves.
- Microfiber cloth: For buffing. I had one from my car kit.
- Optional: Wood polish: To restore shine. I used a $6 can of Pledge.
- Optional: Razor blade: For thick glue, used carefully. I borrowed one.
My total cost was about $25, and you might have some items at home. Always test products on a hidden spot first. Let’s prep your table for cleaning.
Preparing Your Wood Table for Glue Removal
Before you attack that glue, a little prep goes a long way. I skipped this once and got acetone on my table’s edge—oops! Here’s how I prep now:
- Clear the area: Move dishes, decor, or anything on the table. I put mine on the counter.
- Clean the surface: Wipe with a damp cloth to remove dust. I used a soapy rag.
- Protect the table: Tape paper or cloth around the glue spot to shield the finish. I used painter’s tape.
- Work in a ventilated area: Acetone smells strong. I opened my windows.
- Test your method: Dab a hidden spot with your cleaner to check for damage. I tested under the table.
This takes 10 minutes but prevents mistakes. It’s like checking your oil before a drive—do it right! Let’s start with the easiest method: acetone.
Method 1: Removing Super Glue with Acetone
Acetone is my go-to for most super glue messes. It worked like magic on my varnished table. Here’s how I did it:
- Apply acetone: Soak a cotton ball with acetone and dab it on the glue. I let it sit for 1-2 minutes.
- Gently scrape: Use a plastic scraper to lift the softened glue. I nudged it slowly to avoid scratches.
- Wipe clean: Dab with a soapy cloth to remove residue. I used warm water and Dawn.
- Polish the spot: Rub olive oil with a microfiber cloth to restore shine. My table gleamed!
- Check the finish: If it looks dull, apply wood polish. I didn’t need this, but I had Pledge ready.
This took 15 minutes and cost $5. Acetone works best on varnish or polyurethane but can damage wax or shellac. If your finish is delicate, try the next method.
Method 2: Using Rubbing Alcohol for Delicate Finishes
For wax or shellac finishes, I use rubbing alcohol to avoid damage. I helped my mom with her lacquered table this way. Here’s the process:
- Apply alcohol: Dampen a soft cloth with rubbing alcohol and press it on the glue. I waited 2-3 minutes.
- Rub gently: Use the cloth to work the glue loose. I rubbed in circles until it started to lift.
- Scrape if needed: Use a plastic scraper for stubborn bits. I was super gentle to protect the lacquer.
- Clean the area: Wipe with a soapy cloth to remove alcohol. I dried it with a towel.
- Polish: Apply a thin layer of mineral oil to revive the finish. Her table looked perfect.
This took 20 minutes and cost $3. It’s slower but safer for delicate finishes. If the glue’s thick, try the next method.
Method 3: Scraping and Sanding for Thick Glue
For big glue blobs or unfinished wood, I use scraping and sanding. I tried this on my workbench. Here’s how:
- Scrape carefully: Use a plastic scraper or razor blade at a low angle to chip off glue. I used a razor but was super cautious.
- Sand the spot: Rub with 400-grit sandpaper in the wood’s grain direction. I sanded lightly to avoid gouges.
- Clean the dust: Wipe with a damp cloth. I used a microfiber cloth to grab all the particles.
- Polish the wood: Apply olive oil to blend the spot. My workbench looked even-toned.
- Optional: Refinish: If the sanded spot looks different, apply matching stain or polish. I skipped this since my workbench is raw.
This took 25 minutes and cost $5. It’s great for unfinished wood but risky for finished tables—sanding can remove varnish. If you want a chemical-free option, try the next method.
Method 4: Using Heat and Oil for Gentle Removal
For a natural approach, I used heat and oil on a small glue spot on my patio table. Here’s how it went:
- Apply heat: Hold a hairdryer on low 6 inches from the glue for 30 seconds. I warmed the glue to soften it.
- Dab with oil: Apply olive oil with a cloth and let it sit for 5 minutes. I rubbed gently to loosen the glue.
- Scrape softly: Use a plastic scraper to lift the glue. I worked slowly to protect the wax finish.
- Clean the area: Wipe with a soapy cloth to remove oil. I dried it thoroughly.
- Polish: Buff with mineral oil to restore the wood’s glow. My table looked rustic and clean.
This took 20 minutes and cost $0 since I had oil at home. It’s slow but safe for most finishes. Let’s troubleshoot common issues.
Troubleshooting Common Problems
Sometimes, things don’t go perfectly. Here’s how I fixed issues I ran into:
- Glue won’t budge: Let the acetone or alcohol sit longer. I waited 5 minutes for a stubborn spot.
- Finish looks dull: Apply more polish or oil. I revived a dull spot with Pledge.
- Scratches appear: Sand lightly with 400-grit and polish. I fixed a small scratch this way.
- Glue spreads: Wipe it immediately with a damp cloth. I caught a smear early and saved my table.
- Finish strips: If acetone damages the finish, sand and refinish the spot. I avoided this by testing first.
These fixes are quick and keep your table looking great. If you’re unsure, test on a small area. Let’s talk prevention.
Preventing Super Glue Mishaps on Wood Tables
Once your table’s clean, I want to keep it that way. Here’s how I avoid glue problems now:
- Use a protective cover: I put a plastic sheet or newspaper on my table during crafts.
- Work in a safe spot: I use my garage workbench for messy projects.
- Clean spills fast: If glue drips, I wipe it with a damp cloth before it dries.
- Store glue properly: I keep my super glue in a sealed container to avoid leaks.
- Use less glue: I apply tiny drops to avoid excess. Less is more!
These habits save my table from damage. They’re like waxing your car—protect it upfront! Let’s compare the methods.
Comparing Glue Removal Methods
To help you choose, here’s a table based on my experiences:
| Method | Best For | Cost | Time Needed | Tools & Materials | Difficulty |
|---|---|---|---|---|---|
| Acetone | Varnish, polyurethane | $5-$10 | 15 min | Acetone, cotton balls, scraper | Easy |
| Rubbing Alcohol | Wax, lacquer, shellac | $3-$8 | 20 min | Alcohol, cloth, oil | Easy |
| Scraping & Sanding | Unfinished wood, thick glue | $5-$10 | 25 min | Scraper, sandpaper, oil | Medium |
| Heat & Oil | All finishes, small spots | $0-$5 | 20 min | Hairdryer, olive oil, scraper | Easy |
I love acetone for speed, but I’d use alcohol for delicate tables. Pick what matches your table’s finish.
Restoring Your Table’s Beauty
After removing the glue, a little TLC makes your table shine. Here’s what to do:
- Polish the wood: Use wood polish or oil. I buffed my table with Pledge for a glossy look.
- Check for uniformity: Ensure the spot blends. I added extra oil to even out my table’s tone.
- Protect the finish: Apply furniture wax for waxed tables. I did this on my patio table yearly.
- Clean regularly: Dust with a microfiber cloth. I wipe my table weekly to keep it spotless.
- Optional touch-up: If the sandpaper left marks, use a matching stain. I didn’t need this, but I kept it in mind.
This takes 10 minutes and adds years to your table’s life. My dining table looks stunning after a polish!
Safety Tips for Glue Removal
Working with chemicals and tools needs care. Here’s how I stay safe:
- Wear gloves: I used gloves to protect my skin from acetone.
- Ventilate the area: I opened windows to avoid fumes. My kitchen fan helped too.
- Keep cleaners away from kids: I locked my acetone in a cabinet after use.
- Use tools carefully: I held scrapers firmly to avoid slipping.
- Test everything: I checked every product on a hidden spot to prevent damage.
These tips kept me safe and worry-free. It’s like checking your brakes before a road trip—be cautious! Let’s talk about why I love this project.
Why I’m Hooked on This Fix
Getting super glue off my table was one of those projects that made me feel like a DIY superstar. Every time I sit at my dining table, I’m proud I saved it from that sticky mess. It’s not just about saving money (though I saved $200 on refinishing)—it’s about caring for my home and learning a handy skill. This project is perfect for anyone who loves fixing things and wants their furniture to look amazing. Whether it’s a quick acetone dab or a gentle oil rub, you’ll love the results.
Conclusion
There you have it—a complete guide to getting super glue off a wood table! I’ve been through the panic and the polishing, and I’m so excited to share these tips with you. From acetone for tough glue to heat for delicate finishes, you’ve got all the tricks to make your table look flawless. This is a fun, budget-friendly project that anyone can tackle with a few household items and some care. So, grab that cotton ball, test your cleaner, and get ready to feel like a furniture hero. You’ll save money, restore your table’s beauty, and prove you can handle any sticky situation. Happy cleaning!
FAQ
Will acetone ruin my wood table’s finish?
It might damage wax or shellac finishes. I tested acetone on my varnished table first, and it worked fine, but use alcohol for delicate surfaces.
How long does it take to remove super glue from a wooden table?
It took me 15-25 minutes, depending on the method. Acetone was fastest, sanding took a bit longer.
Can I use a metal scraper to remove the super glue?
I wouldn’t. Metal can scratch wood. I used a plastic scraper for $2 to keep my table safe.
What if I don’t have acetone or rubbing alcohol?
Try olive oil and heat. I used a hairdryer and oil for a small spot, and it worked without buying anything.
How do I keep super glue from sticking to my table again?
Use a cover during projects. I now put a newspaper on my table when crafting to catch drips.