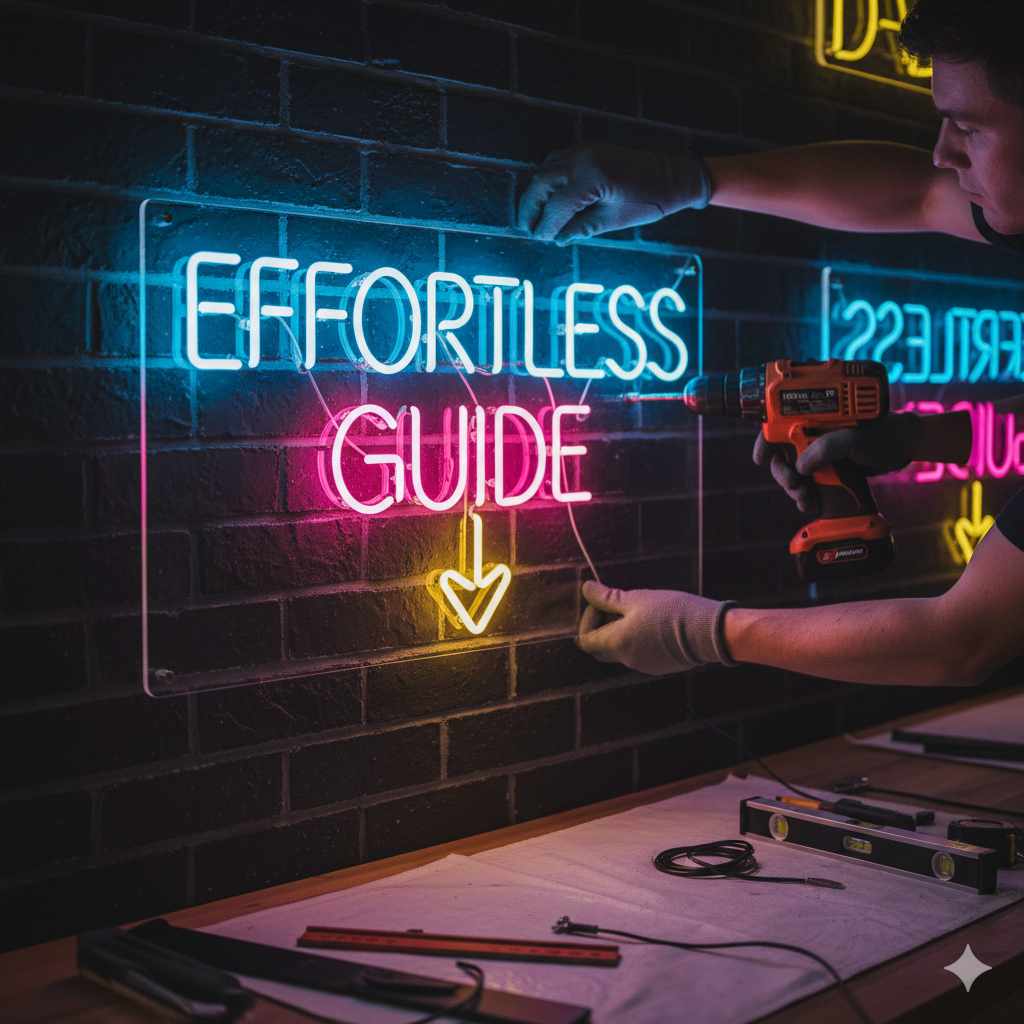
How to Hang a Neon Sign: Effortless Guide
Quick Summary:
Effortlessly hang your neon sign by choosing the right spot, using appropriate hardware like wall anchors and screws, and carefully securing the sign to prevent damage. Follow these simple steps for a secure, stylish display.
Hello there, fellow home improvers! Md Meraj here. Ever look at a blank wall and think, “This space needs a little sparkle”? A vibrant neon sign can be just the ticket to add personality and flair to any room, from your cozy living area to your bustling home office. But the thought of mounting something potentially delicate and electric can feel a bit daunting, right? You might worry about drilling too deep, damaging your wall, or worse, your beautiful new sign. Don’t let that stop you! Today, we’re going to walk through how to hang a neon sign on a wall, step-by-step. We’ll make sure it’s safe, secure, and looks absolutely stunning. Get ready to bring that brilliant glow to your home!
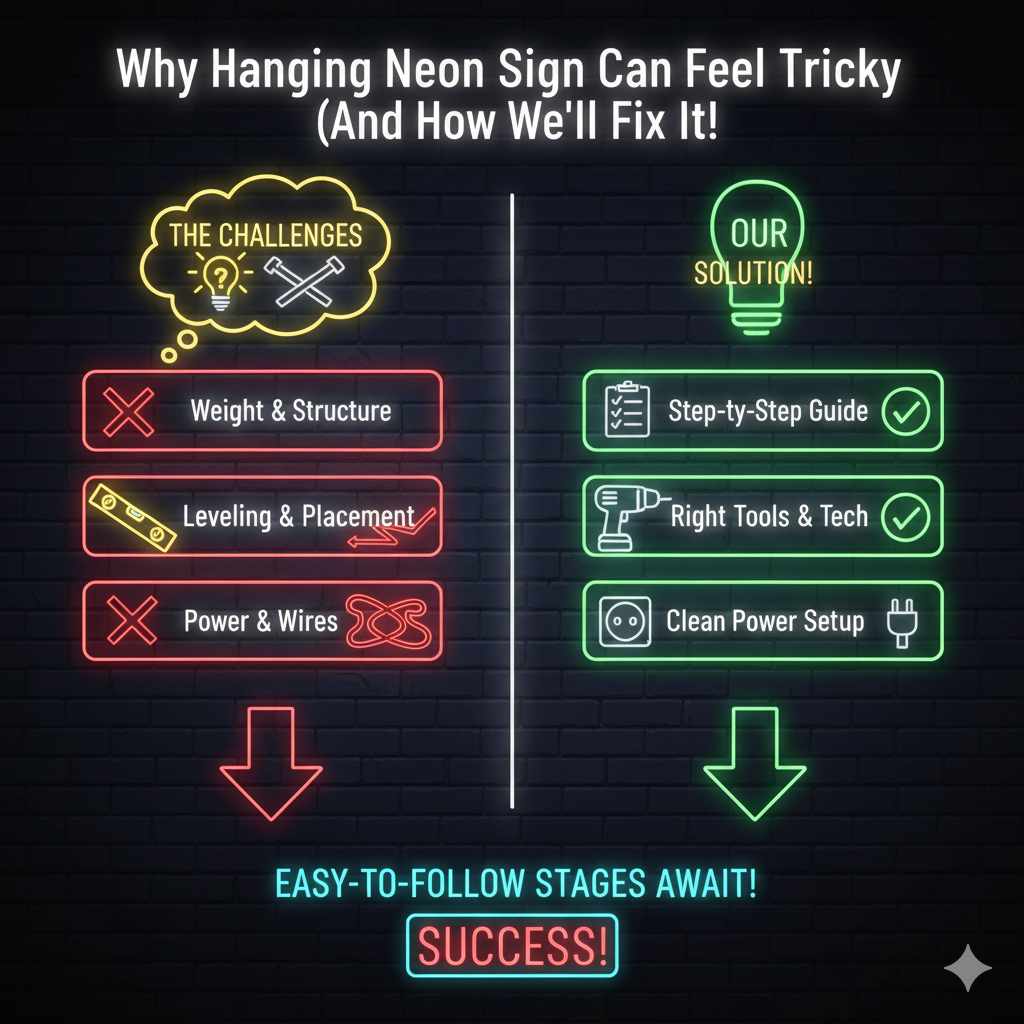
Why Hanging a Neon Sign Can Feel Tricky (And How We’ll Fix It!)
Neon signs, whether they’re classic glass tubes or modern LED versions, are often the centerpiece of a room’s decor. They add a unique vibe, a splash of color, and a touch of retro cool or contemporary chic. However, their structure, weight, and electrical components can make homeowners hesitate. Unlike a simple picture frame, a neon sign requires a bit more consideration for its mounting. You want it to be perfectly level, firmly attached, and safely connected to power without any dangling wires. The good news is, with a little preparation and the right approach, hanging a neon sign is a straightforward DIY project. We’ll break down the process into easy-to-follow stages, so you can confidently transform your space.
Gathering Your Essential Tools and Materials
Before we start drilling, let’s make sure we have everything we need. Having all your supplies ready will make the process smooth and stress-free. Think of this as prepping your workspace, just like I do before starting a woodworking project. It saves time and prevents those “oops, I forgot something!” moments.
What You’ll Need:
- Your Neon Sign: Of course! Make sure it’s unplugged and you know how it’s designed to be mounted (e.g., pre-drilled holes, mounting brackets).
- Measuring Tape: For precise placement.
- Pencil: To mark drilling points.
- Level: To ensure your sign is perfectly straight.
- Drill and Drill Bits: The size will depend on your screws and wall anchors.
- Screws: Appropriate for the weight of your sign and your wall type.
- Wall Anchors: Crucial for drywall or plaster to ensure a secure hold. We’ll talk more about these!
- Screwdriver: Manual or a drill attachment.
- Stud Finder (Optional but Recommended): If you can locate a wall stud, it’s the strongest mounting point.
- Safety Glasses: Always protect your eyes when drilling!
- Ladder or Sturdy Step Stool: If you’re hanging the sign higher up.
Understanding Wall Anchors: Your Best Friend for Drywall
When you’re hanging anything on drywall, it’s vital to use wall anchors. Drywall itself isn’t strong enough to support much weight on its own. Anchors expand behind the drywall, creating a secure base for your screws. There are several types, but for hanging a neon sign, you’ll likely use:
- Plastic Expansion Anchors: These are common and work well for lighter signs. You drill a hole, insert the anchor, and then screw into it.
- Self-Drilling Anchors (or “Monkey Hooks”): These are fantastic for DIYers. They screw directly into the drywall without needing a pilot hole, and many have a hook built-in for hanging.
- Toggle Bolts: For heavier items, these have wings that spring open behind the wall, offering a very strong hold.
The key is to choose anchors that can support at least the weight of your neon sign, plus a little extra for safety. It’s always better to be over-prepared! For more detailed information on choosing the right anchors for your wall type, the U.S. General Services Administration (GSA) provides excellent resources on building and construction standards, which can indirectly inform your home improvement choices.
Step-by-Step Guide: How to Hang a Neon Sign on a Wall
Alright, let’s get down to business. Following these steps will ensure your neon sign is hung safely and looks fantastic. Remember, patience is key!
Step 1: Choose the Perfect Location
This is more than just picking a spot that looks good. Consider:
- Visibility: Where will it make the biggest impact?
- Power Source: Is there an outlet nearby? How will you manage the cord neatly?
- Wall Material: Is it drywall, plaster, brick, or concrete? This affects your hardware choices.
- Traffic Flow: Avoid hanging it where it might get bumped or damaged.
- Sunlight: Direct sunlight can sometimes fade or damage certain types of neon signs over time.
Hold the sign up (or have a helper hold it) to visualize it in different spots. Take a step back and see how it fits with your existing decor.
Step 2: Measure and Mark Your Mounting Points
Once you’ve settled on a location, it’s time to get precise. Most neon signs will have pre-drilled holes or mounting brackets on the back. Measure the distance between these mounting points accurately.
Use your measuring tape to determine the desired height and position on the wall. Then, hold your level against the top edge of where the sign will go and mark a light, level line with your pencil. This line will guide your mounting points. Transfer the distance between your sign’s mounting holes to the wall, using your level to ensure your marks are perfectly aligned with your guide line.
Pro Tip: If your sign has a power cord, consider where it will exit the sign and run to the outlet. You might want to mark a point slightly off-center to accommodate this, or plan for cord management solutions like clips or channels.
Step 3: Install Wall Anchors or Locate Studs
This is where we ensure your sign stays put!
- If using wall anchors: Based on the type of anchor you chose, use your drill with the appropriate drill bit size to create pilot holes at your marked spots. Make sure the hole is just large enough for the anchor. Gently tap the anchor into the hole with a hammer or the handle of your screwdriver until it’s flush with the wall surface.
- If using a stud finder: If your markings happen to land on a wall stud (the solid wooden beams behind your drywall), you can skip the anchors and drill directly into the stud. This is the most secure method. Use a drill bit slightly smaller than your screw diameter for a pilot hole.
For a comprehensive guide on finding studs and understanding wall construction, resources like This Old House offer excellent, practical advice for homeowners.
Step 4: Drill Pilot Holes for Screws
Even when using anchors, a pilot hole is often necessary. For plastic anchors, the hole is already made for the anchor itself. If you’re screwing directly into a stud, drill a pilot hole that’s slightly smaller than the screw’s diameter. This makes it easier to drive the screw and prevents the wood from splitting.
If your sign has mounting brackets, you might need to drill holes for screws that will attach the bracket to the wall. If the sign itself has holes for direct mounting, drill pilot holes through your anchor or into the stud at your marked points.
Step 5: Screw in the Mounting Hardware
Now, you’ll insert the screws that will hold your sign. If you’re using anchors, drive the screws into the anchors until they are snug. If you’re screwing into studs, drive the screws until they are secure but leave enough of the screw head protruding to catch the mounting holes on your sign. The amount you leave out will depend on your sign’s design – you want it to hang securely without being too tight against the wall.
Some neon signs come with specific mounting hardware like standoffs or brackets. Follow the manufacturer’s instructions for these, as they might involve screwing a bracket to the wall first, then attaching the sign to the bracket.
Step 6: Hang Your Neon Sign
This is the moment of truth! With a helper if the sign is heavy or awkward, carefully lift the neon sign and align its mounting holes or brackets with the screws you’ve installed on the wall. Gently lower the sign onto the screws. Ensure it’s seated properly and feels secure.
Give the sign a gentle tug to confirm it’s firmly attached. If it feels loose at all, carefully remove it and re-check your anchors and screws. You might need to use a larger anchor, a stronger screw, or ensure your pilot holes were the correct size.
Step 7: Connect the Power and Tidy Up Cords
Once your sign is securely mounted, plug it in! Admire your handiwork. Now, let’s deal with that power cord.
Use adhesive cord clips, raceways, or cable ties to neatly route the power cord along the wall to the nearest outlet. This not only looks tidier but also prevents tripping hazards. Many hardware stores carry discreet cord management solutions that blend in with your wall color.
Different Mounting Surfaces: What to Know
The type of wall you have will dictate the best mounting method. Here’s a quick rundown:
| Wall Type | Best Hardware | Tips |
|---|---|---|
| Drywall | Plastic anchors, self-drilling anchors, toggle bolts | Always use anchors. Locate studs if possible for extra security. |
| Plaster | Toggle bolts, molly bolts, or anchors specifically for plaster | Plaster can be brittle. Drill slowly and carefully. Avoid over-tightening. |
| Brick/Concrete | Masonry screws (like Tapcons) with masonry drill bits | Requires a hammer drill for best results. Ensure screws are long enough to penetrate the brick/concrete. |
| Wood Paneling | Wood screws, possibly with pilot holes | Screws directly into the wood are ideal. Ensure paneling is securely attached to wall studs. |
LED vs. Glass Neon Signs: Mounting Considerations
While the mounting process is similar, there are a few differences:
- Weight: Traditional glass neon signs are heavier and more fragile than LED neon signs. This means you’ll need stronger anchors and screws for glass neon.
- Fragility: Glass neon is susceptible to breakage. Handle with extreme care during installation. LED neon is more durable and flexible.
- Power Supply: Glass neon often has a larger, more visible transformer. LED neon signs typically have smaller, more discreet power adapters. Plan your cord management accordingly.
Always check the manufacturer’s recommendations for your specific sign, as they will often provide guidance on mounting and weight limits.
Safety First: Always!
Safety is paramount, especially when working with electricity and tools. Here are some crucial points:
- Unplug the sign: Before you do any mounting, ensure your neon sign is completely unplugged from the power source.
- Use safety glasses: Protect your eyes from any debris when drilling.
- Secure your ladder: If using a ladder, make sure it’s stable and on a level surface.
- Don’t over-tighten: Screwing too tightly can strip the anchor or damage the wall.
- Know your limits: If a sign is too heavy or you’re uncomfortable with any step, it’s always best to ask a friend for help or consider hiring a professional.
- Electrical Safety: Ensure all wiring is properly insulated and cords are not frayed. For permanent installations, consider consulting an electrician.
For more on general home safety when using tools, the Occupational Safety and Health Administration (OSHA) offers valuable guidelines that can be applied to DIY projects.
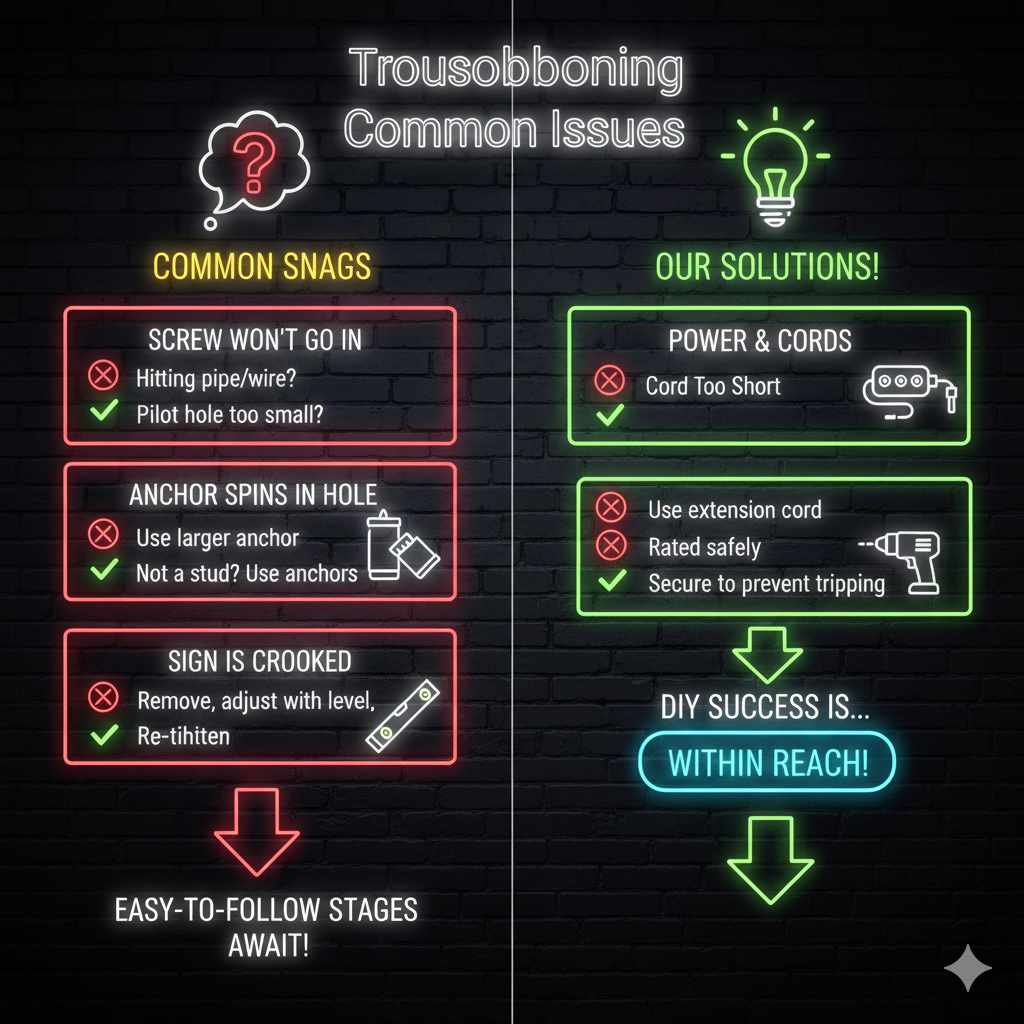
Troubleshooting Common Issues
Even with the best planning, you might encounter a snag. Here are a few common issues and how to solve them:
- The screw won’t go in: You might be hitting something behind the wall (like a pipe or wire – stop immediately if you suspect this!) or your pilot hole is too small. Try a slightly larger drill bit. If you’re in drywall and it feels soft, you may not have hit a stud, and your anchor might not be seated correctly.
- The anchor spins in the hole: The hole might be too large for the anchor. You can try a slightly larger anchor or fill the hole with spackle, let it dry, and then re-drill a pilot hole for a new anchor.
- The sign is crooked: Don’t panic! Carefully remove the sign, loosen the screws slightly, adjust until it’s level using your level, and then re-tighten.
- The cord is too short: You’ll need an extension cord. Ensure it’s rated for the power draw of your sign and use it safely, securing it to prevent tripping.
Frequently Asked Questions (FAQ)
Q1: Can I hang a neon sign on any wall?
Yes, but the method will vary. Drywall, plaster, brick, and concrete all require different mounting hardware and techniques to ensure the sign is securely supported and the wall isn’t damaged.
Q2: How heavy are neon signs?
Traditional glass neon signs can be quite heavy, often weighing several pounds. LED neon signs are significantly lighter, making them easier to hang. Always check the product specifications for your specific sign’s weight.
Q3: Do I need to hire a professional to hang a neon sign?
For most standard-sized LED or smaller glass neon signs, a DIY approach is perfectly feasible with the right tools and this guide. However, for very large, heavy, or complex installations, or if you’re unsure about electrical aspects, consulting a professional installer or electrician is recommended.
Q4: What’s the best way to hang a neon sign without damaging the wall?
Using the correct wall anchors for your wall type and the sign’s weight is crucial. Avoid over-tightening screws, and if you’re concerned about small holes, consider mounting the sign in a way that conceals them or using a strong adhesive mounting strip if the sign is very light and the manufacturer approves.
Q5: How do I manage the power cord for my neon sign?
Neatly route the cord using adhesive cord clips, cable raceways, or channels that match your wall color. This keeps the area tidy and prevents tripping hazards. Plan the cord’s path before you start mounting.
Q6: Can I use command strips to hang a neon sign?
For very lightweight LED neon signs, some users have had success with heavy-duty command strips. However, this is generally not recommended for glass neon signs or even many LED signs due to their weight and potential for damage if they fall. Always check the weight rating of the command strips and the weight of your sign. Traditional screw mounting is far more secure.
Conclusion: Shine On!
There you have it! Hanging a neon sign is a rewarding DIY project that can dramatically enhance your living space. By carefully selecting your location, using the right hardware, and following these straightforward steps, you can confidently mount your sign, ensuring it’s secure, safe, and adds that perfect glow to your home. Remember, preparation and patience are your best tools. Now go ahead, embrace that DIY spirit, and let your new neon sign light up your world!