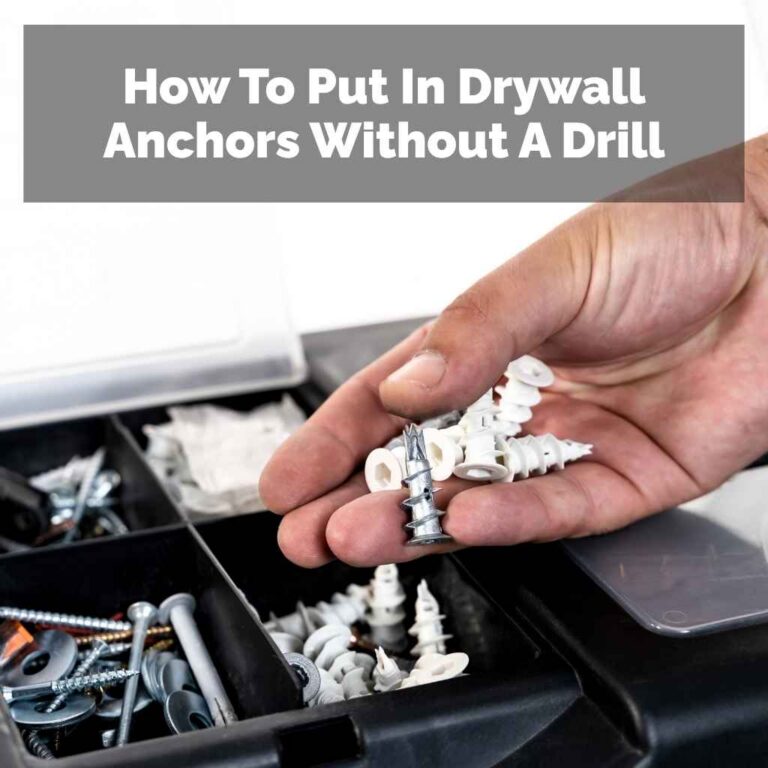
How To Hang Things On Cement Walls Without Drilling Holes: Genius
Hang items on cement walls without drilling! Discover genius, damage-free methods using strong adhesives, heavy-duty tapes, and clever mounting systems. Get your walls looking great, easily and securely.
Ever stare at a beautiful bare cement wall, dreaming of adding some flair with pictures, shelves, or décor, only to be stopped by the thought of drilling? It’s a common challenge, especially if you’re renting or just prefer to keep your walls pristine. The good news is, you don’t need a hammer drill or masonry bits to get your favorite items up. We’re going to explore some truly genius, beginner-friendly ways to hang things on cement walls without making a single hole. Get ready to transform your space with confidence!
The Challenge of Cement Walls
Cement walls, while durable and often found in basements, garages, or modern interiors, present a unique hanging puzzle. Unlike drywall, they are hard and dense, making traditional nail or screw anchors impossible without specialized tools. Many DIYers shy away from drilling into cement due to the potential for dust, noise, and the risk of damaging the wall or the tool. Plus, who wants to commit to a permanent hole if they might want to rearrange their décor later?
Genius Solutions: No-Drill Hanging for Cement Walls
The key to successfully hanging items on cement walls without drilling lies in understanding the materials and choosing the right adhesive or mounting solution. We’ll cover methods that are strong, reliable, and surprisingly easy to use, even for those new to DIY projects.
1. Heavy-Duty Adhesive Strips and Hooks
These are the superheroes of no-drill hanging. Designed with powerful, yet removable, adhesives, they can hold a surprising amount of weight. Many brands offer strips specifically formulated for smooth, hard surfaces like cement.
How They Work:
These strips typically use a strong, pressure-sensitive adhesive on both sides. One side adheres to your wall, and the other to your item. When you’re ready to remove them, you often pull a tab that stretches the adhesive, releasing it cleanly from the wall.
What You Can Hang:
- Lightweight picture frames
- Decorative signs
- Small shelves (check weight limits!)
- Key hooks
- Holiday decorations
Pros:
- Extremely easy to use
- No tools required
- Damage-free removal (when used correctly)
- Widely available
Cons:
- Weight limitations are crucial – always check the packaging!
- Surface preparation is key for best adhesion
- May not be suitable for textured or very porous cement
Surface Preparation is Key:
Before applying any adhesive strip, ensure the cement surface is clean, dry, and free from dust or debris. A quick wipe-down with a damp cloth (and allowing it to dry completely) or a tack cloth can make a huge difference in how well the adhesive sticks. For best results, avoid touching the adhesive surface with your fingers.
2. Strong Construction Adhesives (with Caution!)
For heavier items or a more permanent solution that still avoids drilling, certain construction adhesives can be a great option. These are typically applied in a bead and then the item is pressed firmly into place.
How They Work:
These adhesives create a very strong bond between the item and the cement surface. They often cure over several hours or days, becoming incredibly robust.
What You Can Hang:
- Decorative wall panels
- Heavier mirrors
- Floating shelves (ensure the bracket is securely adhered)
- Wood accents
Pros:
- Can hold significant weight
- Creates a very strong bond
- Less noticeable than visible hooks or strips
Cons:
- Can be difficult to remove without damaging the wall
- Requires careful application
- May require temporary support while curing
- Always test in an inconspicuous area first
Choosing the Right Adhesive:
Look for adhesives specifically designed for masonry or multi-surface use. Brands like Liquid Nails or Loctite offer a range of products suitable for this. Always read the product’s technical data sheet, often available on the manufacturer’s website, for specific application instructions and recommended surfaces. For instance, a product like Loctite Power Grab is formulated for quick bonding on various materials, including concrete.
3. Command™ Hooks and Decorate It™ Strips
Command™ products are a popular and reliable choice for damage-free hanging. They offer a variety of hooks and strips designed for different weight capacities and surfaces, including some that work well on concrete-like finishes.
How They Work:
Similar to the heavy-duty adhesive strips, Command™ uses a unique adhesive technology that sticks firmly but removes cleanly. They often come with easy-to-follow instructions, including a specific removal technique.
What You Can Hang:
- Small to medium picture frames
- Keys
- Utensils in a kitchen
- Lightweight décor items
Pros:
- Reputable brand with proven results
- Variety of weight capacities
- Designed for clean removal
- Easy to find in most stores
Cons:
- Surface preparation is critical
- Not ideal for very heavy items unless specifically rated
- Temperature and humidity can affect performance
Tips for Success with Command™:
Always follow the application instructions precisely. This usually involves cleaning the surface, pressing the strip firmly for a set amount of time (often 30 seconds), waiting for the adhesive to set (usually an hour) before hanging the item, and using the proper removal technique by stretching the tab downwards.
4. Velcro® Brand Industrial Strength Strips
For items you might want to remove and reattach frequently, or for creating a strong but flexible bond, industrial-strength Velcro® strips are a fantastic option.
How They Work:
These strips feature a very strong adhesive backing and the classic hook-and-loop system. You attach one strip to the wall and the corresponding strip to your item, allowing for easy separation and reattachment.
What You Can Hang:
- Removable wall art
- Lightweight organizers
- Temporary signage
- Items that need frequent access
Pros:
- Allows for easy removal and reattachment
- Strong holding power
- Flexible application
Cons:
- The Velcro® itself can be visible
- Adhesive may not be as robust on porous cement as specialized strips
- Requires two surfaces to adhere to
Application Notes:
Ensure both surfaces are clean and dry. Apply firm pressure to both strips for at least 30 seconds to ensure good adhesion. For cement, a smoother finish will yield better results.
5. Tension Rods and Shelving
While not directly adhering to the wall, tension rods are a clever way to add functionality without any adhesive or drilling. They work by pressing against opposing surfaces.
How They Work:
Tension rods expand to fit snugly between two parallel surfaces, creating a secure bar. This can be used to hang curtains, lightweight shelving, or even to create a temporary divider.
What You Can Hang:
- Lightweight curtains or fabric panels
- Small, lightweight shelves (using the rod as a support)
- As a drying rack for lightweight items
Pros:
- Completely non-damaging
- Easy to install and remove
- Adjustable
Cons:
- Only works in spaces with parallel surfaces (e.g., between two walls, or within a doorway)
- Weight capacity is limited
- May not be suitable for very wide spans
6. Adhesive Putty or Mounting Squares
For very lightweight items like posters or small photos, adhesive putty or mounting squares can be a simple solution. These are often re-positionable and easy to use.
How They Work:
These are typically pliable, sticky substances that you can mold to fit the back of your item and then press onto the wall.
What You Can Hang:
- Posters
- Small photos
- Lightweight paper crafts
- Temporary labels
Pros:
- Very easy to use
- Often re-positionable
- Inexpensive
Cons:
- Very low weight capacity
- May leave residue on some surfaces
- Not suitable for textured cement
7. Specialty Adhesives for Masonry
For more permanent, robust solutions that still avoid drilling, there are specialized adhesives designed for direct application to masonry. These are often used in professional settings for mounting fixtures.
How They Work:
These are typically high-strength, fast-curing adhesives that form a very strong bond. They might be epoxy-based or other advanced formulations.
What You Can Hang:
- Light fixtures (ensure compatibility and safety)
- Decorative concrete elements
- Heavy signs (if the bond is sufficient)
Pros:
- Extremely strong bonds
- Designed for challenging surfaces like concrete
Cons:
- Can be difficult to remove without damage
- Requires careful application and often specific curing conditions
- May be overkill for simple decorative items
Where to Find Guidance:
For insights into adhesive technologies and their applications, resources like the Building Science Information website offer technical details on how adhesives work and their limitations on various substrates.
Choosing the Right Method: A Comparison
To help you decide, here’s a quick comparison of the methods discussed:
| Method | Typical Weight Capacity | Ease of Use | Removal | Best For |
|---|---|---|---|---|
| Heavy-Duty Adhesive Strips | Light to Medium (e.g., 1-5 lbs per strip) | Very Easy | Easy (with proper technique) | Picture frames, light décor |
| Construction Adhesives | Medium to Heavy (depends on product) | Moderate | Difficult | Heavier items, more permanent décor |
| Command™ Hooks/Strips | Light to Medium (e.g., 0.5-3 lbs per hook) | Very Easy | Easy (with proper technique) | Keys, small décor, lightweight art |
| Velcro® Industrial Strength | Light to Medium | Easy | Easy | Frequently removable items, organizers |
| Tension Rods | Very Light | Easy | Very Easy | Curtains, lightweight dividers |
| Adhesive Putty/Squares | Very Light (e.g., ounces) | Very Easy | Easy | Posters, small photos |
Step-by-Step: Hanging a Picture Frame with Adhesive Strips
Let’s walk through a common scenario: hanging a picture frame on your cement wall using heavy-duty adhesive strips. This is one of the most popular and accessible methods.
Tools and Materials You’ll Need:
- The picture frame you want to hang
- Heavy-duty adhesive strips (rated for the frame’s weight)
- Rubbing alcohol or a mild cleaner
- Clean, lint-free cloths
- A level (optional, but recommended for straight hanging)
- Measuring tape
The Process:
- Prepare the Wall: Clean the area of the cement wall where the frame will hang. Use rubbing alcohol on a clean cloth to wipe down the surface. This removes any dust, grease, or moisture that could prevent the adhesive from sticking. Allow the surface to dry completely.
- Prepare the Frame: Ensure the back of the picture frame is also clean and dry. If the frame has a rough surface, you might need to attach a small piece of smooth material (like a thin plastic card) to the back of the frame where the adhesive strip will go, to provide a better surface.
- Apply Adhesive Strips to Frame: Carefully read the instructions for your specific adhesive strips. Typically, you’ll peel the backing off one side of the strip and firmly press it onto the back of the picture frame, aligning it with the top edge or as per the product’s recommendation. If using multiple strips, space them evenly.
- Expose the Second Adhesive Side: Carefully peel off the second backing from the adhesive strip(s) attached to the frame. Try not to touch the exposed adhesive.
- Position and Press: Hold the frame against the cement wall in the desired position. Use a level if you want to ensure it’s straight. Once positioned, press the frame firmly against the wall. Apply steady pressure for at least 30 seconds, ensuring all parts of the adhesive strip make good contact with the cement.
- Wait for Adhesion to Set: This is a crucial step! Most adhesive strips require time for the adhesive to bond properly. Check the product packaging for recommended waiting times – this can range from 1 hour to 24 hours. Do not hang the frame immediately after pressing it to the wall if the instructions say to wait.
- Hang Your Frame: Once the adhesive has set, your frame is ready to be displayed!
Important Considerations for Cement Walls
While these methods offer fantastic alternatives to drilling, a few key considerations will ensure your success:
Surface Texture and Porosity
Cement can vary greatly. Smooth, sealed concrete is ideal for most adhesives. Rough, unsealed, or dusty concrete can be problematic. If your cement wall is particularly rough or porous, you might need to:
- Clean it more thoroughly.
- Consider a primer designed for masonry if the surface is very dusty.
- Opt for methods with higher adhesive strength or consider a different approach if the surface is too compromised.
Weight of the Item
This is paramount. Always adhere to the weight limits specified by the adhesive product. Overloading an adhesive strip or bond is the quickest way to have your item fall and potentially get damaged. For heavier items, explore construction adhesives or consider if drilling is truly unavoidable.
Environmental Factors
Temperature and humidity can affect adhesive performance. Most products perform best within a specific temperature range (often room temperature). Extreme cold or heat, or very high humidity, can weaken the bond. Always check the product’s specifications for environmental limitations.
Surface Preparation is Non-Negotiable
We’ve said it before, but it bears repeating: a clean, dry surface is the foundation for any successful adhesive application. Dust, grease, and moisture are the enemies of good adhesion.
Testing in an Inconspicuous Area
If you’re unsure about how an adhesive will perform on your specific cement wall, or if you’re concerned about residue upon removal, test it first in a hidden spot. Hang a small, inexpensive item or a test strip in a closet or behind furniture. Leave it for a few days, then try to remove it according to the instructions.
Frequently Asked Questions (FAQ)
Can I hang a TV on a cement wall without drilling?
For TVs, especially larger ones, drilling is almost always the safest and most recommended method due to the significant weight and safety concerns. While some extremely heavy-duty adhesives exist, they are generally not recommended for mounting electronics like TVs on cement walls without proper structural support and testing. The risk of failure is too high.
Will adhesive strips damage my cement wall when removed?
When used correctly and within their weight limits, reputable adhesive strips like Command™ are designed for damage-free removal. However, on very old, crumbly, or poorly finished cement, there’s always a small risk of minor surface damage or residue. Always test in an inconspicuous area first.
How long do adhesive strips last on cement walls?
The lifespan of adhesive strips can vary depending on the product, the weight of the item, surface preparation, and environmental conditions. Many are designed for temporary or medium-term use. For long-term, permanent displays, stronger bonding methods might be more appropriate, though they may be harder to remove.
Can I use duct tape on cement walls?
While duct tape is strong, it’s generally not recommended for long-term adhesion on cement walls. It can leave a sticky residue that is very difficult to remove from porous surfaces, and its holding power may degrade over time, especially with temperature fluctuations.
What is the strongest no-drill adhesive for heavy items on cement?
For heavier items, consider high-strength construction adhesives specifically formulated for masonry. Brands like Loctite, Liquid Nails, or Gorilla Glue offer heavy-duty options. Always check the product’s maximum weight capacity and application instructions. For very heavy items (e.g., over 10-15 lbs), drilling might still be the most secure option.
How do I remove adhesive residue from cement?
If you do encounter residue, try using rubbing alcohol, an adhesive remover specifically designed for porous surfaces, or even a paste of baking soda and water. Gently rub the residue with a cloth or soft brush. For stubborn residue, a plastic scraper might help, but be careful not to scratch the cement.
Conclusion
Transforming your cement walls doesn’t require a toolbox full of drills and anchors. With the right understanding of adhesive technologies and a bit of care in surface preparation, you can confidently hang your favorite decorations, photos, and even lightweight shelving without leaving a trace. Whether you opt for the convenience of adhesive strips, the strength of construction adhesives, or the versatility of Velcro®, there’s a genius, no-drill solution waiting for you. So go ahead, get creative, and enjoy your beautifully decorated, hole-free cement walls!