How To Install A Bathroom Vanity Light: Essential Guide
Quick Summary: Installing a bathroom vanity light is a manageable DIY project. With basic tools and careful steps, you can safely replace an old fixture or add new lighting to your bathroom, enhancing both its look and functionality. This guide breaks down the process for beginners.
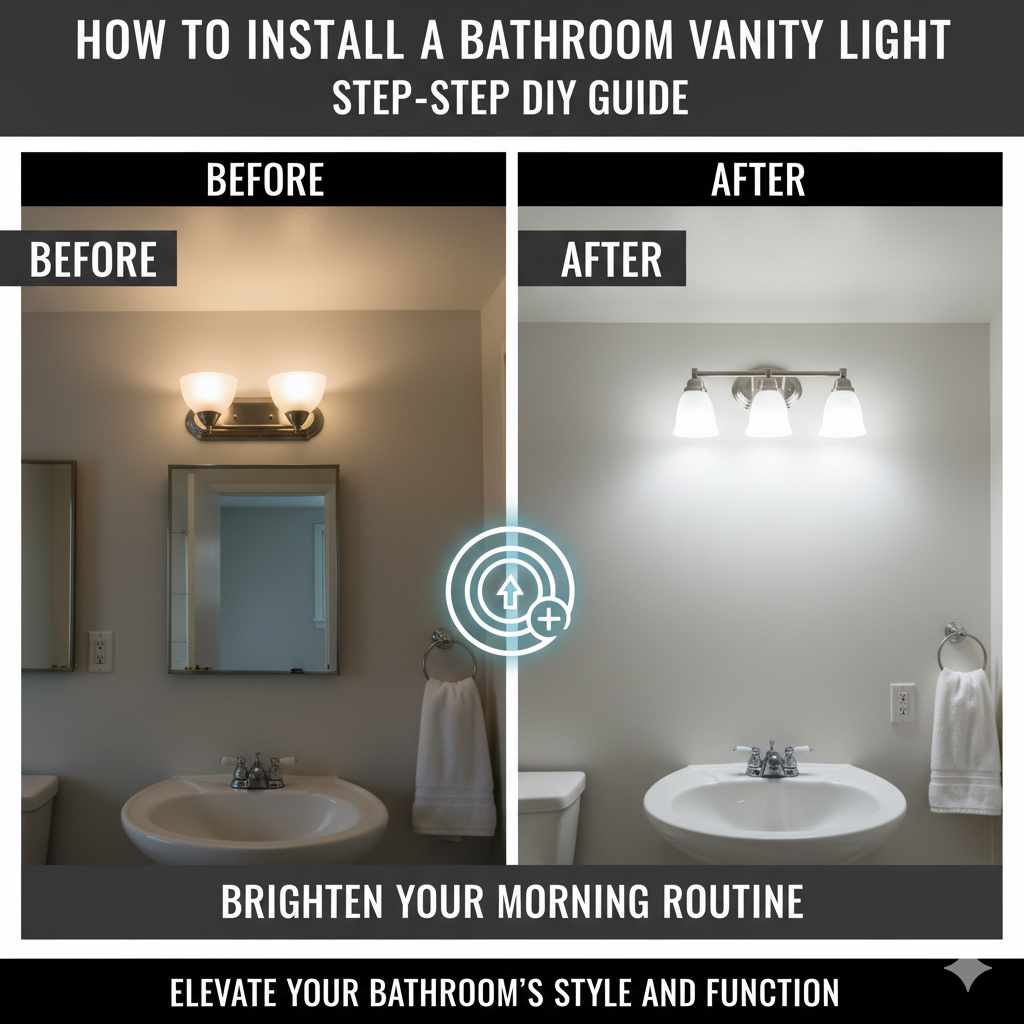
Feeling like your bathroom could use a brighter, more modern touch? A new vanity light can make a huge difference, but the thought of tackling electrical work might seem a bit daunting. Don’t worry! Many homeowners find that upgrading their bathroom lighting is a very achievable DIY project. With a little preparation and these clear, step-by-step instructions, you’ll be enjoying your refreshed bathroom in no time.
We’ll cover everything from gathering your tools to safely connecting the wires and securing your new light fixture. By the end of this guide, you’ll feel confident and ready to transform your bathroom’s ambiance.
Why Upgrade Your Bathroom Vanity Light?
Your bathroom vanity light isn’t just about illumination; it’s a key design element. An outdated or poorly functioning fixture can make your bathroom feel dim, uninviting, or even a bit dated. Upgrading can:
- Improve Task Lighting: A well-placed vanity light provides crucial light for grooming, applying makeup, or shaving.
- Enhance Aesthetics: New lights can instantly modernize your bathroom’s style, from sleek minimalist designs to classic charm.
- Increase Home Value: Small renovations like updating lighting can contribute to your home’s overall appeal and value.
- Boost Energy Efficiency: Newer LED fixtures use less energy and last much longer than traditional incandescent bulbs.

Tools and Materials You’ll Need
Before you begin, gather all your supplies. Having everything ready will make the installation process smoother and safer. Don’t worry if you don’t have all these tools; many can be borrowed or are relatively inexpensive to purchase.
Essential Tools:
- Screwdrivers: A Phillips head and a flathead screwdriver are essential for removing old fixtures and installing new ones.
- Wire Strippers/Cutters: These are crucial for safely exposing the copper wire for connections.
- Voltage Tester (Non-Contact): This is your most important safety tool. It confirms that the power is off before you touch any wires.
- Pliers: Needle-nose pliers can be helpful for manipulating wires.
- Ladder or Step Stool: To safely reach the ceiling or mounting box.
- Safety Glasses: Protect your eyes from dust or debris.
- Work Gloves: For a better grip and protection.
Materials:
- New Vanity Light Fixture: Ensure it’s suitable for bathroom use (check for damp-rated if needed).
- Wire Connectors (Wire Nuts): These come with most new fixtures, but it’s good to have extras.
- Mounting Screws: Usually included with the new fixture.
- Electrical Tape: For added security on wire connections.
- Light Bulbs: Make sure they are compatible with your new fixture.
Safety First: Turning Off the Power
This is the most critical step. Working with electricity can be dangerous if not done correctly. Never skip this part!
- Locate Your Electrical Panel: This is usually in a basement, garage, or utility closet.
- Identify the Circuit Breaker: Find the breaker that controls the bathroom lights. If you’re unsure, it’s often labeled “Bathroom,” “Lights,” or by room name. If not labeled, you might need to turn off breakers one by one until the bathroom lights go out.
- Flip the Breaker: Turn the identified breaker to the “OFF” position.
- Test for Power: Go to your bathroom and try to turn on the light switch. If the light doesn’t turn on, the power is likely off. However, always use your voltage tester for confirmation.
- Test the Fixture Wires: Remove the old light fixture’s cover or bulbs to expose the wires inside the electrical box. Carefully touch the non-contact voltage tester to each wire (black, white, and any ground wire). The tester should not light up or beep. If it does, the power is still on, and you need to return to the electrical panel to find the correct breaker.
Once you’ve confirmed the power is off with your voltage tester, you can proceed with confidence.
Step-by-Step Guide to Installing Your New Vanity Light
Now that safety is secured, let’s get to the fun part: installing your new light!
Step 1: Remove the Old Light Fixture
Carefully detach the old fixture from the wall. It’s usually held in place by screws or a decorative nut.
- Remove the Cover/Shade: Unscrew or unclip any glass shades or covers.
- Remove the Bulbs: Take out the existing light bulbs.
- Locate Mounting Screws: You’ll typically see screws that attach the fixture’s base to the electrical box in the wall. Unscrew these.
- Gently Pull Fixture Away: Once the screws are out, gently pull the fixture away from the wall. It might still be connected by wires.
- Support the Fixture: Be prepared to support the fixture’s weight as you disconnect the wires. You might need a helper for heavier fixtures.
Step 2: Disconnect the Old Wiring
This is where you’ll use your wire strippers and screwdrivers.
- Identify Wire Connections: You’ll see wires coming from the electrical box in the wall connected to wires from the fixture. Typically, there will be a black wire (hot), a white wire (neutral), and a bare copper or green wire (ground).
- Unscrew Wire Nuts: Use your screwdriver or pliers to unscrew the wire nuts connecting the fixture’s wires to the house’s wires.
- Separate Wires: Gently pull the wires apart.
- Carefully Tuck Wires: Once disconnected, carefully tuck the house wires back into the electrical box to keep them out of the way.
- Remove the Old Mounting Bracket: Most fixtures are attached to a mounting bracket screwed into the electrical box. Unscrew this bracket.
Step 3: Install the New Mounting Bracket
Your new vanity light will come with its own mounting bracket or screws. This secures the fixture to the electrical box.
- Consult Your Fixture’s Instructions: Different fixtures have slightly different mounting systems. Always refer to the manufacturer’s guide.
- Attach the Bracket: Align the new mounting bracket over the electrical box. Use the screws provided with your new fixture to secure it firmly to the box. Ensure it’s snug but don’t overtighten.
Step 4: Connect the New Fixture’s Wires
This is the core electrical connection. Pay close attention to matching the wire colors.
General Wire Color Guide:
- Black House Wire (Hot) connects to Black Fixture Wire
- White House Wire (Neutral) connects to White Fixture Wire
- Bare Copper or Green House Wire (Ground) connects to Green or Bare Copper Fixture Wire (or the fixture’s grounding screw)
If your fixture has different colored wires or a different setup, consult its manual. If you have aluminum wiring, it’s best to consult a qualified electrician.
- Prepare Wires: If the ends of the house wires are damaged or not clean, use your wire strippers to remove about 1/2 inch of insulation, exposing fresh copper.
- Connect Ground Wire First: Twist the bare copper or green ground wire from the house with the corresponding ground wire from your new fixture. Screw a wire nut firmly onto the twisted wires.
- Connect Neutral Wire: Twist the white wire from the house with the white wire from the fixture. Secure with a wire nut.
- Connect Hot Wire: Twist the black wire from the house with the black wire from the fixture. Secure with a wire nut.
- Test Connections: Gently tug on each wire to ensure it’s securely held by the wire nut.
- Wrap with Electrical Tape (Optional but Recommended): For extra security, wrap electrical tape around each wire nut and down onto the wires for a secure seal.
For more detailed information on electrical wiring safety and standards, you can refer to resources from the Occupational Safety and Health Administration (OSHA).
Step 5: Mount the New Light Fixture
Now, it’s time to attach the actual light fixture to the wall.
- Carefully Tuck Wires: Gently push the connected wires back into the electrical box. Be careful not to pinch or damage them.
- Align Fixture: Position the new fixture’s base over the mounting bracket.
- Secure the Fixture: Use the screws provided with your new fixture to attach its base to the mounting bracket. Tighten them evenly.
- Install Shades and Bulbs: Attach any glass shades or decorative elements according to the manufacturer’s instructions. Screw in the appropriate light bulbs.
Step 6: Restore Power and Test
The moment of truth!
- Return to Electrical Panel: Go back to your circuit breaker panel.
- Flip Breaker On: Turn the bathroom light’s circuit breaker back to the “ON” position.
- Test the Light: Go to your bathroom and flip the light switch. Your new vanity light should illuminate!
If the light doesn’t work, immediately turn the power off at the breaker and re-check your wiring connections. Most issues are simple connection errors.
Troubleshooting Common Issues
Even with careful steps, sometimes things don’t go as planned. Here are a few common issues and how to solve them:
| Problem | Possible Cause | Solution |
|---|---|---|
| Light doesn’t turn on. | Power is still off at the breaker. | Double-check the breaker is fully in the “ON” position. |
| Loose wire connections. | Turn off power. Re-check all wire nut connections to ensure they are tight and wires are fully inserted. | |
| Incorrect wiring. | Turn off power. Verify that black connects to black, white to white, and ground to ground. | |
| Faulty light bulb. | Try a different, known-working bulb. | |
| Light flickers. | Loose connection. | Turn off power. Check all wire connections for tightness. |
| Incompatible bulbs. | Ensure bulbs are suitable for the fixture and not too high wattage. | |
| Fixture is loose. | Mounting screws not tight enough. | Turn off power. Tighten the screws holding the fixture to the mounting bracket. |
| Mounting bracket not secure. | Turn off power. Ensure the bracket itself is tightly screwed into the electrical box. |
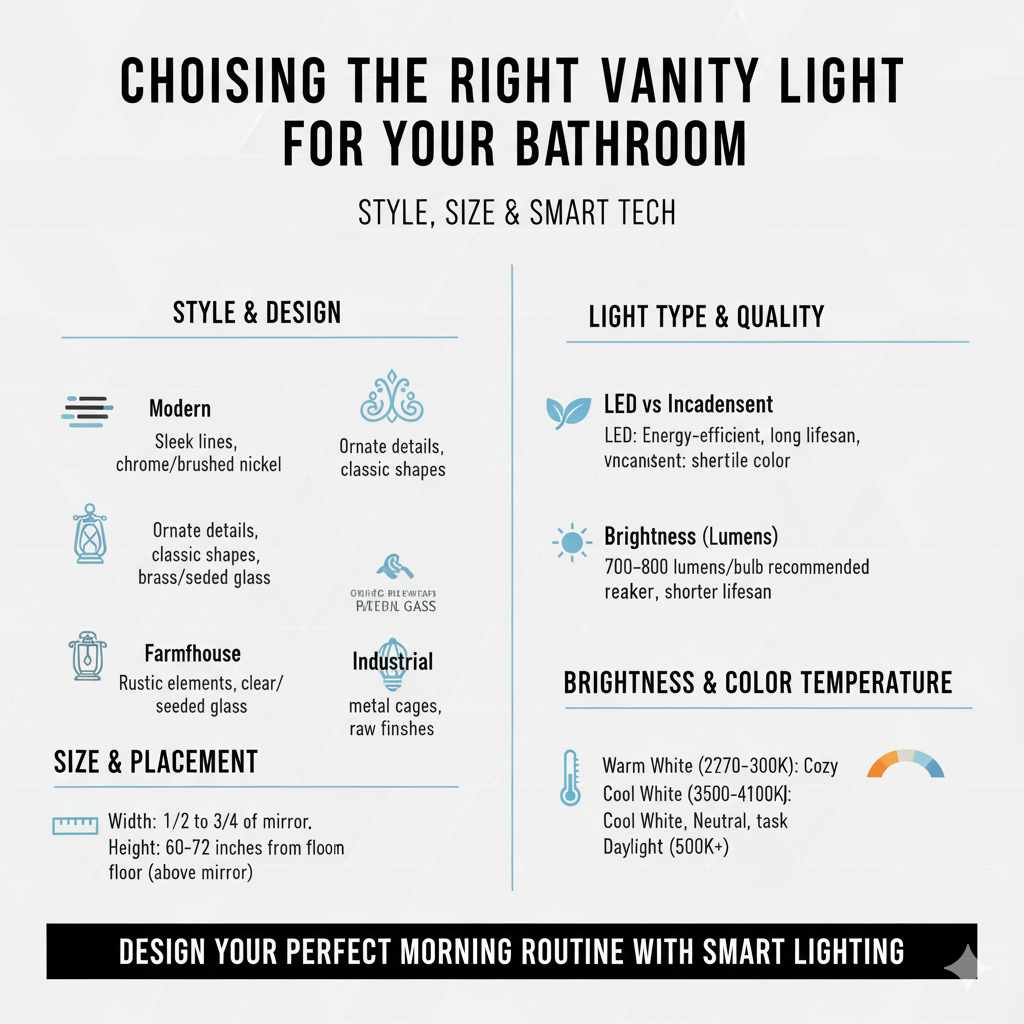
Choosing the Right Vanity Light for Your Bathroom
Beyond the installation, selecting the right light is key to achieving your desired look and function. Consider these factors:
Style and Design
Vanity lights come in a vast array of styles. Think about your bathroom’s overall decor:
- Modern: Sleek lines, minimalist designs, often in chrome or brushed nickel finishes.
- Traditional: Ornate details, classic shapes, materials like brass or oil-rubbed bronze.
- Farmhouse: Rustic elements, often with clear or seeded glass shades.
- Industrial: Exposed bulbs, metal cages, raw finishes.
Size and Placement
The size of your vanity light should be proportionate to your vanity and mirror. A common guideline is for the fixture to be about half to three-quarters the width of the mirror. For placement, lights are often mounted above the mirror, or sometimes on either side for more even illumination. Ensure they are at a comfortable height for most users, typically around 60-72 inches from the floor.
Light Type (LED vs. Incandescent)
LED (Light Emitting Diode) lights are highly recommended for new installations due to their energy efficiency, long lifespan, and variety of color temperatures (warm to cool white). While incandescent bulbs are still available, LEDs offer significant long-term savings and environmental benefits. For more on choosing the right lighting, resources like the U.S. Department of Energy’s Energy Saver website offer excellent advice.
Brightness and Color Temperature
Consider the lumens (brightness) and Kelvin (color temperature) of the bulbs. For bathrooms, a brightness of 700-800 lumens per bulb is often suitable. Color temperature is measured in Kelvin (K):
- Warm White (2700K-3000K): Cozy, inviting light, similar to traditional incandescent bulbs.
- Cool White (3500K-4100K): Brighter, more neutral light, good for task areas.
- Daylight (5000K+): Very bright, crisp light, mimicking natural daylight.
For a bathroom vanity, warm white or cool white are usually preferred for a pleasant grooming experience.
Frequently Asked Questions (FAQ)
Q1: Do I need an electrician to install a bathroom vanity light?
For most straightforward replacements where you’re installing a similar type of fixture, and you’re comfortable following electrical safety steps (especially turning off power and using a voltage tester), you can do it yourself. If you encounter complex wiring, aluminum wiring, or feel at all unsure, it’s always best to hire a qualified electrician for safety and peace of mind.
Q2: How do I know if the power is truly off?
Always use a non-contact voltage tester. After flipping the breaker, test the wires inside the electrical box. The tester will light up or beep if it detects voltage. If it doesn’t, the power is off. Never rely solely on the light switch being off.
Q3: What if my new light fixture has different wire colors than my old one?
Always refer to the wiring diagrams in your new fixture’s instruction manual. Generally, you connect wire to wire of the same color: black to black (hot), white to white (neutral), and green or bare copper to green or bare copper (ground). If you’re unsure, consult an electrician.
Q4: Can I install a vanity light on a dimmer switch?
Yes, but you must ensure that both your new light fixture and the light bulbs you use are specifically rated as “dimmable.” Not all fixtures or bulbs are compatible with dimmer switches.
Q5: How tight should I screw in the wire nuts?
You should screw them on until they are snug and you can’t easily twist them off by hand. The wire ends should be fully covered by the wire nut, and you shouldn’t see any exposed copper wire below the nut. A gentle tug on each wire after connecting will confirm they are secure.
Q6: My new fixture is heavier than the old one. Is that a problem?
Ensure the electrical box in your wall is rated for the weight of the new fixture. Most standard electrical boxes are sufficient for typical vanity lights. If you’re installing a very large or heavy fixture, you might need to reinforce the mounting or use a specialized heavy-duty box. Consult your fixture’s manual or a professional if you have concerns.
Conclusion
You’ve done it! By following these steps, you’ve successfully installed your new bathroom vanity light. Upgrading your lighting is a rewarding DIY project that can significantly improve the look and feel of your bathroom. Remember, safety is always the top priority, especially when working with electricity. Always turn off the power at the breaker and use a voltage tester before touching any wires.
With a little patience and the right tools, you’ve not only enhanced your home but also gained valuable DIY skills. Enjoy your brighter, more beautiful bathroom!