How to Wire a Pendant Light: A Step-by-Step Guide for Homeowners
Hey there! If you’re looking to add a touch of style and personality to your home, installing a pendant light is a fantastic way to do it. I’ve always loved how a single pendant light can transform a room—whether it’s casting a warm glow over your dining table or adding a chic vibe to your kitchen island. But let’s be honest, wiring a pendant light can feel a bit intimidating if you’ve never done it before. Don’t worry, though! I’ve tackled this project myself, and I’m here to walk you through every step. By the end of this guide, you’ll feel confident enough to wire your own pendant light safely and beautifully. Let’s dive in!
Why Choose a Pendant Light?
Pendant lights are more than just a source of light—they’re a statement piece. I remember the first time I swapped out a boring ceiling fixture for a sleek pendant in my living room. The whole space felt instantly more modern and inviting. Pendant lights come in endless styles, from rustic farmhouse globes to minimalist industrial designs, so there’s something for every home. They’re perfect for task lighting, like illuminating a countertop, or creating ambiance in a cozy corner. Plus, they’re relatively easy to install compared to other lighting projects, making them a great DIY choice for beginners and seasoned home improvers alike.
The key to success, though, is understanding the wiring process. It’s not just about making the light turn on—it’s about doing it safely and ensuring it looks great. I learned this the hard way when I rushed through my first attempt and ended up with a slightly crooked fixture. Trust me, taking your time and following the steps below will save you headaches.
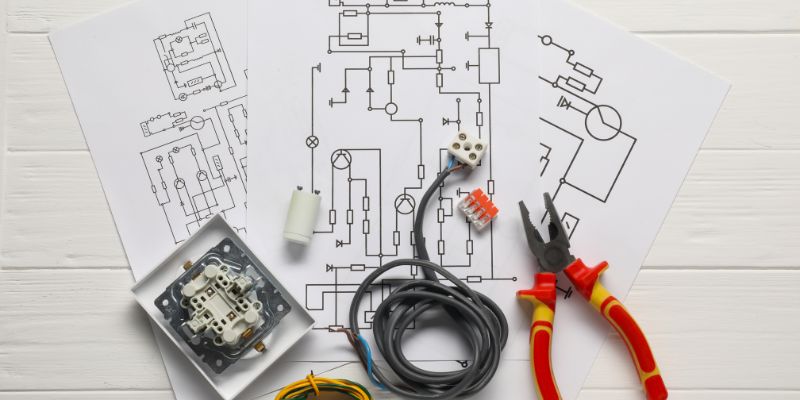
Tools and Materials You’ll Need
Before we get to the wiring, let’s gather everything you’ll need. I like to lay out all my tools and materials on a clean workspace—it feels like prepping for a mini adventure. Here’s what you’ll want to have on hand:
| Item | Purpose |
|---|---|
| Pendant light kit | The light fixture itself, including the cord, socket, and canopy. |
| Wire cutters/strippers | For cutting and stripping the wires to the right length. |
| Screwdriver (Phillips/flat) | To secure the mounting bracket and connect wires. |
| Voltage tester | To ensure the power is off before you start working. |
| Wire nuts | To connect the wires securely. |
| Electrical tape | To insulate connections and prevent shorts. |
| Ladder | To reach the ceiling safely. |
| Drill (optional) | For securing the mounting bracket if new holes are needed. |
| Safety glasses | To protect your eyes from dust or debris. |
You might already have some of these tools at home, but if not, a quick trip to your local hardware store will set you up. I always double-check that my pendant light kit includes a canopy (the part that covers the wiring at the ceiling) and a mounting bracket, as these are crucial for a clean installation.
Safety First: Preparing for the Job
I can’t stress this enough—safety is the most important part of wiring a pendant light. When I first started doing electrical work, I was nervous about getting shocked, so I made sure to follow every precaution. Here’s how to keep yourself safe:
Turn off the power at your breaker box. Find the circuit that controls the area where you’ll be working and switch it off. I always use a voltage tester to double-check that the wires are dead before touching anything. It’s a small step that gives me huge peace of mind. Also, make sure your ladder is sturdy and placed on a flat surface. I’ve had a wobbly ladder scare me more than the wiring itself! Wear safety glasses, especially if you’re drilling or working in an older home where dust might fall from the ceiling.
Finally, if you’re unsure about any part of this process, don’t hesitate to call a licensed electrician. I’ve learned that it’s better to ask for help than to risk a mistake with electrical work.
Removing the Old Fixture (If Necessary)
If you’re replacing an existing light fixture, you’ll need to remove it first. I’ve done this a few times, and it’s usually straightforward but requires patience. Start by removing any glass shades or bulbs from the old fixture. Then, unscrew the canopy or cover plate to expose the wiring. You’ll likely see a mounting bracket attached to the ceiling’s electrical box, holding the fixture in place.
Carefully unscrew the wire nuts connecting the fixture’s wires to the ceiling wires. I like to take a quick photo of the wiring setup before disconnecting anything—it’s a lifesaver if you need to reference how things were connected. Once the wires are free, remove the mounting bracket. If the new pendant light uses a similar bracket, you might be able to reuse the existing screws or anchors, which saves time.
Understanding the Wiring Basics
Before we connect the new pendant light, let’s talk about the wires you’ll be working with. I remember feeling overwhelmed the first time I saw a tangle of wires in my ceiling, but it’s simpler than it looks. Most homes in the USA have three types of wires in a light fixture setup:
- Hot wire (black or red): This carries the electrical current to the fixture.
- Neutral wire (white): This completes the circuit and carries the current back.
- Ground wire (green or bare copper): This ensures safety by directing any stray current to the ground.
Your pendant light will have similar wires, usually color-coded to match. Some pendant lights come with a cloth-covered cord, which might make the wires less obvious, but they’re still there inside the insulation. If your light has a two-wire cord (no ground), don’t worry—we’ll cover how to handle that later.
One tip I learned the hard way: always check the instructions that come with your pendant light. Some fixtures have unique wiring setups, and the manufacturer’s guide will clarify any quirks.
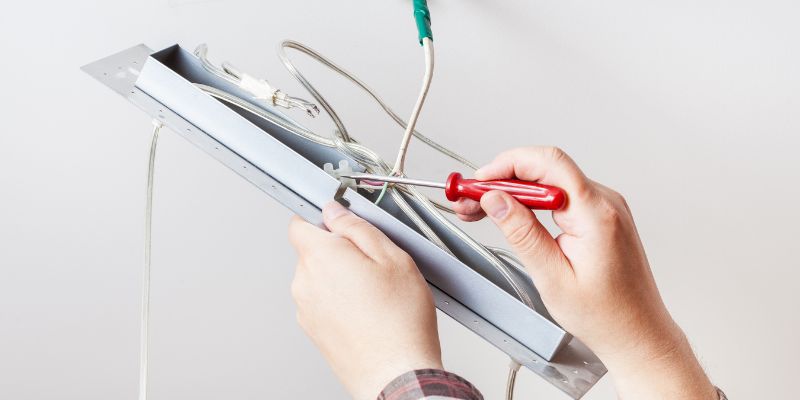
Mounting the Pendant Light
Now that we’re ready to install, let’s start with the mounting bracket. Most pendant lights come with a bracket that attaches to the electrical box in your ceiling. I always hold the bracket up to the box first to make sure it fits. If it doesn’t, you might need to drill new holes or use drywall anchors, but that’s rare.
Secure the bracket to the electrical box with the provided screws. I use a screwdriver for this, tightening just enough to keep it firm without stripping the screws. Once the bracket is in place, thread the pendant light’s cord through the canopy. This is the part that covers the wiring and gives your installation a polished look. Adjust the cord length now if your pendant allows for it—I like to measure twice to ensure the light hangs at the perfect height.
Wiring the Pendant Light
Here comes the fun part—connecting the wires! I always take a deep breath before this step, but it’s easier than it seems. Start by stripping about half an inch of insulation from the ends of the pendant light’s wires using your wire stripper. Be careful not to nick the copper inside, as that can weaken the connection.
Next, match the wires from the pendant light to the ceiling wires:
- Connect the black (hot) wire from the pendant to the black or red wire in the ceiling.
- Connect the white (neutral) wire from the pendant to the white wire in the ceiling.
- If your pendant has a ground wire (green or bare copper), connect it to the ground wire in the electrical box. If there’s no ground wire in the pendant, wrap the ceiling’s ground wire around the grounding screw on the mounting bracket.
To make these connections, twist the bare ends of the matching wires together and cap them with a wire nut. I give each wire nut a gentle tug to make sure it’s secure. For extra safety, wrap each connection with electrical tape. This step isn’t always necessary, but I do it for peace of mind, especially in older homes where wires might be brittle.
If your pendant light doesn’t have a ground wire, don’t panic. Many modern pendants are designed to be safe without one, as long as the fixture is properly insulated. Just make sure the ceiling’s ground wire is securely attached to the mounting bracket.
Securing the Canopy and Testing
With the wires connected, it’s time to finish the installation. Tuck the wires neatly into the electrical box, being careful not to pinch them. Then, screw the pendant’s canopy onto the mounting bracket. I always take a moment to step back and check that the canopy sits flush against the ceiling—it makes a big difference in the final look.
Now, head back to the breaker box and turn the power back on. Flip the light switch and admire your work! If the light doesn’t turn on, don’t worry. I’ve had this happen before, and it’s usually a loose wire nut or a mismatched connection. Turn the power off again, double-check your wiring, and try again.
Adjusting the Height and Style
One of my favorite parts of installing a pendant light is tweaking its height and style to suit the room. Most pendant lights let you adjust the cord length, either by cutting it or using a cord adjuster. I like to play around with the height until it feels just right—too low, and it might obstruct your view; too high, and it could look out of place.
If you’re installing multiple pendants, like over a kitchen island, make sure they’re hung at the same height for a cohesive look. I once hung three pendants slightly off, and it bugged me every time I walked into the room! Use a measuring tape and take your time to get it perfect.
Troubleshooting Common Issues
Even with careful planning, things can go wrong. I’ve run into a few hiccups over the years, so here are some common issues and how to fix them:
- Light doesn’t turn on: Check that the power is on at the breaker and the switch. If it’s still not working, inspect your wire connections for looseness or mismatches.
- Flickering light: This could be a loose wire or a faulty bulb. Tighten the wire nuts and try a new bulb.
- Canopy won’t sit flush: Make sure the mounting bracket is properly aligned and the wires are tucked in neatly.
If you’re still having trouble, it might be time to call an electrician. I’ve learned that there’s no shame in getting professional help for tricky situations.
Maintaining Your Pendant Light
Once your pendant light is up and shining, a little maintenance goes a long way. I dust my fixtures every few months to keep them looking bright and clean. If your pendant has a glass shade, wipe it down with a damp cloth and mild soap. For metal or fabric shades, a dry cloth usually does the trick.
Check the wires and connections annually, especially if your home experiences temperature changes that could loosen things over time. I also like to swap out bulbs for energy-efficient LEDs—it saves money and makes the light last longer.
Conclusion
Wiring a pendant light might seem like a big project, but I promise it’s doable with a little patience and the right tools. I still remember the satisfaction of flipping the switch and seeing my first pendant light glow perfectly in my dining room. It’s not just about the light—it’s about creating a space that feels like you. Whether you’re brightening up a cozy nook or adding flair to your kitchen, this DIY project is a rewarding way to make your home shine. So grab your tools, take it one step at a time, and enjoy the process. You’ve got this!
Frequently Asked Questions
Can I wire a pendant light without an electrician?
Yes, you can! I’ve done it myself several times. As long as you follow safety precautions, like turning off the power and using a voltage tester, it’s a manageable DIY project. If you’re unsure, though, an electrician is always a safe bet.
What if my ceiling doesn’t have an electrical box?
If there’s no electrical box, you’ll need one installed to safely wire a pendant light. I learned this when I tried to install a light in an older home. An electrician can add a box to meet code requirements.
How do I know if my pendant light needs a ground wire?
Check the manufacturer’s instructions. Some pendant lights are designed without a ground wire and are still safe. If your light has one, connect it to the ceiling’s ground wire or the mounting bracket’s grounding screw.
Can I install a pendant light on a sloped ceiling?
Absolutely! I’ve done this in a home with a vaulted ceiling. You’ll need a sloped ceiling adapter, which most pendant light kits include or can be purchased separately.
How do I choose the right bulb for my pendant light?
Look at the fixture’s label or manual for wattage and bulb type recommendations. I prefer LED bulbs for their energy efficiency and long life. Make sure the bulb’s size and shape fit the shade for the best look.