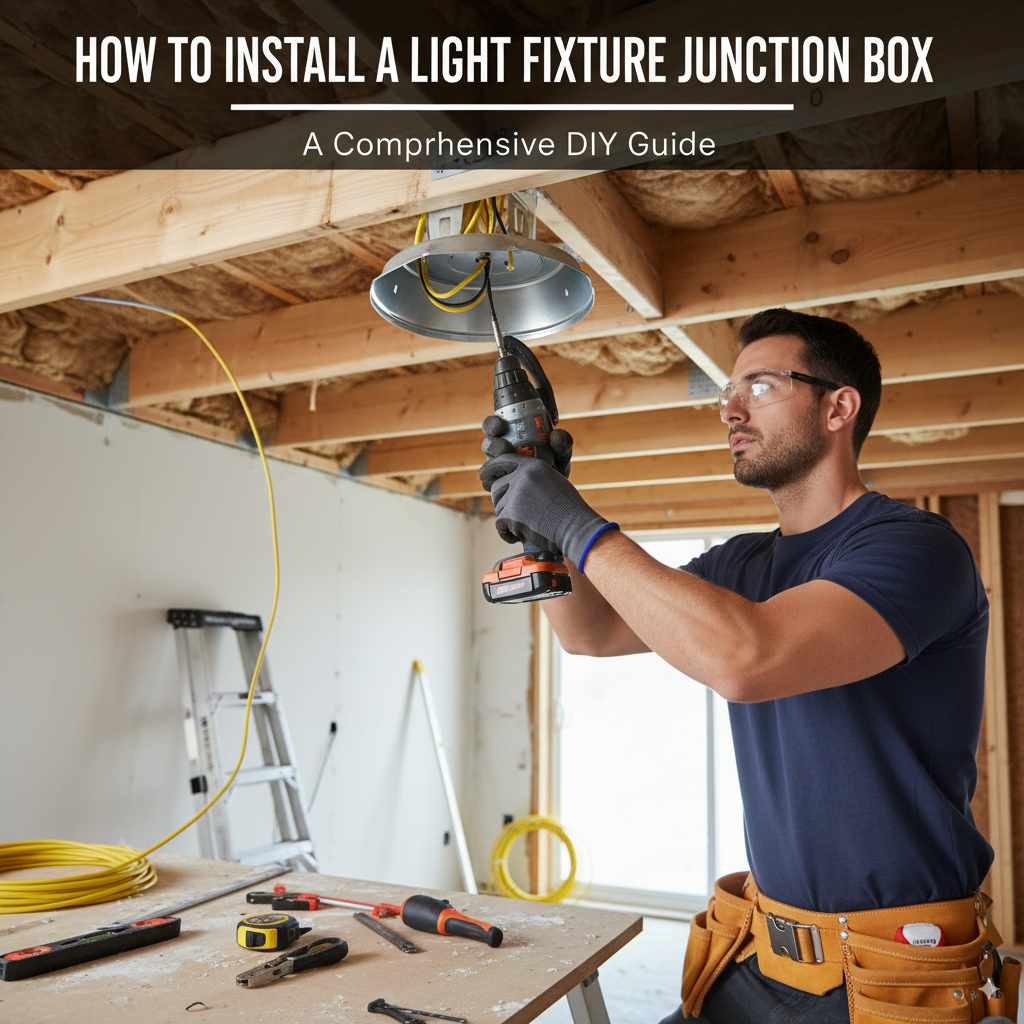
How to Install a Light Fixture Junction Box: Essential Guide
Quick Summary:
Installing a light fixture junction box involves safely connecting electrical wires to a sturdy, accessible box mounted in the ceiling or wall. This guide provides straightforward, step-by-step instructions for homeowners to confidently and correctly install a new junction box, ensuring a safe and secure foundation for any light fixture.
Ever looked up at a bare wire hanging from the ceiling and thought, “That doesn’t look right”? You’re not alone! Dealing with electrical work can feel a bit daunting, especially when it comes to something as crucial as a junction box. But here’s the good news: installing a light fixture junction box is a totally achievable DIY project. With the right guidance, a few basic tools, and a focus on safety, you can create a secure home for your new light. This guide will walk you through every step, making the process clear and simple, so you can get that beautiful new light shining in no time!
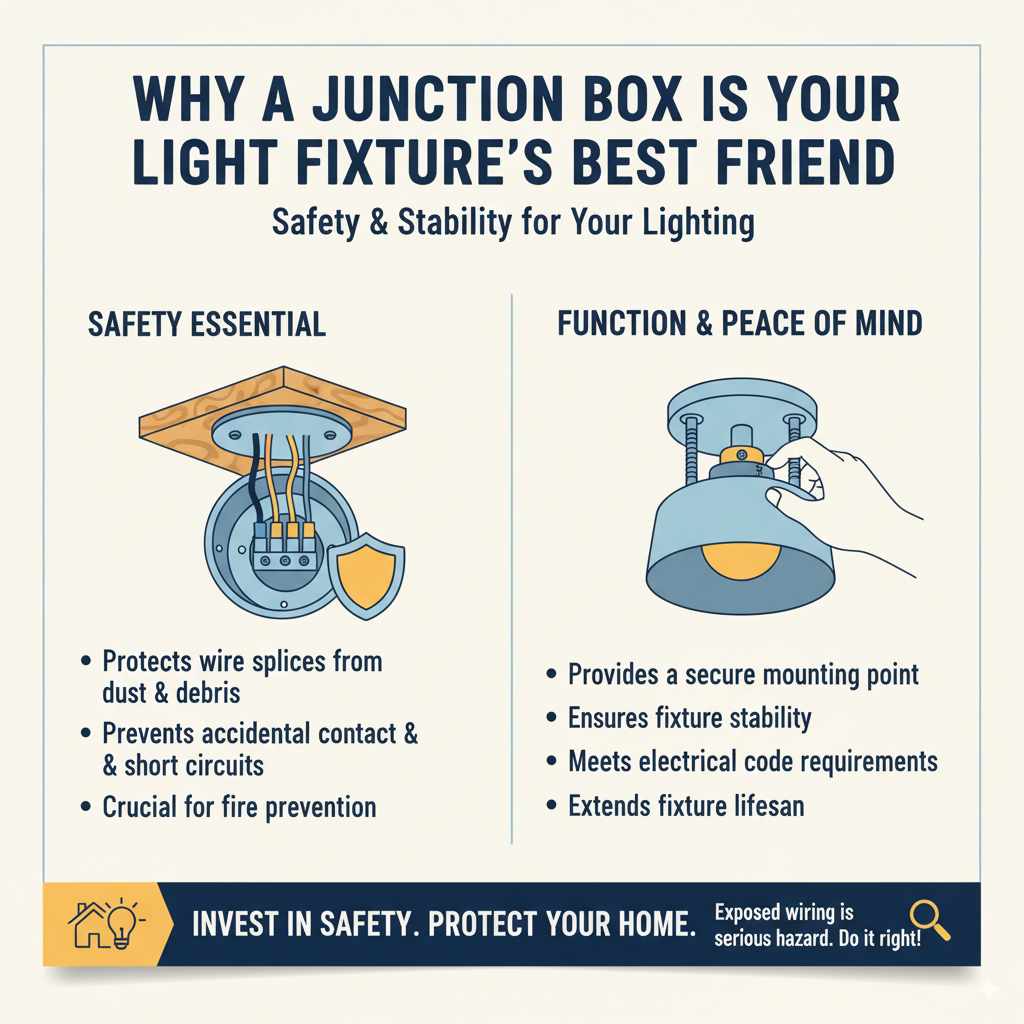
Why a Junction Box is Your Light Fixture’s Best Friend
Think of a junction box as the dedicated parking spot for your light fixture’s electrical connections. It’s not just a decorative cover; it’s a safety essential. Its main job is to safely house all the wire splices and connections, protecting them from dust, debris, and accidental contact. Plus, it provides a secure mounting point for your light fixture, ensuring it stays put and looks great. Without a proper junction box, exposed wiring is a serious hazard, increasing the risk of electrical shocks and fires. That’s why getting this part right is so important for any lighting project.
Safety First! Essential Precautions Before You Begin
Before we even think about touching a wire or a tool, safety has to be our top priority. Electricity is no joke, and taking the right precautions will protect you and your home. It’s always better to be a little over-cautious than to have an accident.
- Turn Off the Power: This is the most critical step. Locate the circuit breaker that controls the area where you’ll be working and flip it to the “OFF” position. To be absolutely sure, test the wires with a non-contact voltage tester before you start any work.
- Inform Others: Let anyone else in the house know you’re working with electricity and that the power to a certain area will be off. You might even want to place a piece of tape over the breaker switch to remind everyone not to turn it back on.
- Use Insulated Tools: Ensure your tools, especially screwdrivers and wire strippers, have insulated handles. This adds an extra layer of protection against accidental shocks.
- Follow Local Codes: Electrical work needs to comply with local building codes. While this guide provides general best practices, it’s always wise to check with your local building department or consult the National Electrical Code (NEC) for specific requirements in your area.
- When in Doubt, Call a Pro: If you feel uncomfortable at any point, or if the wiring looks unusual or complex, don’t hesitate to call a qualified electrician. It’s a small price to pay for peace of mind and safety.
Tools and Materials You’ll Need
Gathering your tools and materials before you start makes the process much smoother. Here’s a list of what you’ll likely need for installing a standard light fixture junction box:
| Item | Description |
|---|---|
| New Junction Box | Choose one rated for the weight of your light fixture and suitable for the location (e.g., ceiling fan rated for heavier loads). Metal boxes are common for new construction or remodel work. |
| Wire Connectors (Wire Nuts) | Plastic or ceramic connectors to join electrical wires. Ensure they are the correct size for the number and gauge of wires you are connecting. |
| Non-Contact Voltage Tester | Essential for confirming power is off at the wires. |
| Screwdrivers | Phillips and flathead, preferably with insulated handles. |
| Wire Strippers/Cutters | To safely remove insulation from wires. |
| Pliers | For gripping and bending wires. |
| Drywall Saw or Utility Knife | If you need to cut a hole in the drywall for the box. |
| Measuring Tape | For precise placement. |
| Pencil | For marking. |
| Electrical Tape | For added security on wire connections. |
| Mounting Screws | Usually come with the junction box, but ensure they are appropriate for your mounting surface. |
| Cable Clamps/Connectors | To secure the electrical cable entering the junction box. |
Types of Junction Boxes Explained
Not all junction boxes are created equal! The type you choose depends on your situation and the fixture you’re installing. Understanding these differences will help you pick the right one.
- Ceiling Boxes: These are the most common for light fixtures. They come in various shapes (round, octagonal, square) and are designed to be mounted to ceiling joists or a brace.
- Fan-Rated Boxes: If you plan to install a ceiling fan, you’ll need a fan-rated box. These are reinforced to handle the extra weight and vibration of a fan, which a standard light fixture box cannot support.
- Old-Work (Remodel) Boxes: These are designed for installation in existing walls or ceilings without access to the joists. They typically have adjustable mounting brackets that clamp onto the drywall.
- New-Work (Construction) Boxes: These are installed when the walls and ceilings are open, usually before drywall is installed. They are typically nailed or screwed directly to ceiling joists or studs.
- Pancake Boxes: These are shallow, round boxes that are ideal for surface-mounting fixtures or in shallow spaces where a deeper box won’t fit.
Step-by-Step: How to Install a Light Fixture Junction Box
Let’s get down to business! This guide focuses on installing a standard ceiling junction box, often in a remodel scenario (old-work box) as this is a common DIY situation. If you’re doing new construction, the principles are similar, but the mounting will be directly to framing.
Step 1: Confirm Power is OFF
I can’t stress this enough: double-check that the power to the circuit you’re working on is OFF at the breaker box. Then, use your non-contact voltage tester to confirm there is no power at the existing wires (if any) or where you plan to install the new box. Hold the tester near the wires; if it lights up or beeps, the power is still on. Go back to the breaker and try again.
Step 2: Locate and Prepare the Mounting Spot
For a remodel box, you’ll need to decide where you want your light fixture. If you’re replacing an old fixture, you’ll likely be working in the same spot. If you’re adding a new one:
- Find a joist: Use a stud finder to locate ceiling joists. Ideally, your junction box should be mounted directly to a joist for maximum support.
- Mark the location: Hold the junction box (or its template, if provided) against the ceiling and trace around it with a pencil.
- Cut the opening: Carefully use a drywall saw or utility knife to cut along your pencil line. Make the hole just large enough for the box to fit snugly.
If you’re installing an old-work box, it will have a bracket that can clamp onto the drywall. For new-work boxes, you’ll position it against the joist before drywall goes up.
Step 3: Install the Junction Box
This step varies slightly depending on the type of box:
For an Old-Work (Remodel) Box:
- Feed the cable: Gently feed the electrical cable (the one coming from your power source) into the junction box through one of the knockouts or cable entry points. Secure it with a cable clamp or connector, ensuring the outer sheathing of the cable is inside the box.
- Position the box: Insert the box into the hole you cut.
- Secure the box: Tighten the screws on the box’s mounting bracket. As you tighten, the bracket arms will spread out and clamp onto the back of the drywall, holding the box firmly in place. Make sure the front of the box is flush with the ceiling surface.
For a New-Work (Construction) Box:
- Position the box: Place the box against the side of a ceiling joist at your desired location.
- Secure the box: Use the provided screws or nails to firmly attach the box to the joist. Ensure it’s level and secure.
- Feed the cable: Run the electrical cable through a knockout or cable clamp on the box, making sure the outer sheathing is secured and inside the box.
Important Note: If you’re installing a box for a ceiling fan, ensure it’s a fan-rated box and that it’s securely mounted to a ceiling joist or a specialized fan brace. Standard boxes are not strong enough.
Step 4: Prepare the Wires
Now it’s time to work with the wires. Remember, the power is still OFF!
- Strip the insulation: If the wires aren’t already stripped, use your wire strippers to carefully remove about 1/2 to 3/4 inch of insulation from the end of each wire. Be careful not to nick or cut the copper wire itself.
-
Check the wires: You should typically see three types of wires:
- Hot (usually black): Carries the electrical current.
- Neutral (usually white): Completes the electrical circuit.
- Ground (usually bare copper or green): A safety wire.
If you see different colored wires, consult a qualified electrician or a reliable electrical guide to understand your specific wiring setup.
Step 5: Make the Electrical Connections
This is where you connect the incoming power wires to the wires that will go to your light fixture. If you’re installing a new box and running a new cable for the fixture, you’ll connect the incoming power cable to the outgoing fixture cable. If you’re simply replacing an old box, you’ll connect the incoming power to the fixture wires directly.
Here’s the standard way to connect wires using wire nuts:
- Connect Ground Wires: Twist the bare copper (or green) ground wire from the power source together with the ground wire from the junction box (if it has one) and the ground wire from your light fixture. Screw a wire nut onto the twisted wires until it’s snug.
- Connect Neutral Wires: Twist the white neutral wire from the power source together with the white neutral wire from your light fixture. Screw a wire nut onto these wires.
- Connect Hot Wires: Twist the black hot wire from the power source together with the black hot wire from your light fixture. Screw a wire nut onto these wires.
Important Considerations:
- Ensure all connections are secure. Give each wire a gentle tug to make sure it’s held firmly by the wire nut.
- For extra security, you can wrap electrical tape around the wire nut and the wires, extending a bit onto the wires themselves.
- Make sure no bare copper is exposed outside of the wire nuts.
Step 6: Secure the Wires and Install the Fixture Cover
Carefully tuck all the connected wires and wire nuts back into the junction box. They should fit relatively neatly. Then, attach your new light fixture according to its specific installation instructions. The fixture’s mounting bracket or base will typically cover the junction box.
Step 7: Restore Power and Test
Once the fixture is securely mounted and all connections are made, it’s time to restore power.
- Go back to your circuit breaker panel and flip the breaker back to the “ON” position.
- Go to your new light fixture and flip the light switch.
If everything was done correctly, your new light should turn on! If it doesn’t, or if the breaker trips immediately, turn the power off at the breaker again and re-check all your connections.
Troubleshooting Common Issues
Even with careful work, sometimes things don’t go perfectly the first time. Here are a few common hiccups and how to address them:
- Light Flickers or Doesn’t Turn On: This is almost always a loose wire connection. Turn off the power and re-check all your wire nut connections. Ensure they are tight and that no wires have slipped out.
- Breaker Trips Immediately: This indicates a short circuit, meaning a hot wire is touching a neutral or ground wire. Turn off the power immediately and carefully inspect all connections for exposed wires.
- Fixture Feels Loose: The junction box might not be securely mounted to the ceiling joist or the drywall. Turn off the power, and if possible, tighten the mounting screws for the box or ensure the old-work box’s clamps are fully engaged.
- Humming Sound: A slight hum might be normal for some fixtures, but a loud hum can indicate a loose connection or an issue with the fixture itself. Turn off the power and check connections. If the hum persists after re-checking, the fixture might be faulty.
When to Call a Professional Electrician
While this guide aims to empower you to tackle this project, there are times when calling a professional is the smartest and safest choice. Consider hiring an electrician if:
- You encounter wiring that looks old, brittle, or confusing (e.g., aluminum wiring, knob-and-tube wiring).
- The circuit breaker keeps tripping even after you’ve checked all connections.
- You need to run new wiring through walls or ceilings and are unsure about routing or code compliance.
- You are installing a very heavy fixture, like a large chandelier or a ceiling fan in an area not designed for it.
- You simply feel uncomfortable or uncertain about any part of the process. Your safety is worth the cost of professional help.
You can find qualified electricians through local recommendations, online directories, or by contacting your local building department for a list of licensed professionals.

Frequently Asked Questions (FAQs)
Q1: Can I just screw a light fixture directly to the ceiling drywall without a junction box?
Absolutely not. This is a major safety hazard. A junction box provides a secure enclosure for electrical connections and a safe mounting point for the fixture. Drywall alone is not strong enough to support a fixture and offers no protection for the wiring.
Q2: What is the difference between an old-work box and a new-work box?
A new-work box is installed when the walls and ceilings are open, typically during new construction, and is attached directly to framing. An old-work (or remodel) box is designed for existing walls and ceilings; it has a special bracket that clamps onto the drywall from the front after a hole has been cut.
Q3: My ceiling has plaster and lath instead of drywall. How do I install a junction box?
Working with plaster and lath can be trickier. You’ll need to carefully cut an opening, similar to drywall. For support, you’ll likely need to install a brace between the joists or use a specialized plaster ring and box assembly designed for this material. It might be best to consult a professional for this type of installation.
Q4: Can I use a plastic junction box, or do I need a metal one?
Both plastic and metal junction boxes are safe and code-compliant when used correctly. Metal boxes are often preferred for their durability and grounding capabilities, especially in unfinished areas. Plastic boxes are lighter, easier to work with, and won’t corrode. Always ensure the box is rated for the weight of your fixture and the type of installation.
Q5: How do I know if my junction box is strong enough for a ceiling fan?
You must use a junction box specifically labeled as “fan-rated” or “for use with ceiling fans.” These boxes are designed to support the weight and vibration of a fan, which standard light fixture boxes cannot handle. They are typically mounted directly to a ceiling joist or a sturdy fan brace.
Q6: What do I do if the wires in my old junction box are aluminum, not copper?
Aluminum wiring was used in some homes built between the mid-1960s and early 1970s. It requires special connectors and techniques to prevent fire hazards. If you find aluminum wiring, it’s highly recommended to turn off the power and call a qualified electrician to address it safely.
Conclusion
Installing a light fixture junction box might seem like a small step, but it’s a foundational one for any lighting project. By following these steps, prioritizing safety, and using the right tools, you’ve successfully created a secure and reliable spot for your new light. Remember, every DIYer starts somewhere, and tackling projects like this builds your confidence and skills. Enjoy the warm glow of your newly installed light, knowing you did it safely and correctly. Happy lighting!