How to Install a Vanity Light: A Step-by-Step Guide for a Brighter Bathroom
Hey there! If you’ve ever looked at your bathroom mirror and thought, “This lighting could use a serious upgrade,” you’re in the right place. Installing a vanity light is one of those home improvement projects that feels daunting but is totally doable with a little guidance. I’ve tackled this project myself, and let me tell you, there’s something incredibly satisfying about flipping the switch and seeing your bathroom glow with fresh, flattering light. Whether you’re swapping out an old fixture or starting from scratch, this guide will walk you through every step to install a vanity light like a pro. Let’s dive in and brighten up your space!
Why Upgrade Your Vanity Light?
Let’s start with why this project is worth your time. A good vanity light isn’t just about looks—it’s about function. When I replaced the outdated, dim fixture in my bathroom, it was like night and day (pun intended). Proper lighting makes tasks like shaving, applying makeup, or even just brushing your teeth so much easier. Plus, a stylish vanity light can elevate your bathroom’s vibe, making it feel like a spa retreat.
Vanity lights come in all shapes and sizes—sleek modern bars, vintage-inspired sconces, or minimalist globes. They’re a small change with a big impact. And here’s the best part: you don’t need to be an electrician to install one. With some basic tools and a bit of patience, you can handle this project in an afternoon. Ready to get started? Let’s talk about what you’ll need.
Tools and Materials You’ll Need
Before you start unscrewing anything, gather your supplies. I learned the hard way that having everything on hand saves a ton of frustration. Here’s what you’ll need to install a vanity light:
| Item | Purpose |
|---|---|
| New vanity light fixture | The star of the show—choose one that fits your bathroom’s style and size. |
| Screwdriver (Phillips/flat) | For removing the old fixture and securing the new one. |
| Wire stripper | To trim and prepare electrical wires if needed. |
| Voltage tester | To ensure the power is off and keep you safe. |
| Wire nuts | To connect wires securely. |
| Electrical tape | To insulate wire connections. |
| Step ladder | To reach the fixture safely. |
| Drill and anchors | If your new fixture requires new mounting holes. |
| Pliers | For twisting wires or tightening nuts. |
| Safety glasses | To protect your eyes from dust or debris. |
You might already have some of these tools at home, like I did when I started. If not, they’re easy to find at any hardware store. Pro tip: double-check that your new vanity light comes with a mounting bracket and screws. Some fixtures don’t include them, and you don’t want to be stuck mid-project.
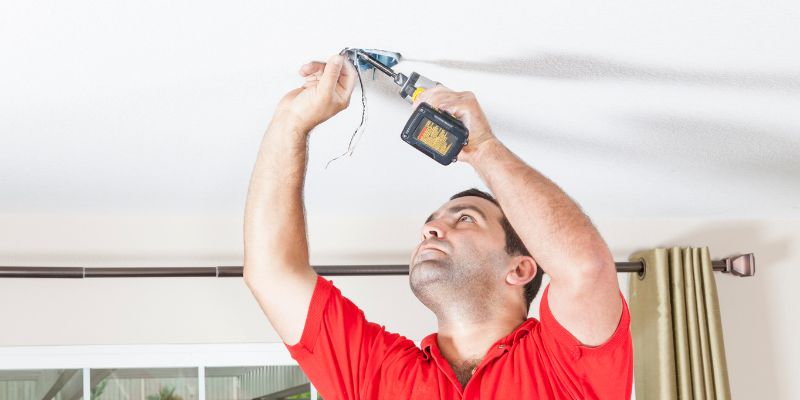
Safety First: Turn Off the Power
I can’t stress this enough—safety comes first. Working with electricity is no joke, and I’ve had a close call or two that taught me to respect the wires. Before you touch anything, head to your electrical panel and turn off the breaker that powers your bathroom light. Don’t just rely on the light switch; flipping the breaker ensures no current is flowing.
Once the breaker is off, use a voltage tester to confirm the wires are dead. I remember feeling a little paranoid the first time I did this, so I tested the wires twice just to be sure. Hold the tester to the wires in the electrical box where your old light is mounted. If it doesn’t beep or light up, you’re good to go. If it does, double-check your breaker and try again. Safety glasses are a smart move here, too, just in case.
Removing the Old Vanity Light
With the power off, it’s time to take down the old fixture. This part always feels like the start of something new, like peeling away an old layer of paint. Start by removing any glass shades or bulbs from the old light. Most shades are held in place by small screws or clips—unscrew them carefully and set the pieces aside.
Next, look for the screws holding the fixture to the wall. They’re usually on the sides or bottom of the base plate. Use your screwdriver to remove them, and gently pull the fixture away from the wall. You’ll see wires connected to the back—don’t yank them! Instead, carefully unscrew the wire nuts (those little plastic caps) to disconnect the wires. If the wires are tangled or taped, take your time to avoid damaging them. Once the wires are free, the old fixture should come right off.
If your bathroom doesn’t have an existing light, you’ll need to install an electrical box. That’s a bigger job, and I’d recommend calling an electrician unless you’re confident with wiring. For most of us, though, this project is about replacing an existing fixture, so let’s keep going.
Preparing for the New Vanity Light
Now that the old light is out, take a moment to prep for the new one. This is where I like to lay out all the parts of the new fixture and read the instructions. Every light is a little different, and trust me, skimming the manual saves headaches later. Check the mounting bracket that came with your new light—it’s the piece that attaches to the electrical box in the wall.
If the new bracket matches the old one’s size and screw holes, you’re in luck. If not, you might need to drill new holes or use wall anchors. I had to do this once when I picked a fancy light that didn’t quite fit the existing setup. Measure twice, drill once, and make sure the bracket is level. A crooked light is noticeable, and it’ll bug you every time you look at it.
Also, inspect the wires coming out of the wall. They should be in good shape—no fraying or exposed copper. If they look damaged, you’ll need to trim them with a wire stripper and expose about half an inch of fresh wire. Don’t worry if this sounds tricky; it’s easier than it seems once you’re holding the tools.
Wiring the New Vanity Light
Here’s where things get interesting. Wiring sounds intimidating, but it’s like connecting puzzle pieces. Your new light will have three wires: black (hot), white (neutral), and green or bare copper (ground). The wires in the wall should match: black to black, white to white, and ground to ground.
Start with the ground wire. Twist the bare or green wire from the fixture to the ground wire in the wall, and secure them with a wire nut. I like to give the wires a gentle tug to make sure they’re tight. Next, connect the white wires the same way, followed by the black wires. If your fixture has a different setup (like no ground wire), follow the manufacturer’s instructions to the letter.
Once the wires are connected, wrap each wire nut with electrical tape for extra security. I learned this trick after one of my connections came loose during a test run—not fun. Tuck the wires neatly into the electrical box to avoid pinching them when you mount the fixture.
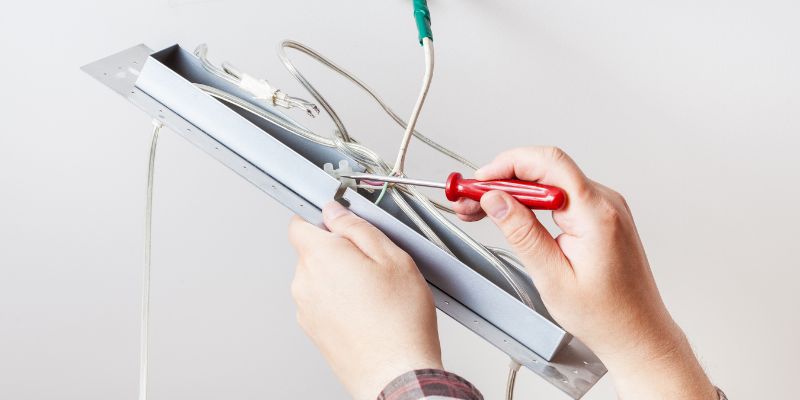
Mounting the New Fixture
With the wires connected, it’s time to hang your new vanity light. This part feels like the home stretch, and it’s so rewarding to see the new fixture take shape. Attach the mounting bracket to the electrical box using the provided screws. Make sure it’s secure and level.
Now, align the fixture’s base with the bracket and screw it into place. Most vanity lights have decorative caps or screws that cover the mounting hardware, giving it a polished look. Tighten everything carefully, but don’t overtighten—you don’t want to crack the fixture or strip the screws.
If your light has shades or covers, attach them now. I always install the bulbs last to avoid breaking them during the process. Use the wattage recommended by the manufacturer to prevent overheating. LED bulbs are my go-to because they’re energy-efficient and last forever.
Testing Your New Vanity Light
This is the moment of truth! Head back to your electrical panel and turn the breaker back on. Flip the light switch and watch your bathroom come to life. When I did this for the first time, I couldn’t stop smiling—the new light made my bathroom feel like a whole new space.
If the light doesn’t turn on, don’t panic. Double-check that the breaker is fully on and the bulbs are properly seated. If it still doesn’t work, turn off the power and inspect your wire connections. A loose wire nut is often the culprit. If you’re still having trouble, it might be time to call an electrician, but most issues are simple fixes.
Choosing the Right Bulbs
Let’s talk bulbs for a second, because they make a huge difference. When I first installed my vanity light, I used whatever bulbs I had lying around, and the result was harsh and unflattering. For bathrooms, aim for bulbs with a color temperature of 2700K to 3000K—they give off a warm, inviting glow. Anything too cool (like 5000K) can make your bathroom feel like a hospital.
LED bulbs are ideal because they’re energy-efficient and long-lasting. Check the lumens (brightness) to match your bathroom’s size. For a small bathroom, 800-1000 lumens per bulb is plenty. If your fixture takes multiple bulbs, multiply that number to get the total output. And don’t forget to check the maximum wattage your fixture can handle—usually listed on the fixture or in the manual.
Styling Tips for Your Vanity Light
Now that your light is installed, let’s make it shine (literally and figuratively). The right vanity light can set the tone for your bathroom’s style. Here are a few tips I’ve picked up from my own projects:
- Match the vibe: If your bathroom has a modern look, go for a sleek light bar or geometric sconces. For a cozy, traditional feel, try a fixture with glass shades or brushed nickel finishes.
- Consider size: A light that’s too big or too small can throw off the balance. Measure your mirror and aim for a fixture that’s about 75% of its width.
- Placement matters: Ideally, the light should be at eye level (about 60-66 inches from the floor) to minimize shadows. If you’re installing multiple lights, space them evenly around the mirror.
- Dimmers are magic: If your budget allows, install a dimmer switch. It’s perfect for creating a relaxing mood or brightening things up for tasks.
When I added a dimmer to my vanity light, it was a game-changer. Mornings felt brighter, and evenings felt softer and more relaxing. It’s a small upgrade with a big payoff.
Troubleshooting Common Issues
Even with careful planning, things can go wrong. Here’s how I’ve handled some common hiccups:
- Flickering lights: This usually means a loose connection. Turn off the power and check your wire nuts. If that doesn’t fix it, the bulb might be faulty.
- Fixture not flush with the wall: Check that the mounting bracket is secure and the electrical box isn’t protruding. Wall anchors can help if the screws aren’t gripping.
- Uneven light distribution: If one side of your mirror is brighter than the other, your fixture might be off-center. Double-check your measurements and adjust if needed.
If you hit a wall (no pun intended), don’t hesitate to consult a professional. It’s better to be safe than to risk a faulty installation.
Maintaining Your Vanity Light
Once your light is up and running, a little maintenance goes a long way. Dust the fixture regularly to keep it sparkling—bathrooms get humid, and dust loves to stick. I use a microfiber cloth to clean the shades and avoid scratching them. If you have glass shades, a quick wipe with glass cleaner keeps them crystal clear.
Check the bulbs every few months to make sure they’re still performing. If you notice any flickering or dimming, replace them before they burn out completely. And if you live in a humid climate like I do, keep an eye out for rust or corrosion on metal parts. A little preventative care keeps your vanity light looking brand-new.
Why This Project Is Worth It
Installing a vanity light is one of those projects that feels like a big win. Not only does it improve your bathroom’s functionality, but it also adds a touch of personality. When I finished mine, I couldn’t believe how much brighter and more inviting my bathroom felt. It’s amazing how a small change can make such a big difference.
This project also builds confidence. If you’re new to DIY, nailing something like this makes you feel like you can tackle anything. And if you’re a seasoned DIYer, it’s a quick way to refresh your space without breaking the bank. Either way, you’ll end up with a bathroom that looks better and works better.
Conclusion: Light Up Your Bathroom with Confidence
There’s something so rewarding about installing a vanity light yourself. From picking the perfect fixture to wiring it up and flipping the switch, every step brings you closer to a brighter, more beautiful bathroom. I remember standing back after my first installation, admiring how the new light made my space feel fresh and welcoming. It’s not just about the light—it’s about creating a space where you feel good every day.
So grab your tools, pick a fixture that speaks to you, and give this project a try. You don’t need to be an expert to get it right. With a little patience and this guide, you’ll have a vanity light that’s both functional and fabulous. And who knows? This might just be the start of your next big home improvement adventure. Happy installing!
Frequently Asked Questions
What tools do I need to install a vanity light?
You’ll need a screwdriver, wire stripper, voltage tester, wire nuts, electrical tape, a step ladder, and possibly a drill with anchors. Safety glasses and pliers are also handy. Make sure you have everything before starting to avoid interruptions.
Is it safe to install a vanity light myself?
Yes, it’s safe as long as you follow precautions. Always turn off the power at the breaker and use a voltage tester to confirm the wires are dead. If you’re unsure about any step, consult an electrician.
How do I choose the right vanity light for my bathroom?
Consider your bathroom’s style and size. Measure your mirror to pick a fixture that’s proportional—about 75% of the mirror’s width is ideal. Choose bulbs with a warm color temperature (2700K-3000K) for flattering light.
What should I do if my new vanity light doesn’t turn on?
Check that the breaker is on and the bulbs are properly installed. If it still doesn’t work, turn off the power and inspect your wire connections for loose or incorrect wiring. A professional can help if the issue persists.
Can I install a vanity light without an existing electrical box?
Installing a new electrical box is a complex job that requires wiring knowledge. If your bathroom doesn’t have one, I recommend hiring an electrician to ensure it’s done safely and up to code.
How long does it take to install a vanity light?
For most people, it takes 1-2 hours, depending on experience and whether you need to adjust the mounting. If you’re drilling new holes or troubleshooting, it might take a bit longer. Take your time to do it right.