How to Install Door Trim Without Nail Gun: Easy Installation Methods
To install door trim without a nail gun, use construction adhesive and finish nails. Apply the adhesive to the back of the trim, then secure it with finish nails.
When it comes to home improvement, installing door trim can add a touch of elegance to any room. However, not everyone has access to a nail gun. Fortunately, it’s possible to achieve a professional-looking finish using alternative methods. By following a few simple steps and using the right tools, you can successfully install door trim without a nail gun.
We’ll explore a step-by-step process for achieving this, providing you with a cost-effective and efficient solution for your home improvement projects. Whether you’re a seasoned DIY enthusiast or a novice homeowner, these tips will help you achieve a polished result without the need for specialized equipment.
Understanding Door Trim Installation Methods
Door trim installation is a crucial aspect of finishing any interior doorway. While the traditional method involves the use of a nail gun, there are alternative methods that can achieve the same result without the need for specialized equipment.
Overview Of Traditional Nail Gun Method
In the traditional nail gun method, the door trim is installed using a pneumatic or cordless nail gun. This method requires precise aim and significant force to securely attach the trim to the door frame. While effective, it can be challenging for those without experience using power tools. Additionally, the use of a nail gun may not be suitable for certain situations, such as when working in confined spaces or areas where noise levels must be minimized.
Introduction To Alternative Nail Gun-free Methods
For those seeking a nail gun-free approach to installing door trim, there are several methods that can be employed to achieve professional results. These methods leverage basic hand tools and adhesive materials to secure the trim in place without the need for a nail gun.
Tools And Materials Required
When it comes to installing door trim without a nail gun, having the right tools and materials is essential for achieving a professional finish. Let’s take a look at the essentials you’ll need to get the job done effectively.
Essential Tools For The Installation
- Hammer: A quality hammer with a smooth face is crucial for driving nails securely into place.
- Trim Nail Set: This is used to set the nail heads below the surface of the trim, helping to hide them from view.
- Trimming Shears or Miter Saw: These are essential for cutting the trim to the required lengths and angles for precise installation.
- Measuring Tape and Pencil: A reliable measuring tape and pencil are necessary for accurately marking cut lines and positioning of the trim.
- Screwdriver: A screwdriver is needed for securing the trim in place with screws, providing an alternative to nails.
Appropriate Materials For The Job
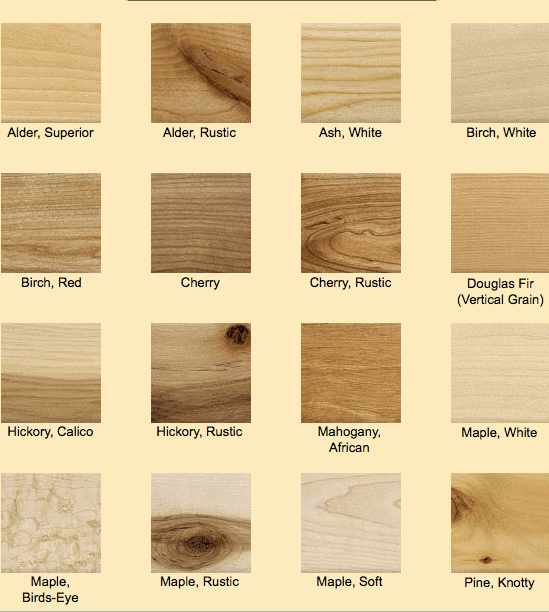
- Wood Trim: Opt for high-quality wood trim that complements your door and interior design. Pine, oak, or poplar are popular choices.
- Nails: Galvanized finish nails are recommended as they offer excellent corrosion resistance, resulting in a long-lasting installation.
- Screws: If you opt for screw installation, choose coated screws suitable for woodworking to ensure optimal strength and durability.
- Wood Glue: Using wood glue in conjunction with nails or screws can enhance the bond between the trim and the door, providing additional stability.
- Spackle or Wood Filler: These materials are useful for filling nail or screw holes and any gaps for a seamless finish.
Pros And Cons Of Each Tool And Material
| Tools/Materials | Pros | Cons |
|---|---|---|
| Hammer | Simple and effective | Requires physical effort |
| Trim Nail Set | Ensures nails are set below the surface | Additional tool required |
| Trimming Shears/Miter Saw | Precise cuts for professional finish | Initial investment for a miter saw |
| Measuring Tape and Pencil | Accurate measurements | May require multiple measurements for complex cuts |
| Screwdriver | Stronger alternative to nails | May split wood if not pre-drilled |
| Wood Trim | Natural and aesthetically pleasing | Prone to warping if not properly sealed |
| Nails | Quick and easy to install | Possible nail pops over time |
| Screws | Strong and durable | Visible screw heads unless filled and painted |
| Wood Glue | Enhances bond and stability | Requires time for drying |
| Spackle/Wood Filler | Creates seamless finish | Additional step in the installation process |
Preparing The Door And Trim
When preparing to install door trim without a nail gun, it’s important to focus on the initial steps of assessing the condition of the door and trim, making necessary preparations, and measuring and marking for precise fitting. Properly preparing the door and trim will set the stage for a successful installation, ensuring that the finished result is both functional and visually appealing.
Assessing The Condition Of The Door And Trim
Before beginning the installation process, it’s crucial to assess the condition of both the door and the trim. Check for any damage, warping, or irregularities that could affect the installation process or the final appearance of the trim.
Necessary Preparations Before Installation
Prior to installing the door trim, it’s essential to prepare the area and gather the required tools and materials. Create a clean and clutter-free workspace, and ensure that all necessary tools such as a tape measure, level, pencil, miter saw, and wood glue are readily available.
Measuring And Marking For Precise Fitting
Accurate measurements and precise markings are key to a professional-looking door trim installation. Use a tape measure to measure the length and width of the door, and carefully mark the trim pieces accordingly. It’s also important to account for corners and angles, as well as ensuring that each piece of trim is cut to the exact dimensions required for a seamless fit.
Step-by-step Installation Guide
Installing door trim without a nail gun can be a straightforward process with the right tools and techniques. This step-by-step installation guide outlines various methods for securing door trim without the use of a nail gun, ensuring a professional finish without the need for specialized equipment.
Adhesive-based Installation Method
One effective approach for installing door trim without a nail gun is through the use of adhesive. Adhesive-based installation provides a strong bond and eliminates the need for visible nails, resulting in a clean and seamless finish.
Choosing The Right Adhesive
When opting for an adhesive-based installation, selecting the appropriate adhesive is crucial. Ensure the adhesive is specifically designed for trim and molding, providing sufficient bonding strength and durability.
Application Techniques For A Secure Hold
To achieve a secure hold, apply the adhesive generously along the back of the trim. Press the trim firmly against the wall to allow for optimal adhesion and ensure a strong bond.
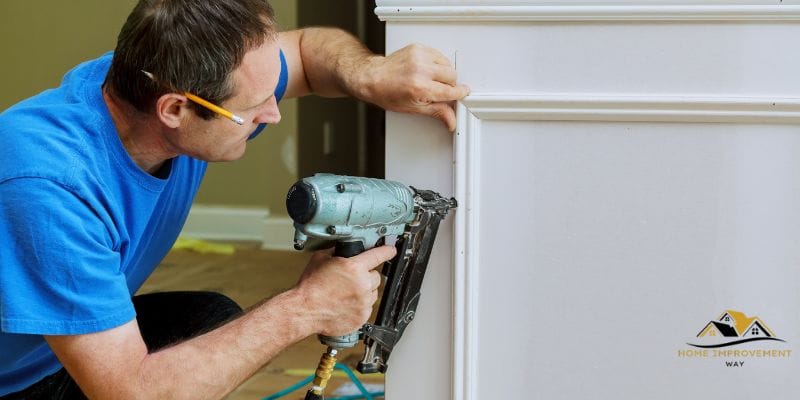
Utilizing Finishing Nails And A Hammer
In instances where adhesive alone may not provide the level of security desired, utilizing finishing nails and a hammer can reinforce the installation.
Proper Placement And Technique For Nail Installation
When using finishing nails, it is essential to position them strategically to avoid splitting the trim. Employing a hammer with precision and control ensures the nails are driven in without causing damage.
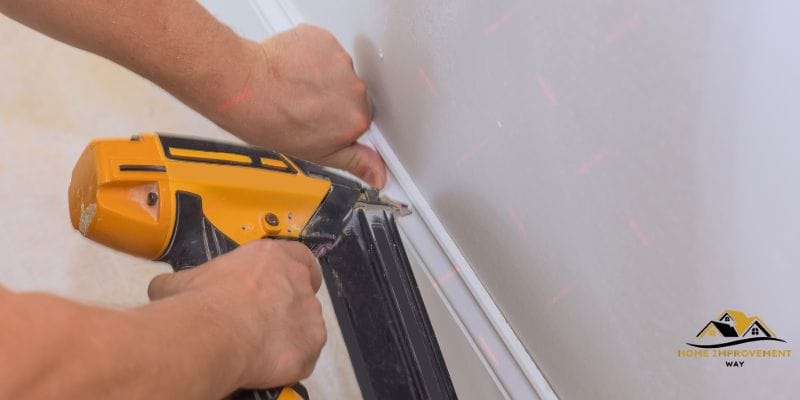
Using A Brad Nailer As An Alternative To A Standard Nail Gun
A brad nailer serves as a viable alternative to a standard nail gun, offering ease of use and accuracy for trim installation without the need for excessive force.
Understanding The Use And Benefits Of A Brad Nailer
Compared to traditional nail guns, a brad nailer utilizes smaller gauge nails, resulting in minimal visible holes and reduced risk of splitting the trim. Additionally, the compact size of a brad nailer allows for precise placement in tight spaces.
Tips For Successful Brad Nailer Application
Ensure the trim’s material and thickness align with the brad nailer’s recommended specifications. Furthermore, maintain consistent pressure and angle when firing the nails to achieve a secure and professional installation.
Finishing Touches And Additional Considerations
As you approach the final stages of installing door trim without a nail gun, focusing on the finishing touches and additional considerations is crucial for achieving a polished and professional result. By paying attention to details such as sanding and priming the door trim, caulking and sealing, and avoiding common installation mistakes, you can elevate the appearance and longevity of your door trim installation.
Sanding And Priming The Door Trim
Before applying the final coat of paint, it’s essential to sand the door trim to ensure a smooth and even surface. Start with a medium-grit sandpaper to remove any rough spots or imperfections, then switch to a fine-grit sandpaper for a polished finish. After sanding, wipe the trim clean to remove any dust. Additionally, applying a primer can help the paint adhere better to the trim, resulting in a more durable and professional-looking finish.
Caulking And Sealing For A Professional Look
Caulking the seams and gaps around the door trim not only enhances the aesthetic appeal but also helps to seal out moisture, drafts, and pests. Utilize a high-quality, paintable caulk and a caulking gun for precise application. Smooth out the caulk with a damp sponge or finger for a seamless look. After caulking, ensure that any exposed wood or gaps are sealed with an appropriate wood sealer to protect the trim from moisture and potential damage.
Tips For Avoiding Common Installation Mistakes
- Ensure the trim pieces are securely fastened with adhesive and appropriate tools, such as clamps, until the adhesive has dried.
- Measure and cut the trim accurately to achieve seamless joints and corners.
- Inspect the trim for any gaps or uneven surfaces before proceeding with painting or sealing.
- Use a level to ensure the trim is straight and aligned properly.
- Avoid overapplying caulk, as excessive amounts can detract from the overall appearance of the trim.
Frequently Asked Questions On How To Install Door Trim Without Nail Gun
How Can I Install Door Trim Without Using A Nail Gun?
To install door trim without a nail gun, you can use alternative fastening methods such as adhesive, screws, or a brad nailer. These methods provide a secure hold without the need for a nail gun.
What Are The Tools Needed For Installing Door Trim Without A Nail Gun?
You will need a hammer, nails, wood glue, a brad nailer, or screws to install door trim without a nail gun. Ensure you have the correct tools on hand before starting the installation process.
Are There Any Alternative Methods For Securing Door Trim Without A Nail Gun?
Yes, alternative methods for securing door trim include using construction adhesive, screws, or a brad nailer. These methods are effective in securing the trim without the need for a nail gun.
Can I Achieve A Professional Finish Without Using A Nail Gun For Door Trim Installation?
Yes, you can achieve a professional finish by using alternative methods such as adhesive, screws, or a brad nailer. Proper technique and attention to detail are key for achieving a polished look without a nail gun.
Conclusion
Installing door trim without a nail gun is easy and accessible to anyone, regardless of skill level. By following the step-by-step instructions and utilizing alternative tools such as adhesive and brad nails, you can achieve professional-looking results in no time.
Embrace this approach and transform your space with confidence.