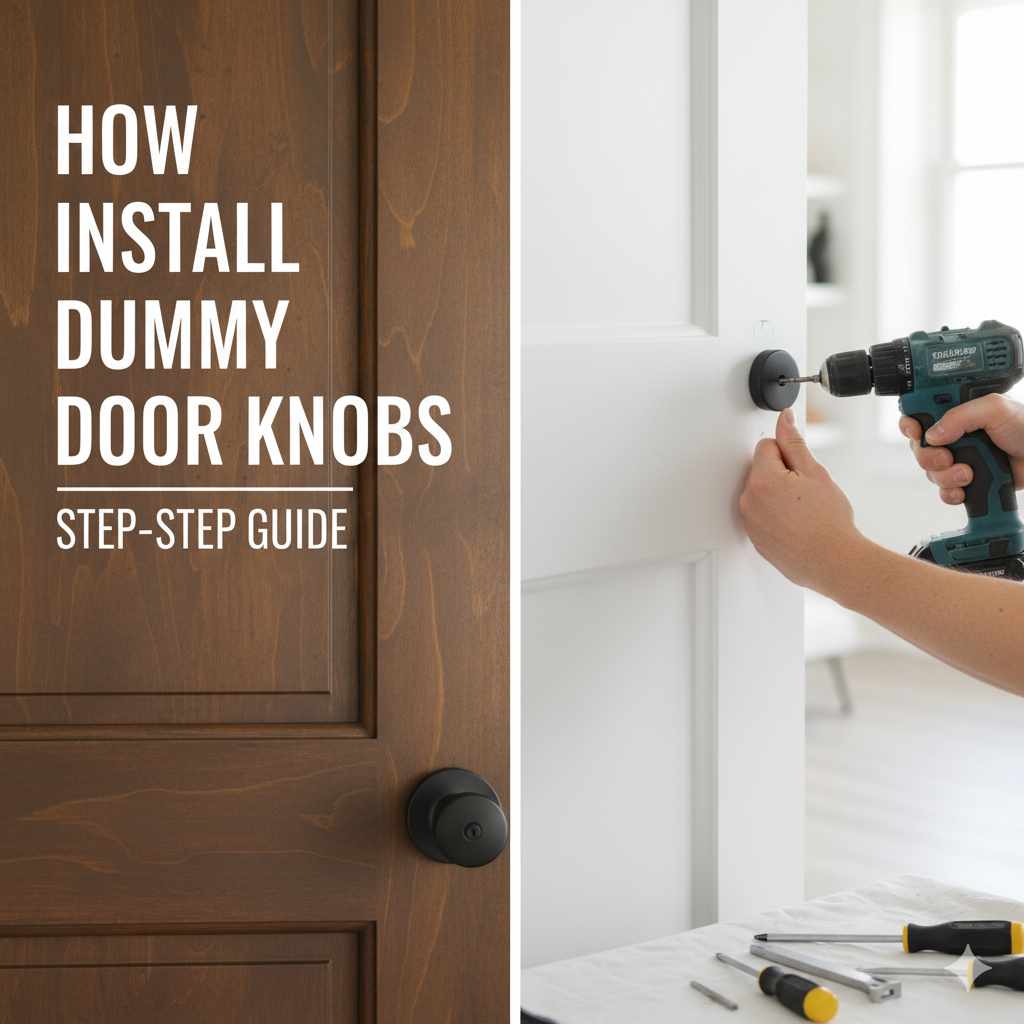
How to Install Dummy Door Knobs: Effortless Guide
Quick Summary:
Installing dummy door knobs is a straightforward DIY task. This guide provides simple, step-by-step instructions to help you easily mount these non-latching knobs on doors where only a pull or push is needed, enhancing your home’s functionality and style.
Welcome, home improvers! Are you looking to add a touch of elegance or simply a functional pull to a door that doesn’t need to latch, like a closet or pantry door? Dummy door knobs are perfect for this! They offer a polished look without the complex mechanism of a regular doorknob. Many homeowners find themselves staring at a new set of dummy knobs, wondering if it’s a job they can tackle themselves. The good news is, it absolutely is! With just a few basic tools and clear instructions, you can have these beautiful knobs installed in no time. We’ll walk through each step, making sure you feel confident and ready to complete this simple yet impactful upgrade.
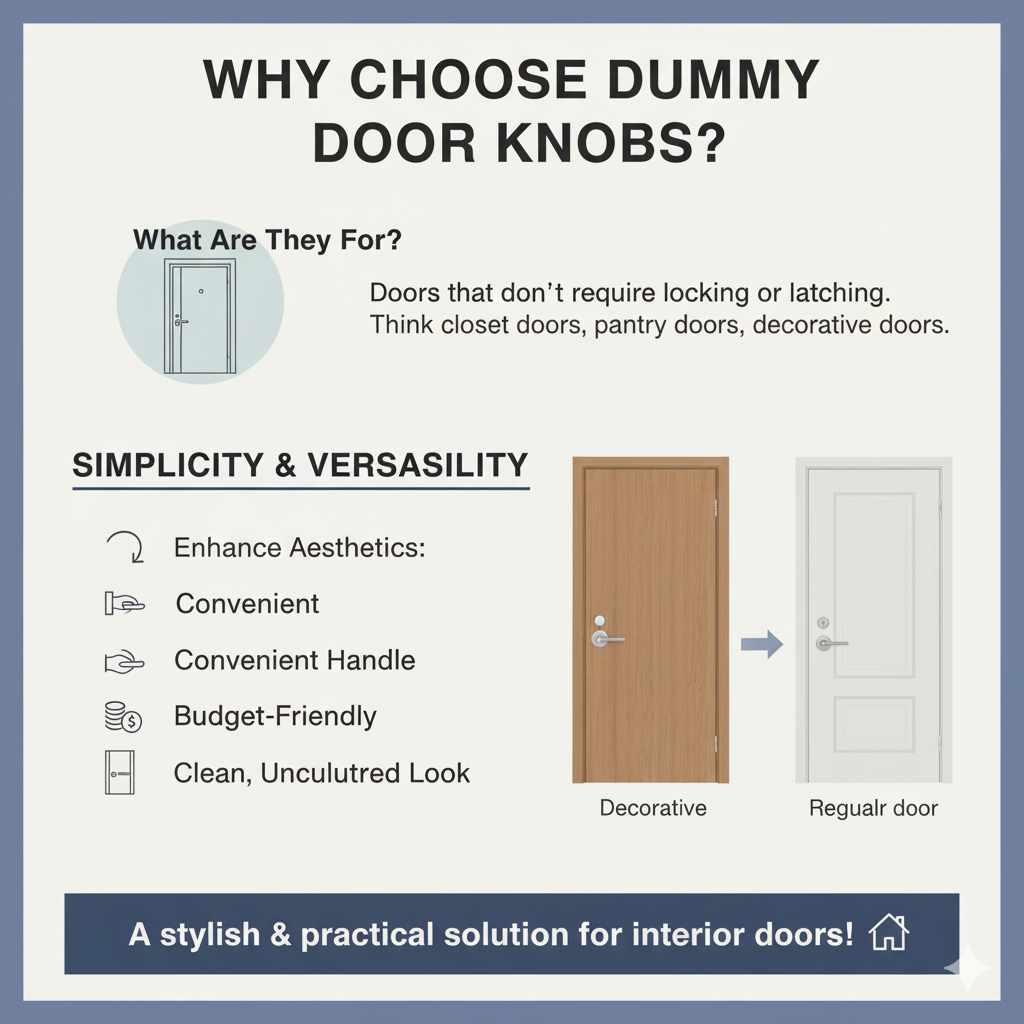
Why Choose Dummy Door Knobs?
Dummy door knobs, sometimes called passage door knobs, are designed for doors that don’t require a locking mechanism or a latch to stay shut. Think about those interior doors in your home: your closet doors, pantry doors, or even decorative doors that are purely for aesthetics. For these, a full-fledged, locking doorknob is often overkill. Dummy knobs provide the look and feel of a traditional doorknob, offering a comfortable grip and a stylish finish, but they don’t operate a latch or lock.
Their appeal lies in their simplicity and versatility. They can:
- Enhance the aesthetic of a room by matching other hardware.
- Provide a convenient handle for doors that are pushed or pulled open.
- Be a more budget-friendly option than full passage or privacy knobs.
- Offer a clean, uncluttered look for doors that don’t need to close securely.
Many homeowners opt for dummy knobs as a cost-effective and stylish solution for interior doors. They’re a fantastic way to maintain a consistent design theme throughout your home without the added complexity and expense of functional hardware on every single door.
Understanding Your Dummy Door Knob Set
Before we dive into the installation, let’s get familiar with the parts of a typical dummy door knob set. Most sets come with everything you need for a smooth installation:
- Exterior Knob: This is the knob that will be visible on one side of the door.
- Interior Knob: This knob goes on the opposite side of the door.
- Spindle (or Rod): A metal rod that connects the two knobs, passing through the door. Some modern dummy knobs might use a simpler screw-through system without a traditional spindle.
- Screws: Used to secure the knobs to the door and sometimes to connect the two halves.
- Mounting Plates/Roses: These are decorative circular plates that sit behind the knobs, covering any holes in the door.
It’s always a good idea to lay out all the parts and compare them to the instructions that came with your specific hardware. This way, you’ll know exactly what you’re working with.
Tools You’ll Need
The beauty of installing dummy door knobs is that you don’t need a lot of specialized tools. Most of these are common items found in any home toolkit:
- Screwdriver: A Phillips head screwdriver is most common, but check your hardware’s screws. A set with various sizes is ideal.
- Measuring Tape: To ensure precise placement.
- Pencil: For marking.
- Drill (Optional, but recommended for new holes): If you don’t have existing holes, a drill with appropriate drill bits will be necessary. A 1/4-inch bit is often used for pilot holes, and a larger spade bit or hole saw (typically 1-1/2 inch or 2-1/8 inch, depending on the knob size) will be needed for the main bore if creating new holes.
- Safety Glasses: Always protect your eyes, especially when drilling.
- Chisel and Hammer (Optional): If your door has a mortise (a cut-out for a latch mechanism) that needs to be slightly modified or if you’re installing a new strike plate.
- Work Gloves: For a better grip and protection.
Having the right tools makes the job much easier and ensures a professional-looking finish. If you’re drilling new holes, make sure you have the correct size drill bits. Referencing the hardware manufacturer’s specifications is key here.
Step-by-Step Guide: How to Install Dummy Door Knobs
This guide assumes you are installing dummy knobs on a door that either has existing holes from a previous knob or you are creating new holes. We’ll cover both scenarios.
Scenario 1: Replacing an Existing Door Knob
This is the easiest scenario. If your door already has holes for a doorknob, you’re essentially swapping out the old for the new.
-
Remove the Old Knob:
- Locate the screws holding the old knob assembly together. These are usually on the interior side of the knob.
- Unscrew them completely using your Phillips head screwdriver.
- Gently pull the two halves of the old knob apart. The spindle should come out with one side.
- If there’s a latch mechanism in the door edge, you might need to unscrew a plate on the edge of the door as well.
-
Clean the Area:
- Wipe down the door surface where the old knobs were. This ensures a clean surface for your new hardware.
-
Install the New Dummy Knobs:
- Take one of your new dummy knobs (usually the exterior one) and slide its spindle through the existing hole in the door.
- Place the decorative mounting plate (rose) over the spindle on the other side of the door.
- Align the screw holes on the new knob assembly with the holes in the door.
- Insert the screws provided with your new hardware and tighten them securely with your screwdriver. Don’t overtighten, as this can strip the screws or damage the door.
- Ensure the knob is snug against the door but still allows for smooth operation (even though it’s non-functional, it should feel solid).
Scenario 2: Installing Dummy Door Knobs on a New Door or Where No Holes Exist
This scenario requires a bit more work, as you’ll need to create the holes for the knobs. This is where your drill comes in handy. Safety first: always wear safety glasses!
-
Mark the Knob Centerline:
- Decide where you want the doorknob. For most interior doors, the standard height is about 36 to 44 inches from the floor.
- Using your measuring tape and pencil, mark the desired height on both sides of the door. Draw a light line across the door edge to indicate the top of where the latch would go (if there were one), and then extend this line across the face of the door on both sides. This is your centerline.
-
Drill the Large Hole for the Knobs:
- Most dummy knob sets require a 1-1/2 inch or 2-1/8 inch hole. Check your hardware’s specifications.
- Using a spade bit or hole saw of the correct size, drill through the door from one marked centerline to the other. Start drilling from one side, and when the pilot bit emerges on the other side, switch to drilling from that side. This helps prevent splintering and ensures a clean hole. Drill slowly and steadily.
- If your dummy knobs come with a spindle that requires a smaller hole through the edge of the door, you’ll need to drill that as well. The size is usually specified by the manufacturer.
-
Prepare the Door Edge (If necessary):
- If your dummy knob set mimics a standard passage knob and requires a small hole on the edge of the door for the spindle to pass through, drill this hole now. Use the recommended drill bit size from your hardware instructions (often 1/4 inch or 5/16 inch). This hole should intersect the larger knob holes.
- If you are installing a dummy knob that replaces a latching knob, you might need to remove the old latch plate. If the door has a pre-cut mortise for a latch, you might need to fill it or simply ignore it if it won’t interfere.
-
Install the Knobs:
- Insert the spindle of one knob through the large hole in the door, aligning it with the smaller hole on the edge if applicable.
- Place the decorative mounting plate (rose) over the knob mechanism on the other side of the door.
- Align the screw holes and insert the screws. Tighten them until the knob is snug and secure against the door.
- Repeat for the second knob on the opposite side, ensuring it aligns perfectly with the first.
-
Test and Adjust:
- Gently check if the knobs are secure. They shouldn’t wobble.
- Since dummy knobs don’t latch, there’s no “operation” to test, but ensure they feel solid and well-attached.
Types of Dummy Door Knobs and Their Applications
Dummy door knobs come in various styles and are suited for different purposes. Understanding these can help you choose the right ones for your home.
Styles
The aesthetic of your dummy knobs can significantly impact the look of your door and room. Popular styles include:
- Traditional/Antique: Often feature ornate designs, brushed finishes (like oil-rubbed bronze or antique brass), and detailed backplates.
- Modern/Contemporary: Characterized by clean lines, geometric shapes, and finishes like brushed nickel, chrome, or matte black.
- Transitional: A blend of traditional and modern, offering versatility for various decor styles.
- Rustic: May include distressed finishes, hammered textures, or unique materials.
Applications
Where you use dummy knobs is as important as their style. Here are common places:
- Closet Doors: Perfect for keeping clothes contained without needing a lock.
- Pantry Doors: Provide easy access to your kitchen staples.
- Interior French Doors (Non-latching side): Often, one side of a French door might only need a pull.
- Decorative Doors: For doors that are purely for show or divide spaces without needing to be secured.
- Pocket Doors: While pocket doors often have specific hardware, some homeowners use dummy knobs as pulls on the surface.
Choosing the Right Dummy Knob Set
When selecting dummy door knobs, consider these factors:
| Factor | Considerations | Why It Matters |
|---|---|---|
| Style and Finish | Match existing hardware or your room’s decor. Popular finishes include satin nickel, polished chrome, matte black, brass, and bronze. | Ensures a cohesive and attractive look throughout your home. |
| Door Thickness | Ensure the knob set is designed for your door’s thickness (most standard interior doors are 1-3/8″ to 1-3/4″). | Incorrect fit can lead to loose knobs or difficulty in installation. |
| Backset Size | This is the distance from the edge of the door to the center of the large hole. While less critical for dummy knobs than latching ones, it’s good to be aware of. | Ensures the knobs are positioned correctly on the door. |
| Durability and Quality | Look for solid metal construction rather than hollow plastic or thin metal. Reputable brands often offer better quality. | A well-made knob will last longer and feel more substantial. |
| Ease of Installation | Some sets are designed for simpler installation, especially if you’re new to DIY. | Saves time and reduces frustration. |
A good resource for understanding door hardware measurements and types is the Building Science Corporation’s Door Hardware and Door Systems document, which provides in-depth information on how doors and their hardware function together.
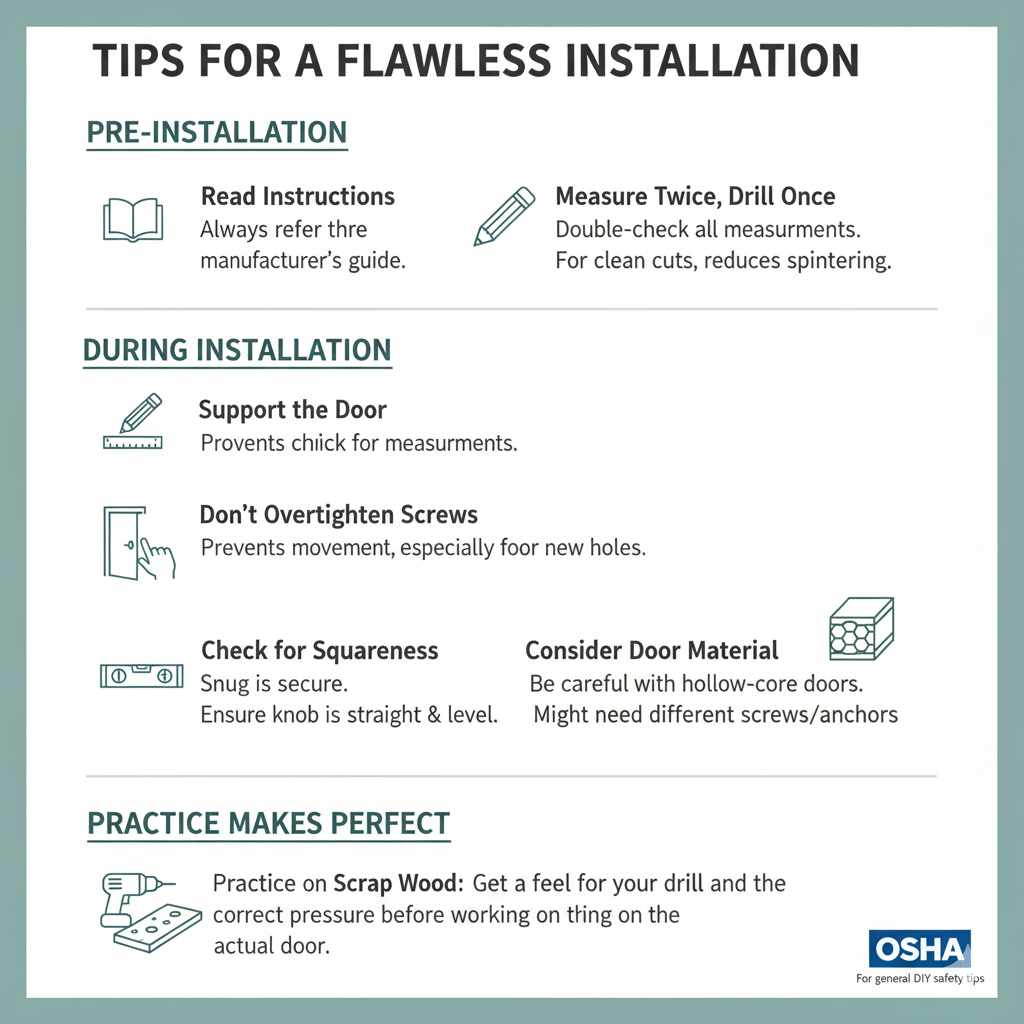
Tips for a Flawless Installation
Even with a straightforward project like installing dummy knobs, a few tips can make the process even smoother and ensure a professional result.
- Read the Manufacturer’s Instructions: While this guide is comprehensive, always refer to the specific instructions that come with your hardware. They know their product best!
- Measure Twice, Drill Once: This old adage is crucial, especially when drilling new holes. Double-check all your measurements before you make any holes.
- Use a Sharp Drill Bit: A sharp bit will cut cleanly and easily, reducing the risk of splintering or getting stuck.
- Support the Door: If you’re drilling new holes, it can be helpful to have someone support the door, or prop it up securely.
- Don’t Overtighten Screws: Tighten screws until they are snug and the knob feels secure. Overtightening can strip the screw threads or damage the door.
- Check for Squareness: Ensure the knobs are installed straight and level. A small level can be helpful here.
- Consider the Door Material: If you’re working with a hollow-core door, be extra careful not to overtighten screws, as they can easily strip the thin material. You might need longer screws or specific anchors if the provided ones don’t get a good grip.
- Practice on Scrap Wood: If you’re nervous about drilling into your actual door, practice drilling holes in a scrap piece of wood first. This helps you get a feel for your drill and the correct pressure.
These small steps can prevent common mistakes and ensure your new dummy knobs look and feel like they were installed by a pro. For more general DIY safety tips, the Occupational Safety and Health Administration (OSHA) offers valuable guidance on home safety practices.
Frequently Asked Questions (FAQ)
- What is the difference between a dummy knob and a passage knob?
- A dummy knob is purely decorative and offers no latching or locking function. A passage knob also has no locking function but operates a latch to keep the door closed. Both are used for doors that don’t require security.
- Can I install dummy knobs on an exterior door?
- While you can physically install them, dummy knobs are generally not recommended for exterior doors because they offer no security and cannot latch the door shut. They are best suited for interior doors.
- What size hole do I need to drill for dummy door knobs?
- The most common hole size for the knob mechanism is 1-1/2 inches or 2-1/8 inches in diameter. Always check the specific requirements for your chosen dummy knob set.
- Do dummy knobs come in pairs?
- Yes, dummy knob sets typically include two knobs – one for each side of the door – along with the necessary mounting hardware.
- Can I use dummy knobs on a pocket door?
- Some homeowners use them as surface-mounted pulls on pocket doors, but specialized pocket door hardware is usually recommended for proper function and aesthetics. Ensure the dummy knob doesn’t interfere with the door sliding into its pocket.
- How do I know if I need to drill a hole in the door edge for the spindle?
- If your dummy knob set comes with a spindle (a metal rod connecting the two knobs), you will likely need a smaller hole drilled through the edge of the door for the spindle to pass through. This is usually specified in the installation instructions.
- What if my door has a hole for a latch mechanism, but I’m installing dummy knobs?
- If your door has a pre-drilled hole for a standard latch, you can often ignore it if it doesn’t interfere with the dummy knob’s mounting. Some dummy knob sets might come with a decorative filler plate to cover this hole if desired.
Conclusion
You’ve done it! Installing dummy door knobs is a fantastic way to enhance the look and feel of your interior doors without a complicated process. Whether you’re replacing an old knob or starting fresh with a new installation, following these steps will equip you with the knowledge and confidence to achieve a professional result. Remember to take your time, use the right tools, and always prioritize safety. With your new dummy knobs in place, your doors will not only look more polished but also function perfectly for their intended purpose. Enjoy the satisfaction of a job well done, and the beautiful, subtle upgrade to your home!