How to Install Floating Shelves Without Drilling
Got that perfect spot for a floating shelf but don’t want to put holes in your walls? You’re not alone! Many people find How to Install Floating Shelves Without Drilling a bit tricky at first.
It can seem like magic, but it’s really just smart tools and clever methods. This guide will show you exactly how to do it step by step. We’ll make it super simple so you can enjoy your new shelves fast.
Let’s get started with what you need.
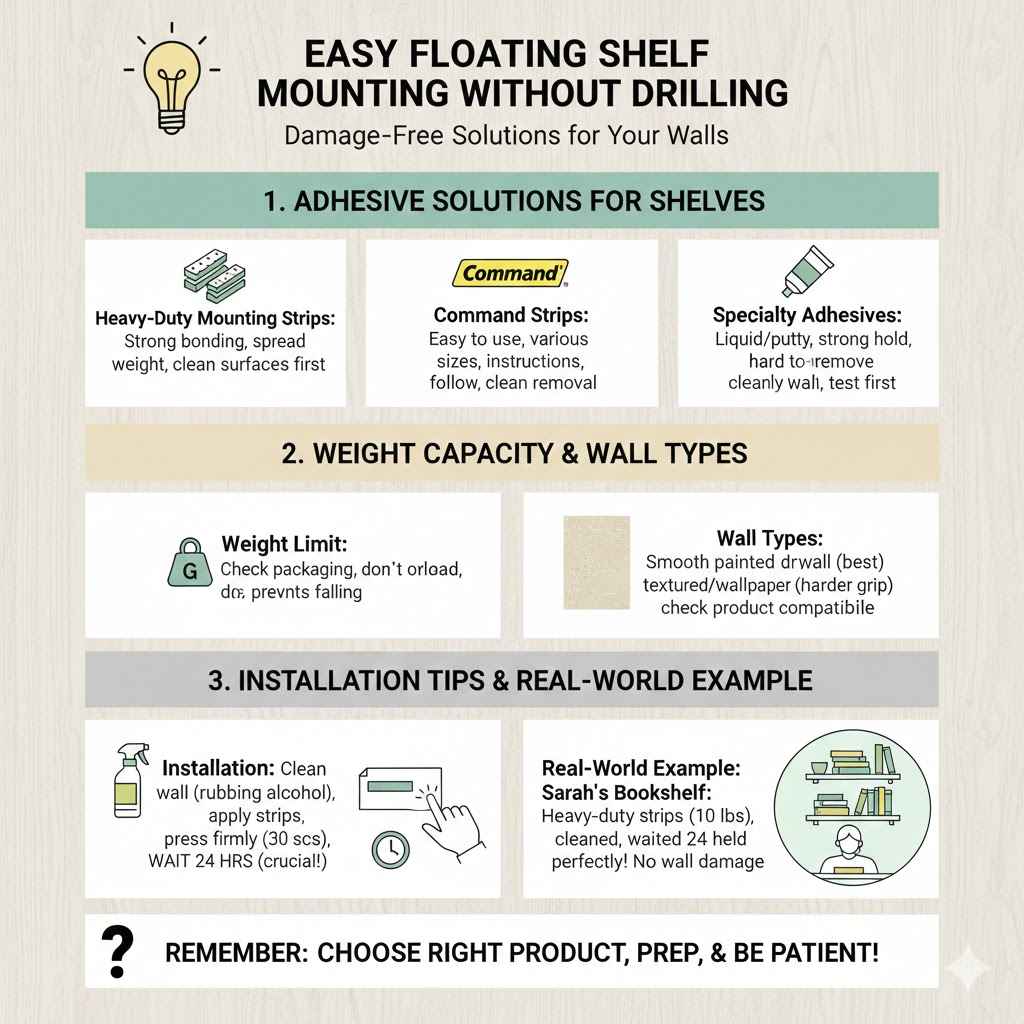
Easy Floating Shelf Mounting Without Drilling
This section focuses on the easiest ways to get those stylish floating shelves up without ever touching a drill. We’ll explore the most popular and effective methods that rely on strong adhesives and special mounting systems designed for damage-free installation. You’ll learn which products work best and how to apply them correctly for a secure and long-lasting hold.
It’s all about choosing the right tools for the job to keep your walls looking fresh.
Adhesive Solutions for Shelves
Adhesives are your best friend when you want to hang shelves without making holes. These aren’t your average sticky strips; they are specially formulated to hold significant weight. We’ll look at different types of heavy-duty adhesive tapes and mounting strips.
These products often use a strong bonding agent that can support the shelf and whatever you place on it.
Heavy Duty Mounting Strips
These strips are often made from a strong foam or plastic with a powerful adhesive on both sides. One side sticks to the shelf’s bracket, and the other sticks to your wall. They spread the weight across a larger surface area.
This is key to preventing the shelf from falling. Always clean your wall and the shelf bracket thoroughly before applying. This removes dust and grease, which can stop the adhesive from sticking well.
Press firmly after applying to make sure it bonds completely. Many brands offer strips rated for different weight capacities, so pick ones that match your needs.
Command Strips
Command strips are very popular because they are easy to find and use. They come in various sizes and weight limits, making them versatile. The key is to follow the instructions precisely.
This means cleaning the surface, applying the strips with the correct pressure, and waiting the recommended time before hanging the shelf. They are designed to hold strong but also remove cleanly without damaging paint or wallpaper. This is a big plus for renters or anyone who likes to redecorate often.
Specialty Adhesives
Beyond strips, there are also liquid adhesives or putty-like substances that can be used. These might be good for very specific situations or for adding extra security to other mounting methods. However, they can sometimes be trickier to remove cleanly.
Always test a small, hidden area first if you are unsure about how they will affect your wall surface. For most floating shelves, the adhesive strips are the most user-friendly option.
Weight Capacity and Wall Types
It is important to know how much your shelf will hold. Every adhesive product has a weight limit. This limit tells you how much your shelf and its contents can weigh.
If you put too much on, the adhesive can fail. This means your shelf could fall down. Always check the packaging for this information.
Different walls need different approaches. Smooth, painted drywall is usually the best surface. It’s clean and flat, letting adhesives stick well.
Walls with textured paint or wallpaper can be harder for adhesives. The texture can create small gaps. This makes it difficult for the adhesive to make full contact.
In some cases, these textures might prevent adhesive mounting altogether. Always check the adhesive product’s recommendations for wall types.
Installation Tips for Adhesive Mounting
Preparation is key for a strong bond. Clean the wall surface where the shelf will go. Use a good degreaser or rubbing alcohol.
Make sure the wall is completely dry before you start. Also, clean the back of your shelf’s mounting bracket. This removes any dust or oils.
Once cleaned, carefully apply the adhesive strips or tape. Follow the manufacturer’s instructions for placement and pressure. Press firmly for at least 30 seconds.
This helps the adhesive stick really well. Then, wait. Most adhesives need time to cure before they reach their full strength.
This waiting period is usually at least 24 hours. Resist the urge to hang things on the shelf too soon. This waiting time is crucial for a secure hold.
Real-World Example
Sarah wanted to add a small floating shelf above her desk for her favorite books. She didn’t want to drill into her newly painted wall. She chose heavy-duty mounting strips rated for up to 10 pounds.
She cleaned the wall and the shelf bracket with rubbing alcohol. Then, she applied the strips, pressed firmly, and waited 24 hours. After the wait, she placed her books on the shelf, and it held perfectly.
She was happy with the clean look and no wall damage.
Using Tension Rods and Leaning Methods
Another way to get a shelf look without drilling is by using tension rods or leaning your shelves against the wall. These methods are great for temporary setups or for people who want a lot of flexibility. They don’t damage your walls at all.
We will cover how these work and what kind of shelves are best suited for them.
Tension Rod Shelf Solutions
Tension rods are designed to fit snugly between two surfaces, like walls or the insides of cabinets. You can use them to create a “shelf” by placing a sturdy board or a pre-made shelf on top of them. The rod holds itself in place by the pressure it exerts against the walls.
This means no screws or nails are needed.
When choosing a tension rod, make sure it’s strong enough for the weight you plan to put on it. Measure the space carefully to get the right size rod. The rod needs to be installed securely so it doesn’t slip.
You can place a piece of non-slip matting on top of the tension rod before putting your shelf on it. This adds extra grip and stops the shelf from sliding around.
Example Scenario for Tension Rods
Imagine you have a small pantry and need extra storage. You can use two tension rods placed parallel to each other. Then, lay a wooden board across them to create a new shelf.
This doubles your storage space instantly. It’s a quick and easy fix that requires no tools and can be removed just as easily.
Leaning Shelf Designs
Leaning shelves are designed to stand on their own. They rest against the wall for stability. This style is very popular for a modern or rustic look.
Because they are freestanding, they require no mounting at all. You just place them where you want them.
When choosing a leaning shelf, ensure it has a wide enough base or is weighted correctly. This keeps it from tipping over. They are perfect for displaying plants, books, or decorative items.
You can easily move them from room to room. Some leaning shelves even come with anti-tip hardware that you can optionally attach to the wall for extra safety, but they work fine without it.
Sample Leaning Shelf Use
You can use a tall leaning bookshelf in a living room to hold your collection of novels and photos. Its angled design makes it stable. It looks great and can be moved if you decide to rearrange your furniture.
This offers a stylish way to add storage without any permanent fixtures.
Pros and Cons of Non-Drill Methods
Pros
The biggest advantage is no wall damage. This is fantastic for renters or anyone who likes to change their decor often. It saves time because you don’t need to deal with drilling, anchors, or potential wall repairs.
These methods are often very affordable, especially tension rods and simple adhesive strips. They offer flexibility, allowing you to move shelves easily when needed. Plus, many of these solutions are very quick to set up.
Cons
The main limitation is weight capacity. Adhesive strips and tension rods might not hold as much as securely screwed-in shelves. You need to be very careful about what you place on them.
Some stronger adhesives can be difficult to remove cleanly if you aren’t careful or if they aren’t designed for easy removal. Also, textured walls or surfaces might not work well with certain adhesive products. For heavy items, drilling might still be the most reliable option.
Choosing the Right Tools and Materials
Selecting the correct tools and materials is essential for any DIY project, especially when you aim for a drill-free installation. This section will guide you through identifying the best products for your needs. We’ll talk about what makes a tool effective and what materials are strong and reliable.
Getting this right means your shelves will be secure and look great.
Essential Adhesive Products
For installing floating shelves without drilling, your primary tools will be strong adhesives. These come in various forms. Heavy-duty mounting tape is a popular choice.
It’s usually made of foam with strong adhesive on both sides. Another option is specialized adhesive hooks or clips designed for shelves.
Always look for products that clearly state their weight capacity. This is critical. You need to match the adhesive’s strength to the weight of your shelf plus the items you plan to put on it.
Products like Command strips are well-known and reliable for many situations. They are designed to hold strong but also to be removed without damaging paint.
Heavy Duty Mounting Tape
This tape is often thicker and more robust than standard double-sided tape. It’s designed to bond with surfaces and distribute weight evenly. When using it, ensure both the wall surface and the shelf bracket are clean and dry.
Press firmly and hold for the recommended time. Many tapes require a curing period of 24 hours to reach their maximum strength. This waiting time is crucial for ensuring the bond is secure enough for your shelf.
Adhesive Shelf Brackets
Some companies make brackets specifically for adhesive mounting. These often come with the necessary adhesive strips attached or recommended. They are designed to work with standard floating shelf components.
Make sure the bracket is suitable for the type of shelf you have. Also, verify the weight limit for the bracket system.
Tools for Surface Preparation
Before you apply any adhesive, the surface needs to be perfectly clean. This is non-negotiable for a strong bond. You will need a good cleaner.
Rubbing alcohol is excellent for removing grease and grime from walls. A clean, lint-free cloth is also essential.
You’ll also want a way to measure. A tape measure is important to make sure your shelf is level. A spirit level will help you check this precisely.
Even with adhesive mounting, a level shelf looks much better. For marking where the shelf will go, a pencil is ideal because it can be erased easily.
Cleaning Supplies
A bottle of rubbing alcohol (isopropyl alcohol) is highly recommended. It evaporates quickly, leaving a clean, residue-free surface. Use a clean, lint-free cloth or paper towel to wipe down the area.
Avoid using household cleaners that might leave a film or residue. This can weaken the adhesive bond.
Measuring and Marking Tools
A tape measure is necessary to determine the exact placement of your shelf. A spirit level is crucial to ensure the shelf is straight, which significantly impacts its appearance. A sharp pencil allows for precise, yet erasable, marks on the wall.
Always double-check your measurements before applying adhesives.
Choosing the Right Shelf Style
Not all floating shelves are created equal when it comes to no-drill mounting. The shelves themselves should be lightweight. This is because the adhesives have a limit.
Hollow-core shelves or those made from lighter materials are often best. Solid wood shelves can be quite heavy and might require a more robust mounting solution.
The mounting system of the shelf also matters. Some floating shelves have an integrated bracket that can be attached to the wall with adhesive. Others require you to attach a separate bracket first.
If you are buying a shelf specifically for no-drill mounting, look for ones that explicitly state they are compatible with adhesive hardware.
Statistic on Adhesive Product Usage
According to industry reports, the use of adhesive mounting solutions has seen a significant increase over the past five years. One survey found that over 40% of consumers now prefer damage-free hanging options for home decor. This trend highlights a growing demand for products that offer convenience and wall protection.
| Adhesive Type | Typical Weight Capacity | Best For |
|---|---|---|
| Heavy Duty Mounting Strips | 5-20 lbs per set | Light to medium weight items |
| Command Strips (Large) | Up to 16 lbs | Picture frames, small shelves |
| Specialty Adhesive Putty | Varies greatly, often low | Temporary displays, posters |
How to Install Floating Shelves Without Drilling Step-by-Step
Now that you understand the methods and materials, let’s walk through the actual process of How to Install Floating Shelves Without Drilling. Following these steps carefully will ensure your shelf is installed securely and looks fantastic. We’ll break down each action to make it super clear.
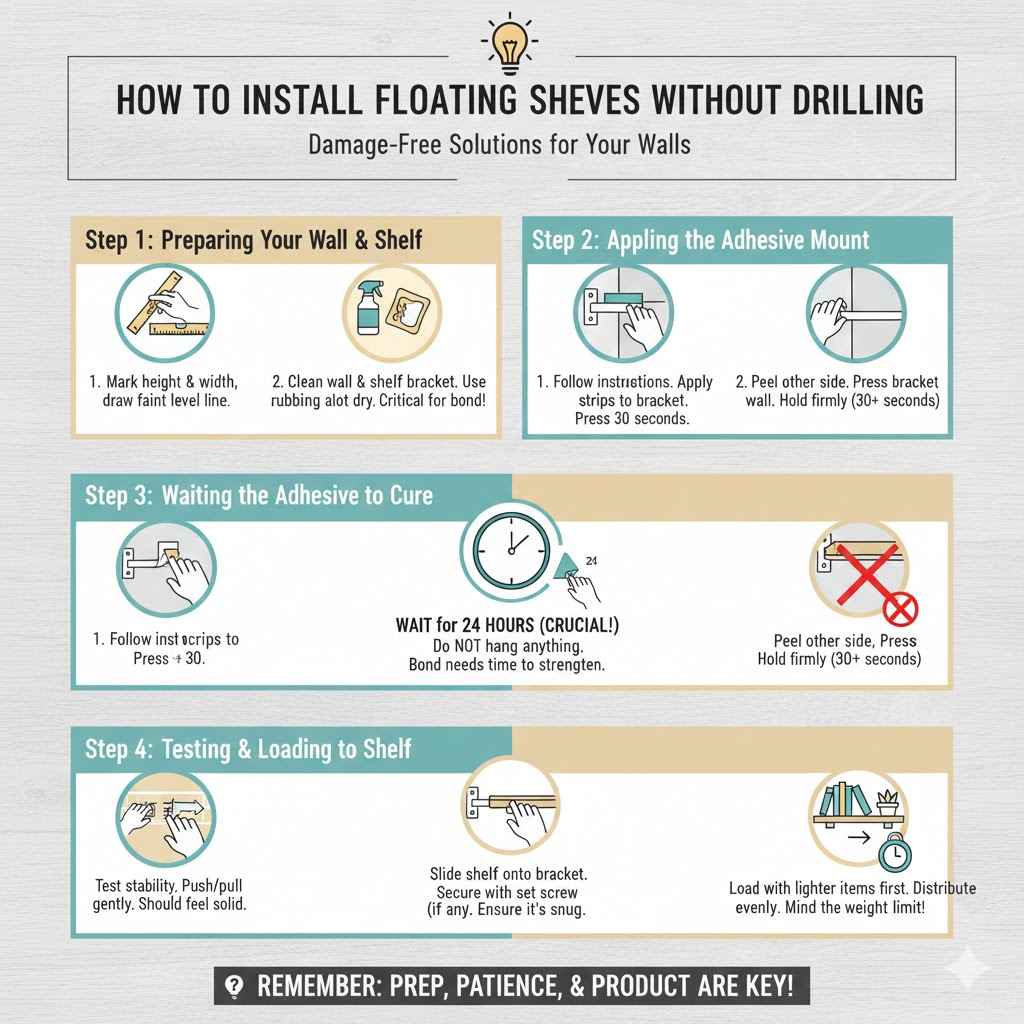
Step 1 Preparing Your Wall and Shelf
First, decide exactly where you want your shelf. Use your tape measure and pencil to mark the desired height and width. Use your spirit level to draw a faint, horizontal line on the wall.
This line will guide your shelf placement.
Next, clean the wall area thoroughly where the shelf bracket will attach. Use rubbing alcohol and a clean cloth to remove any dust, dirt, or grease. Also, clean the back of the shelf’s mounting bracket.
Let both surfaces dry completely. A clean surface is critical for the adhesive to stick properly.
Step 2 Applying the Adhesive Mount
Take your chosen adhesive product, whether it’s mounting strips or a specialized bracket with adhesive. Carefully follow the instructions provided with the product. If using strips, peel off the backing from one side and apply them to the back of the shelf bracket.
Press firmly for at least 30 seconds.
Then, peel off the other side of the backing. Align the bracket with the pencil line you made on the wall. Press the bracket firmly against the wall.
Hold it in place for the full duration recommended by the adhesive manufacturer, usually around 30 seconds or more. Ensure good contact across the entire surface of the adhesive.
Step 3 Waiting for the Adhesive to Cure
This is arguably the most important step for a strong, lasting hold. You must wait for the adhesive to cure. Most heavy-duty adhesives need at least 24 hours.
Some might suggest longer, depending on temperature and humidity. Do not hang anything on the shelf during this waiting period. Trying to use it too soon will weaken the bond and could cause the shelf to fall.
Be patient; it’s worth it.
Step 4 Attaching the Shelf
Once the adhesive has fully cured, it’s time to attach the actual shelf to its bracket. Many floating shelf systems simply slide onto or click into the mounted bracket. Ensure it is securely seated.
If your shelf has a set screw or another securing mechanism, now is the time to use it. This provides extra stability and prevents the shelf from accidentally sliding off the bracket. Make sure these screws are snug but do not overtighten.
Step 5 Testing and Loading the Shelf
Before placing your decorative items, give the shelf a gentle push and pull to test its stability. It should feel very secure and not wobble. If it feels loose, you might need to re-evaluate the adhesive application or consider if the weight capacity was exceeded.
Now, you can start placing your items on the shelf. Begin with lighter objects and gradually add heavier ones, being mindful of the weight limit. Distribute the weight as evenly as possible across the shelf.
Enjoy your newly installed floating shelf!
Sample Scenario for Testing
John installed a floating shelf above his TV. He used strong adhesive strips rated for 15 pounds. After waiting 24 hours, he first placed a small plant on it, about 3 pounds.
He wiggled the shelf gently. It felt solid. Then, he added a couple of books, bringing the total weight to about 10 pounds.
The shelf held firm, giving him confidence.
Frequently Asked Questions
Question: What is the strongest way to hang a shelf without drilling?
Answer: The strongest drill-free methods typically involve high-strength, double-sided mounting tapes or specialized adhesive brackets. These products are designed to distribute weight and bond securely to clean, dry wall surfaces. Always check the weight capacity of the adhesive and the shelf.
Question: Can I hang heavy items on a no-drill shelf?
Answer: For heavy items, it’s generally safer to use traditional drilling methods. While some heavy-duty adhesives can hold a significant amount, they may not be as reliable as screws into wall studs. Always check the specific weight limits for both the shelf and the adhesive system.
Question: How do I remove adhesive shelf mounts without damaging my wall?
Answer: Most good quality adhesive products, like Command strips, provide instructions for safe removal. This usually involves gently stretching the strip downwards to break the adhesive bond. Avoid pulling straight out.
If residue remains, it can often be cleaned with rubbing alcohol.
Question: Will adhesives work on textured walls?
Answer: Adhesives generally work best on smooth, flat surfaces. Textured walls can make it difficult for the adhesive to create a full, even bond. This can significantly reduce the holding power.
For textured walls, drilling into studs is often the most reliable option.
Question: What kind of shelf is best for adhesive mounting?
Answer: Lightweight shelves are ideal for adhesive mounting. Shelves made from hollow materials, engineered wood, or composite materials are often lighter than solid wood. Ensure the shelf’s mounting mechanism is also compatible with adhesive hardware.
Final Thoughts
Installing floating shelves without drilling is totally achievable and looks great. You’ve learned about using strong adhesives, tension rods, and leaning designs. By preparing your surfaces well and choosing the right products, you can create stylish storage.
Get creative with your space and enjoy your new, damage-free shelves.