How To Install Hardwood Flooring: Proven Essential
Bolded Quick Summary (Top of Article)
Installing hardwood flooring yourself is very achievable with the right prep work and tools. This guide breaks down the essential steps—from acclimation and subfloor prep to laying the first row and finishing touches—making your DIY hardwood floor installation straightforward and successful.
Have you ever looked at beautiful hardwood floors and thought, “I wish I could do that myself”? You are not alone! Hardwood flooring is a fantastic upgrade, but the installation process often seems complicated and expensive. Many homeowners worry about gaps, warping, or damaging their new investment. Don’t let fear stop you. With clear, simple steps and the right guidance, you absolutely can lay down stunning hardwood floors.
This guide is your friendly mentor, designed to take you from overwhelmed beginner to confident installer. We will walk through every proven essential step, focusing on safety and making sure your floor looks professional and lasts for decades. Ready to transform your space? Let’s start by making sure your materials are ready for the job.
Why DIY Hardwood Flooring Installation is Worth Your Time
Choosing to install your own hardwood floors offers huge benefits that go beyond just saving money on labor. It’s about pride, customization, and learning a valuable skill.
The Perks of Going Pro-DIY
- Cost Savings: Labor is a big chunk of any flooring quote. Doing it yourself keeps more money in your pocket for buying higher-quality wood or better tools.
- Control Over Quality: You control the pace and precision. You can take extra time in tricky areas where a hired crew might rush.
- Personal Satisfaction: There is nothing quite like walking across a floor you installed with your own two hands.
- Learning a Trade Skill: Woodworking and home improvement skills are always useful for future projects.

Phase 1: Essential Preparation – The Secret to Success
The biggest mistake beginners make is rushing the setup. Think of preparation as the foundation of your home—if it’s weak, the house (or the floor) will eventually fail. For hardwood, this means two critical things: acclimation and subfloor perfection.
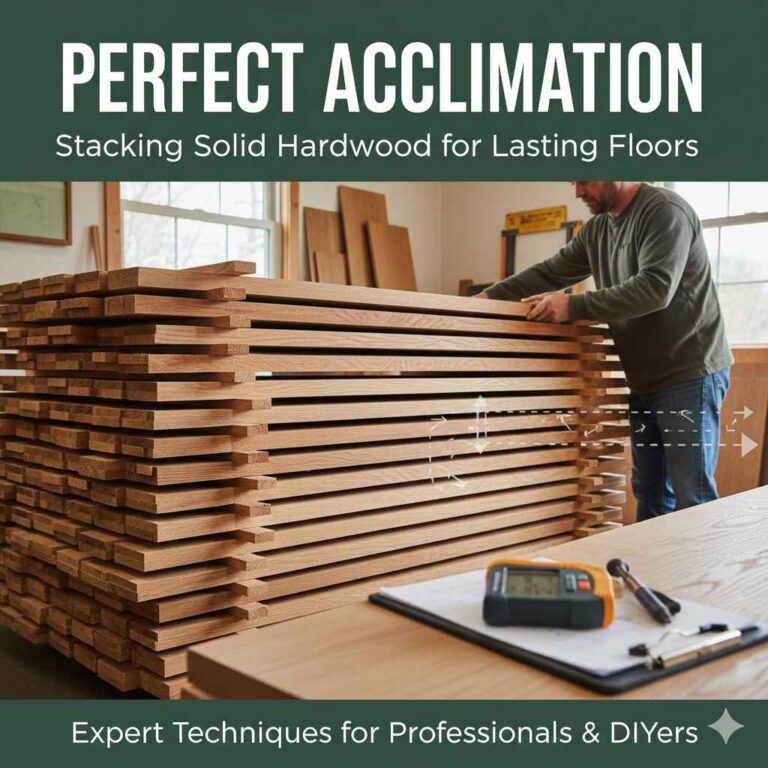
Step 1: Acclimate Your Hardwood Flooring
Wood is a natural material. It constantly breathes, absorbing or releasing moisture based on the air around it. If you install it straight from the warm truck into your climate-controlled home, it will change shape later, leading to gaps or buckling. This process is called acclimation.
How to Acclimate Properly:
- Check the Environment: Ensure your home’s HVAC system is running, maintaining the temperature and humidity you expect the floor to live in long-term. A good target range is generally between 60°F and 80°F with relative humidity between 35% and 55%.
- Bring in the Boxes: Open the boxes, but leave the wood planks inside their original packaging (or loosely stacked). This allows air to circulate around the wood while preventing rapid changes.
- Wait Patiently: Most manufacturers require the wood to sit for 3 to 7 days, sometimes longer for engineered wood. Always follow the specific manufacturer’s instructions!
- The Squaring Test: After the waiting period, take a few boards from the middle of different boxes. If they lay flat and don’t seem to be bending or cupping, they are likely ready.
Step 2: Subfloor Inspection and Repair
Your hardwood floor needs a perfectly flat, clean, and dry base. Whether you have plywood, OSB (Oriented Strand Board), or even concrete underneath, flatness is key.
Checking for Flatness
Use a long, straight edge (like a 6-foot level or a long piece of framing lumber). Lay it across the subfloor in multiple directions. If there are gaps under the straight edge greater than 1/8 inch over 6 feet, you need to correct it. Gaps allow the floorboards to move, leading to squeaks or cracking fasteners.
Subfloor Repair Basics
- High Spots: Grind down high spots using a belt sander or floor edger.
- Low Spots: Fill depressions with a quality floor leveling compound or patch, following the product’s cure time precisely.
- Moisture Check: This is critical, especially over crawlspaces or concrete slabs. Use a moisture meter to test the subfloor. High moisture is the number one killer of hardwood floors. If moisture is high, you must address the source (e.g., vapor barrier, dehumidifier) before proceeding. For concrete, a moisture vapor retarder membrane is essential.
Step 3: Planning Your Layout
Before you even touch a nail gun, you need a plan. This prevents ending up with tiny, awkward strips of wood along the far wall.
Finding the Main Direction
Generally, lay planks parallel to the longest wall or parallel to the direction of the natural light coming from the main windows. This helps hide the small gaps between boards.
Calculating the Starting Wall and Room Width
Measure the room width in the direction the boards will run. Divide the room width by the width of your flooring planks (including the tongue/groove if applicable). Subtract the space needed for expansion gaps (usually 1/2 inch to 3/4 inch) from the total width.
If the remaining number results in a final row that is less than 2 inches wide, adjust your starting point. You want the first and last rows to be roughly the same width. To do this, divide the total width by two and start your first row in the center of that measurement.
Phase 2: Gathering Your Tools and Materials
Having the right gear makes the job safer, faster, and cleaner. For standard tongue-and-groove solid or engineered hardwood, you will likely be nailing down the floor.
Essential Tool Checklist
| Tool Category | Specific Tool Needed | Why You Need It |
|---|---|---|
| Measuring & Marking | Tape Measure, Carpenter’s Square, Chalk Line | For accurate layout and ensuring straight lines. |
| Cutting | Miter Saw (for crosscuts) | For precise, repeatable cuts at the ends of boards. |
| Cutting | Table Saw or Circular Saw with a guide rail | For ripping boards lengthwise or making careful, straight cuts. |
| Fastening | Flooring Nailer (Pneumatic or Manual) | The specialized tool for driving cleats at the correct angle (blind nailing). |
| Fastening | Hammer and Flooring Gauge Block | To set the nailer correctly and protect the wood edge during nailing. |
| Finishing | Tapping Block and Pull Bar | To gently seat boards tightly against each other without damaging the edges. |
| Safety | Safety Glasses, Ear Protection, Dust Mask | Always protect your eyes, ears, and lungs! |
Pro Tip on Nailers: If you are installing engineered wood or using a floating floor method (which we won’t cover here as this focuses on nailing), you might use an adhesive sprayer or specialized click-lock tools instead of a nailer. For traditional installation, rent a quality pneumatic flooring nailer; it saves your back and ensures consistent fastening.
Phase 3: The Installation Process – Laying the Wood
This is where the magic happens. We will proceed row by row, focusing on tight seams and correct fastening.
Step 4: Setting Up the Expansion Gap and First Row
Hardwood floors must be allowed to expand and contract. This gap is hidden by the baseboard or shoe molding later. A gap of 1/2 inch to 3/4 inch is standard, depending on the floor width and climate.
- Install Spacers: Place consistent wood spacers (or factory-cut wedges) along the entire starting wall.
- Prepare the First Board: The first row is critical for alignment. You will likely need to remove the bottom lip (the tongue) of the boards facing the starting wall so they sit flush against the spacers. Use a circular saw or table saw to carefully trim this edge off.
- Position and Fasten: Place the first board (groove side facing the wall) snug against the spacers. Check that it is perfectly straight using your chalk line reference.
- Blind Nailing: For the first row, you must face-nail (drive nails down through the face of the board) because there is no adjacent board to blind-nail into. Use your flooring nailer or set your nails carefully with a nail set about 1 inch from the edge and every 6–8 inches.
Step 5: Laying Subsequent Rows
This is where the tongue-and-groove system shines. You will be “blind nailing” into the groove of the previous board.
- Stagger the Seams: Never have seams line up in adjacent rows. The end joints should be staggered randomly, ideally at least 6 inches apart, for a natural look. If the last board of Row 1 was 10 inches long, start Row 2 with the cutoff piece from Row 1 (provided it’s longer than 6 inches).
- Cut the Starting Piece: Cut the first board for Row 2. Remember the expansion gap!
- The Angle Technique: Position the second board against the first. Hold the board at about a 45-degree angle toward the previous row. Slide the tongue of the new board firmly into the groove of the established row.
- Nail Down: Once angled in, press the board down flat onto the subfloor. Use your flooring nailer to drive a cleat through the floor’s tongue at a 45-degree angle (this is blind nailing). The pressure of the nail pulls the board tightly against the previous row, closing the seam.
- Use the Tapping Block: For stubborn joints, place the tapping block against the edge of the board and gently tap it with a hammer until the seam disappears. Do not hit the wood directly!
Step 6: Working Around Obstacles and Finishing Rows
Rooms are rarely perfect rectangles. You will encounter doorways, vents, and oddly shaped walls.
Cutting Around Vents
If you have floor vents, measure carefully. You will need to cut a piece to fit around the vent opening. Often, it is easier to cut the board in half, leaving space for the vent opening, and then install the vent cover over the resulting gap later.
The Last Row Challenge
The final row will almost always need to be ripped (cut lengthwise) to fit. Measure the remaining gap between the second-to-last row and the wall, remembering to subtract the required expansion space.
- Rip the boards to the exact width needed using your table saw or circular saw with a guide.
- Since you cannot blind-nail the last row (the groove is against the wall), you must face-nail it. Drive nails through the face, close to the edge.
- After the floor is installed, these face-nails must be sunk slightly below the surface using a nail set, and the resulting holes must be filled with a matching stainable wood putty.
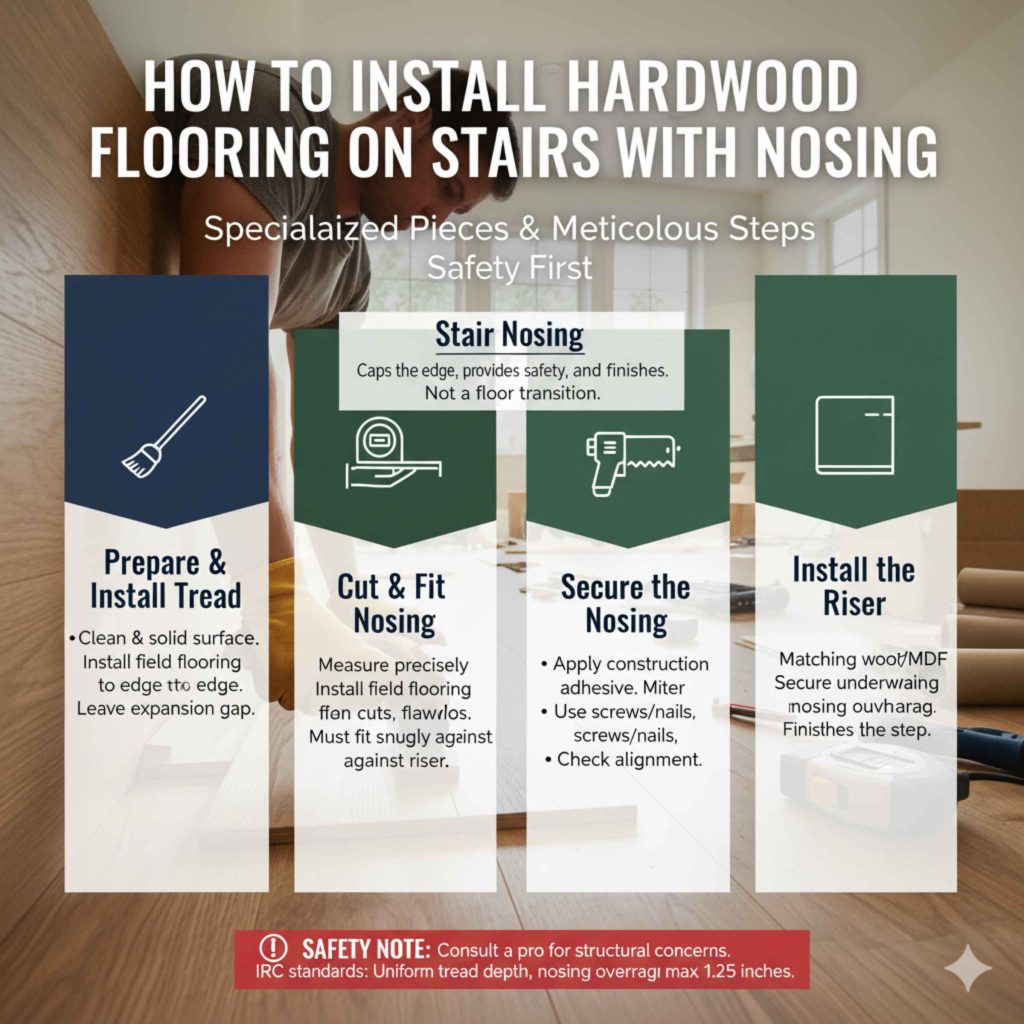
Special Consideration: How to Install Hardwood Flooring on Stairs with Nosing
Stairs are structurally different from floors and require specialized pieces called stair nosing. This piece caps the edge of the stair tread, providing a safe, finished look. You cannot simply use a regular floor transition piece here.
Understanding Stair Nosing
Stair nosing is a profiled trim piece designed to overlap the edge of the tread and meet the riser (the vertical part of the step) or the next section of flooring. It provides a safe, rounded edge that prevents tripping and protects the end grain of your flooring.
Installing hardwood on stairs requires meticulous measurement and often involves a combination of glue, screws, and specialized nails.
Stair Installation Steps (Overview)
- Prepare the Tread: Ensure the existing stair tread surface is clean and solid. If installing over existing treads, ensure they are level and secure.
- Install the Flooring: Install the main field of hardwood flooring right up to the edge of the stair tread where the nosing will sit. Leave the standard expansion gap at the edge of the tread.
- Cut and Fit the Nosing: Measure the width of the tread precisely. The nosing piece must fit perfectly against the riser below it and overlap the installed floor slightly. This often requires precise miter cuts on the ends of the nosing if the stairs are angled, or a simple square cut if they meet a wall.
- Secure the Nosing: Nosing is typically secured using a combination of strong construction adhesive (applied underneath the nosing) and specialized flooring screws or nails driven through the underside or the top edge (which will be covered by the riser material).
- Install the Riser: Once the nosing is secure, install the riser material (often matching wood or painted MDF) underneath the nosing overhang. This secures the nosing from below and finishes the vertical face of the step.
Safety Note: Stairs require extra attention to structural integrity. If you are unsure about the underlying structure of your stairs, consult a professional carpenter before covering them with hardwood. The safety standards for stair tread depth and overhang are strict. According to the International Residential Code (IRC), stair treads must have a uniform depth, and the nosing overhang must not exceed 1.25 inches.
Phase 4: Finishing Touches and Cleanup
Once all the boards are down, your work isn’t quite done. A few final checks ensure longevity and beauty.
Step 7: Final Inspection and Cleanup
Walk the entire floor, tapping on any areas that sound hollow. If you find a hollow spot, it means the cleat didn’t fully engage the subfloor. You may need to carefully drive an extra nail at an angle nearby or use a few drops of wood glue under the seam and clamp it overnight.
Remove all temporary spacers along the walls. Inspect any face-nailed boards (like the last row) and use your nail set to drive those nail heads slightly below the surface.
Step 8: Filling and Finishing (If Applicable)
If you face-nailed, use a stainable wood filler that matches your wood tone to fill the small nail holes. Allow it to dry completely according to the product directions.
If you are installing pre-finished flooring, you are done! If you installed raw wood, this is when the sanding and finishing process begins (which is a whole separate, advanced project!).
Step 9: Reinstalling Trim and Vents
This is the satisfying final step where your hard work is revealed.
- Carefully remove the baseboards you took off earlier.
- Reinstall them, making sure the new baseboard covers the expansion gap completely.
- Reinstall vent covers.
Troubleshooting Common Beginner Hardwood Issues
Even with careful planning, small issues pop up. Here’s how to fix the most common beginner headaches.
| Problem | Likely Cause | Simple Fix |
|---|---|---|
| Gaps between boards after installation. | Insufficient acclimation or not pulling boards tight enough during nailing. | If gaps are minor (less than 1/8″), use a matching wood filler or putty. If large, you may need to carefully pry up a section and re-lay it, ensuring you use the tapping block. |
| Buckling or cupping (edges rise up). | Moisture fluctuation or failure to leave an expansion gap near the walls. | Remove baseboards and check the gap. If the gap is too small, you may need to carefully undercut the baseboard or use a router to trim the edge of the flooring slightly. |
| The nailer is not setting the nail head flush. | The nailer’s pressure setting is too low, or the cleat is hitting a knot/hard spot in the subfloor. | Increase the air compressor pressure slightly. If the subfloor is the issue, use a manual nail set and hammer to finish driving the last few stubborn nails on that board. |
| Squeaky boards. | The board is loose or not fully seated against the subfloor. | Locate the squeak. Drive an extra nail or screw at a slight angle through the tongue area of the board into the subfloor, or apply a small amount of construction adhesive underneath the board if possible. |
Frequently Asked Questions (FAQ) for New Installers
Q1: Can I install hardwood flooring over old vinyl or linoleum?
A: Generally, no. Most manufacturers require a solid wood or plywood subfloor. If the vinyl or linoleum has significant padding or is deteriorating, it must be completely removed. If the vinyl is thin, glued down firmly, and perfectly flat, some experts allow covering it, but it adds a moisture risk and reduces the floor’s stability.
Q2: What is the difference between solid and engineered hardwood installation?
A: Solid hardwood must always be nailed or stapled down to a wood subfloor. Engineered hardwood can often be nailed, glued down, or floated (using a click-lock system over an underlayment), giving you more options depending on the product and subfloor type.
Q3: How much extra wood should I buy?
A: For standard rectangular rooms, plan to purchase 5% to 7% extra material for waste from cuts and mistakes. If the room has many angles, bays, or complex layouts, increase this waste factor to 10% or more.
Q4: Do I need to nail every board?
A: Yes, for a traditional nail-down installation, every board must be fastened securely to the subfloor to prevent movement, squeaking, and gapping. The blind-nailing technique ensures the fasteners are hidden.
Q5: What is the best way to handle hardwood around a fireplace hearth?
A: The flooring must butt right up against the hearth material (tile, stone, or brick). You must leave a small expansion gap (1/4 to 1/2 inch) between the wood and the hearth, which is then covered by a transition piece called a reducer or threshold trim.
Q6: What temperature and humidity should my house be before I start laying wood?
A: The house should be fully climate-controlled for at least one week before delivery. Aim for temperatures between 65°F and 75°F, and relative humidity between 40% and 50%. This stabilizes the wood before installation.
Conclusion: You Can Build Confidence with This Floor
Installing hardwood flooring is one of the most rewarding home improvement projects you can tackle. By respecting the wood—giving it time to acclimate, ensuring your subfloor is rock solid, and taking your time with that crucial first row—you set yourself up for guaranteed success. Remember, woodworking is about patience and precision, not speed. Those small moments spent measuring twice, cutting once, and gently tapping those boards into place are what separate a good floor from a fantastic one.
Don’t forget the safety gear, and trust the process we’ve outlined here. When you finally stand back to admire your newly installed, beautiful hardwood floor, you’ll know every satisfying footstep is a testament to your own skill and dedication. Go ahead, grab that nailer—you’ve got this!