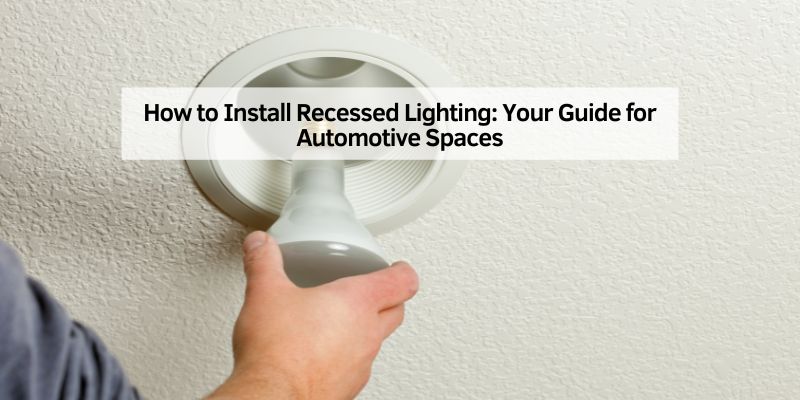
How to Install Recessed Lighting: Your Guide for Automotive Spaces
Hey there, friend! So, you’re curious about how to install recessed lighting? I’m thrilled to dive into this with you because it’s a project that’s super rewarding, especially for us car folks who love a well-lit garage or shop. I still remember the first time I installed recessed lights in my garage—it was like turning a dim cave into a bright showroom for my classic Mustang!
After years of wrenching, building, and tinkering with lighting setups, I’ve learned the ins and outs of getting those sleek, modern lights installed right. Whether you’re lighting up your automotive workspace, a carport, or even a showroom for your rides, this guide’s got you covered. Let’s sit down, like we’re chatting over a workbench with a cold drink, and I’ll walk you through every step in simple terms. This article is packed with practical tips for anyone in the USA looking to brighten their space. Ready to light up your automotive world? Let’s get started!
What Is Recessed Lighting?
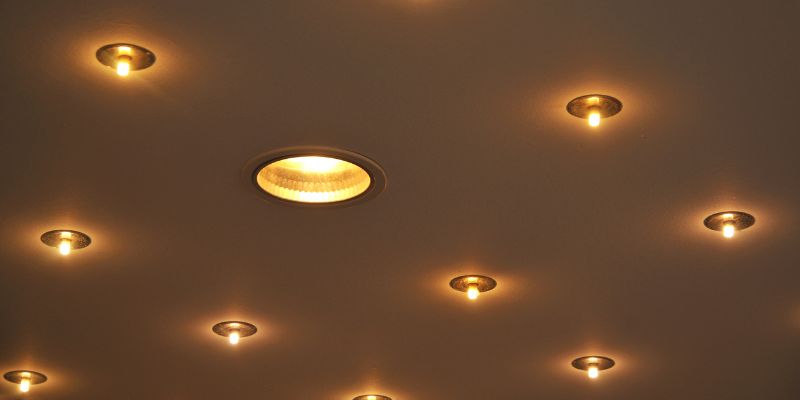
Recessed lighting is a type of light fixture that sits flush with the ceiling. It’s like having a spotlight built into your ceiling, giving a clean, modern look. I love how they make my garage feel spacious without bulky lamps hanging down. They’re perfect for automotive spaces because they provide bright, even light for working on cars or detailing.
These fixtures, often called can lights or downlights, have a housing that goes into the ceiling and a bulb inside. I’ve used them in my shop to highlight my tools and car projects. They come in different sizes, usually 4 to 6 inches, and can be dimmable or adjustable for focus.
Why Choose Recessed Lighting for Automotive Spaces?
Recessed lights are a game-changer for car enthusiasts. Here’s why I’m hooked:
- Bright Illumination: They light up every corner, making it easy to spot bolts or paint flaws. My garage went from shadowy to crystal clear.
- Space-Saving: No dangling fixtures to bump into. I can swing my car doors wide without worry.
- Sleek Look: They blend into the ceiling, keeping my shop tidy. It feels like a pro mechanic’s space.
- Versatile: Adjust or dim them to focus on a car or workbench. I dim mine for chill evenings.
- Energy-Efficient: LED recessed lights save power. My electric bill dropped after switching.
For automotive work, good lighting is a must. Recessed lights let me work late without straining my eyes, whether I’m under the hood or polishing chrome.
Tools and Materials You’ll Need
Before you start, gather your gear. I’ve done this enough to know what’s essential. Here’s my list:
- Recessed Light Kits: Housing and trim for each light. I bought 6-inch LED kits for my garage.
- Ladder: To reach the ceiling safely. I use a 6-foot step ladder.
- Drywall Saw: For cutting holes in the ceiling. My $10 saw works great.
- Tape Measure: To space lights evenly. I keep a 25-foot one handy.
- Stud Finder: To avoid ceiling joists. My magnetic one’s a lifesaver.
- Wire Strippers and Cutters: For electrical connections. I got a $15 combo tool.
- Electrical Cable: 12/2 or 14/2 NM cable, depending on your circuit. I used 14/2 for my setup.
- Wire Nuts and Connectors: To join wires securely. I grabbed a $5 pack.
- Junction Box: If adding new wiring. I needed one for my shop.
- Screwdriver and Drill: For mounting and cutting. My cordless drill’s a workhorse.
- Voltage Tester: To check power safely. I spent $10 on a non-contact tester.
- Safety Gear: Gloves, goggles, and a dust mask. I wear them to stay safe.
I spent about $200 on materials for six lights, including kits and wiring. Check your local hardware store like Home Depot or Lowe’s for deals.
Planning Your Recessed Lighting Layout
Planning is key to a great setup. I sketched my garage layout before starting, and it saved me headaches. Here’s how I do it:
- Measure Your Space: Note ceiling dimensions. My garage is 20×20 feet.
- Decide Light Count: One light per 20-30 square feet works for automotive tasks. I used six lights for 400 square feet.
- Space Evenly: Place lights 4-6 feet apart for uniform light. I spaced mine 5 feet apart in two rows.
- Avoid Joists: Use a stud finder to mark ceiling joists. I dodged mine to make cutting easier.
- Focus on Work Areas: Place lights over benches or car bays. I put two over my lift.
- Consider Dimmers: Plan for dimmable switches if you want control. I added a dimmer for versatility.
I drew a grid on paper, marking light spots and wiring paths. It took 30 minutes but ensured my lights were perfect for wrenching.
Checking Electrical Requirements
Recessed lighting needs power, so check your setup. I’m no electrician, but I’ve learned the basics. Here’s what to know:
- Circuit Capacity: Ensure your circuit can handle the lights. My 15-amp circuit supports six 15-watt LEDs.
- Wire Gauge: Use 14/2 cable for 15-amp or 12/2 for 20-amp circuits. I used 14/2 for my garage.
- Breaker Check: Confirm your breaker isn’t overloaded. I checked mine with a voltage tester.
- Permits: Some areas require permits for electrical work. I called my city hall to confirm.
- Shut Off Power: Always turn off the breaker before working. I double-check with a tester.
If your circuit’s maxed out, you might need a new one. I hired an electrician for $300 to add a circuit when my shop needed more juice. If you’re not comfy with wiring, call a pro.
Choosing the Right Recessed Lights
Picking the right lights makes a difference. I’ve tried a few types, and here’s what I look for:
- Size: 4-inch for small spaces, 6-inch for garages. I chose 6-inch for broad coverage.
- Type: New construction or remodel housings. I used remodel kits for my existing ceiling.
- Bulb: LED for efficiency and brightness. My 15-watt LEDs give 1000 lumens each.
- Color Temperature: 4000K for cool, bright light in shops. I avoid warm 2700K—it’s too cozy for work.
- Trim Style: Baffle trims reduce glare, reflectors boost brightness. I picked baffles for my garage.
- Dimmable: Get dimmable LEDs for flexibility. I love dimming mine for detailing.
I spent $20 per light for quality LED kits at Home Depot. Cheap ones burn out fast, so I stick with brands like Halo or Cree.
Preparing Your Ceiling
Before cutting holes, prep your ceiling. I made this mistake once and had to patch drywall—ugh! Here’s my process:
- Mark Light Locations: Use your layout plan and a pencil. I marked six spots with a tape measure.
- Check for Obstacles: Use a stud finder to avoid joists or pipes. I found a joist and shifted one light.
- Trace Templates: Most kits include a cardboard template. I traced circles for my 6-inch lights.
- Clear the Area: Move cars or tools below. I parked my truck outside to avoid dust.
- Protect Floors: Lay a drop cloth for debris. I used an old tarp from my shop.
This took me an hour but saved time later. Double-check your marks to avoid off-center lights.
Cutting Holes in the Ceiling
Cutting is where it gets real. I was nervous my first time, but it’s easy with practice. Here’s how I do it:
- Gear Up: Wear goggles and a mask—drywall dust is messy. I learned this the hard way!
- Use a Drywall Saw: Poke a hole in the traced circle and saw along the line. I cut slowly for clean edges.
- Check Fit: Test the light housing in the hole. I shaved a bit off one hole for a snug fit.
- Keep Holes Even: Use a level if needed. My ceiling’s flat, so I eyeballed it.
- Save Cutouts: You might need them for patches. I tossed mine but regretted it.
Each hole took 5 minutes. I vacuumed the dust to keep my shop clean. If you hit a joist, reposition the light or consult a pro.

Running Electrical Wiring
Wiring sounds scary, but it’s manageable for remodel kits. I followed my electrician friend’s advice. Here’s the steps:
- Turn Off Power: Flip the breaker and test with a voltage tester. I triple-check for safety.
- Access Wiring: Use the attic or crawlspace to run cables. My garage has attic access, so I ran wires there.
- Run Cable: Feed 14/2 cable from a junction box or existing circuit to each light. I stapled cables to joists every 4 feet.
- Connect to Lights: Most remodel kits have push-in connectors. I stripped wires and pushed them into my housings.
- Secure Junction Box: If adding a new box, mount it to a joist. I used an existing box to save time.
Wiring took me two hours for six lights. If you’re new to electrical work, watch videos or hire an electrician to avoid shocks or code violations.
Installing the Recessed Light Housings
Now it’s time to mount the lights. I love this part—it’s when things start looking cool! Here’s how:
- Insert Housing: Push the remodel housing into the hole. My kits had clips that grip the drywall.
- Secure Clips: Press or twist clips to lock in place. I checked that each one was tight.
- Connect Wires: Attach the housing’s wires to your cable with wire nuts. I matched black to black, white to white, and ground to ground.
- Push Up: Slide the housing fully into the ceiling. My LEDs clicked in easily.
- Test Fit: Ensure it’s flush with the ceiling. I adjusted one that was crooked.
This took 10 minutes per light. I turned the power back on briefly to test connections before moving to trims.
Adding Trim and Bulbs
The trim and bulb finish the look. I was amazed how sleek my garage looked after this step. Here’s what to do:
- Choose Trim: Snap or screw the trim onto the housing. My baffles trims clipped in.
- Install Bulb: Screw or clip the LED bulb into the housing. My kits had integrated LEDs, so no extra bulb was needed.
- Check Alignment: Ensure trims are flush and even. I nudged one for a perfect fit.
- Clean Up: Wipe dust off trims. I used a rag to make them shine.
- Test Lights: Turn on the power and check each light. All six of mine lit up perfectly!
This was quick—5 minutes per light. I dimmed them to test my switch, and it felt like a pro shop.
Connecting to a Switch or Dimmer
You’ll need a switch to control your lights. I added a dimmer for flexibility. Here’s how:
- Choose a Switch: Standard or dimmable. I got a $15 LED-compatible dimmer.
- Run Cable: Connect the light circuit to the switch box. I ran 14/2 from my junction box.
- Wire the Switch: Connect black (hot) to the switch, white (neutral) to neutral, and ground to ground. I used wire nuts for tight connections.
- Mount Switch: Screw it into the wall box and add a faceplate. My dimmer looked sleek.
- Test: Turn on the breaker and flip the switch. My lights dimmed smoothly from bright to soft.
Wiring the switch took 30 minutes. If you’re unsure, an electrician can do this for $100-$200.
Safety Tips for Installing Recessed Lighting
Safety keeps your project fun and injury-free. I’ve had close calls, so here’s what I do:
- Power Off: Always shut off the breaker. I test with a voltage tester every time.
- Wear Gear: Goggles, gloves, and a mask protect you. I got drywall dust in my eye once—ouch!
- Use a Stable Ladder: No wobbly stools. My ladder’s rated for my weight.
- Avoid Overloading Circuits: Check your breaker’s capacity. I consulted my electrician friend.
- Handle Wires Carefully: Don’t nick insulation. I strip wires gently to avoid shorts.
I keep a first-aid kit in my shop for emergencies. Safety first means I can enjoy my lights worry-free.
Troubleshooting Common Issues
Sometimes things go wrong, but I’ve fixed most hiccups. Here’s what to check:
- Lights Won’t Turn On: Check connections or the breaker. I found a loose wire nut once.
- Flickering: Could be a bad dimmer or bulb. I swapped my dimmer for an LED-compatible one.
- Uneven Holes: Patch with drywall compound. I fixed a sloppy cut with $5 spackle.
- Overheating: Ensure housings have clearance from insulation. I moved the attic insulation away.
- Buzzing: Loose trim or bad dimmer. I tightened my trims to stop a hum.
I test each step to catch issues early. If you’re stumped, call an electrician for peace of mind.
Maintaining Your Recessed Lights
Recessed lights need little upkeep, but I do these to keep them shining:
- Clean Trims: Wipe dust monthly with a damp rag. I clean mine during shop sweeps.
- Check Bulbs: Replace burned-out LEDs every 5-10 years. My integrated LEDs haven’t needed swapping yet.
- Inspect Wiring: Look for loose connections yearly. I check my junction box during maintenance.
- Dust Housing: Clear attic dust to prevent overheating. I vacuumed mine last spring.
- Test Dimmers: Ensure smooth operation. My dimmer’s still perfect after two years.
Maintenance takes 15 minutes a year but keeps my garage bright and safe. I make it part of my shop routine.
Cost of Installing Recessed Lighting
Costs vary, but I kept mine affordable. Here’s my breakdown for six lights:
- Light Kits: $20 each, so $120 total.
- Wiring and Connectors: $30 for cable, nuts, and a junction box.
- Tools: $50 for saw, tester, and strippers (I already had some).
- Dimmer Switch: $15 for a quality one.
- Permit: $50 in my area, but check locally.
- Total DIY: About $265.
Hiring a pro costs $100-$200 per light, so $600-$1200 for six. I saved big by doing it myself, but spent $300 on an electrician for a new circuit. Shop sales at hardware stores to cut costs.
Why Recessed Lighting Rocks for Car Folks
Recessed lights make my automotive life better. They’re bright enough to spot every nut and bolt, sleek enough to keep my shop looking sharp, and efficient enough to save cash. I feel like a pro mechanic every time I flip the switch and see my cars glow. They’re perfect for garages, carports, or showrooms, turning any space into a gearhead’s dream.
Wrapping It Up with a Bright Glow
Hey, buddy, you’re now a recessed lighting pro! From planning your layout to flipping that dimmer switch, you’ve got all the know-how to light up your automotive space. I remember my first install, fumbling with wires, but now I grin every time my garage sparkles. Head to your shop, grab those tools, and start your lighting project with confidence. Whether you’re wrenching on a hot rod or showcasing your pride and joy, these lights will make it shine. So, cut those holes, wire it up, and bask in the glow—I’m cheering you on!
FAQ
What is recessed lighting?
It’s a fixture that sits flush with the ceiling, perfect for bright, sleek lighting in garages.
Do I need an electrician to install recessed lights?
Not always, but hire one for new circuits or if you’re unsure. I did most of mine myself.
How many recessed lights do I need for my garage?
One per 20-30 square feet. I used six for my 20×20-foot garage.
Can I install recessed lights in an existing ceiling?
Yes, use remodel kits. I installed mine in my finished garage ceiling.
How much does it cost to install recessed lighting?
About $50 per light for DIY, $100-$200 per light with a pro. I spent $265 for six.
Are LED recessed lights worth it?
Yes, they’re bright, efficient, and last year’s. My LEDs saved me on power bills.
Is recessed lighting safe for automotive shops?
Yes, if installed correctly with proper wiring and clearance. I follow safety steps to avoid issues.