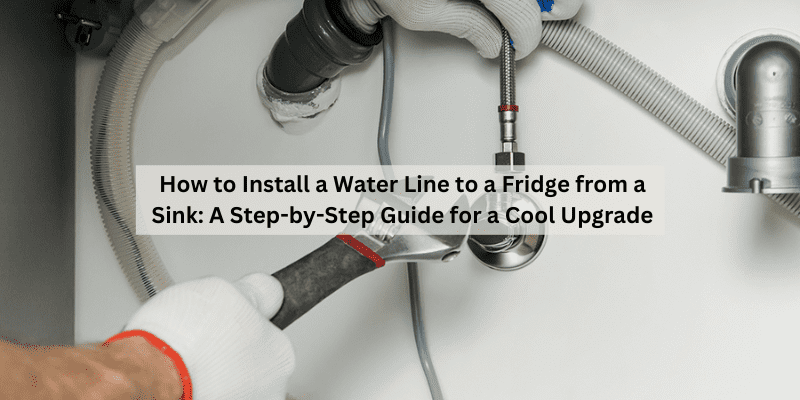
How to Install a Water Line to a Fridge from a Sink: A Step-by-Step Guide for a Cool Upgrade
Hey there! So, you’re thinking about hooking up a water line to your fridge for that awesome ice maker or water dispenser? I totally get why you’d want to do this—it’s such a game-changer to have cold water and ice on tap. When I moved into my new place, my fridge didn’t have a water line, and I was determined to fix that. I’d never done it before, but after some research and a bit of trial and error, I got it working perfectly. Now, I’m excited to share everything I’ve learned with you! In this guide, I’ll walk you through how to install a water line to your fridge from the sink, step by step. Whether you’re handy with tools or a total beginner, I’ve got you covered with clear, practical tips. Let’s get started and make your fridge the coolest appliance in your kitchen!
Why Install a Water Line to Your Fridge?
First, let’s talk about why this project is worth your time. When I got my fridge with an ice maker, I was thrilled—until I realized it needed a water line to work. Without it, the ice maker was just a fancy shelf. Connecting a water line means you can enjoy ice cubes and chilled water anytime without buying bags of ice or refilling trays. It’s convenient, saves money in the long run, and makes your kitchen feel a bit more luxe.
Plus, it’s not as hard as it sounds. I was nervous at first, thinking I’d need to hire a plumber, but with the right tools and a little patience, I did it myself for under $50. This project can save you from pricey professional installation, and it’s super satisfying to do it yourself. Ready to dive in? Let’s figure out what you need to know before you start.
Assessing Your Setup
Before you grab your tools, you need to check a few things. I learned this the hard way when I bought the wrong tubing and had to make a second trip to the hardware store. Here’s what I do now:
- Check your fridge: Look at the back or manual to confirm it has a water inlet for an ice maker or dispenser. Mine had a threaded port labeled “water line.”
- Locate the sink’s water supply: Most sinks have a cold water shut-off valve under the cabinet. This is where you’ll connect the new line. My valve was easy to spot—a small knob on a copper pipe.
- Measure the distance: Figure out how far your fridge is from the sink. I used a measuring tape to estimate about 15 feet for my setup.
- Inspect the space: Look for obstacles like cabinets or walls between the sink and fridge. I had to plan a route under my cabinets to keep the line hidden.
Taking these steps helps you choose the right materials and avoid surprises. Once you’ve got a clear picture, you’re ready to gather supplies.
Gathering the Right Tools and Materials
Having the right stuff makes this project so much easier. I put together a list based on what I used for my installation. Here’s what you’ll need:
- Water line kit: I bought a ¼-inch copper or plastic tubing kit for about $20. It includes tubing, a saddle valve, and fittings.
- Adjustable wrench: This is for tightening connections. I already had one in my toolbox.
- Screwdriver: You’ll need it to secure the saddle valve. A basic flathead or Phillips works fine.
- Drill and bits: If you need to make holes for the tubing to pass through cabinets, a drill is handy. I used a ½-inch bit.
- Pipe cutter or utility knife: For cutting copper or plastic tubing to size. I used a $5 pipe cutter.
- Teflon tape: This seals threaded connections to prevent leaks. A small roll costs about $2.
- Bucket and towel: These catch any water drips during installation. Trust me, I was glad I had them!
You can find most of these at a hardware store or online. My total cost was around $30 since I already owned some tools. Double-check your fridge’s manual for any specific requirements, like tubing size.
Method 1: Using a Saddle Valve for Easy Installation
This is the method I used, and it’s great for beginners. A saddle valve taps into your sink’s cold water line without cutting pipes. Here’s how I did it:
- Turn off the water: Find the shut-off valve under your sink and turn it off. I opened the faucet to drain any leftover water.
- Attach the saddle valve: Place the saddle valve over the cold water pipe. It’s like a clamp that pierces the pipe. I tightened it with a screwdriver until it felt secure.
- Connect the tubing: Attach one end of the ¼-inch tubing to the saddle valve. I used an adjustable wrench to tighten the compression fitting.
- Run the tubing: Route the tubing from the sink to the fridge. I tucked mine along the baseboards and through a small hole I drilled in a cabinet.
- Connect to the fridge: Attach the other end to the fridge’s water inlet. My fridge had a threaded port, so I used Teflon tape and tightened it with a wrench.
- Turn on the water: Slowly open the saddle valve and check for leaks. I had a tiny drip at first, so I tightened the fittings a bit more.
This method took me about an hour, and my ice maker was churning out cubes by the next day. It’s straightforward and doesn’t require advanced plumbing skills.
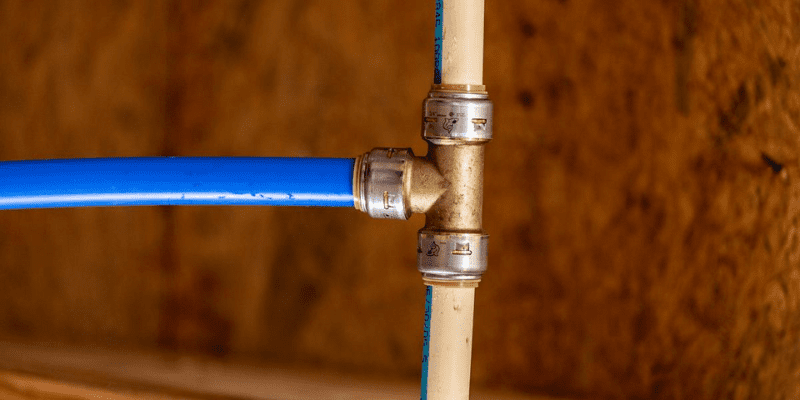
Method 2: Using a T-Fitting for a More Permanent Setup
If you’re comfortable with basic plumbing, a T-fitting (or tee valve) is a sturdier option. I tried this on a friend’s fridge, and it’s great for a long-term solution. Here’s how it works:
- Shut off the water: Turn off the cold water valve under the sink. I placed a bucket underneath to catch drips.
- Cut the pipe: Use a pipe cutter to remove a small section of the cold water line where you’ll install the T-fitting. I cut about an inch out.
- Install the T-fitting: Slide the T-fitting onto the pipe and secure it with compression fittings. I used Teflon tape on the threads for a tight seal.
- Attach the tubing: Connect the ¼-inch tubing to the T-fitting’s outlet. I used a compression nut to keep it secure.
- Run the tubing: Like with the saddle valve, route the tubing to the fridge. I drilled a hole through a cabinet to keep it neat.
- Connect to the fridge: Attach the tubing to the fridge’s water inlet and tighten it.
- Check for leaks: Turn the water back on and inspect all connections. I had to tweak one fitting to stop a small leak.
This method is a bit more involved, butit it feels more professional. It took me about 90 minutes, but the result was super reliable.
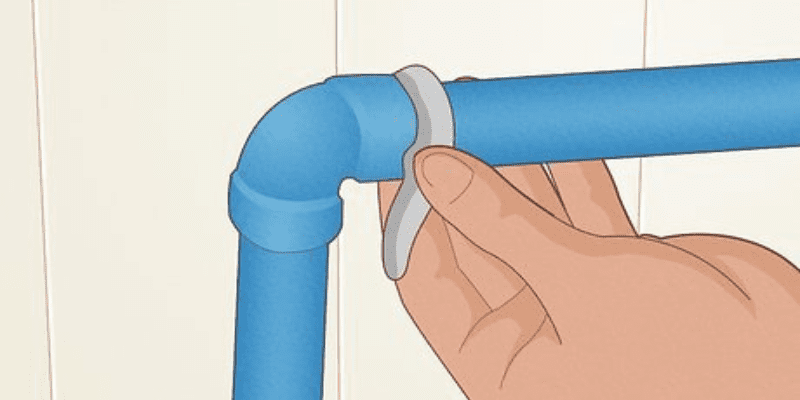
Method 3: Using a Push-Fit Connector for a No-Tools Option
If you want the easiest setup possible, push-fit connectors are a dream. I helped a neighbor use this method, and we were done in under 45 minutes. Here’s how:
- Turn off the water: Shut off the cold water valve under the sink. I used a towel to catch any drips.
- Choose a push-fit connector: These fittings snap onto the pipe without tools. I got a ¼-inch push-fit tee for about $10.
- Attach the connector: Push the connector onto the cold water line until it clicks. It’s so simple—I was amazed at how fast it was.
- Connect the tubing: Snap the ¼-inch tubing into the connector’s outlet. I gave it a gentle tug to make sure it was secure.
- Run the tubing: Route the tubing to the fridge, keeping it out of sight. I used adhesive clips to stick it to the cabinet’s underside.
- Connect to the fridge: Push the tubing into the fridge’s water inlet. Mine had a push-fit port, so no tools were needed.
- Test the system: Turn on the water and check for leaks. Everything was perfect on the first try!
This method is perfect if you’re not super handy or want a quick setup. It’s a bit pricier, but the ease is worth it.
Securing and Hiding the Water Line
Once the line is connected, you want it to look neat and stay safe. I made a mess of my first attempt with tubing dangling everywhere, so here’s what I do now:
- Use clips or tape: Secure the tubing to cabinets or baseboards with adhesive clips or painter’s tape. I used clips to keep mine tidy.
- Drill holes if needed: If the tubing needs to go through cabinets, drill small holes. I used a ½-inch bit and sanded the edges to avoid snags.
- Cover exposed tubing: If the line is visible, cover it with a plastic conduit. I found a white one that blended with my kitchen walls.
- Check for kinks: Make sure the tubing isn’t bent or pinched. I had to reroute mine once to avoid a sharp corner.
A neat installation looks better and prevents damage to the line. My kitchen looks clean, and I don’t worry about tripping over tubing.
Testing and Troubleshooting
After connecting everything, you need to make sure it works. I had a few hiccups the first time, but here’s how I test and fix issues:
- Turn on the water slowly: Open the shut-off valve gradually. I watched for drips at every connection.
- Check the fridge: Run the water dispenser or ice maker to ensure water flows. My ice maker took a few hours to start producing.
- Look for leaks: Inspect all fittings. I found a small leak at the saddle valve and tightened it with a wrench.
- Fix low water pressure: If the flow is weak, check for kinks in the tubing. I straightened a bent section, and it fixed the issue.
- Clear air from the line: Run the dispenser for a minute to flush out air bubbles. I filled a glass or two before it ran clear.
Testing takes a few minutes but saves you from bigger problems later. My fridge was up and running smoothly after a quick check.
Comparing Installation Methods
To help you choose the best method, here’s a table based on my experiences:
| Method | Difficulty | Cost | Time Needed | Tools Needed | Best For |
|---|---|---|---|---|---|
| Saddle Valve | Easy | $15-$25 | 1 hour | Screwdriver, wrench, pipe cutter | Beginners, quick setup |
| T-Fitting | Medium | $20-$35 | 1.5 hours | Pipe cutter, wrench, Teflon tape | Permanent, reliable install |
| Push-Fit Connector | Easy | $25-$40 | 45 min | None | Tool-free, fast installation |
I loved the push-fit method for its simplicity, but the T-fitting felt more secure for long-term use. Pick what matches your skills and budget.
Safety Tips for a Smooth Installation
Safety is key when working with water lines. I learned a few lessons after a small water spill in my kitchen. Here’s what to keep in mind:
- Turn off the water: Always shut off the water supply before starting. I double-check the valve to avoid surprises.
- Keep a bucket handy: Place it under the pipe to catch drips. It saved my floor more than once.
- Check for leaks: Inspect connections carefully after turning the water on. I use a paper towel to spot tiny drips.
- Avoid overtightening: Tighten fittings snugly, but don’t force them. I cracked a fitting once by going too hard.
These tips keep your kitchen dry and your project stress-free.
Maintaining Your Water Line
Once your water line is installed, a little maintenance keeps it running smoothly. Here’s what I do:
- Check for leaks monthly: I look at all connections to catch issues early.
- Replace tubing every 5 years: Copper or plastic tubing can wear out. I marked my calendar to check mine in 2028.
- Clean the fridge’s filter: If your fridge has a water filter, replace it as recommended. Mine needs a new one every 6 months.
- Inspect the valve: Make sure the saddle or T-fitting valve isn’t corroding. I give mine a quick look during cleaning.
These steps ensure your ice maker and dispenser work perfectly for years.
Why I Love This Project
Installing a water line to my fridge was one of the most rewarding DIY projects I’ve done. Every time I grab a glass of cold water or toss ice into a drink, I feel a little spark of pride. It’s not just about convenience—it’s about making my kitchen work better for me. I saved money by doing it myself, and I learned skills I can use for other home projects. Whether you choose a saddle valve or a push-fit connector, this is a project anyone can tackle with a bit of patience.
Conclusion
There you go—a complete guide to installing a water line to your fridge from the sink! I’ve been through this process myself, and I’m so excited to share these tips with you. From picking the right method to securing the tubing, you’ve got everything you need to make your fridge a water-dispensing superstar. This project is easier than it looks, and the payoff is huge—ice and cold water whenever you want! Grab your tools, take it one step at a time, and enjoy the satisfaction of a job well done. Your kitchen is about to get a whole lot cooler. Happy installing!
Frequently Asked Questions
Can I install a water line on any fridge?
Most fridges with an ice maker or water dispenser have a water inlet. Check your fridge’s manual or back for a ¼-inch port. Mine had one, and it was easy to spot.
Do I need a plumber for this project?
Not usually! I did it myself with basic tools. If you’re nervous about cutting pipes, use a push-fit connector for a no-fuss setup.
How long does the installation take?
It depends on the method. The saddle valve took me an hour, the T-fitting about 90 minutes, and the push-fit was under 45 minutes. Plan for a bit extra if it’s your first time.
What if my fridge is far from the sink?
You can buy longer tubing—up to 25 feet or more. I used 15 feet and routed it under the cabinets to keep it hidden.
Will this affect my fridge’s warranty?
Installing a water line shouldn’t void the warranty, but check your manual. I called my fridge’s manufacturer to confirm, and they said it was fine as long as I followed their guidelines.