How to Lock a Sliding Closet Door
Hey there! If you’re reading this, chances are you’ve got a sliding closet door that’s begging for a bit more security or privacy. I get it—those sleek, space-saving doors are fantastic, but sometimes you need to keep curious kids, nosy roommates, or even pets out of your closet. I’ve been there, wrestling with my own sliding closet doors in my home, trying to figure out the best way to lock them without breaking the bank or tearing up the place. After plenty of trial and error, I’m excited to share everything I’ve learned about locking a sliding closet door. Whether you’re a DIY newbie or a seasoned home improver, this guide is packed with practical tips, step-by-step instructions, and solutions that actually work. Let’s dive in and make your closet a fortress!
Why You Might Need to Lock a Sliding Closet Door
Let’s start with the basics: why bother locking a sliding closet door? For me, it was about keeping my toddler from turning my closet into her personal dress-up playground. Sliding closet doors are super common in American homes, especially in bedrooms and apartments where space is tight. But unlike traditional hinged doors, they don’t always come with built-in locks. Here’s why you might want to add one:
- Privacy: If you share your home with roommates or family, a locked closet keeps your personal stuff, well, personal.
- Safety: Got kids or pets? Locking the closet prevents them from getting into things they shouldn’t, like cleaning supplies or fragile items.
- Organization: A lock can deter others from rummaging through your neatly arranged closet.
- Security: If you store valuables—like jewelry or important documents—a lock adds an extra layer of protection.
I learned this the hard way when my cat figured out how to paw open my sliding door and turned my sweaters into her new nap spot. Locking the door solved that problem fast!
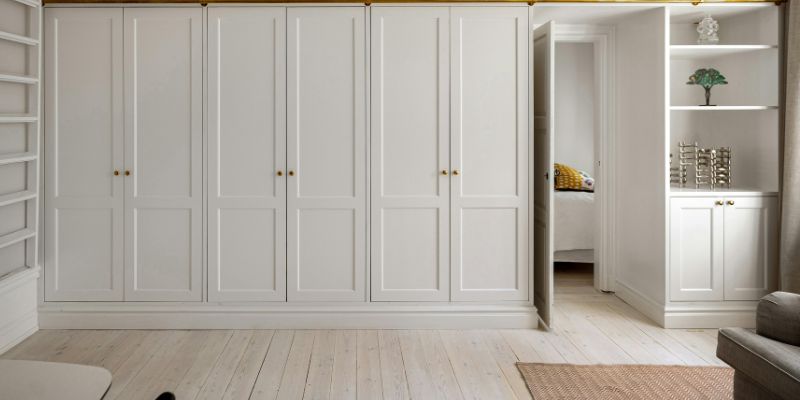
Types of Sliding Closet Doors
Before we jump into locking solutions, let’s talk about the types of sliding closet doors you might have. Knowing your door type helps you pick the right lock. I’ve worked with a few different setups in my home and rentals, so here’s what I’ve come across:
- Bypass Doors: These are the most common. Two panels slide past each other on parallel tracks. You’ll find them in most bedrooms.
- Pocket Doors: These slide into a wall cavity, disappearing when open. They’re trickier to lock but not impossible.
- Barn-Style Sliding Doors: These are trendy, single-panel doors that slide along a track mounted above the doorway. They’re more decorative but can still be secured.
Each type needs a slightly different approach to locking, so keep your door in mind as we go through the options. If you’re unsure what you’ve got, take a quick look at how the door moves and where the tracks are.

Tools and Materials You’ll Need
I’m all about keeping things simple, so I’ve listed the basic tools and materials you might need for most locking methods. I always make sure to have these on hand before starting any project:
| Item | Purpose |
|---|---|
| Screwdriver | For installing locks or brackets |
| Drill | To make pilot holes for screws |
| Measuring tape | To ensure accurate placement |
| Level | To keep things straight |
| Lock kit (varies) | Depends on the lock type you choose |
| Double-sided tape | For temporary or renter-friendly options |
| Marker or pencil | To mark spots for drilling or placement |
You might not need everything for every method, but having these ready saves time. I keep a small toolbox in my garage for projects like this—it’s a lifesaver!
Method 1: Installing a Sliding Door Lock Kit
One of the first things I tried was a dedicated sliding door lock kit. These are designed specifically for bypass sliding doors, and they’re pretty straightforward to install. Here’s how I did it:
- Choose the Right Lock Kit: I found kits at my local hardware store for about $15-$30. Look for ones labeled for sliding closet doors. They usually include a latch and a receiver plate.
- Position the Lock: Hold the latch against the edge of one door where it overlaps the other. Mark the screw holes with a pencil. I made sure it was at a height my kids couldn’t reach.
- Drill Pilot Holes: Use a drill bit slightly smaller than your screws to make pilot holes. This prevents the wood from splitting.
- Attach the Latch: Screw the latch onto the door. I used a screwdriver for a snug fit.
- Install the Receiver: Align the receiver plate on the second door so it catches the latch when closed. Mark, drill, and screw it in place.
- Test It: Slide the doors and lock them. Make sure it’s secure but doesn’t jam the doors.
This method worked great for my bedroom closet. It’s sturdy, and the lock feels professional. If you’re not handy, don’t worry—it took me about 20 minutes, and I’m no carpenter!
Method 2: Using a Slide Bolt Lock
If you want something a bit more heavy-duty, a slide bolt lock is a solid choice. I used this for a closet where I store my tools because it feels extra secure. Here’s what I did:
- Pick a Slide Bolt: These are simple metal bolts that slide into a keeper. I got one for about $10 online.
- Mark the Placement: Close the doors and decide where the bolt will go. I placed mine near the top to keep it out of reach.
- Attach the Bolt to the Door: Hold the bolt against the edge of one door, mark the screw holes, and drill pilot holes. Screw it in tightly.
- Install the Keeper: Slide the bolt into the locked position and mark where it hits the second door or the frame. Attach the keeper there with screws.
- Check the Fit: Slide the bolt back and forth to ensure it locks smoothly.
I love how solid this feels. It’s not the prettiest, but it gets the job done, especially for closets with heavier items.
Method 3: Renter-Friendly Options with Adhesive Locks
When I lived in an apartment, I couldn’t drill holes without risking my deposit. That’s when I discovered adhesive locks, which are a game-changer for renters. Here’s how I made it work:
- Find an Adhesive Lock: Look for stick-on latches or magnetic locks at hardware stores or online. I found a pack of two for $12.
- Clean the Surface: Wipe the door surfaces with rubbing alcohol to remove dust or grease. This helps the adhesive stick.
- Position the Lock: Peel off the adhesive backing and press the lock onto one door. I placed mine where the doors overlap for maximum security.
- Attach the Receiver: Stick the receiver piece on the other door, aligning it with the lock. Hold it firmly for 30 seconds to set the adhesive.
- Let It Cure: Wait 24 hours before using the lock to ensure it sticks properly.
This method saved me in my old apartment. It’s not as strong as a screwed-in lock, but it held up for everyday use. Plus, it’s easy to remove without damage.
Method 4: DIY Solutions with Household Items
Sometimes, you just need a quick fix without spending a dime. I’ve had moments where I needed to lock my closet temporarily, like during a family gathering. Here are a couple of DIY tricks I’ve used:
- Dowel Rod Trick: Cut a wooden dowel or broomstick to fit tightly between the door and the track’s end. I wedged one in to keep the door from sliding open. It’s cheap and effective but not super secure.
- Velcro Strips: I stuck heavy-duty Velcro strips on both doors where they overlap. Press them together to “lock” the door. It’s not Fort Knox, but it kept my cat out!
- Zip Tie Hack: For a one-time fix, I looped a zip tie through the door handles (if your doors have them). Snip it off when you’re done.
These are great for short-term needs or if you’re waiting for a proper lock to arrive. I’ve used the dowel trick when I had guests over and didn’t want anyone poking around.
Method 5: Locking Pocket Sliding Doors
Pocket doors are a bit trickier because they slide into the wall. I had one in a rental once, and it took some creativity to secure it. Here’s what worked for me:
- Use a Pocket Door Lock Kit: These are special locks designed for pocket doors. I found one for about $25 that included a latch and strike plate.
- Install the Lock: Follow the kit’s instructions, which usually involve cutting a small notch in the door edge for the latch. I used a chisel for this, but go slow if you’re new to it.
- Attach the Strike Plate: This goes on the door frame where the latch catches. I had to be precise to make sure it lined up.
- Test the Lock: Slide the door in and out to ensure it locks smoothly without sticking.
If you’re not comfortable cutting into the door, a temporary adhesive lock can work here too, but it’s less secure. Pocket doors are a bit of a hassle, but the right lock makes a big difference.
Method 6: Securing Barn-Style Sliding Doors
Barn-style doors are gorgeous but can be tough to lock because they’re exposed. I helped a friend secure one in her home, and here’s what we did:
- Choose a Barn Door Lock: Look for a teardrop latch or hook-and-eye lock designed for barn doors. I found a stylish one for $20 that matched her decor.
- Mount the Latch: Attach the latch to the door’s edge, usually near the top or bottom. Mark and drill pilot holes, then screw it in.
- Install the Receiver: Place the receiver on the wall or frame where the latch catches. Make sure it’s aligned properly.
- Test and Adjust: Slide the door and lock it to check for smoothness. I had to tweak the receiver’s position slightly to get it perfect.
This method adds a rustic charm while keeping the door secure. It’s a win-win for style and function.
Maintenance Tips for Sliding Door Locks
Once you’ve got your lock installed, a little maintenance goes a long way. I learned this after my first lock started sticking after a year. Here’s what I do to keep things smooth:
- Lubricate the Lock: Use a graphite-based lubricant on moving parts every 6 months. I just squirt a little in and work the lock a few times.
- Check Screws: Tighten any loose screws with a screwdriver. I do this every few months to prevent wobbling.
- Clean the Tracks: Dust and debris can make doors harder to slide, which stresses the lock. I vacuum the tracks and wipe them with a damp cloth.
- Inspect Adhesive Locks: If you used stick-on locks, check the adhesive every few weeks. I had to replace one after it started peeling.
A little TLC keeps your lock working like new and saves you from replacing it too soon.
Choosing the Right Lock for Your Needs
With so many options, how do you pick the best one? Here’s what I consider based on my experience:
- Budget: DIY solutions like dowels or Velcro are cheapest, while lock kits range from $10-$30.
- Permanence: If you own your home, screwed-in locks are durable. Renters should stick to adhesive or temporary options.
- Security Level: For valuables, go with a slide bolt or lock kit. For light privacy, adhesive locks or DIY tricks work fine.
- Aesthetics: Barn door locks can double as decor, while slide bolts are more utilitarian.
I ended up mixing and matching—adhesive locks for my apartment days and a slide bolt for my current home. Think about your specific needs and go from there.
Common Mistakes to Avoid
I’ve made my fair share of oops moments, so let me save you some trouble:
- Skipping Measurements: I once installed a lock too low, and my kid figured it out in a day. Measure carefully and keep locks out of reach.
- Using Weak Adhesive: Cheap adhesive locks can fail. Spend a little more for quality.
- Over-tightening Screws: This can strip the wood or damage the door. I learned to go gentle with the screwdriver.
- Ignoring Door Alignment: If your doors aren’t sliding smoothly, the lock won’t work right. Fix the tracks first.
Take your time, and you’ll avoid the headaches I had early on.
Conclusion
Locking a sliding closet door doesn’t have to be a headache. Whether you’re keeping out curious kids, protecting your stuff, or just wanting a bit of privacy, there’s a solution that fits your needs and budget. I’ve tried everything from fancy lock kits to simple dowel rods, and each has its place depending on the situation. The key is to know your door type, pick a lock that matches your lifestyle, and install it with care. I hope this guide makes your project as smooth as it was for me once I got the hang of it. Now, go make that closet secure and enjoy the peace of mind!
Frequently Asked Questions
Can I lock a sliding closet door without drilling?
Yes! I’ve used adhesive locks and Velcro strips in rentals. They stick well if you clean the surface first and use quality products. For a temporary fix, try a dowel rod wedged in the track.
How do I know which lock is best for my sliding door?
It depends on your needs. For high security, I’d go with a slide bolt or lock kit. For renters, adhesive locks are great. If you want something quick and cheap, a DIY solution like a zip tie or dowel works.
Are sliding door locks safe for homes with kids?
Absolutely, as long as you place them out of reach. I put mine high up so my toddler can’t get to them. Always test the lock to make sure it’s secure.
Can I install a lock on a pocket sliding door?
Yes, but it’s a bit trickier. I used a pocket door lock kit that required a small notch in the door. If you’re not comfortable cutting, try an adhesive lock for a temporary fix.
How do I maintain my sliding door lock?
I lubricate mine with graphite every 6 months and tighten screws as needed. Also, keep the door tracks clean to prevent sticking. It’s simple but keeps the lock working smoothly.