How to Remove a Schlage Door Handle: A Step-by-Step Guide to Easy Removal
Most Schlage door handles release with one push: press a straightened paperclip into the lever’s pin hole until it clicks, then pull the handle free — Custom Series levers use a hex-screw and Allen wrench instead. Forcing it without releasing the pin can bend the spindle or snap the retainer clip, turning a quick fix into a locksmith call. This guide covers the pin-hole method, hex-screw method, older A-Series handles, and stripped-screw fixes.
I chose a Schlage Accent lever for my own front door and have removed and reinstalled it more than once — for a wobbly screw, a rekey, and a style swap. Everything below is the exact process, tools, and mistakes from that hands-on experience.
Why You Might Need to Remove a Schlage Door Handle
Let’s start with why you’d want to take off a Schlage door handle in the first place. Schlage makes some of the best door hardware out there—sturdy, stylish, and reliable. I chose a Schlage Accent lever for my front door because it looked sleek and felt solid. But even great handles need attention sometimes.
You might need to remove one to tighten loose screws, like I did when my handle started wobbling. Or maybe you’re replacing it with a new style or a smart lock. I helped a friend swap out a Schlage knob for a lever because her cat kept opening the door! Other times, you might need to rekey the lock for security or remove it to paint the door. Whatever the reason, knowing how to do it saves you from calling a locksmith, which can cost $50-$100. For more knob, deadbolt, and smart lock projects, see our full door hardware & locks guides hub.
Understanding Schlage Door Handles
Before you grab your tools, let’s talk about what makes Schlage handles unique. Schlage offers knobs, levers, and handlesets in styles like Accent, Bowery, and Latitude. I’ve worked with both knobs and levers, and they’re built to last. Most have a hidden release mechanism, which makes them look sleek but can be tricky to remove if you don’t know the trick.
Schlage handles come in two main types: passage (non-locking, for closets), privacy (locking, for bathrooms), and keyed entry (for exterior doors). My front door has a keyed entry lever, which needed a key to remove. Some older models, like the 1960s A-series, have different setups, but most modern ones follow a similar design. Knowing your handle type helps you figure out the removal process.
A Schlage lever or knob handle is a spring-loaded door fitting that couples an interior and exterior grip through a spindle running through the door’s bore hole. Most modern residential models release with a spring-loaded pin (press-and-pull) or a hex set screw (loosen-and-slide) hidden on the interior side’s neck. Keyed entry versions also lock the spindle to the cylinder, so the key must be turned before the pin will release.
Tools You’ll Need
Having the right tools makes this job so much easier. I learned this after trying to use a butter knife—big mistake! Here’s what I use now:
- Small flathead screwdriver: To pry off covers or press release pins. I got one for $2.
- Phillips screwdriver: To remove mounting screws. I already had one in my toolbox.
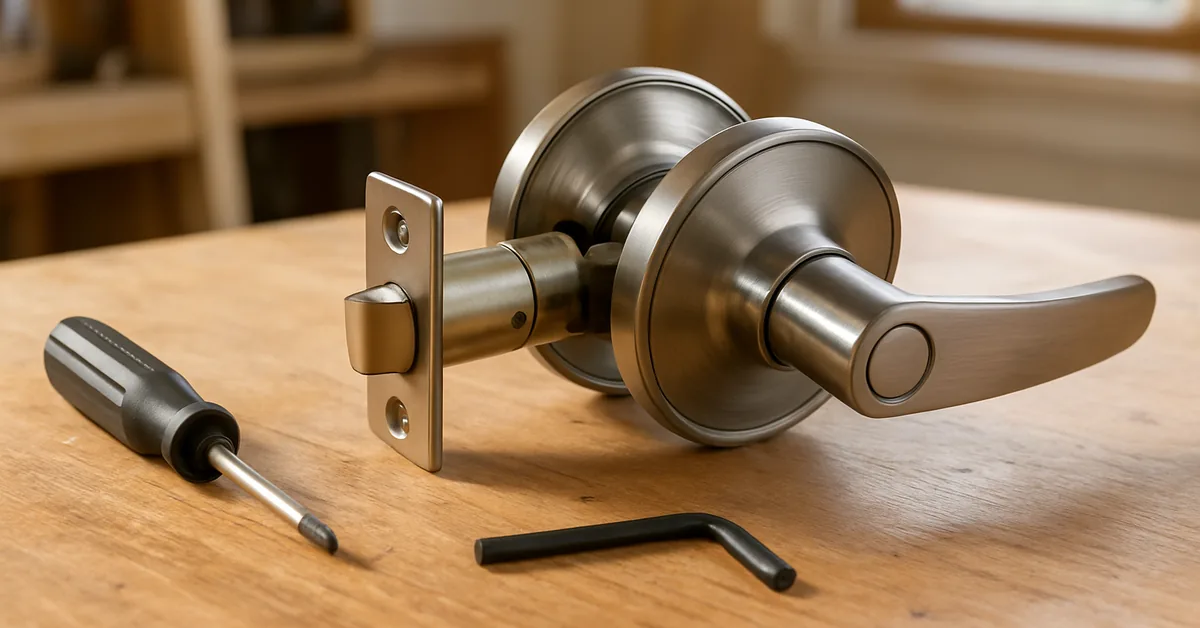
- Paperclip or pin tool: For pressing the release pin. Schlage often includes a pin tool, but a paperclip works too.
- Allen wrench: For some levers with hex screws. I used a $5 set.
- Key (if keyed): For keyed entry handles. I used my house key.
- Optional: Gloves: To keep your hands clean. I use cheap rubber gloves.
- Bucket or container: To hold screws and parts. I used a small bowl.
My total cost for tools was about $10, and most are household items. Check your handle to see if it has a pin hole or hex screw before starting.
Best Replacement Handle Pick
Schlage Accent Keyed Entry Door Handle – $44.00
Same Accent lever body this guide removes, in a keyed-entry version for exterior doors — BHMA Grade 2/AAA certified, so it passes the same cycle and impact testing covered in the data point below.
- Best for: Replacing a worn or rekeyed front/exterior door lever
- Why we picked it: Reversible for left- or right-handed doors, fits the same 2-3/8″ or 2-3/4″ backset covered in this guide’s removal steps
- Main drawback: Includes only 2 keys — order spares separately if you share the house
Compare more Schlage Accent handle options
 Option 1 Schlage Accent Privacy Handle – $32.97
|
 Option 2 Schlage Accent Passage Handle – $30.88
|
 Option 3 Schlage Latitude Passage Handle – $33.69
|
As an Amazon Associate we earn from qualifying purchases.
Preparing to Remove the Handle
Before you dive in, a little prep goes a long way. I skipped this once and lost a tiny screw—never again! Here’s how I set up:
- Check the handle type: Look for a small hole or slot on the handle’s neck. My Accent lever had a tiny hole. Keyed handles might need the key.
- Gather tools: Lay out your screwdriver, paperclip, and key on a clean surface. I work on a towel to catch parts.
- Open the door: This gives you access to both sides. I propped mine open with a shoe.
- Clean the area: Wipe the handle to see screws or pins. I used a damp rag.
This prep takes 5 minutes but saves you from frustration. It’s like getting your car ready for a road trip—check everything first!
Method 1: Removing a Schlage Knob with a Pin Hole
This is the most common way to remove a Schlage knob, like my bedroom door’s passage knob. Here’s how I do it:
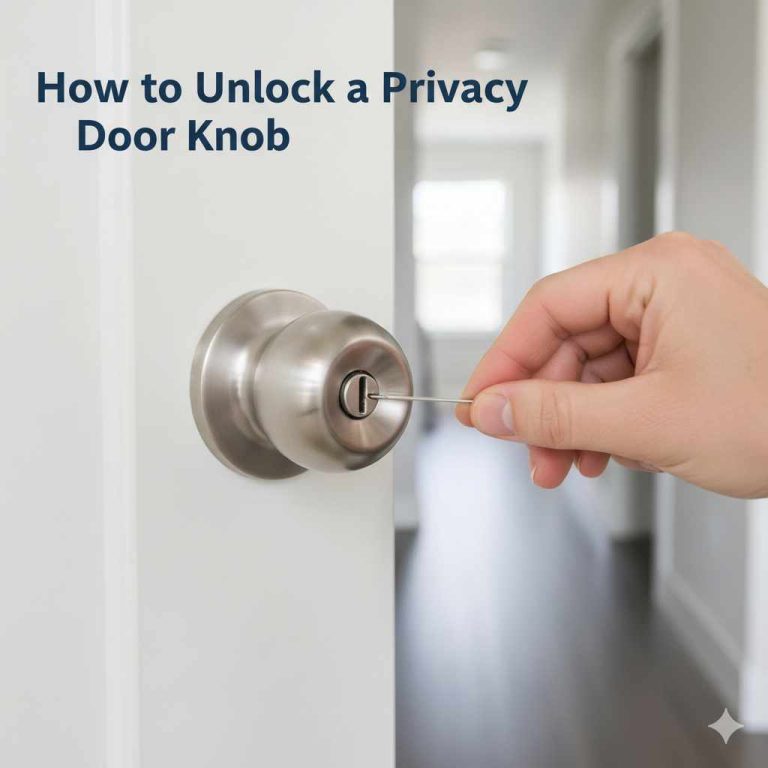
- Locate the pin hole: Look on the neck of the knob, near the door. Mine had a small round hole.
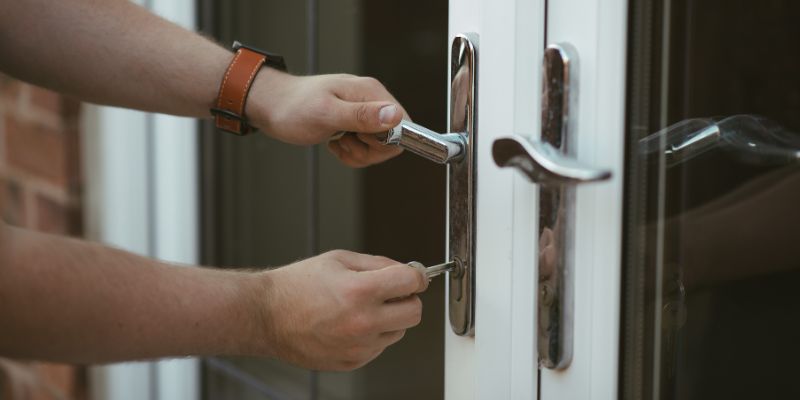
- Insert a paperclip: Straighten a paperclip or use the Schlage pin tool. I pushed it firmly into the hole until I felt a click.
- Pull the knob: While pressing the pin, pull the knob toward you. Mine popped off easily.
- Remove the cover plate: Slide off the decorative rose (the round plate). I gently pried mine with a flathead screwdriver if it stuck.
- Unscrew the mounting screws: Use a Phillips screwdriver to remove the two screws inside. Mine were tight, so I used steady pressure.
- Pull off the other knob: The outside knob should slide out. I set both knobs in my bowl.
- Remove the latch: Open the door and unscrew the two screws on the latch plate (on the door’s edge). Slide out the latch mechanism.
This took me about 10 minutes. It’s straightforward once you find the PIN. If the pin doesn’t click, wiggle the paperclip gently.
Method 2: Removing a Schlage Lever with a Pin Hole
Levers, like my front door’s Accent, are similar but sometimes need a key. Here’s how I removed mine:
- Check for a key: If it’s a keyed entry, insert the key and turn it 90 degrees (vertical). I did this to align the lock.
- Find the pin hole: Look on the inside lever’s neck. Mine had a small hole under the curve.
- Press the pin: Use a paperclip or pin tool to push the release pin. I pressed hard while pulling the lever.
- Remove the lever: Pull the inside lever off. Mine came off with a gentle tug.
- Slide off the rose: Pry the cover plate gently with a flathead screwdriver. I was careful not to scratch the door.
- Unscrew the screws: Remove the two mounting screws with a Phillips screwdriver. I kept them in my bowl.
- Remove the outside lever: Pull it out, along with the lock cylinder if keyed. I set it aside carefully.
- Take out the latch: Unscrew the latch plate on the door’s edge and slide out the mechanism.
This took 15 minutes because the key step threw me off at first. If the lever won’t budge, double-check the key’s position.
Method 3: Removing a Schlage Lever with a Hex Screw
Some Schlage levers, like my office door’s Latitude, use a hex screw instead of a pin. Here’s how I handled it:
- Locate the hex screw: Look on the inside lever’s neck for a small hexagonal hole. Mine was tiny but visible.
- Find the right Allen wrench: Use a small Allen wrench (usually 1/16 or 3/32 inch). I tried a few from my set to find the right fit.
- Loosen the screw: Turn the wrench counterclockwise. I didn’t remove the screw fully—just loosened it.
- Pull off the lever: Slide the inside lever off. Mine came off smoothly.
- Remove the rose: Gently pry the cover plate with a flathead screwdriver. I used light pressure to avoid damage.
- Unscrew the mounting screws: Use a Phillips screwdriver to remove the two screws. I kept them safe in my bowl.
- Remove the outside lever: Pull it out, along with any lock parts. I set them aside.
- Extract the latch: Unscrew the latch plate and slide out the mechanism.
This took 12 minutes and felt easier than the pin method. If the screw’s stuck, apply steady pressure to avoid stripping it.
Method 4: Removing an Older Schlage A-Series Handle
Older Schlage handles, like 1960s A-series, are trickier. I helped a neighbor with one on her vintage home. Here’s how we did it:
- Check for a retainer tab: Look for a slot or tab on the inside knob’s neck. Hers had a small slot.
- Press the tab: Use a flathead screwdriver to depress the tab. I pushed while pulling the knob.
- Remove the knob: The inside knob popped off after some wiggling.
- Pry off the rose: The cover plate was stuck with old paint. I scored around it with a utility knife, then pried gently.
- Unscrew the screws: Remove the two mounting screws with a Phillips screwdriver. These were rusty, so I used WD-40.
- Pull out the lock body: The outside knob and lock body slid out together. I rocked it gently to free it.
- Remove the latch: If it’s stuck, push the latch while pulling. Hers had a “shutter” mechanism, so I pressed the latch to release it.
This took 20 minutes because of the paint and rust. Older models might need extra patience, but it’s doable.
Troubleshooting Common Issues
Sometimes, things don’t go smoothly. Here’s how I fixed problems I ran into:
- Pin won’t release: If the pin doesn’t click, try turning the key (if keyed) or wiggling the paperclip. I had to rotate my key halfway to align the lock.
- Handle won’t come off: If it’s stuck, check for paint or grime. I cleaned around my neighbor’s rose with a knife to free it.
- Screws are stripped: If screws won’t turn, use a larger screwdriver or screw extractor. I replaced a stripped screw with a $1 spare.
- Latch won’t slide out: Push the latch while pulling. I pressed my latch with a screwdriver to release it.
These fixes are quick and keep you moving. Don’t stress if you hit a snag—it’s part of DIY!
“Insert the paperclip and push firmly until you feel an actual click before you pull — if you just tug on the handle without that click, you’re fighting the pin, not releasing it. That one detail is what tripped me up the first time.”
Comparing Schlage Handle Removal Methods
To help you choose the right method, here’s a table based on my experiences:
| Method | Best For | Time Needed | Tools Needed | Difficulty |
|---|---|---|---|---|
| Knob with Pin Hole | Passage/privacy knobs | 10 min | Paperclip, Phillips screwdriver | Easy |
| Lever with Pin Hole | Keyed/privacy levers | 15 min | Paperclip, key, Phillips screwdriver | Medium |
| Lever with Hex Screw | Modern levers | 12 min | Allen wrench, Phillips screwdriver | Easy |
| Older A-Series Handle | Vintage Schlage knobs | 20 min | Flathead screwdriver, knife, WD-40 | Hard |
I found the hex screw method easiest, but pin holes are more common. Pick based on your handle’s design.
📊 Schlage’s Accent series (the line used throughout this guide) carries a BHMA Grade 2/AAA certification, meaning it passed independent cycle, impact, and load testing under the ANSI/BHMA A156.39 residential lockset standard before the handle you’re removing was ever sold. — Source: ANSI Blog, BHMA Certified Secure Home Label
Reinstalling or Replacing the Handle
Once the handle’s off, you might want to reinstall it or swap it out. Here’s what I do:
- Tighten screws: If you removed it to tighten, reinstall the latch, then the handle, and tighten screws firmly. I did this for my wobbly lever.
- Replace with a new handle: Slide in the new latch, align the lock body, and screw it together. I helped my friend install a Schlage smart lock this way.
- Clean parts: Wipe the latch and screws before reinstalling. I used a rag to keep things shiny.
- Test it: Turn the handle or key to ensure it works. I tested my new lock three times before locking up.
This takes 10-15 minutes and feels so satisfying when it clicks into place.
Maintaining Your Schlage Handle
Keeping your Schlage handle in top shape prevents future removals. Here’s what I do:
- Tighten screws monthly: I check my handle’s screws to avoid wobbling.
- Clean with soap: Use mild soap and water to clean the handle. I avoid harsh chemicals to protect the finish.
- Lubricate the lock: Spray WD-40 into the keyhole yearly. I did this to keep my lock smooth.
- Check for wear: Replace worn parts like gaskets. I haven’t needed this yet, but I keep spares.
These habits keep my handle looking and working great. It’s like routine maintenance on your car—small steps pay off.
Safety Tips for Removing the Handle
Working with tools requires caution. Here’s what I keep in mind:
- Wear gloves: Protect your hands from sharp edges. I cut my finger once without gloves.
- Secure the door: Prop it open to avoid locking yourself out. I used a chair to hold mine.
- Store parts safely: Keep screws and pins in a bowl. I lost a screw once and had to buy a replacement.
- Don’t force it: If something’s stuck, check for paint or misalignment. I broke a pin tool by pushing too hard.
These tips make the job safe and smooth. Safety first, always!
Why I Love This Project
Removing a Schlage door handle is one of those DIY projects that makes you feel like a pro. Every time I turn my front door handle and it feels solid, I smile, knowing I fixed it myself. It’s not just about saving money, though I saved $75 by not calling a locksmith—it’s about mastering your home. This job is doable for anyone with a few tools and some patience, and it’s so rewarding to see the results.
Frequently Asked Questions
How do I know if my Schlage handle has a pin or hex screw?
A small round hole means a pin; a hexagonal hole means a hex screw. My lever had a pinhole.
Do I need a key to remove a Schlage keyed handle?
Yes, for keyed entry handles. I turned my key 90 degrees to release the pin.
What if the handle won’t come off after pressing the pin?
Wiggle the paperclip or check for paint. I cleaned around my rose to free a stuck handle.
Can I remove a Schlage handle without tools?
Not really. You need at least a paperclip or a screwdriver. I tried without tools once and gave up.
Is it hard to remove an older Schlage handle?
It’s trickier due to rust or paint. I used WD-40 and a knife to free my neighbor’s 1960s handle.
What is the official name of the tool used to release a Schlage lever’s pin?
Schlage calls it the Emergency Pin tool — a small wire with a loop on one end that ships inside the box with F-Series levers like the Accent and Custom Series. A straightened paperclip works as a substitute if you’ve misplaced it.
What if a Schlage handle’s mounting screw is stripped?
Stop turning it with the same screwdriver. Switch to a slightly larger flathead, use a screw extractor bit, or press a wide rubber band between the driver tip and the screw head for extra grip before turning again.
Conclusion
Removing a Schlage door handle comes down to finding the release: a pin hole for most knobs and levers, or a hex screw for Custom Series levers. Older A-Series handles just take more patience with paint and rust. This guide to removing a Schlage door handle covers every method above, so match your handle to the right one and you’ll have it off in 10 to 20 minutes with a screwdriver and a paperclip.
Sponsored / affiliate links. As an Amazon Associate I earn from qualifying purchases. I may earn additional commission from eligible campaigns.