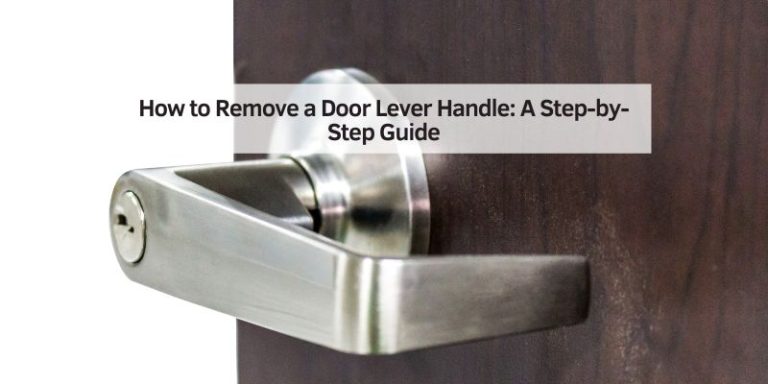
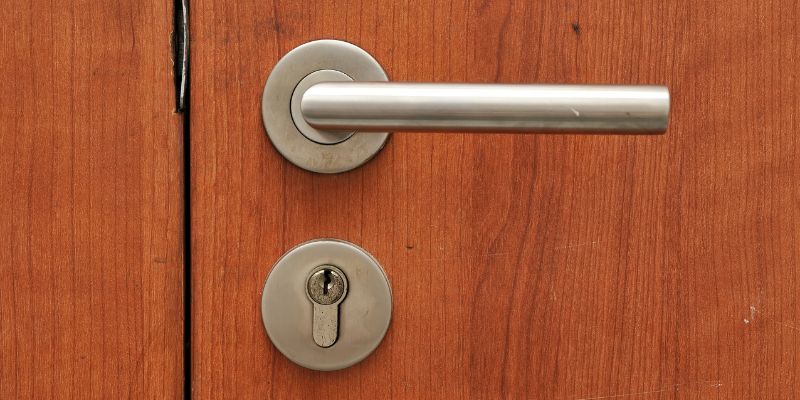
How to Take a Commercial Door Handle Off (Lever & Mortise Guide)
Most commercial door handles come off by removing a hidden Allen-key set screw under the lever, then the mounting screws behind it — mortise locksets need one extra step to free the lock body first. Forcing a stuck lever without checking that screw is the top reason installers strip screws or crack hardware rated for 1,000,000 cycles under ANSI/BHMA A156.2. This guide covers lever, mortise, and panic-bar removal, grade differences, and what to check before buying a replacement.
Affiliate disclosure: Home Improvement Way is reader-supported. As an Amazon Associate, we earn from qualifying purchases made through links on this page, at no extra cost to you.
Quick Answer
Check the underside of the lever for a small Allen-key set screw first — loosen it, then remove any cover plate and the mounting screws behind it. If the handle is keyed, unlock it before pulling; mortise locksets and panic exit devices also need their faceplate or mounting rail screws removed to free the lock body or bar before the trim comes off.
Understanding Commercial Door Handles
Commercial door handles are built for high-traffic doors in offices, schools, and stores, so they carry heavier internal mechanisms than a residential door knob — often a mortise lock body, a heavy-duty lever set, or a panic exit device. Unlike a home door knob, most are rated and tested under an ANSI/BHMA hardware grade, which is exactly why they resist the same quick-pry removal tricks that work on lighter hardware.
Before you start, identify what you’re working with: a lever, a knob, a mortise lockset, or a panic bar on an exit door. Check whether it’s a keyed entry set, a passage (non-locking) lever, or a privacy function with a thumb-turn. Knowing this up front saves a wasted trip back for the right tool.
Gathering the Right Tools
Having the right tools on hand before you start is what actually saves time here — most stalled removals come down to the wrong screwdriver tip, not a stuck mechanism. Here’s what to have ready:
| Tool | Purpose |
|---|---|
| Flathead Screwdriver | For prying off cover plates or loosening slotted screws. |
| Phillips Screwdriver | For removing most mounting screws on the handle or lockset. |
| Allen (hex) Wrench Set | For the set screw found on most lever handles — usually 1/8” or 5/64”. |
| Needle-Nose Pliers | For gripping small parts, springs, or a stuck lock body. |
| Penetrating Lubricant (e.g., WD-40) | To free rusted or paint-sealed screws and mechanisms. |
| Small Parts Container | To keep screws and springs from disappearing mid-job. |
If the handle is keyed, have the key on hand to disengage the lock before you start. Some manufacturers — Schlage and Sargent among them — use a proprietary hex size or a spanner-head screw on certain product lines, so check the hardware for any markings first.
Best Commercial Lever Lockset Pick
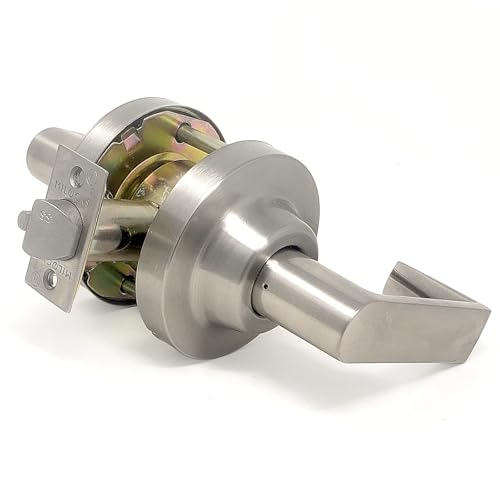
Dynasty Hardware Grade 2 Keyed Office Lever Lockset – $75.56
A direct ANSI/BHMA Grade 2 replacement for the keyed lever sets this guide walks through removing — same mounting-screw and set-screw pattern, so reinstalling with the new lever follows the same steps in reverse.
- Best for: Replacing a worn keyed office door lever
- Why we picked it: ADA-compliant lever, satin chrome finish matches common commercial trim
- Main drawback: Grade 2, not rated for the heaviest exterior entrance traffic
Compare more commercial lever lockset options
 Option 1 HISAFE Grade 2 Passage Door Lever – $68.99
|
 Option 2 BSEED Fire-Rated Grade 2 Lever Lock – $57.95
|
 Option 3 MiLocks Grade 1 Keyed Entry Lever – $179.99
|
As an Amazon Associate we earn from qualifying purchases.
Identifying the Handle Type
Not all commercial door handles come apart the same way. Here are the four types you’ll run into most often:
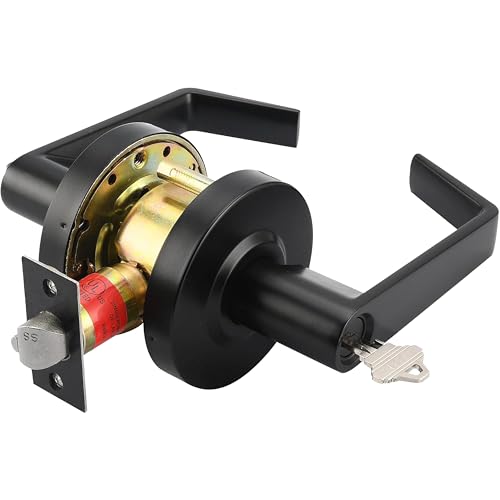
- Lever Handles: Common in offices, these usually hide a set screw on the underside of the lever, or a cover plate hiding the mounting screws.
- Knob Handles: Less common in newer commercial buildings (many building codes now require lever-style hardware for ADA compliance), these may have a push-button or key lock.
- Mortise Locks: Heavy-duty, with a larger rectangular lock body set into a pocket cut in the door edge. Trickier to remove — see the dedicated section below.
- Panic Bars (Exit Devices): Found on emergency exits, these have a touchpad or crossbar spanning at least half the door’s width and require extra care to avoid disabling life-safety hardware.
Look closely at your commercial door handle. Is there a small hole for an Allen wrench? A decorative cover plate? Those are your clues. If you can find a brand name stamped on the rose or lockset — Schlage and Sargent are common — that narrows down the exact removal pattern.
Step-by-Step Removal Process
Once you’ve identified the handle type and gathered your tools, here is the order that works for the vast majority of lever and knob-style commercial door handles.
Step 1: Locate and Remove the Set Screw
Many commercial door handles, especially levers, have a small set screw on the underside or side of the lever itself. Insert an Allen wrench into the hole and turn counterclockwise to loosen it. If it’s stuck, a spray of penetrating lubricant helps — don’t force it. Set the screw aside in your parts container.
Step 2: Remove the Cover Plate
Some handles have a cover plate (rose) hiding the mounting screws underneath. Gently pry it off with a flathead screwdriver, or twist it counterclockwise by hand if it’s threaded. Once it’s off, you’ll see the screws holding the handle to the door.
Step 3: Unscrew the Mounting Screws
Use a Phillips screwdriver to remove the exposed mounting screws, turning slowly to avoid stripping them. Expect two to four screws depending on the hardware. If the handle feels loose but won’t come off, don’t yank it — there may be a lock still engaged.
Step 4: Disengage the Lock Mechanism (If Applicable)
For a keyed lever or knob, insert the key and turn to the unlocked position first. For a mortise lock, you’ll need to remove the faceplate on the door’s edge and pull the entire lock body out after the handle’s mounting screws are free — see the mortise-specific steps below.
Step 5: Pull Off the Handle
With the screws out and any lock disengaged, gently pull the handle away from the door. If it’s stuck, wiggle it or check for a second hidden screw or clip. Handles on both sides of the door are removed the same way — repeat for the opposite side if needed.
Step 6: Remove the Spindle or Latch
With the handle off, you’ll see the spindle (the rod connecting both sides) or the latch mechanism. Pull it out by hand, or use needle-nose pliers if it’s stubborn. If you’re reinstalling new hardware, note how these parts fit together first.
Removing Mortise Locks and Panic Bars: What’s Different
A mortise lock is a heavy-duty lockset that sits inside a rectangular pocket mortised into the door edge, rather than bored straight through the door face. It differs from a cylindrical (bored) lever set by having its latch, deadbolt, and lever mechanism combined into one case, which is why it can’t simply be pulled off after removing the lever.
To remove a mortise lock: take off the lever trim as in Steps 1–3 above, then unscrew the narrow faceplate visible on the door’s edge. With the faceplate free, grip the lock body with needle-nose pliers and pull it straight out of the mortise pocket — it may take firm, steady pressure since these cases fit snugly by design. Never pry against the door edge itself; you’ll damage the mortise pocket.
Panic bars (exit devices) are life-safety hardware, so treat removal more cautiously. Most mount to the door with a horizontal mounting rail secured by screws hidden under an end cap or cover, plus a separate strike or latch assembly at the door edge. Remove the end caps first, then the rail screws, before the crossbar or touchpad assembly comes free. Because exit devices are inspected for code compliance on commercial buildings, reinstall or replace them with an equivalent UL 305-listed unit rather than leaving an exit door without hardware.
ANSI/BHMA Grades and ADA Requirements for Commercial Door Handles
ANSI/BHMA grading is the industry rating system that determines how a commercial lockset is built and cycle-tested, and it’s the reason commercial hardware feels heavier and more resistant to removal than a residential knob. Grade 1 is the top tier, required for most building entrances and high-traffic institutional doors; Grade 3 is builder-grade hardware meant for light residential interior use, not commercial exteriors.
| Grade | Cycle Test | Typical Use |
|---|---|---|
| Grade 1 | 1,000,000 cycles | Building entrances, institutional corridors, high-traffic commercial doors |
| Grade 2 | 400,000 cycles | Light-commercial and office interiors |
| Grade 3 | 250,000 cycles | Builder-grade hardware for residential interior doors |
📊 ADA-compliant door hardware must be operable with one closed hand, without tight grasping, pinching, or twisting, and require no more than 5 lbf of force to operate — Source: U.S. Access Board, ADA Standards Chapter 4. This is exactly why lever handles (not round knobs) are now standard on commercial doors.
Panic exit devices follow a related but separate standard, ANSI/BHMA A156.3, which requires the touchpad or crossbar to span at least half the door’s width and release with a maximum of 15 lbs of applied force, with Grade 1 devices cycle-tested to 500,000 operations.
“In my experience, the hex-key set screw hidden under the lever is the part people miss most — spending thirty seconds checking for it before prying at a cover plate saves the finish on both the door and the lockset.”
Handling Common Challenges
If screws are stripped, stretch a rubber band between the screwdriver tip and the screw head for extra grip. If the handle won’t budge, double-check for a second hidden set screw or clip before forcing anything. For rusted or paint-sealed hardware, penetrating lubricant and a few minutes of patience solve most stuck screws.
Mortise locks cause the most confusion because the lock body has to come out of the door edge, not just the lever off the face. If you’re stuck at this point, unscrew the faceplate on the door’s edge and pull the lock body out with steady pressure — see the mortise section above for the full sequence.
Safety Tips to Keep in Mind
Wear work gloves to protect your hands from sharp edges or a slipping screwdriver. If you’re on a ladder for a high-mounted handle, make sure it’s stable before you start. Never force a stuck screw or handle — it can damage the door, the lockset, or you. On an emergency exit door with a panic bar, don’t remove or disable the hardware while the building is occupied; check with a locksmith or your local fire code official first, since exit devices are life-safety equipment subject to inspection.
Replacing or Reinstalling the Handle
Once the old handle is off, clean the door and mechanism before installing new hardware. Confirm the new lockset matches your door’s thickness (commercial doors commonly run 1-3/4”) and backset, and matches the lock function you need — passage, privacy, keyed entry, classroom, or storeroom. Follow the manufacturer’s instructions and reverse the removal steps above to secure the new handle.
Common Mistakes to Avoid
- Prying at a cover plate before checking for a set screw — this scratches the rose and the door finish for nothing.
- Forcing a keyed lever without unlocking it first — this can bend the spindle or crack the lock body.
- Yanking a mortise lock body out by the faceplate screws alone — the faceplate can bend; grip the body itself.
- Disabling a panic bar on an occupied exit door — this creates a life-safety and code-compliance problem, not just a maintenance one.
FAQs
How do I know what type of commercial door handle I have?
Look for a small hex-key hole or set screw under the lever (most lever sets), a push-button or key cylinder on a knob, a rectangular faceplate on the door edge (mortise lock), or a touchpad/crossbar spanning at least half the door’s width (panic exit device). A manufacturer name stamped on the lockset narrows down the exact removal steps.
What if the mounting screws are stuck or stripped?
Spray a penetrating lubricant onto the screw head and let it sit for a minute, then use a screwdriver that fully seats in the slot. For a stripped screw, stretch a rubber band over the tip for extra grip before switching to a screw extractor bit.
Can I remove a commercial door handle without a key?
Yes, if the lock is already unlocked or the lever has no key cylinder at all, such as passage or privacy function levers. A keyed lever generally needs the key turned to unlocked first; if the key is lost, a locksmith can drill or bypass the cylinder.
How long does it take to remove a commercial door handle?
A standard lever with an exposed set screw and no lock typically takes 10 to 15 minutes with the right hex key and screwdriver. A keyed mortise lockset or panic exit device usually runs 30 to 45 minutes, mostly spent freeing the lock body from the door edge.
What’s the difference between ANSI/BHMA Grade 1, 2, and 3 commercial locksets?
Grade 1 locksets are cycle-tested to 1,000,000 open-close operations and are standard for building entrances and high-traffic doors. Grade 2 is tested to 400,000 cycles for light-commercial or office use. Grade 3 is tested to 250,000 cycles and is builder-grade hardware meant for residential interior doors, not commercial exteriors.
Conclusion
Taking off a commercial door handle comes down to finding the set screw before you pry at anything else, then working through the mounting screws and any lock mechanism in order. Mortise locks and panic bars add a step, but the same patience-over-force approach applies. With the right tools and a few minutes, you’ll have the handle off — and know exactly what to look for when it’s time to put a new one on.
Sponsored / affiliate links. As an Amazon Associate I earn from qualifying purchases. I may earn additional commission from eligible campaigns.