Door Hardware Maintenance Guide
Maintain door hardware by diagnosing the symptom first, then using the mildest cleaner and the right lubricant; if a latch, hinge, or lock still binds after one cleaning, one lubrication, and one adjustment, replace it. Ignore wear or use the wrong product, and you can strip finishes, pack grit into moving parts, or turn a cheap fix into a full lockset replacement. This guide covers diagnosis, finish-safe cleaning, lubrication points, adjustments, and the point where replacement makes more sense than more maintenance.
Start with diagnosis, not cleaning
![WD-40 Specialist® White Lithium Grease, New Bigger Can, 13.3 OZ [1-Pack]](https://m.media-amazon.com/images/I/41c233OiEDL._SL500_.jpg)


Match the symptom before touching the finish
Door hardware includes the working parts that let a door control access to the doorway, including hinges, locks, and knobs. Door hardware maintenance can include lubrication and cleaning, but I always diagnose first. A squeak, wobble, gritty feel, and slow latch return do not call for the same fix.
A sticking latch often comes from strike misalignment, paint buildup on the latch edge, or seasonal swelling in the door. A gritty key turn usually points to dirt inside the cylinder or corrosion starting on exposed metal. A loose lever points to fasteners, worn mounting holes, or a cracked trim ring.
What common symptoms usually mean
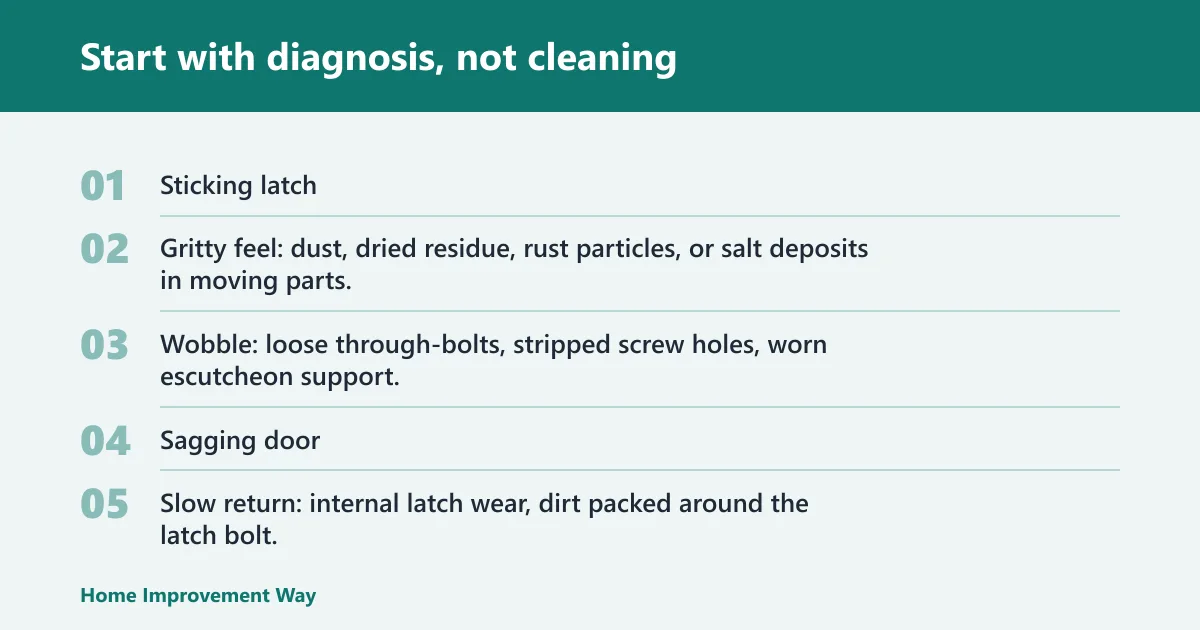
- Sticking latch: strike out of position, swollen door edge, dirty latch face, or a weak internal spring.
- Gritty feel: dust, dried residue, rust particles, or salt deposits in moving parts.
- Wobble: loose through-bolts, stripped screw holes, worn escutcheon support, or cracked knob hub.
- Sagging door: hinge screws pulling out, hinge knuckle wear, bent hinge leaves, or frame movement.
- Slow return: internal latch wear, dirt packed around the latch bolt, or misalignment forcing the spring to work too hard.
- Squeak: dry hinge pin, metal-to-metal rubbing at a pivot, or hinge rust.
Separate hardware trouble from door fit trouble
Do one simple check before spraying anything. Open the door and work the latch by hand. If it retracts and returns cleanly while the door is open, but sticks only when closing, the problem is usually alignment or swelling, not lack of lubricant.
Check the gap around the door. If the reveal tightens at the top latch side and widens at the bottom, hinge sag is more likely than latch failure. If the latch scrapes the strike lip, adjust the strike or correct sag before touching the lock.
When to stop and plan for replacement
Stop troubleshooting when the finish is peeling, the lock body is rust-pitted, the latch spring stays weak after cleaning, or screws no longer hold because threads or mounting holes are stripped. I catch a lot of failing sets by checking the latch face, hinge knuckles, screw heads, and the underside of exterior levers every few months, because orange dust, bubbling finish, and rough pin movement show up there first. Some maintenance tasks are suitable for homeowners with basic tools, but failed internal lock parts usually mean replacement.
📊 The article notes typical maintenance or repairs can cost between $100 and $300. Source: Garage Door Maintenance.
What parts of door hardware need maintenance?
Door hardware that needs attention includes handles, knobs, levers, locks, latch assemblies, hinges, hinge pins, strikes, escutcheons, and mounting screws. Moving parts need a different approach from finish surfaces, and interior hardware ages very differently from exterior sets exposed to rain, humidity, condensation, or salt air.
Handles, knobs, levers, locksets, and latch assemblies
These are the parts people notice first, but they also hide the most dirt. Skin oils, hand lotion, cooking residue, and cleaner overspray collect around the neck of knobs, under levers, and at the seam where the latch bolt enters the door edge.
Keyed locks add another maintenance point. If a cylinder binds, puff in a small shot of dry graphite, work the key in and out a few times, and wipe the key clean; I do not use oily spray there because it turns dust into paste and makes the key action worse.
Hinges, hinge pins, strikes, escutcheons, and screws
Hinges carry the door load. When the door sags, the latch and strike stop lining up, and people often blame the handle. Check hinge screws first, then hinge knuckle wear, then the strike position.
Escutcheons and trim plates hide mounting points. If they rock when pressed, look for loose through-bolts or stripped machine screws. Strikes also move. A strike plate that shifts even slightly can make a healthy latch feel defective.
Moving parts versus finish surfaces
The finish surface needs the mildest cleaner that removes grime. The moving part needs the right lubricant for its design. Mixing those jobs is where damage happens. Metal polish on a coated matte black lever can remove color. Grease inside a lock cylinder can turn a light drag into a sticky mess.
Interior hardware and exterior hardware age differently
Interior sets usually fail from skin oil, dust, and loose fasteners. Exterior sets also deal with water spotting, oxidation, road grit, pollen, freezing rain, and salt film. In shoreline or extreme-weather areas, maintenance may be needed every three or four months.

How do you maintain door hardware without ruining the finish?
Start by identifying whether the hardware is coated, plated, or solid metal, then use the mildest cleaner that fits that finish and exposure. I usually start with a dry microfiber wipe, then a second microfiber cloth that is only slightly damp with mild soap and water, and I use a soft toothbrush only in seams, screw recesses, and around the latch face where grime tends to collect. Stop if color transfers to the cloth, the sheen changes, or rubbing exposes a different base metal.
Identify coated, plated, and solid-metal finishes first
This matters more than most guides admit. A plated chrome or brass surface can be thin. A coated black or oil-rubbed bronze surface can lose color from hard rubbing long before the dirt is gone. Stainless steel is usually more forgiving, but it can still scratch and show water marks.
If the finish looks intentionally aged or dark at edges, assume that look is part of the finish. Do not polish it bright. On many decorative sets, “cleaner” can quickly become “missing finish.”
Safe tools and cleaners by finish
- Brass: use a microfiber cloth, mild soap, cotton swabs for joints, and a soft toothbrush for crevices. Avoid hard rubbing unless the maker confirms solid unlacquered brass.
- Stainless steel: use mild soap or a non-abrasive cleaner, then dry fully to prevent spotting. Brush lightly in the visible grain if there is one.
- Chrome: use mild soap and a soft cloth only at first. Chrome scratches easily and shows haze from abrasive pads.
- Black or matte black: use damp microfiber and gentle blotting around edges. Avoid metal polish and aggressive scrubbing.
- Oil-rubbed bronze: clean lightly, then dry at once. Heavy rubbing can remove the dark top layer and expose a warmer base tone.
What to avoid on sensitive finishes
Abrasive pads, powdered cleansers, stiff wire brushes, bleach, and ammonia-heavy products can damage finishes, especially if the manufacturer warns against them. Metal polish is risky on coated and plated hardware. If a cleaner leaves a chalky look, stop there and rinse with a damp cloth.
Warning signs that cleaning is removing finish
Look for color on the cloth, bright spots on edges, uneven gloss, or a coppery or gray tone appearing under the top layer. That is not dirt. That is finish loss. Once that starts, cleaning should stop and the part should be protected, touched up if possible, or replaced.
Safe cleaning method by finish and exposure
Interior touchpoint grime
For interior handles, knobs, levers, and escutcheons, wipe first with a dry microfiber cloth. Then use a cloth dampened with mild soap and water. Work into seams with cotton swabs or a soft toothbrush. Dry right away so moisture does not collect behind trim or at the latch face.
Exterior buildup from weather and traffic
Exterior hardware tends to gather rain spotting, pollen, grit, and oxidation faster than interior hardware. Start with a plain-water wipe to lift loose debris before using soap. That first wipe matters in salt air, where dry rubbing can drag salt crystals across a plated finish.
After cleaning, dry every edge, screw recess, and seam. Trapped moisture around mounting screws and escutcheon edges often starts finish failure long before the lever or knob itself looks bad.
Cleaning around latch faces and crevices
- Open the door so the latch edge is easy to reach.
- Brush debris from the latch face, strike opening, and hinge knuckles with a soft brush.
- Wipe with mild soap on microfiber or a cotton swab.
- Do not flood the latch opening or keyway.
- Dry fully, then check latch return by pressing it in by hand.
Post-cleaning checks that prevent trapped moisture
After any cleaning, inspect screws, strike alignment, hinge wear, latch return, and finish condition. Open and close the door several times. If the latch still drags, do not assume it needs more spray. Check alignment, hinge sag, and door fit before a second round of maintenance.
What lubricant is best for squeaky or stiff door hardware?
Many people use dry graphite for lock cylinders and keyed parts, silicone spray for light moving points where a dry film is helpful, and white lithium grease for exposed metal-to-metal pivots such as some hinge pins. Avoid oily sprays inside keyways and avoid grease where it will trap dust or stain finishes.
Dry graphite for lock cylinders
Dry graphite is the safer pick for most keyed cylinders because it does not stay wet and collect grit. Use a small amount, work the key gently, and stop if the key still grinds or catches. Forcing a rough cylinder can break a key or damage worn pins.
Silicone spray for light moving contact points
Silicone spray works well where a thin, dryish film is wanted, such as some latch side contact points, light pivots, or moving hardware that should not hold dust. Apply it sparingly to a cloth or into the target area with control. Wipe overspray at once, especially on dark finishes.
White lithium grease for exposed pivots and hinge pins
White lithium grease suits exposed metal-to-metal points where the lubricant can stay put, such as a hinge pin removed for service or a visible pivot that is not inside a fine lock mechanism. Use a very small amount. If grease squeezes out and attracts lint, there is too much.
Where lubricant causes trouble
Do not spray oil-based products into lock cylinders if dry graphite is the safer fit. Do not pack grease into latches hidden inside the door edge unless the hardware maker allows it. Gummy residue, black sludge, and new grit after lubrication all point to the wrong product or too much of it.
How do you fix loose, sagging, or sticking hardware?
Fix loose or sticking hardware by checking fasteners, hinge condition, strike alignment, and door fit in that order. Tighten what is actually loose, not every screw in sight. If the latch works when the door is open but fails when closed, correct sag or strike position before adding lubricant.
Tightening handles and escutcheons without stripping threads
Hold the trim steady and snug screws evenly. Stop when the hardware no longer rocks. Over-tightening can strip threads, distort trim, or crack a concealed mounting plate. If a screw spins without tightening, the problem is not looseness anymore; it is stripped engagement.
Check through-bolts on levers and interconnected locksets. If the face trim is tight but the lever still wobbles, the spindle, hub, or internal spring cage may be worn.
Checking hinge screws and sag before blaming the latch
With the door partly open, lift the handle side gently. Movement at the hinges points to wear or loose screws. A top hinge screw pulling out of the frame often causes latch-side sag. That changes the backset relationship at the strike even though the lock body itself is fine.
If a screw hole is stripped, simply tightening harder will not solve it. The mount needs repair or a longer, suitable replacement screw where the hinge and frame allow it.
Adjusting strike alignment and latch engagement
Look for rub marks on the strike lip and latch face. If the latch hits high, low, or sideways, move the strike or address sag. A latch should enter the strike cleanly and return without scraping. If it must be forced to close, the spring will wear faster.
Signs of internal wear
Replace the part if the latch return still feels slow after cleaning, one careful lubrication, and one alignment correction. The same goes for a lever that droops, a knob that slips on its spindle, or a keyed cylinder that still grinds after dry graphite. Internal wear is past basic maintenance.
How do you remove rust or tarnish safely, and when is replacement smarter?
Remove surface rust or tarnish with the least aggressive method that works for the finish, and stop before rubbing through plating or coatings. Light oxidation and water spotting can often be cleaned. Deep pitting, flaking finish, seized lock parts, and rust around springs or screw seats usually mean replacement.
Surface rust versus pitting
Surface rust looks like staining or light roughness on top of the finish. Pitting shows actual craters in the metal. Surface rust on a hinge pin or exposed steel screw may clean up. Pitting on a latch face, lock body, or plated trim means the protective surface has already failed.
Tarnish, oxidation, and water spotting by finish
Brass may darken naturally, and polished brass with a lacquer or plating is usually best cleaned gently rather than buffed hard. Stainless steel often shows water spotting more than tarnish. Chrome can show haze and fine scratch marks easily. Dark coated finishes may show pale wear spots where the top layer is thinning.
Why abrasives do damage fast
Abrasive pads can remove the finish before they remove the stain. Aggressive polish can leave bright patches on oil-rubbed bronze and matte black. Even a toothbrush should be soft. If the stain remains after mild soap, controlled brushing, and careful drying, it may be better to live with slight cosmetic wear than strip the part bare.
Replace instead of cleaning when these signs appear
- Rust pitting on lock bodies, latch bolts, or hinge knuckles
- Peeling or bubbling finish on plated or coated hardware
- Cracked knobs, split levers, or broken escutcheons
- Latch springs that fail to return after one service attempt
- Recurring key drag after dry graphite and cleaning
- Screw holes or mounting posts too worn to hold tension
Typical maintenance or repairs can cost between $100 and $300. When corrosion has reached the working parts, repeated service often costs more than a new set.
How often should door hardware be cleaned and lubricated?
Clean high-touch door hardware monthly, inspect exterior sets seasonally, check lubrication needs every six months, and inspect again after major weather events. In shoreline or extreme-weather areas, maintenance may be needed every three or four months. Frequency should follow exposure, touch level, and symptom history, not a vague “as needed” routine.
Monthly spot checks for high-touch doors
Wipe interior handles, knobs, and levers that see daily use. Check for wobble, finish wear near the grip, and screws backing out. Exterior front and back doors deserve the same quick check because skin oil and weather work together on those surfaces.
Six-month lubrication and fastener checks
Garage door moving parts may be lubricated every six months, and that timing is a useful reminder for household door hardware too. Every six months, inspect hinges, latch action, strike alignment, and fasteners. Professional tune-ups include tightening of all hardware, but many of these checks are suitable for homeowners with basic tools.
Seasonal and post-weather-event inspections
Seasonal maintenance includes checking weather stripping before and after winter. At the same time, inspect exterior hardware for water spotting, rust bloom around screws, and latch drag from seasonal swelling. After wind-driven rain, freeze-thaw cycles, or salt spray, inspect again and dry any hardware that stayed wet.
How do you stop door hardware from sticking in humid weather?
First confirm whether humidity is swelling the door or actually affecting the latch. If the latch moves freely with the door open, fix alignment, swollen edges, or strike fit before lubricating. Clean the latch face, dry condensation, and reduce moisture exposure; lubrication alone will not cure a humidity-related fit problem.
Check the door fit before the lockset
Humidity can swell the door edge or frame enough to pinch the latch path. Look for fresh rub marks on paint, finish, or the strike opening. If the latch bolt compresses only when pushed sideways by the strike, the hardware is reacting to poor fit, not causing it.
Clean and dry the right places
Moisture often sits around the latch face, strike recess, and under escutcheon edges. Wipe those areas dry. Remove grime that can turn damp and sticky. If condensation is frequent, shorten inspection intervals and watch for early oxidation on screws and latch corners.
Use lubricant only where it belongs
If the latch itself drags while the door is open, a light, appropriate lubricant on the moving latch mechanism may help. If the keyway binds, use dry graphite. Do not keep spraying products into a lockset that is fighting swollen wood or a shifted strike.
How do you protect exterior door hardware in coastal salt air?
Protect exterior hardware in coastal salt air by rinsing away salt film, drying the hardware fully, shortening inspection intervals, and using finish-safe cleaners only. Salt crystals scratch plated surfaces during dry wiping, and trapped salt moisture accelerates corrosion around screws, latch faces, hinge pins, and trim seams.
Rinse-and-dry habits for shoreline exposure
Use a damp microfiber cloth to lift salt before any rubbing. Follow with mild soap if needed, then dry every surface and seam. Pay attention to the underside of levers, the top edge of escutcheons, and screw recesses where salty moisture sits longer than expected.
Shorter inspection intervals for coastal doors
In shoreline or extreme-weather areas, maintenance may be needed every three or four months. Check monthly for salt haze, white crusting, orange rust bloom, and early finish loss. Exterior hardware near sprinklers or direct wind-driven rain may need even closer attention in practice.
What fails first outside
Fasteners, hinge pins, and latch faces usually show trouble before the larger trim pieces do. A lever can still look fine while the strike screws corrode and loosen, or the hinge pin starts rusting inside the knuckle. That is why post-cleaning inspection matters as much as surface washing.
When should you clean, repair, or replace worn door hardware?
Clean when the problem is surface dirt, light oxidation, or mild residue; repair when fasteners, strike position, or hinge alignment are at fault; replace when springs fail, parts stay rough after one service cycle, corrosion is pitted, or the finish is peeling off plated or coated hardware.
Use one service cycle as a hard stop
A practical stop point prevents overworking the finish and the fasteners. Use one cleaning, one correct lubrication, and one adjustment. If the symptom remains, move from maintenance to repair or replacement. That rule keeps a small issue from becoming stripped screws, rounded trim, or a broken key.
Repairable versus non-repairable wear
Repairable issues include loose screws, minor strike movement, removable hinge squeaks, and surface dirt in a latch path. Non-repairable signs include cracked knobs, split lever bases, spring failure, deep pitting, stripped mounting posts, and recurring latch failure after alignment has been corrected.
Decision checklist: safest action by symptom, finish, and environment

How to use this table
Match the symptom first, then check the finish and the exposure. Start with the listed mild action, test the hardware, and stop at the replacement threshold if the symptom remains. This is the core of a diagnosis-first Door hardware maintenance guide, and it prevents a lot of avoidable finish damage.
| Symptom | Likely cause | Finish | Environment | Safest first action | Lubricant, if needed | Stop and replace when |
|---|---|---|---|---|---|---|
| Latch sticks only when door closes | Strike misalignment or door sag | Any plated or coated finish | Interior or exterior | Check rub marks, tighten hinge screws, inspect strike position, clean latch face with mild soap | None at first | Latch still binds after one adjustment and works poorly even with door open |
| Key turns gritty | Dirt or corrosion in cylinder | Brass, chrome, stainless, black, oil-rubbed bronze | Exterior, humid, or dusty entry | Wipe face clean, keep liquid out of keyway | Dry graphite only | Key still catches, grinds, or needs force after one graphite treatment |
| Hinge squeak | Dry hinge pin or light rust | Painted, plated, or stainless hinge | Interior or exterior | Clean exposed pin and knuckle area first | White lithium grease on removed pin or controlled silicone where suitable | Squeak returns fast and hinge shows looseness or knuckle wear |
| Lever or knob wobbles | Loose through-bolts or stripped mounting threads | Chrome, brass, matte black, oil-rubbed bronze | High-touch interior or exterior | Snug screws evenly, support trim, inspect escutcheon movement | None | Screws spin, trim cracks, or handle still rocks with hardware fully seated |
| Slow latch return | Dirt around latch bolt, weak spring, or misalignment load | Any | Interior or humid exterior | Clean latch face and opening, test with door open, then inspect strike | Light silicone on suitable moving point only if needed | Return remains slow after one cleaning, one lubrication, and one adjustment |
| Water spots or haze | Mineral residue or cleaner film | Stainless or chrome | Exterior or bath-adjacent interior | Clean with mild soap or non-abrasive cleaner, rinse wipe, dry fully | None | Rubbing changes sheen or reveals scratches |
| Dark finish looks patchy | Over-cleaning or coating wear | Matte black or oil-rubbed bronze | High-touch or exterior sun exposure | Stop scrubbing, wipe gently, dry, inspect edges for base-metal show-through | None | Color has lifted, bright base tone shows, or coating peels |
| Orange rust at screws or latch face | Surface corrosion from moisture or salt | Plated steel or coated steel parts | Exterior, coastal, or humid | Clean lightly with mild soap, soft brush, rinse wipe, dry fully | White lithium on exposed pivot only if appropriate | Rust is pitted, flakes off, or reaches working lock parts |
Post-maintenance inspection checklist
- Open and close the door several times.
- Confirm the latch retracts and returns without dragging.
- Check that the strike receives the latch cleanly.
- Inspect top and middle hinge screws for pullout or movement.
- Press on escutcheons and trim to check for rocking.
- Look for stripped screw heads, spinning screws, or cracked trim.
- Check the finish for haze, bright spots, peeling, or color transfer.
- Wipe away any excess lubricant before the hardware goes back into service.
Frequently asked questions
How do you maintain door hardware without ruining the finish?
Identify the finish first, then start with microfiber, mild soap, a soft brush, and careful drying. Coated and plated hardware needs lighter pressure than solid metal. Avoid abrasive pads, metal polish on dark coated parts, and flooding seams or keyways. Stop if the cloth picks up color or the sheen changes.
How often should door hardware be cleaned and lubricated?
Clean high-touch hardware monthly, inspect exterior sets seasonally, and check lubrication and fasteners every six months. In shoreline or extreme-weather areas, maintenance may be needed every three or four months. Also inspect after storms, freeze-thaw periods, or long stretches of humidity that affect door fit and corrosion risk.
What lubricant is best for squeaky or stiff door hardware?
Dry graphite fits lock cylinders and keyed parts. Silicone spray suits some light moving contact points where a dry film is preferred. White lithium grease works on exposed metal-to-metal pivots such as some hinge pins. Use each product sparingly, and do not put oily sprays in keyways or grease where dust will collect.
How do you stop door hardware from sticking in humid weather?
Test the latch with the door open before lubricating anything. If it moves freely open but sticks when closing, humidity is likely affecting door fit or strike alignment. Clean and dry the latch face, check for swollen edges or rub marks, and correct sag or strike position before treating the hardware itself.
When should you clean, repair, or replace worn door hardware?
Clean when the issue is dirt, light oxidation, or residue. Repair when screws, strikes, or hinges are out of position or no longer tight. Replace when pitting, peeling finish, cracked trim, failed springs, or recurring latch problems remain after one cleaning, one proper lubrication, and one adjustment.
How do you protect exterior door hardware in coastal salt air?
Lift salt with a damp microfiber cloth before rubbing, then wash lightly with mild soap and dry every seam, screw recess, and trim edge. Shorten the inspection cycle to every three or four months in shoreline exposure. Watch hinge pins, strike screws, and latch faces first, because those parts often corrode before trim does.
Sponsored / affiliate links. As an Amazon Associate I earn from qualifying purchases. I may earn additional commission from eligible campaigns.