Garage Door Repair Guide
Use this garage door repair guide in order: verify the opener has power and the manual locks are open, inspect the photo-eyes and tracks, then test door balance with the opener disconnected. If the door will not stay halfway open, stop and call a pro. Guessing at the fault can burn out an opener, bend hardware, or put you next to a high-tension spring. This guide walks you through safe diagnosis, the simple fixes first, and the point where DIY stops.
When should you stop and not operate the garage door?

Stop using the door at once if you see a broken spring, a frayed or slack cable, a roller out of track, one side hanging lower, a bent bottom bracket, a door stuck partly open under tension, or impact damage that changes how the sections carry weight. Any of those faults can turn a basic check into a drop or twist hazard.
Red-flag conditions that make cycling unsafe
- Broken spring signs: a loud bang, a visible gap in a torsion spring, an extension spring hanging loose, or a door that suddenly feels far too heavy.
- Cable danger signs: fraying, bird-caging, one cable slack, a cable off the drum, or one side of the door rising higher than the other.
- Off-track conditions: a roller outside the track, a crushed track lip, or a section leaning inward or outward.
- Bottom bracket damage: bent bracket, missing fasteners, or any distortion where the cable attaches at the lower corner.
- Impact damage: cracked stiles, hinge tear-out, bowed sections near the opener arm, or a bent bottom section from backing into the door.
Why these faults change the risk
Garage door springs and cables store and transfer lifting force. If one side loses support, the other side can keep pulling, which twists the door and overloads the track, rollers, hinges, and opener arm.
The bottom bracket and cable drum are part of that load path. They are not homeowner adjustment points. If they are bent or loose, do not touch their fasteners.
How to secure the area and what not to touch
- Keep people, pets, and vehicles clear of the opening.
- If the door is fully closed, leave it closed.
- If it is partly open and unstable, support the area underneath only if needed for safety, then call for service. Do not keep cycling the opener.
- Do not loosen set screws on torsion hardware.
- Do not remove bottom brackets, cable drums, or spring anchor hardware.
- Do not pull the red emergency release on a crooked, partly open, or visibly damaged door.
What should you check first when the garage door stops working?
First, confirm the opener outlet has power, the breaker is on, and any GFCI on that circuit is reset. Then test the wall control, replace the remote battery, check the keypad, and make sure the opener is not in lock mode. After that, inspect the floor area for small obstructions, ice bonding the seal to the slab, and visible damage. This order rules out the easy faults before you move to heavier mechanical checks.
Power, outlet, breaker, and GFCI checks
If the opener shows no lights and makes no sound, confirm the outlet has power. Plug in a lamp or phone charger to verify the receptacle in seconds. Also check the garage breaker and any GFCI device upstream of the opener outlet, which may be on a different wall or in an adjacent room.
If the outlet is live but the opener stays dead, the opener may have an internal board or capacitor issue. Treat that as an opener fault, not a door fault.
Wall control, remote, keypad, and lock mode
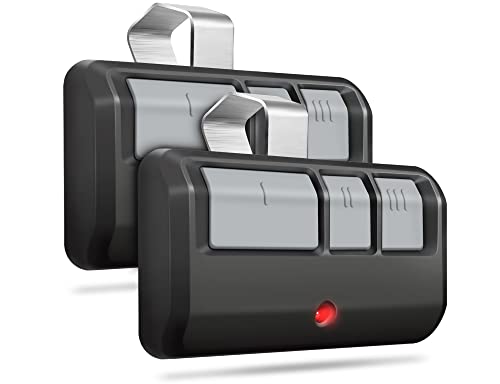
Press the wall control first. If the wall button works but the remotes do not, try a fresh remote battery, then test the remote from a short distance and again from farther away. LED bulbs in the opener, wireless cameras, and other nearby electronics can interfere with the radio signal on some setups.
If neither remotes nor keypad work, check the opener’s lock or vacation mode. Many wall consoles disable radio controls while the hardwired button still works. If the keypad is wired, inspect the visible low-voltage wire at the wall and opener head for cuts, staples driven too tight, or loose terminals.
Obstructions, frozen threshold contact, and floor-level damage
Look across the full width of the opening. Small items, packed ice, a swollen weatherseal, or a shifted threshold can stop the door at floor level and mimic a sensor or limit problem.
On a cold morning, the bottom seal can freeze to damp concrete. The opener strains, the door lifts an inch, then stops. That symptom points first to adhesion at the floor, not to spring replacement.

What determines the final price of a garage door repair?
Garage door repairs typically cost between $98 and $860, but the final bill depends on which components failed and how difficult they are to access. Broken torsion springs, damaged panels, and opener motor failures consistently drive prices higher than minor adjustments like sensor realignment or track cleaning.
Understanding how estimates are built helps you compare quotes accurately and avoid paying for unnecessary work. The supporting guide breaks down labor variables, emergency service premiums, and the specific damage patterns that change pricing most. It also explains when repairing individual parts offers better long-term value than replacing the entire system. Reviewing these details before hiring a technician ensures you address the actual fault rather than a symptom that will return. Compare the full breakdown in our garage door repair cost guide.
How do you tell an opener problem from a door problem?
A useful separator is the manual release test, but only when the door is fully closed or otherwise securely supported. If the opener disconnects and the door feels extremely heavy, drops fast, or binds by hand, the door has a mechanical fault. If the door moves normally by hand, the opener or its controls are the main suspect.
Using the manual release safely
Use the red emergency cord only when the door is fully closed, or when an open door is firmly supported and not damaged. If cables are slack, springs look broken, or the door is crooked, do not release it.
Once disconnected, lift the door by hand from a centered grip point, and keep your fingers clear of section joints and track pinch points.
What the disconnected door should feel like
A healthy, balanced door should lift and lower with even force through the full travel. It should not drop fast or surge upward. At about halfway open, it should stay close to that position instead of drifting hard up or down.
If it binds at one spot, check for track damage, roller wear, or panel distortion. If it feels heavy through the whole travel, suspect spring or cable trouble rather than an opener motor.
Symptoms that point to the opener
- No response at all: power supply, dead logic board, wall control fault, or lock mode.
- Motor hums but door does not move: stripped drive gear, failed capacitor, seized trolley, or a door that is too heavy for the opener to start.
- Door moves a little then stops: force setting too low, travel setting wrong, track friction, or balance problem.
- Door closes then reverses: sensors, floor contact, force setting, or friction near the bottom.
How to re-engage the opener after testing
Return the door to the fully closed position if possible. Then move the trolley back into engagement based on the opener design, usually by running the opener until the carriage reconnects or by snapping the release lever back into the engaged position before the next cycle.
Do not re-engage and power the opener against a door that failed the balance test.
Diagnose the opener, controls, and safety sensors
Opener response patterns: no power, hums only, moves then stops, reverses
A silent opener with no lights usually points to lost power or failed internal electronics. An opener that hums but does not move can have a failed start capacitor, a stripped gear, or a door that is mechanically overloaded.
If the motor runs and the chain, belt, or screw drive moves but the door does not, inspect the trolley connection and release mechanism. If the opener starts and then stops under load, treat that as a warning, not a reason to raise the force setting right away.
Travel limit and force setting errors that mimic larger failures
Travel limits tell the opener where fully open and fully closed positions are. If the close limit is set too far, the door may hit the floor, treat it as an obstruction, and reverse. If the up limit is off, the trolley can overtravel and strain hardware.
Force settings are not a fix for a heavy or binding door. If extra force is needed to complete a cycle, the real fault is usually friction, poor balance, or damage.
Photo-eye alignment, dirty lenses, and sensor wiring faults
Safety sensors are usually located near the floor on both sides of the opening. If the door starts down and then reverses, sensor interruption is one common cause, but it is not the only one.
Clean both lenses. Check that each sensor points directly at the other and that the brackets are not bent. Look for loose bell wire, damaged insulation, or staples driven too tightly into the sensor wire.
If the wall button closes the door only while held continuously, many systems are bypassing a sensor fault. That points strongly to the photo-eyes or their wiring, not to the motor itself.
Remote, keypad, and interference problems
If the wall control works but remotes work only close to the door, install fresh remote batteries and look for interference sources. Reprogram the remote or keypad if new batteries do not restore normal operation.
If the wall control opens the door every time, but a visor remote works only from the driveway entrance and the wireless keypad fails after rain, suspect a weak remote battery, a keypad battery or seal problem, or radio interference, not a bad spring.
Inspect tracks, rollers, and hinges before you blame the motor
Debris, dents, loose brackets, and visible misalignment
Tracks should be clean, continuous, and firmly fastened. Small stones, hardened grease, screws backing out, or a dented track section can add enough drag to trip the opener’s force logic.
Minor issues you can see from the floor are fair to inspect. Crushed track sections, bent flag brackets, or rollers climbing the track edge are stop-work conditions.
Roller wear and nylon versus steel replacement considerations
Worn rollers wobble, bind, or ride unevenly. Nylon rollers often run quieter than steel rollers, while steel rollers can still work well if they are in good condition and suited to the door hardware.
Lubrication can help a sound roller with a dry bearing. It cannot repair a cracked wheel, a missing bearing, or a roller stem that no longer tracks straight.
Lubrication limits: what it helps and what it cannot fix
Use garage-door-rated lubricant on hinges, roller bearings if serviceable, and spring coils if the manufacturer allows it. Wipe off the excess so it does not collect grit.
Do not coat the track running surface to chase a friction problem. Also, do not treat lubricant as a cure for bent tracks, balance problems, bad cables, or opener force errors.
How friction can trigger reversal or overload symptoms
Extra drag near the floor can make the opener think the door struck an object. That is why reversal on close is not always a sensor fault. Friction and poor balance can create the same symptom.
A common miss is cleaning the photo-eyes repeatedly while a bent lower track section on the left side goes unnoticed. The door starts down, rolls into the tight spot, loads the opener, and reverses before fully closing.
Is the door out of balance, and what does that mean?
A garage door is out of balance when the springs no longer offset the door’s weight through the full travel. After disconnecting the opener safely, lift the door by hand to roughly halfway. If it drops, rises on its own, or feels unusually heavy, stop using the opener and treat the springs or cables as the likely cause.
How to perform a manual balance check safely
- Close the door fully.
- Verify there is no visible cable, spring, bracket, or track damage.
- Pull the manual release.
- Lift the door slowly to about halfway.
- Let go carefully while staying ready to control movement.
- Lower the door if it is stable enough to do so safely.
What drifting, slamming, or excessive weight indicates
If the door slams down, the spring system is not carrying enough load. If it rises by itself, spring tension may be too high or poorly matched. If one side lags, the cable and spring system may be uneven even if the opener still moves the door.
Excessive weight is the clearest sign that the opener is compensating for a spring problem. An opener is a guide and drive unit, not the primary counterbalance.
How imbalance connects to springs, cables, and opener strain
Balance depends on spring force, cable condition, drum tracking, and door geometry. A weak or broken spring raises opener load sharply. A slack cable can shift weight to one side and twist the door in the tracks.
Keep using the opener in that condition and it may strip gears, overheat, or bend the top section where the opener arm attaches.
Springs, cables, and bowed panels: repair, reinforce, or replace?
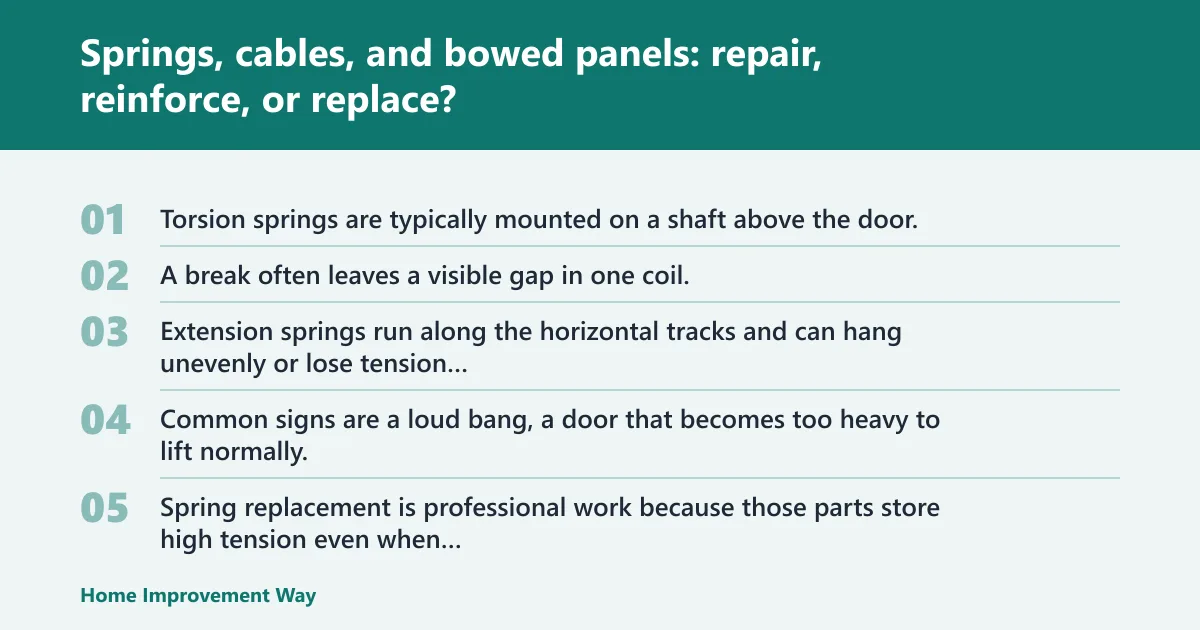
Torsion versus extension spring failure signs and why replacement is professional work
Torsion springs are typically mounted on a shaft above the door. A break often leaves a visible gap in one coil. Extension springs run along the horizontal tracks and can hang unevenly or lose tension suddenly.
Common signs are a loud bang, a door that becomes too heavy to lift normally, uneven rise, or an opener that strains and stops. Spring replacement is professional work because those parts store high tension even when the door is closed.
Cable warning signs, drum relationship, and do-not-operate thresholds
Cables typically wrap around drums near the top corners and anchor at the bottom brackets. If a cable frays, jumps the drum, bird-cages, or goes slack on one side, the door can rack farther out of level with every cycle.
Do not operate the door if any cable damage is visible. Do not remove the bottom bracket or loosen drum hardware. Those parts are directly tied to spring force.
How to assess a bowed or structurally damaged door panel
Cosmetic dents can often stay in service if hinges, stiles, and section edges remain straight. Bowing is different. A bowed panel can shift load to the opener arm, top strut, and hinges, especially on the top section during opening.
Check for missing or failed reinforcement struts, cracks at hinge attachment points, and panel flex around the opener bracket. Impact near the bottom section matters more than a shallow dent in the center of a mid panel because it affects the path into the tracks and the cable load path.
When panel repair or reinforcement is reasonable and when full replacement is safer
Repair or reinforcement may make sense when damage is limited to one section, the frame members are intact, and matching parts are available. Bowing tied to a missing strut or damaged opener bracket can sometimes be corrected by replacing the failed reinforcement and the affected section.
Replacement is the safer call when multiple sections are bowed, stiles are cracked, hinge screws have torn out repeatedly, or the door geometry no longer tracks cleanly. For homeowners weighing replacement options, it is worth knowing that Garage Living offers garage doors as part of its renovation services, and Garages for Atlanta says it can add a new garage door with side opener. Side-mounted openers can reduce stress on a damaged top section in the right application, but only after the door itself is structurally sound.
Diagnostic decision table: symptom, first check, likely cause, safe fix, stop-work trigger
How to use the one-page decision table
Read across the row that matches the main symptom, then do only the first check listed. If that check points to a high-tension or off-track fault, stop there. The table is built to separate homeowner-safe cleaning, reset, and lubrication tasks from pro-only repairs before parts are ordered.
Decision table
| Symptom | Safest first check | Likely cause | Homeowner-safe fix | Immediate stop-work red flags |
|---|---|---|---|---|
| No opener lights, no sound | Test outlet power; check breaker and GFCI | Dead outlet, tripped breaker, failed opener electronics | Restore power; reset GFCI; verify plug connection | Burn smell, smoke, scorched wiring, repeated breaker trip |
| Wall button works, remotes do not | Replace remote battery; check lock mode | Dead battery, radio lock, remote programming issue, interference | New battery; unlock console; reprogram remote/keypad | Exposed low-voltage wiring, wet keypad wiring, damaged wall console |
| Door starts down then reverses | Clean and align photo-eyes; inspect lower track for bind | Sensor misalignment, dirty lens, track friction, force or limit error | Clean lenses; square brackets; remove debris; correct obvious obstruction | Door twists, one side lags, cable slack, roller climbs track |
| Motor hums, door barely moves | With door closed, disconnect opener and test door by hand | Heavy unbalanced door, failed capacitor, stripped gear, seized trolley | If door moves normally by hand, service opener controls or drive parts | Door too heavy to lift, loud spring bang, visible spring gap |
| Door feels very heavy by hand | Look for torsion spring gap or loose extension spring | Broken or weakened spring, cable issue | None beyond securing area and leaving door closed | Any broken spring symptom; uneven lift; slack cable |
| Door binds at one spot | Inspect that section of track and rollers from the floor | Dent, debris, worn roller, bowed panel, loose hinge | Clear debris; lubricate sound hinges or bearings; tighten non-tension fasteners only if obviously loose and accessible | Crushed track, roller out of track, hinge tear-out, panel crack at hardware |
| One side lower than the other | Check cables visually on both sides without touching | Slack cable, cable off drum, spring or bracket problem | None | Any uneven hang, bird-caged cable, bent bottom bracket |
| Door opens a little, then stops or reverses upward | Balance test with opener disconnected and door closed first | Poor balance, track friction, opener force too low | If balance is good, clear friction sources and review opener settings | Door will not stay halfway open, slams shut, races upward |
| Door will not close unless wall button is held | Check sensor lights, lens cleanliness, and wire damage | Photo-eye fault or wiring break | Clean, realign, secure loose visible wire | Cut or crushed sensor wire near staples or track edge |
| Top panel bows when opener pulls | Inspect opener bracket and reinforcement strut | Missing strut, weak top section, structural panel damage | None unless replacing a clearly separate non-tension bracket part that the door maker specifies | Cracked stile, torn hinge area, opener bracket pulling through panel |
| Door stuck partly open | Look for visible cable, track, or spring failure before touching release | Mechanical jam, cable issue, spring failure, opener stop under load | None unless the door is confirmed sound and can be safely lowered manually | Partial open under tension, crooked door, damaged parts, unsupported weight |
Failure combinations that mislead homeowners
Some doors have two faults at once. Sensor misalignment plus track friction can look like a simple photo-eye issue because the door reverses on close. Poor balance plus overly high opener force can hide a weakening spring until a cable jumps the drum.
That is why this guide places the balance test after the basic power and sensor checks, but before any part replacement.
Frequently asked questions
can a damaged garage door be repaired
Yes, some damage can be repaired, but only if the door remains structurally sound. Cosmetic dents and isolated hardware replacement are different from bowed sections, cracked stiles, hinge tear-out, or impact near the bottom section. When damage changes load paths or tracking, repair may give way to section replacement or full door replacement.
how to repair a damaged garage door
Repair starts with diagnosis, not part swapping. Confirm the damage is cosmetic rather than structural, then separate control issues, sensor faults, track friction, and balance problems. Homeowner-safe work usually means cleaning sensors, clearing debris, and lubricating sound moving parts. Broken springs, cable faults, off-track rollers, and structural panel failures are pro repairs.
how to fix a bowed garage door
A bowed garage door is fixed only after you find why it bowed. Check for a missing reinforcement strut, a failed opener bracket area, hinge tear-out, or impact damage. If the panel skin alone is bent, section replacement may work. If stiles or multiple sections are distorted, replacement is often safer than trying to force the door straight.
why garage door not working
A garage door may fail because the opener has no power, the wall console is in lock mode, the remotes need batteries, the sensors are misaligned, the tracks are binding, or the counterbalance system has failed. The fastest separator is a safe manual-release test with the door closed, followed by a balance check.
why won’t my garage door go down
The most common reason is a photo-eye problem, but it is not the only one. Doors also reverse because they hit floor resistance, track friction, poor balance, or close-force settings that are out of adjustment. Clean and align the sensors first, then inspect the lower track and test balance before changing force settings.
when is a garage door problem unsafe to fix myself
It is unsafe when springs, cables, bottom brackets, drums, or off-track conditions are involved, or when the door hangs unevenly, feels too heavy, or is stuck partly open under load. It is also unsafe to pull the emergency release on a crooked or damaged open door because the door can drop quickly.
Sponsored / affiliate links. As an Amazon Associate I earn from qualifying purchases. I may earn additional commission from eligible campaigns.