Toilet Repair Guide
You can often narrow down many toilet problems quickly by matching the symptom to a few common parts: flapper, fill valve, flush valve, wax ring, or shutoff/supply line. Miss the match, and you can burn money on parts, raise the water bill, or miss a hidden leak that starts softening the floor. This toilet repair guide gives a symptom-first checklist, simple tests with basic tools, part-by-part fixes, and clear stop points for calling a plumber or replacing the toilet.
Shut off the water first and size up the risk


How to use the water shutoff valve before the bowl overflows
The water shutoff valve is usually on the wall or floor near the toilet supply line. Turn it clockwise until it stops. Korky says to turn off the water supply immediately if a toilet is about to overflow. I do that before anything else, because it stops the refill cycle and gives me room to find the real fault instead of mopping up a worse mess.
If the handle will not move, do not lean on it hard enough to twist the pipe or snap an old valve stem. A stuck shutoff can be a clear place to stop and inspect. If overflow risk is rising, remove the tank lid and lift the float or flapper to stop incoming water while the shutoff problem is handled.
Signs you can keep diagnosing versus signs to stop at once
Keep going if the issue is a running toilet, ghost flushing, a slow fill, a noisy refill, or a minor leak limited to the tank hardware. Korky describes ghost flushing as a toilet flushing on its own, and that usually points to a leak path inside the tank rather than a drain problem.
Stop at once for cracked porcelain, water coming through the ceiling below, a rocking toilet with a soft floor, sewage backing up into another fixture, or a shutoff valve that will not close. A wax ring repair can wait a few hours. A rotten subfloor should not.
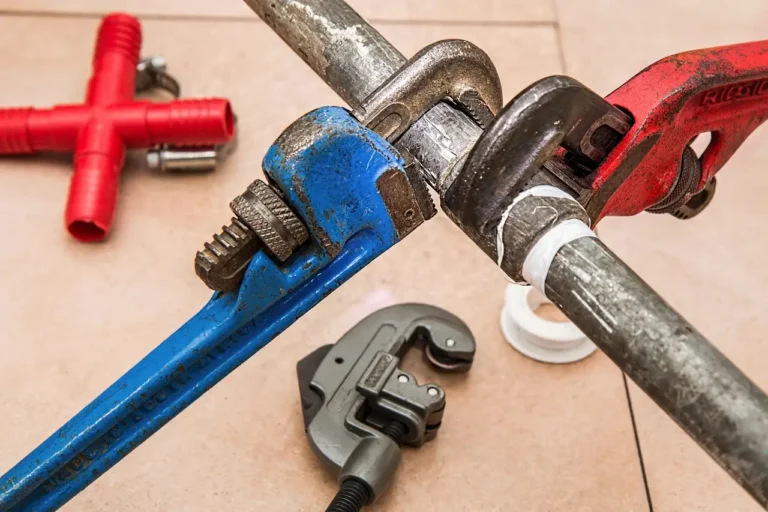
The basic tools and cleanup supplies worth setting beside you
- Adjustable wrench
- Channel-lock pliers
- Sponge and small bucket
- Towels or rags
- Gloves
- Dye tablets or food coloring
- Replacement flapper, fill valve, gasket, or bolts if already identified
- Toilet plunger with flange or beehive head
I set these within arm’s reach before I crack a supply nut or pull a tank lid, because toilet work usually means one wet hand, one cramped shoulder, and very little room to hunt for tools. Korky distinguishes a toilet plunger from a sink plunger. A toilet plunger is designed to seal inside a round or elongated bowl outlet, while a cup-style sink plunger usually leaks air around the opening and does poor work on toilet clogs.
What symptom do you have right now?
Start with what can be seen or heard right now: running water, a refill hiss, a bowl that rises too high, water on the floor, or a flush that acts oddly. Those clues narrow the likely fault fast, and they do it before any parts are bought.
Constant running or ghost flushing
If the tank refills long after the last flush, suspect the flapper first. If the tank reaches its normal level but water still slips into the overflow tube, suspect the fill valve or float setting. If a new flapper still leaks, move attention to the flush valve seat or body.
Slow fill, noisy refill, or tank that will not stop filling
These are fill valve symptoms until proven otherwise. Hard-water buildup, a mis-set float, debris in the valve, or simple wear can all slow refill or keep the valve from shutting off cleanly. A hiss or chatter after the tank appears full is a strong clue.
Double flush, weak flush, leak, clog, or overflow
Korky identifies a toilet flush problem where it flushes twice with one press. A chain that is too tight, a flapper that stays up too long, or excess tank water level are the usual checks. Leaks between tank and bowl point to the tank-to-bowl gasket, bolts, or cracks. Base leaks after flushing point lower, often to the wax ring or a wax-free seal.
A toilet is the fixture in your bathroom that holds waste in the bowl, moves it with stored tank water, and relies on a trapway and drain line to carry it off. Flush toilets use water, while dry or non-flush toilets do not. That matters here because a flush problem can come from tank parts, bowl design, drain condition, or plain lack of water volume.
Five-minute toilet symptom-to-part decision table
| Observable sign | Likely faulty component | Quick confirmation test | Replacement part type | Size note | Rough cost band | Stop-repair threshold |
|---|---|---|---|---|---|---|
| Tank refills every few minutes with no flush | Flapper | Add dye to the tank and wait; if color appears in the bowl without flushing, that suggests a leak from the tank to the bowl. | Toilet flapper | Match 2-inch or 3-inch opening | Usually a low-cost part | Stop if flapper seat is chipped or flush valve is cracked |
| Water runs into overflow tube after tank is full | Fill valve or float setting | Lower float; if water still creeps up, valve is failing | Fill valve | Universal height-adjustable models are made to fit many tanks. | Low-cost to moderate | Stop if shutoff valve will not close or supply connection leaks |
| Flushes twice with one press | Flapper chain or flapper timing | Check for chain with no slack or flapper hanging open too long | Flapper, chain, or adjustment | Correct flapper style matters on some canister systems | Often low-cost | Stop if handle, trip lever, and flapper geometry do not match the tank design |
| Tank fills slowly or makes loud hiss/chatter | Fill valve | Shut off water, disconnect supply, check for debris at valve inlet | Fill valve | Quiet aftermarket versions are available | Low-cost to moderate | Stop if supply pipe is corroded or shutoff leaks under operation |
| Water leaks between tank and bowl during or after flush | Tank-to-bowl gasket or bolts | Dry area, flush once, watch underside of tank and bolt holes | Tank-to-bowl gasket kit and bolt set | Many kits fit either 2-inch or 3-4 inch flush outlets. | Moderate | Stop if tank porcelain is cracked |
| Water appears at base after flushing | Wax ring or wax-free seal | Wipe floor dry, flush, check for fresh seepage at base | Wax ring or wax-free seal | You may need to remove the toilet to replace it. | Low-cost part, higher labor effort | Stop if floor is soft, dark, or crumbling |
| Bowl rises high and drains slowly | Clog | Do not flush again; plunge with toilet plunger | No replacement part at first | Use flange or beehive toilet plunger | Tool cost only unless drain work is needed | Stop if repeated clogs affect other fixtures too |
| New flapper installed but toilet still runs | Flush valve | Feel flapper seat for pits or inspect body for cracks | Flush valve repair kit | Often replaced as a complete assembly | Moderate | Stop if tank removal risks cracked bolts or fragile porcelain |
| Weak flush despite full bowl drain line being clear | Flapper opening, refill setting, or bowl design | Hold handle down; if flush improves, flapper drop timing is off | Flapper or fill valve adjustment | Single-flush and dual-flush systems behave differently | Often adjustment first | Stop if toilet has chronic poor design or replacement fit is uncertain |
Why is my toilet running constantly?
A constantly running toilet is usually a flapper leak or a fill valve that does not shut off fully. The fastest split is simple: if water leaks from tank to bowl, blame the flapper or flush valve; if water rises into the overflow tube, blame the fill valve or float setting.
How to tell a flapper leak from a fill valve shutoff problem
Remove the tank lid. If the water level is below the marked fill line and the valve keeps adding water every few minutes, put dye in the tank. Color in the bowl means the flapper is leaking. No dye in the bowl, but water entering the overflow tube, points to the fill valve.
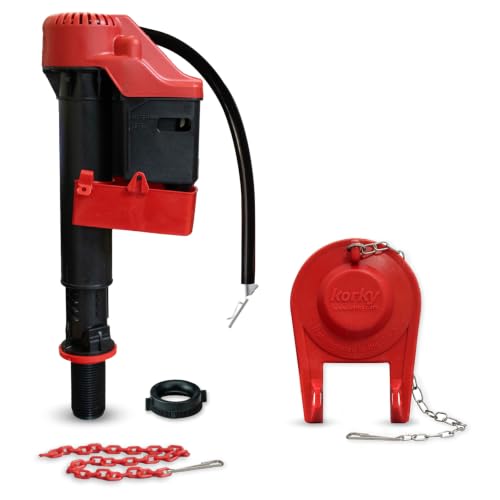
Korky says a toilet flapper should be replaced every five to ten years. Hard water, heavy use, and cleaning tablets left in the tank can shorten that life. Warped rubber, slime on the sealing face, or a chain that holds the flapper slightly open all create the same symptom.
When a worn flush valve seat or cracked flush valve is the real cause
If a new flapper does not stop the leak, inspect the seat it lands on. A rough, pitted, or cracked flush valve seat will leak past even a fresh flapper. On many toilets, the flush valve is replaced as a complete repair part rather than pieced together.
This is where many misdiagnoses happen. I have seen people buy two flappers in a row when the real leak path was the hard plastic below them.
Dye tests and hand checks that confirm the leak path
- Turn off the water shutoff valve.
- Mark the tank water line with a pencil or a bit of tape.
- Add dye tablets or a few drops of food coloring.
- Wait without flushing.
- Check the bowl for color.
- Feel the flapper edge and valve seat for grit or mineral crust.
If the water level drops and dye reaches the bowl, the leak is through the flapper seat area. If the water level stays high but overflow flow continues during refill, the fill valve remains the better suspect.
How do I know if the flapper, fill valve, or flush valve is bad?
The flapper fails by leaking from tank to bowl, the fill valve fails by refilling badly or refusing to shut off, and the flush valve fails when its body or sealing surface no longer lets a good flapper seal. One symptom can overlap, so use a quick test before buying parts.
Flapper failure signs
Look for warped rubber, a chain with too little slack, mineral buildup on the seat, poor contact around the rim, or the wrong flapper size. A 2-inch flapper on a 3-inch opening is unlikely to work properly. Some flappers also absorb water and turn heavy, which changes drop timing and causes odd flush behavior.
Ghost flushing often starts here. Korky describes ghost flushing as a toilet flushing on its own, and a slow tank leak is usually what triggers the refill cycle.
Fill valve failure signs
Look for a slow refill, hiss, chatter, spurting, or water creeping into the overflow tube after the tank should be full. A mis-set float can imitate a bad valve, so adjust first. If the adjustment range is used up, or the valve still sticks, replacement is the cleaner fix.
Quiet aftermarket versions are widely available. They help with whistle and hiss complaints in powder rooms and bedrooms where refill noise matters.
Flush valve failure signs
Suspect the flush valve when a new flapper and clean seat still leak, or when the plastic body shows a hairline crack. The flush valve creates the main drain path from tank to bowl. If that path is damaged, the toilet keeps losing water no matter how many small rubber parts are swapped.
How do I fix a toilet that keeps flushing twice or flushes weakly?
A toilet that flushes twice or weakly usually has a flapper timing problem, a chain length issue, or a low tank refill setting. Start by checking how long the flapper stays open, where the water level settles, and whether holding the handle down changes the flush result.
Chain length, flapper drop timing, and tank water level checks
Too little chain slack can hold the flapper up and make the toilet dump extra water, creating a double flush. Too much slack can weaken the initial lift and cause a lazy flush. The best check is visual: flush once and watch whether the flapper drops too late or too soon.
If holding the handle down gives a much stronger flush, the flapper is closing early. If one press sends the bowl into a second wave, the flapper may be hanging open too long.
Single-flush and dual-flush issues that affect flush performance
Modern flush performance is measured in gallons per flush, but tank parts are only part of the story. Bowl design matters too. Good Housekeeping says the Glacier Bay McClure includes a dual-flush system, and dual-flush models can show different symptoms depending on whether the half or full flush side is misadjusted.
Single-flush toilets are usually easier to diagnose because one lever action controls one dump volume. Dual-flush systems add linkage and settings that need to be checked before any part is blamed.
When bowl design or low tank refill changes the result
A full tank does not always mean a strong flush. If the refill ratio leaves too little water in the bowl after each cycle, carryover flushes can turn weak or noisy. If a toilet has always flushed poorly, the issue may be design, not wear. At that point, replacement can make more sense than repeated tuning.
What causes a toilet to leak between the tank and bowl or at the base?
A leak between the tank and bowl usually comes from the tank-to-bowl gasket, bolt washers, or a cracked tank. A leak at the base after flushing points more often to the wax ring or a wax-free seal. Wet floors can also come from supply drips or simple condensation.
Tank-to-bowl gasket failures, bolt leaks, and cracked tank checks
Dry the area fully, then flush once and watch under the tank with a flashlight. Water from the center outlet suggests the tank-to-bowl gasket. Water from bolt holes suggests hardware washers or loose bolts. A crack often leaves a thin track of water down the porcelain wall.
Tank-to-bowl gasket kits are commonly sold for 2-inch and 3-4 inch flush outlet setups. Match the kit to the toilet’s flush hardware rather than guessing by brand alone.
Wax ring versus wax-free seal problems after rocking or reinstall
If the floor gets wet mainly after a flush and the tank area stays dry, suspect the base seal. A rocking toilet can crush or shift a wax ring. Wax-free options exist and can be easier to position on some installs, especially where the toilet must be lifted and reset more than once.
Leak prevention depends on floor condition too. If the flange is loose or the floor is soft, a new seal will not solve the whole problem.
When a wet floor points to supply line, condensation, or subfloor trouble instead
Touch the supply line and shutoff connection. A drip there can mimic a base leak. In humid rooms, tank condensation can also puddle on the floor. If the toilet rocks and the floor feels spongy, pause the repair and inspect for subfloor decay before reinstalling anything.
How do I stop a toilet bowl from overflowing or clear a clog safely?
Turn off the water first, stop any refill into the bowl, and do not flush again until the water level drops. Most overflow events get worse because the toilet is flushed a second time. After the level stabilizes, use the right toilet plunger with controlled strokes.
Immediate overflow response without making the mess worse
Korky says most toilet clogs can be fixed in minutes with the right technique. That only helps if the refill is stopped first. Shut the valve, remove the tank lid, and lift the float if needed. If the bowl is nearly at the rim, wait. Time is safer than a second flush.
How to use a flange or beehive toilet plunger the right way
Korky notes a toilet plunger is designed to seal inside a round or elongated bowl outlet. That seal matters more than brute force. Set the flange into the outlet, keep the cup full of water, then push and pull with steady pressure until the clog breaks and the bowl drains.
A cup-style sink plunger is the wrong tool here. It slides on the porcelain and leaks air instead of moving water.
When repeated clogs mean the issue is past the toilet
If the same toilet clogs often with normal use, the problem may be farther down the drain or tied to weak bowl design. If another fixture gurgles or backs up at the same time, stop treating it as a toilet-only issue. That is drain-line territory.
Which replacement part fits my toilet, and when is replacement smarter than repair?
The right part fit depends on the flush opening, tank hardware, and toilet layout. Check flapper size, flush valve size, and gasket style before buying. Repair is usually worth it for isolated wear parts, but cracks, poor fit, repeat leaks, and chronic weak flushing can favor full replacement.
How to measure flapper and flush opening size: 2-inch vs 3-inch
Flapper sizing matters because the rubber seal must match the flush valve opening. The common sizes are 2-inch and 3-inch. Measure the opening at the flush valve, or compare the old flapper to the outlet diameter. Too small leaks. Too large can bind and distort drop timing.
This is one of the most common wasted trips to the store. Flappers are not all interchangeable.
Picking fill valves, tank-to-bowl gasket kits, and quiet aftermarket parts
Many fill valves are height-adjustable and fit a wide range of tanks, but the refill clip and overflow setup still need to match the toilet. For tank-to-bowl leaks, choose the gasket kit by outlet size and tank style. Quiet aftermarket fill valves are a smart pick where refill noise is the main complaint.
When rough-in, age, cracks, or repeat failures make a new toilet the better call
Toilet rough-in is the distance from the finished wall to the center of the floor bolts, and a 12-inch rough-in is common on many modern toilets. That dimension controls fit. If replacement is on the table, rough-in comes first.
Repeated internal repairs on a poor-flushing bowl often stop making sense. Cracked porcelain, a damaged tank, recurring base leaks, or unreliable fitment usually tip the math toward replacement. Sitting toilets are more convenient for people with disabilities and the elderly, so replacement decisions can also be about accessibility. Good Housekeeping says the Toto Drake has a seat height of 17 inches, which shows how replacement choices can affect comfort as well as repair cost.
For cost planning, flappers are usually in the lowest price band, fill valves and gasket kits tend to sit a step above, and flush valve or reset work rises with labor because the tank or toilet may need to come off. Once labor reaches the low hundreds and the fixture still has poor flush performance, replacement deserves a hard look.
What tools do I need for toilet repair?
Most toilet repairs need only a wrench, pliers, sponge, bucket, towels, gloves, dye tablets or food coloring, and the correct replacement part. Add a flange or beehive toilet plunger for clog work. Keep a flashlight nearby because leaks often show up first under the tank or behind the bowl.
Simple maintenance schedule that prevents repeat failures
Check the flapper seal and chain slack whenever the tank lid is already off. Korky says a toilet flapper should be replaced every five to ten years, and heavy use or hard water can push that sooner. Inspect fill valve shutoff behavior when refill sounds change. After any reset, watch the base closely for the next several flushes.
People use different toilet types based on the country that they are in, and part styles vary too. I match by what is in the tank, not by assumption.
Frequently asked questions
Why is my toilet running constantly?
A running toilet usually means water is leaking from the tank into the bowl through the flapper, or the fill valve is overfilling into the overflow tube. Use dye in the tank and watch the overflow tube. That separates a seal problem from a shutoff problem fast.
How do I fix a toilet that keeps flushing twice?
Start with the chain and flapper timing. If the chain is too tight or the flapper stays up too long, one press can trigger a double flush. Lowering an overfilled tank water level and correcting chain slack usually solves it without replacing major parts.
What causes a toilet to leak between the tank and bowl?
The usual causes are a worn tank-to-bowl gasket, leaking bolt washers, loose hardware, or a crack in the tank. Dry everything first, then flush once and watch closely underneath. The exact drip path tells whether the center gasket, the bolts, or the porcelain failed.
How do I fix a toilet that fills slowly?
A slow-filling toilet usually needs fill valve cleaning, float adjustment, or fill valve replacement. Check the shutoff valve is fully open, then inspect the fill valve for debris or hard-water buildup. If adjustment does little and refill remains weak or noisy, replace the valve.
How do I know what flapper size I need?
Measure the flush valve opening in the tank and match the flapper to it. The common sizes are 2-inch and 3-inch. Do not guess by appearance alone. The wrong size can cause constant running, ghost flushing, weak flushes, or a flapper that hangs up during operation.
How do I plunge a toilet correctly?
Use a flange or beehive toilet plunger, not a cup-style sink plunger. Set the plunger so it seals inside the bowl outlet, keep the head full of water, then push and pull with controlled strokes. Stop if repeated attempts fail or if other fixtures also back up.
Sponsored / affiliate links. As an Amazon Associate I earn from qualifying purchases. I may earn additional commission from eligible campaigns.