Bathroom maintenance tips: a homeowner’s repair guide
Bathroom maintenance tips: a homeowner’s guide
By Jordan Hale, homeowner and home-maintenance writer with 12 years of hands-on renovation and repair experience.
Bathroom maintenance often works well on a simple routine of daily drying, weekly cleaning, and monthly inspections, with caulk or leak repairs whenever water lingers for about a day or more. Skip that routine and small leaks, loose grout, and trapped humidity can turn into mold, stained ceilings, rotten trim, and expensive plumber visits. This homeowner’s guide lays out the schedule, the highest-risk spots to check, and the point where cleaning stops helping and repair needs to start.
The pricey failures usually start where you can see them. Humidity hangs after showers, condensation forms on glass and paint, grout stays damp, caulk softens, and odors follow. Once water keeps getting past the surface, you are out of cleaning territory and into repair work.
For Bathroom maintenance tips: a homeowner’s guide, I frame the job around prevention. Start with the wet area, then the vanity and sink drain, then the toilet base, then the exhaust path that should be removing moisture but often is not. In my own house, the first warning was not mold on tile but a vanity side panel that stayed slightly swollen near the tub for weeks; once I traced it back to splash and weak post-shower ventilation, the fix was mostly routine drying and a small caulk repair rather than a cabinet replacement.
Bathroom maintenance tips: homeowner’s guide to high-risk failure points


How moisture turns into repair work
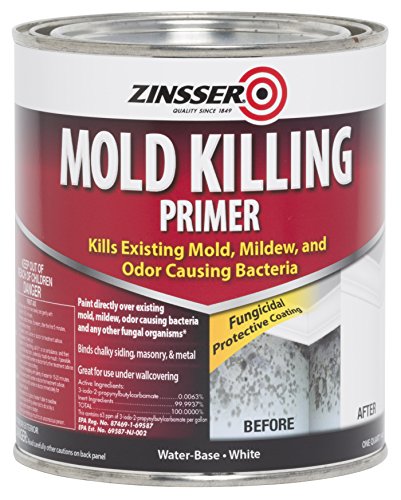
Bathrooms fail in a chain. Humidity leads to condensation. Condensation keeps surfaces wet. Wet surfaces feed mold, soften caulk, stain grout, swell vanity panels, rust hardware, and shorten the life of finishes that would otherwise last much longer.
A bathroom that stays wet too long usually gives warnings before major damage: mirror fog that lingers, damp grout lines by the next day, musty smell near the shower, paint bubbling above the door, or a vanity side panel that feels swollen. Guidance from the U.S. Environmental Protection Agency and the Centers for Disease Control and Prevention consistently supports controlling moisture quickly because damp indoor surfaces are what allow mold and material damage to keep progressing.
The zones that fail first
- Wet area: shower corners, tub edges, grout joints, shower sweep, and lower glass.
- Vanity: sink rim, faucet base, trap area, cabinet floor, and side panels near the toilet or tub.
- Toilet base: movement, caulk gaps, soft flooring, and recurring odor.
- Exhaust path: fan grille, duct route, window trim, and any ceiling area that stays damp.
A priority order when time is tight
- Dry wet surfaces after showers.
- Vent the room until condensation clears.
- Check grout and caulk at corners and edges.
- Keep sink and shower drains moving freely.
- Watch for hidden leaks, swelling, or odor.
Bathroom maintenance tips: what should I do to keep my bathroom in good shape?
Keep the room dry first, clean second, and inspect third. A short daily reset after showers, a weekly pass on grout, drains, towels, and dust, plus a monthly leak-and-caulk check will prevent most homeowner-level bathroom problems before they turn into repairs.
The 5-minute daily reset
Run the extractor fan or crack the window right after every shower, and keep it going until the mirror clears and the ceiling no longer feels damp. That matches the basic approach recommended by the Home Ventilating Institute and major building-science guidance: keep ventilation running long enough to remove lingering humidity, not just while you are in the shower. That matters most in the first few minutes after bathing, when warm surfaces pull moisture out of the air as the room cools.
Pulling water off the shower right away cuts down on moisture that would otherwise sit there and turn into condensation. Glass shower screens are often dulled by limescale and persistent water marks, and I have found that a squeegee or window vac after every shower does the most to keep shower screens clear.
- Squeegee shower glass and tile.
- Wipe faucet bases and the sink deck with a microfiber cloth.
- Hang towels flat so they dry fully.
- Check the floor around the toilet and vanity for stray water.
The weekly tasks that stop buildup
Weekly work is where prevention pays off. Grout should be scrubbed every week or two with a paste of water and baking soda. That routine limits staining, slows mold growth, and makes hairline cracks easier to spot before water starts getting behind the tile. It also lines up with conservative care advice from major grout and tile manufacturers, which generally warn against overusing aggressive abrasives or bleach-heavy cleaning on joints and sealants.
Dust belongs on the weekly list too. In a damp room, dust sticks to moisture and turns into grime on trim, fan grilles, baseboards, and the tops of light fixtures. Regular wiping keeps inspection points visible.
The monthly inspection points many homeowners miss
Once a month, check the places cleaning does not fix: caulk at corners, the underside of the sink trap, vanity toe-kicks, the ceiling near the fan, toilet hold-down area, and the bottom edge of painted trim.
Look for peeling paint, rusting hardware, persistent mirror fog, recurring damp grout, or soft trim. If the same area never seems fully dry, maintenance is already losing to a moisture source.
Seasonally, vacuum the exhaust fan grille, inspect the damper if you can reach it, and check whether the fan seems to remove steam or mostly just makes noise. In homes with central HVAC, replacing HVAC filters every 1-3 months improves air quality and system efficiency.
Where an HVAC drain line serves nearby equipment, clearing an HVAC drain line with vinegar or a wet/dry vacuum can prevent mold buildup and water damage. That is not a bathroom task in every house, but when the bathroom sits near an air handler, it can matter.
Bathroom maintenance tips: how do I prevent mold in the bathroom?
Mold prevention comes down to shorter wet time, better airflow, and faster response when moisture starts lingering. Run ventilation after every shower, wipe down the wettest surfaces like the lower glass, tile corners, and tub edge, wash fabrics on schedule, and treat any area that stays damp into the next day as a moisture problem, not a cleaning problem.
Use ventilation the right way after showers
Run the extractor fan or crack the window after every shower. In practice, keep air moving until the mirror clears, the ceiling no longer feels humid, and the shower corners start drying instead of holding beads of water. Consumer guidance from the EPA and many bath fan makers also supports using a timer or delayed shutoff so the room has enough time to dry after bathing.
Small bathrooms need even more attention. They saturate fast, especially with a shower curtain, low ceiling, or weak fan. A fan timer helps because many people walk out and switch the fan off while the room is still damp.
How long wet surfaces should stay wet before concern starts
If grout lines, the tub deck, or painted trim are still visibly damp by the next day, there may be a problem. That could be poor airflow, hard-water residue holding moisture, failed caulk at a joint, or water escaping past the shower door sweep.
Persistent mirror fog after the room should have aired out is another clue. It often points to weak exhaust, a blocked duct, or a room that simply needs longer ventilation after each shower.
Small mold patches and the DIY limit
Small patches of mould can usually be dealt with using household cleaners. A diluted vinegar-and-water solution can be a homeowner option for light growth on non-stone surfaces, and it helps to keep the area ventilated during cleaning so loosened residue and fumes do not build up in the room. EPA guidance also draws a practical line between limited surface mold you can clean safely and larger or repeated growth that suggests a hidden moisture source.
Large or recurring areas are different. Fast-growing mould covering large areas should be left to professionals. If cleaned mold returns quickly, the issue is usually hidden moisture, not weak cleaner.
Red flags that mean cleaning is no longer enough
- Musty odor that returns after the room is cleaned and dried.
- Mold reappearing along the same caulk line or grout joint.
- Growth spreading outside the splash zone.
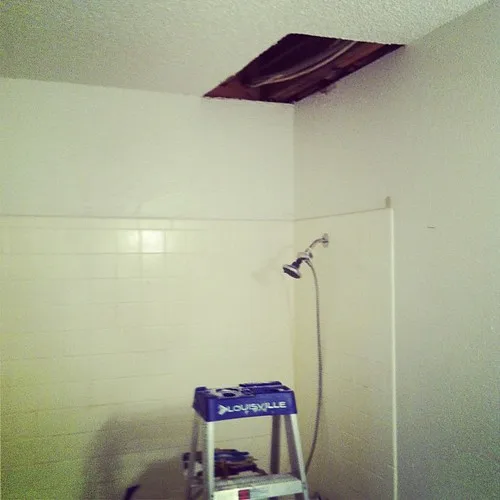
- Soft drywall, peeling paint, or swollen trim near the shower.
- Fan runs but steam still hangs in the room.
Bathroom maintenance tips: how often should I clean bathroom grout and tiles?
Clean grout and tile on a weekly or every-other-week cycle, depending on use and drying conditions. Bathrooms with hard water, low ventilation, or frequent showers may need the shorter interval because residue and trapped moisture tend to build up faster and can make grout staining, mold, and cracking more likely.
A grout routine homeowners can keep up with
Grout should be scrubbed every week or two with a paste of water and baking soda. Use a soft grout brush, not a stiff metal tool, and rinse well so powder does not sit in the joints and attract more residue.
For stained grout, oxygen-powdered bleach is better for grout than liquid chloride-based bleach. Liquid chloride bleach can be too aggressive around some joints and nearby finishes, and repeated harsh cleaning often hides a water problem instead of fixing it. That caution matches typical care instructions from tile, grout, and caulk manufacturers, which usually call for pH-balanced or non-abrasive methods before stronger chemistry.
What causes grout to stain, flake, or crack
Staining usually starts with soap film, hard-water minerals, and dust sticking to damp joints. Mold shows up where drying is slow. Cracking comes from movement, water entry behind tile, failed caulk where walls change plane, delayed repairs, and cleaners that slowly wear the grout surface.
Bathrooms with loose shower door sweeps or missing caulk at corners tend to show cracked grout first at the lower edges. Water sneaks behind the surface, then the joint weakens, darkens, or begins to powder out.
When cleaning is no longer enough
Flaking grout or tiles coming off means the grout may need replacing. At that point, repeated scrubbing is often wasted effort. Regrouting or targeted repair is usually cheaper than waiting for water to loosen more tile or rot the backer below.
Hairline cracks can be monitored if the area stays dry between uses. Wide cracks, recurring damp spots, and grout that rubs away onto a fingertip should move the job out of the cleaning bucket and into repair planning.
Bathroom maintenance tips: what causes bathroom grout to crack and how do I stop it?
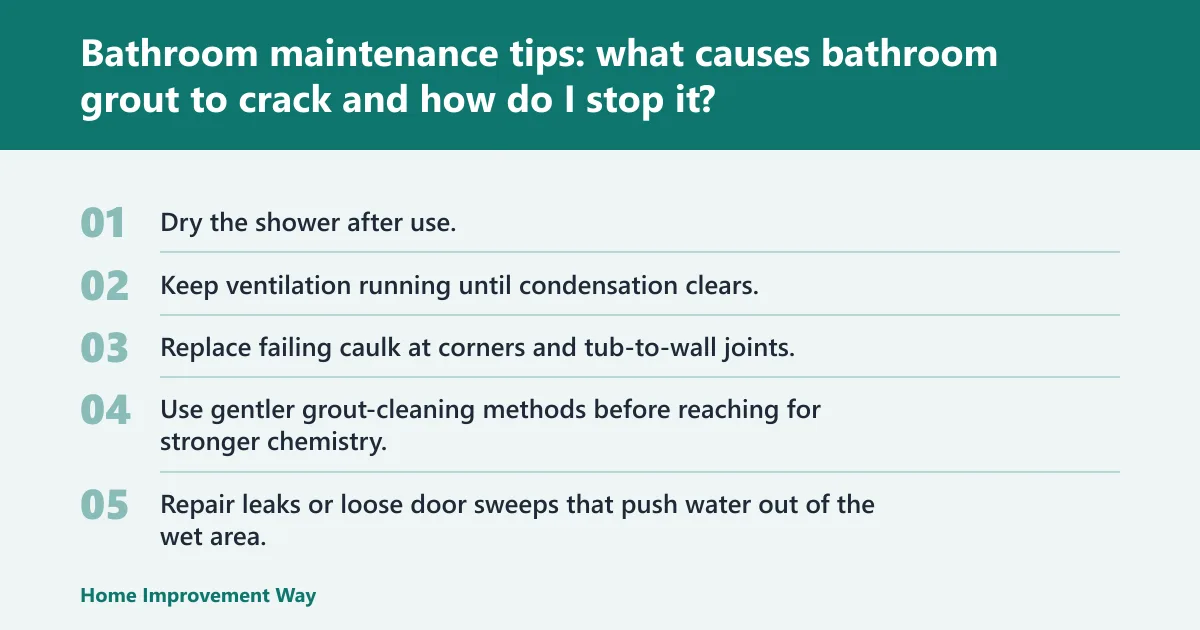
Bathroom grout cracks when the surface moves, water gets behind it, corner caulk fails, or harsh cleaning wears it down over time. The fix is to control moisture, keep changes of plane caulked, repair leaks early, and stop treating recurring grout damage as a scrubbing issue.
Movement and water entry
Wall-to-wall corners, wall-to-tub joints, and the lower edge of a shower enclosure move more than flat field tile. Those joints should rely on sound caulk, not brittle grout. When caulk fails, water gets in, the substrate shifts, and nearby grout starts to crack. This is a standard tile-assembly principle reflected in Tile Council of North America guidance and in sealant maker instructions for change-of-plane joints.
Poor ventilation and delayed repairs
Bathrooms that stay humid keep grout wetter for longer. That weakens the joint over time and makes small failures spread faster. A tiny crack near a damp corner can become a larger patch of loose grout if the room never dries fully.
How to stop the cycle
- Dry the shower after use.
- Keep ventilation running until condensation clears.
- Replace failing caulk at corners and tub-to-wall joints.
- Use gentler grout-cleaning methods before reaching for stronger chemistry.
- Repair leaks or loose door sweeps that push water out of the wet area.
Bathroom maintenance tips: how do I keep shower glass from getting water spots and haze?
Keep shower glass clear by removing water before it dries, then cleaning mineral film before it hardens. Daily squeegee work prevents most haze, while periodic cleaning with glass cleaner, vinegar solution, or citric acid helps in hard-water homes where mineral buildup forms faster.
Why shower glass clouds up
Glass shower screens are often dulled by limescale and persistent water marks. In hard-water homes, each drying cycle leaves a little mineral residue behind. Add soap film and body oils, and the glass takes on a hazy, chalky look that gets harder to remove over time.
After-shower drying methods
A squeegee or window vac after every shower can help keep shower screens clear. Follow with a microfiber cloth along the bottom edge, hinges, handle mounts, and chrome trim where water tends to sit.
That same quick pass helps nearby tile, too. Less standing water means less condensation, slower mold growth, and fewer minerals hardening onto grout and hardware.
What to clean with and what to avoid
Glass cleaner works for light film. A vinegar solution helps on basic mineral residue. For heavier limescale, many tile and glass pros prefer citric acid because it cuts mineral buildup well. Use care around natural stone, since acidic cleaners can damage it.
Avoid abrasive pads on glass, plated trim, and coated hardware. On chrome, skip rough powders and stiff scrubbers that can leave fine scratches. Rinse cleaners off metal trim so residue does not sit in seams.
Bathroom maintenance tips: how do I stop dust and moisture buildup in a bathroom?
Reduce dust so damp surfaces have less to grab onto, then make the room easier to dry. Regular fabric washing, fewer items left on counters, and quick wiping of horizontal surfaces keep grime from bonding to humidity and make hidden moisture easier to spot.
Why dust matters more in bathrooms
Dust on a dry shelf is mostly cosmetic. Dust on a damp vanity side, baseboard, or fan grille turns sticky fast. That grime traps moisture, slows drying, and hides early signs of leaks or mold.
A HEPA-filter vacuum helps reduce dust and pet dander. Even a short pass on floor corners, baseboards, and the fan grille cuts what would otherwise settle onto wet surfaces.
Laundry habits that help control mold and odor
Towels and bath mats are maintenance items, not decor. Wash them regularly because damp fabric holds skin oils, moisture, and dust. Shower curtains can be machine washed regularly to kill bacteria and keep mould at bay.
Do not leave bath mats heaped on the floor or towels bunched on hooks for days. Spread them so air can reach both sides, especially in small bathrooms with low ventilation.
Storage and clutter fixes that speed drying
Keep the floor and vanity top as open as possible. Fewer bottles around the tub edge means fewer places for water to sit and fewer blind spots where caulk can fail unnoticed.
For rental turnover or guest baths, this matters even more. Extra products, spare tissue packs, and decorative baskets often block airflow and hide leaks until the next deep clean.
Bathroom maintenance tips: what bathroom maintenance tasks should I do weekly?
Weekly bathroom maintenance should target buildup before it hardens or starts trapping moisture. Focus on grout, shower glass, sink drains, towels and mats, dust on horizontal surfaces, and a fast scan for failed caulk, soft trim, recurring odor, or water where it should never sit.
The weekly checklist
- Scrub grout lines and rinse them clean.
- Clean shower glass and wipe lower tracks or door sweeps.
- Clear hair from sink and shower drains.
- Wash towels, bath mats, and if needed the shower curtain liner.
- Dust and wipe trim, fan grille, shelves, and vanity sides.
- Check caulk lines, toilet base, and cabinet floor for moisture.
What weekly work prevents
This short list prevents the issues that snowball fastest: mold on grout, haze on glass, sink clogs from hair and soap scum, odors from damp fabric, and missed leaks that swell trim or vanity panels. If you want a deeper step-by-step on adjacent bathroom tasks, this routine pairs naturally with Glass shower screens, mirror fog, and faucet base upkeep already covered elsewhere on the site.
Bathroom maintenance tips: when should I call a plumber for a bathroom problem?
Call a plumber when clogs keep returning, drains gurgle, backups affect more than one fixture, water appears where no splash should reach, or a toilet or faucet connection leaks. Cleaning and plunging are fine for minor buildup, but repeated symptoms usually point to a repair issue. Consumer advice from organizations such as the American Society of Home Inspectors and many plumbing trade groups also treats recurring backups, hidden leaks, and loose toilets as repair calls rather than cleaning jobs.
Minor sink and drain clogs you can handle
Hair and soap scum are the usual bathroom drain culprits. Minor sink blockages can be tackled with a plunger. Remove visible debris first, then try a few controlled plunges rather than repeated violent force that can stress old slip joints. For nearby help with fixture disassembly around the sink area, see faucet base guidance before forcing corroded parts.
Signs the blockage is more than routine buildup
- Slow drain returns soon after clearing.
- Gurgling from the drain after water runs.
- Water backing up in another fixture.
- Leak develops under the sink when plunging.
- Odor persists even when the trap is clean.
Leaks, movement, and trade boundaries
A loose toilet base should not wait. Movement can break the wax seal or allow water to damage flooring. Likewise, water stains below the bathroom, cracked tile from substrate movement, or fan venting failure belong to a pro.
Not every moisture issue needs a plumber. If the fan does not clear steam, an HVAC or electrical trade may be the right call. If mold returns fast or tile is loosening, a tile or remediation pro may be needed instead. EPA mold guidance is especially useful here: repeated or widespread growth usually means moisture control and material repair matter more than another round of surface cleaning.
Surface-safe cleaning and repair boundaries by material
What to avoid on grout and caulk
Do not use metal brushes, razor scraping on soft joints, or repeated doses of harsh chloride bleach on grout or caulk. Those methods can roughen the surface, open pores, and shorten the life of joints that already spend too much time wet. That is in line with common care directions from grout and silicone-sealant manufacturers, which typically recommend non-abrasive tools and caution against repeated harsh chemical exposure.
When a joint is split, missing, or peeling, cleaning is not the fix. Move from maintenance to repair and address the failed seal before more water gets behind the finish. If you are comparing whether a joint needs cleaning or replacement, the closest related task is usually shower cleaning first, then caulk repair once the area is fully dry.
Chrome, porcelain, fiberglass, and acrylic
On chrome, use soft cloths and non-abrasive cleaners. Rough powders can dull plated finishes. Porcelain can take more scrubbing than fiberglass or acrylic, but gritty pads still leave marks over time.
Fiberglass and acrylic scratch easily. Use non-abrasive cleaners and soft sponges only. Once scratched, they hold grime and hard-water film much faster.
Glass, stone, and specialty finishes
Glass handles routine glass cleaner well, and vinegar solution can help with water marks. Citric acid is often a better choice for heavier mineral buildup, but keep acids away from natural stone unless the product is clearly safe for it.
Natural stone needs pH-appropriate cleaners. Acidic products that work on shower glass can etch stone surfaces and leave dull spots that cleaning cannot reverse.
The bathroom maintenance matrix: task, frequency, time, and risk prevented
How to use the one-page matrix
Use the matrix as a real schedule, not a wish list. Start with the tasks that keep water from sitting, then the ones that catch failure early, then the seasonal items that restore airflow and access.
| Task | Frequency | Time required | Risk prevented | Surfaces and tools involved |
|---|---|---|---|---|
| Run extractor fan or open window after showers | After each shower | 5-20 minutes of room ventilation, little hands-on time | Condensation, mold, peeling paint, damp grout | Fan or window; check mirror, ceiling, and corners |
| Squeegee shower glass and wipe wet trim | After each shower | 2-4 minutes | Limescale, water spots, lingering moisture | Shower glass, chrome trim; squeegee, microfiber, window vac |
| Wipe sink deck, faucet base, and vanity splash zone | Daily | 1-2 minutes | Mineral buildup, swelling vanity panels, hidden leaks | Porcelain, chrome, laminate or painted vanity; microfiber cloth |
| Scrub grout with baking soda paste | Weekly or every two weeks | 10-20 minutes | Staining, mold, missed cracks | Grout and tile; baking soda paste, soft grout brush |
| Clean shower glass fully | Weekly | 10 minutes | Haze, mineral film, hardware corrosion | Glass, trim; glass cleaner, vinegar solution, or citric-acid product safe for adjacent surfaces |
| Clear hair and soap scum from drains | Weekly | 5-10 minutes | Slow drains, odor, minor clogs | Sink and shower drains; gloves, drain tool, plunger if needed |
| Wash towels and bath mats | Weekly | 10 minutes hands-on, wash time separate | Odor, mold, dirt transfer back to floors | Fabrics; laundry supplies |
| Dust fan grille, trim, shelves, and baseboards | Weekly | 5-10 minutes | Grime on damp surfaces, blocked airflow, hidden leaks | Painted trim, fan cover, shelves; microfiber or HEPA-filter vacuum |
| Inspect caulk, grout cracks, toilet base, and cabinet floor | Monthly | 10 minutes | Water escape, subfloor damage, recurring mold | Caulk lines, tile joints, toilet base, vanity interior; flashlight, tissue or dry cloth |
| Vacuum exhaust fan grille and check airflow | Seasonally | 10-15 minutes | Recurring humidity, mold, ceiling staining | Fan grille and nearby ceiling; vacuum, screwdriver if needed for cover |
| Review caulk, shower sweep, and grout reseal needs | Seasonally | 15-30 minutes | Water bypass, cracked joints, repeated cleaning with no result | Wet-area joints and door bottom; replacement sweep, sealant if repair is due |
Replacement thresholds and repair handoff points
- Caulk: replace when it splits, pulls away, stays mold-stained, or no longer seals a corner.
- Grout: reseal or repair when it darkens from water entry, powders, flakes, or cracks repeatedly.
- Fan: stop relying on it if steam lingers and the room does not dry in a normal window after use.
- Shower sweep: replace when water escapes the wet area or the strip hardens and gaps open.
- Drain maintenance: stop repeating DIY clearing if clogs return quickly or backups spread to other fixtures.
Red-flag escalation box: stop cleaning and call a pro
- Fast-growing mould covering large areas should be left to professionals.
- Water stains on ceilings below the bathroom.
- Loose toilet base or flooring that feels soft nearby.
- Cracked tile tied to movement underfoot.
- Recurring mold on the same joint after cleaning and drying.
- Persistent odor from a drain, cabinet, or wall cavity.
- Fan noise without real steam removal.
- Flaking grout or tiles coming off means the grout may need replacing.
Frequently asked questions
What should I do to keep my bathroom in good shape?
Follow a simple prevention system: dry wet surfaces daily, clean grout, drains, and fabrics weekly, and inspect caulk, leaks, and hidden moisture monthly. Focus first on ventilation, shower drying, and early leak signs, because moisture left in place is what drives most bathroom damage.
How often should I clean bathroom grout and tiles?
Clean grout every week or two, with the shorter interval for busy bathrooms, hard-water homes, and low-ventilation layouts. Regular scrubbing with baking soda paste helps limit staining and mold, and it gives a clear chance to spot cracks or flaking before repairs get larger.
How do I prevent mold in the bathroom?
Run ventilation after every shower, wipe down the wettest surfaces such as the shower glass, tile corners, tub rim, and faucet base, wash towels and bath mats regularly, and treat next-day dampness as a warning sign. Small patches of mould can usually be dealt with using household cleaners, but fast return or spreading growth needs a professional review.
What causes bathroom grout to crack and how do I stop it?
Grout cracks because of movement, water getting behind tile, failed caulk at corners, harsh cleaning, and rooms that stay damp too long. Keep corner joints sealed, dry the shower after use, fix leaks quickly, and move to repair when grout starts flaking or repeatedly darkening.
How do I keep shower glass from getting water spots and haze?
Remove water before it dries. A squeegee or window vac after every shower can help keep shower screens clear, and weekly cleaning with glass cleaner, vinegar solution, or citric acid handles mineral film. In hard-water homes, daily drying matters more than stronger chemistry.
When should I call a plumber for a bathroom problem?
Call a plumber for repeated slow drains, gurgling, backups, active leaks, or a loose toilet base. Minor sink blockages can be tackled with a plunger, but recurring symptoms usually mean hair and soap scum are no longer the whole problem and repair is due.
When should I call a mold remediation pro instead of cleaning it myself?
Call a remediation pro when mold covers a large area, comes back quickly after cleaning, appears outside the normal splash zone, or is paired with soft drywall, swollen trim, or a strong musty odor. At that point, the real job is usually moisture diagnosis and material repair, not stronger cleaner.
What adjacent bathroom maintenance jobs should I pair with this routine?
The most useful adjacent jobs are shower cleaning, drain clearing, caulk repair, and mold removal, because they tackle the same moisture chain from different angles. If your weekly routine keeps surfacing the same issue, move from general upkeep to the directly related repair page or trade call before hidden damage spreads.
Practical bottom line: if your bathroom dries fully between uses, surfaces stay intact much longer; if it stays damp into the next day, treat that as a repair warning, not a housekeeping shortcoming.
Sponsored / affiliate links. As an Amazon Associate I earn from qualifying purchases. I may earn additional commission from eligible campaigns.