How to Prevent Mold in a Bathroom Before It Starts
Keep bathroom humidity around or below 50% after the room dries, and run the exhaust fan during showers and for about 20 to 30 minutes after. Fix leaks, dry wet surfaces, and ventilate hidden damp spots before mold can start. Ignore that routine, and moisture builds in grout, caulk, corners, and drywall, where repairs get far more expensive. This guide covers the humidity target, airflow checks, drying steps, and the common bathroom spots that need attention first.
Bathroom mold prevention audit

Use this audit as a quick pass after showers and a deeper check once a week. It focuses on the conditions mold needs first: moisture, weak airflow, and damp materials that stay wet long enough for growth to start.
| Checkpoint | Pass criteria | Fail sign | Simple action if it fails |
|---|---|---|---|
| Humidity reading | Stays below about 50% after the room dries | Humidity holds above 50% for long after showering | Run the fan longer and use a hygrometer to recheck |
| Fan runtime | Runs during the shower and 20 to 30 minutes after | Fan shuts off right away or rarely gets used | Set a timer or switch habit so it runs longer |
| Airflow feel test | Air is clearly moving at the grille | Weak pull, rattling, or no obvious draw | Clean the grille, inspect ducting, and check fan size |
| Shower surface dry-down | Glass, tile, and ledges are dried after use | Standing water remains on tile or glass | Use a squeegee and wipe the wet zones |
| Caulk seam condition | Seams are smooth, intact, and not pulling away | Cracks, peeling, gaps, or dark staining along seams | Remove failed caulk and replace it |
| Grout seal status | Grout is sealed and water does not soak in fast | Grout looks chalky, dark, or stays damp | Clean, dry, and reseal grout if it is unsealed |
| Leak check | No drips under sinks, around valves, or at traps | Water spots, loose fittings, or slow drips appear | Fix the leak promptly before moisture spreads |
| Curtain drying | Curtain or liner opens out and dries between showers | Folded liner stays clumped and wet | Spread it fully and wash or replace if it stays damp |
| Mat drying | Bath mat dries within the day | Mat stays damp underneath or smells musty | Hang it up or switch to a quicker-drying mat |
| Towel moisture | Towels dry fully between uses | Towels remain heavy, cool, or musty | Spread towels out, wash them, and improve air movement |
| Ceiling-corner spotting | No specks, shadowing, or damp edges in corners | Dark dots or discoloration at ceiling corners | Increase ventilation and inspect the fan housing and roof or vent path |
| Window or vent condition | Window opens freely or grille is clean and clear | Dust buildup, stuck sash, or condensation on the frame | Clean the opening and use it with mechanical ventilation when weather allows |
How to use the 12-checkpoint audit
Start with the fan, humidity, and visible wet zones. Those three tell you whether the room is drying fast enough. Then check the failure points that mold usually finds first: ceiling corners, fan housing, shower seams, curtain folds, mats, and towels.
Say your bathroom is 5 by 8 feet with no window. In the example, the shower ends, the mirror clears in about ten minutes, but the hygrometer still reads about 58% an hour later. That points to weak exhaust, a fan that is too small, or moisture trapped in fabrics and seams.
Pass/fail criteria for humidity, airflow, and wet surfaces
Keep bathroom humidity below about 50% after the room dries. A hygrometer gives you a number, which matters more than a guess because small bathrooms can spike fast after a shower and stay damp longer than expected. If wet surfaces still bead after the fan cycle, the room has not dried enough.
A strong fan should move air in a way you can feel at the grille. If the pull seems weak, check whether the unit vents outdoors, whether the grille is clogged, and whether the fan is sized for the room. A bathroom fan that is too small for the space can run for about 30 minutes and still leave moisture behind.
What to do when a checkpoint fails
- Keep the fan running and open the door only if it helps move drier air through the room.
- Dry glass, tile, ledges, and the shower threshold with a squeegee or towel.
- Check the hidden wet zones: curtain folds, mat backing, towel hooks, ceiling corners, and behind the toilet or vanity.
- Inspect caulk and grout at the shower-tile intersections for cracks, gaps, or staining.
- Look for leaks under sinks, at supply lines, and around the tub overflow or valve trim.
- If humidity stays high, add a dehumidifier or improve exhaust capacity.

Mold usually starts where water lingers, not where it looks worst. Corners, caulk lines, grout joints, fan housings, and the back side of a shower curtain can stay damp long after the room looks dry.
Where mold begins first
The first weak points are often ceiling corners, the upper edge of the shower, and seams around tubs, sinks, and tile. Grout is porous unless it is sealed, so it can hold moisture at the surface and deeper in the joint. Fan housings collect dust, and dust plus dampness creates a better starting point for growth.
Picture a tiled shower with a cracked bead of caulk at the tub edge. Water hits that line every day, then sits in the gap where a wipe-down cannot reach. That is the kind of hidden damp spot that turns into a recurring mold line.
Why post-shower moisture matters more than a quick wipe later
The first hour after a shower matters most. That is when humidity spikes, mirror and window condensation form, and surfaces remain warm and wet at the same time. A quick wipe later helps, but it does not undo an hour of damp air trapped in a small room.
Small bathrooms and windowless layouts
Small bathrooms can hold moisture longer because the same shower adds more humidity to a smaller air volume. Windowless rooms depend even more on mechanical ventilation. If the fan is weak, dirty, or ducted poorly, the room may look fine while hidden surfaces stay damp.
How to keep bathroom humidity below mold levels
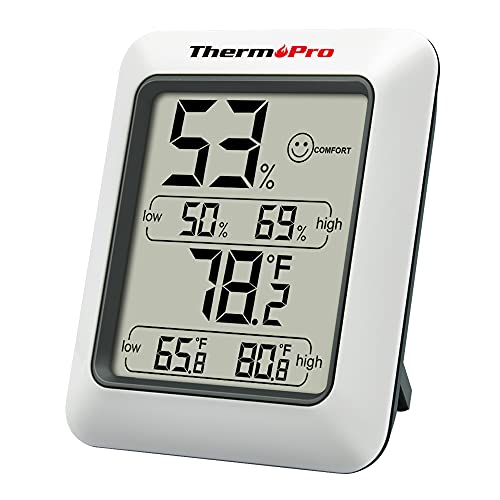
Use a hygrometer and aim to keep bathroom humidity below about 50% after the room dries. That target gives you a clear standard instead of a vague feeling that the room seems dry enough. If the number keeps climbing after each shower, the room needs more drying time or better ventilation.
Use a hygrometer to track humidity spikes
Place the hygrometer where it can read the room, not right next to the shower stream. Check the reading before showering, right after, and again after the fan has run for about 20 to 30 minutes. In a small bathroom, the spike can be sharp, and that is normal; the issue is how quickly it falls.
What to do if humidity stays high after showers
First, verify that the fan actually moves air outdoors. Next, clean the cover and grille so dust does not choke the intake. If the reading still stays high, the fan may be undersized for the room, or the duct run may be too long, kinked, or blocked. A dehumidifier can help in small or windowless baths, especially when the room lacks a usable window.
How should you run the bathroom fan?
Run the exhaust fan during every shower and for 20 to 30 minutes afterward. That routine removes moist air while it is being made and keeps the room from holding onto the spike that follows a hot shower. Short fan bursts are usually not enough.
How to tell if airflow is weak
Weak airflow often shows up as lingering mirror fog, damp corners, or a room that still feels clammy after the fan has been on. You may also notice a loose grille, dust buildup, or a fan that sounds like it is working harder than the air it moves. If a tissue barely moves at the grille, airflow may be poor.
Check the duct path if the fan seems weak. A bath fan should vent outdoors, not into an attic or closed space. Backdraft dampers can stick or install backward, which reduces effective flow and can let damp air drift back into the room.
Why ducting outdoors matters
Ventilation only helps if the moist air leaves the building. A fan that dumps into a cavity can shift the problem somewhere else, including insulation, roof decking, or wall framing. That kind of hidden moisture can lead to mold away from the bathroom itself.
Cleaning the grille and cover
Dust on the cover and grille cuts airflow. Remove the cover as the manufacturer allows, vacuum the dust, and wipe the grille clean. This is simple maintenance, but it matters because a dirty fan can look fine while moving far less air than it should.
Stop condensation on cold surfaces
Cold surfaces collect moisture first. Mirrors, windows, and exterior walls can sweat during and after a shower, and that condensation often settles in corners or along trim where it dries slowly. Wipe those surfaces quickly before water beads spread to the edges.
Mirror, window, and exterior-wall condensation
The highest-risk spots are usually the mirror, the window frame, and any wall that stays cooler than the rest of the room. If moisture keeps showing up in the same place, that surface may be a cold spot that needs faster drying or better airflow.
Nighttime moisture that lingers into morning
Bathrooms can retain moisture overnight, especially after an evening shower. If the room is still damp by morning, the fan may need a longer run time, the door may need to stay open briefly after the room dries, or a dehumidifier may be needed to pull the last bit of moisture out of the air.
Seal the seams that trap moisture
Caulk and grout are not just finish materials. They are also moisture pathways when they fail. Cracks, peeling edges, and discolored joints are warning signs that water is getting where it should not.
Silicone vs. acrylic-latex caulk
Silicone caulk is usually the better choice for wet seams because it handles constant moisture better than acrylic-latex. Acrylic-latex is easier to tool and paint, but it is less suited to shower edges and other damp joints. In a shower or tub area, silicone is usually the safer option.
When cracking or peeling means replacement
If caulk is cracked, pulling away, or turning dark along the edge, it is past the point of a simple touch-up. Remove the failed line and replace it. Mold often grows in the seam behind the visible bead, where surface cleaning cannot reach.
Grout sealing and shower-tile intersections
Grout is porous unless it is sealed. Sealer maintenance depends on the product, but many shower areas need periodic resealing because repeated wetting wears it down. Watch the tile and shower intersections closely; those joints see constant splash and are common mold starting points.
Use the right materials for damp zones
Mildew-resistant paint, a dehumidifier, a squeegee, and fast-drying accessories each help in a different way. None of them fixes poor ventilation by itself. They work best as part of a routine that removes water before it sits.
Mildew-resistant paint and what it can do
Bathroom-rated paint can help on walls and ceilings that face regular humidity, especially away from direct splash zones. Antimicrobial additives are useful, but they do not stop mold if water keeps collecting on the surface. Paint helps finish a dry room; it does not dry a wet one.
Dehumidifiers for small or windowless bathrooms
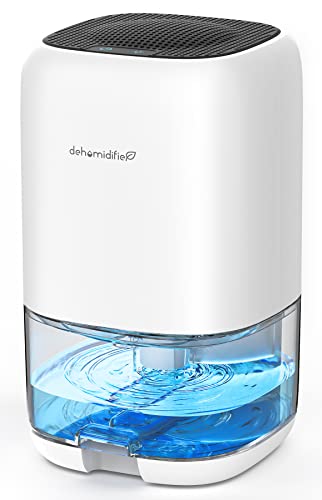
A dehumidifier can help when the room stays damp after showers or when the bathroom has no window and weak natural drying. Choose a capacity that matches the space, often measured in pints per day, and think about drainage before you buy. A unit with continuous drain options can be easier to live with than one that needs frequent emptying.
Squeegees, shower curtains, mats, and towels
A squeegee is one of the simplest daily tools for mold prevention. Use it on glass and tile after showers so standing water does not linger. Keep it where you can reach it without effort; if it is buried in a drawer, the habit usually fades.
Mold-resistant shower curtains and liners are worth choosing because they dry faster and are easier to wash. Even then, they need to be spread open so folds do not stay wet. Bath mats and towels should dry fully between uses; if they remain damp, they become moisture reservoirs instead of helpers.
Frequently asked questions
How to deal with mold in bathroom corners and caulk
Dark specks in corners and along caulk usually mean moisture has stayed there too long. Clean the area only after improving airflow, then replace cracked or peeling caulk if the mold keeps returning. If the seam is failing, cleaning alone will not solve the problem.
How often should I run the bathroom fan to prevent mold?
Run the fan every time you shower, and keep it on for 20 to 30 minutes afterward. In a small or windowless bathroom, a longer run may be needed if the hygrometer still reads above about 50% after the room should be dry.
What humidity level should a bathroom stay under to avoid mold?
Keep bathroom humidity below about 50% after the room has had time to dry. Short spikes during a shower are normal, especially in a small room. The key is how quickly the reading falls once the fan and drying routine do their work.
How do I clean mold in a bathroom without making it worse?
First, fix the moisture source or the mold will return. Then clean the visible growth carefully, avoid scrubbing dry spores into the air, and dry the area completely afterward. If mold is inside failed caulk, porous grout, or wall material, replacement may be safer than repeated cleaning.
Sponsored / affiliate links. As an Amazon Associate I earn from qualifying purchases. I may earn additional commission from eligible campaigns.