How to Sanitize Bathroom High-Touch Surfaces Safely
High-touch bathroom surfaces are the spots people grab over and over, so they need more attention than low-contact walls or cabinet fronts. In a bathroom, that usually means faucet handles, the faucet base, toilet flush levers, light switches, drawer pulls, soap dispenser buttons, door knobs, shower controls, cabinet pulls, touchscreen or electronic bidet controls, and similar touchpoints that collect fingerprints and residue fast.
Frequency matters more than size. A small switch plate can get more hand contact than a large tile wall, and a bathroom faucet often gets repeated use by multiple people. Clean those touchpoints first, then sanitize or disinfect the cleaned surface with the right product and the right wet time.
The most frequently touched bathroom surfaces

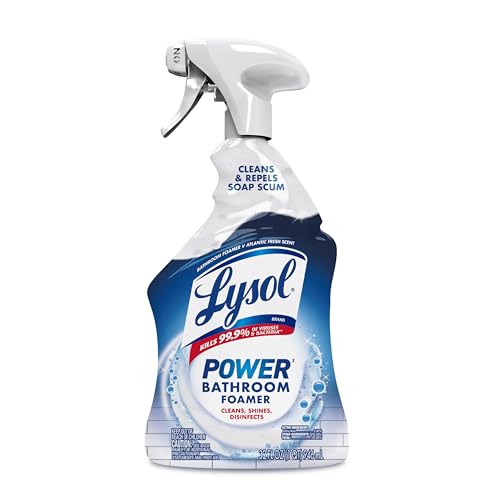
Cleaning vs. sanitizing vs. disinfecting
Cleaning removes visible soil, soap film, and fingerprints so a product can reach the surface evenly. Sanitizing lowers germs to a safer level on approved surfaces and is usually enough for routine bathroom touchpoints. Disinfecting is stronger and is better for illness, heavy shared use, or higher contamination risk, but only when the label allows that surface.
Use this rule for routine bathrooms: clean first, sanitize on common high-touch nonporous surfaces, and disinfect only when the bathroom has had sickness, heavy guest use, or visible contamination that calls for a stronger product. If the surface is electronic or delicate, choose the safest labeled method rather than the strongest one.
What you’ll need
- EPA-registered sanitizer or disinfectant labeled for the exact bathroom surface
- Microfiber cloths or disposable towels
- Gloves, if the label calls for them
- Fresh water and a mild cleaner for the pre-clean step
- Separate cloths for bathroom zones
- Good ventilation, such as an open window or running exhaust fan
How do you clean first without leaving residue?

Clean visible soil off first, because sanitizer and disinfectant work best on a surface free of dust, grease, fingerprints, and soap film. Use a clean cloth with a mild cleaner, then switch to the sanitizing or disinfecting product only after the surface looks clear. Work in zones so residue does not move from one fixture to another.
- Start with the driest visible buildup and wipe it away.
- Use one cloth for the sink zone, then change it before moving to the toilet or door area.
- Keep a second cloth or towel ready for handles, switches, and small seams.
- Follow with the labeled sanitizer or disinfectant only after the surface is free of visible soil.
Picture a 6-by-8-foot bathroom with a chrome faucet, a plastic light switch, and a glazed tile backsplash. If you wipe everything with the same cloth, residue from the sink area can get dragged onto the switch plate and leave the sanitizer fighting grime instead of germs. A zone change prevents that.
Bathroom surfaces decision table
| Surface | Material | Clean-first method | Sanitize or disinfect choice | Safe application method | Wet-contact reminder | Rinse if required | Common mistake to avoid |
|---|---|---|---|---|---|---|---|
| Faucet handles | Chrome or metal | Wipe fingerprints, soap film, and hard-water residue first | Sanitize for routine use; disinfect after illness or heavy contamination | Spray the cloth or apply to the surface only if the label allows it | Keep visibly wet for the full label time | If the label says to rinse, rinse only after the contact time ends | Wiping dry too soon around the handle grip |
| Faucet base | Metal on sealed countertop | Clean the seam where water and grime collect | Sanitize or disinfect if the label lists both surfaces | Use a cloth edge to reach around the base and behind the spout | Rewet as needed so the seam stays wet | Rinse only if the product directions require it | Missing the ring of buildup at the mounting point |
| Toilet flush lever | Plastic or metal | Remove visible smudges before treatment | Disinfect when the bathroom has had illness or heavy shared use | Wipe the lever, hinge, and surrounding plate evenly | Do not let the lever dry before the dwell time ends | If required, rinse after the full wet time only | Touching only the top and skipping the hinge area |
| Light switch | Plastic switch plate | Dust and clean lightly with minimal liquid | Sanitize if the label allows electronics or switch plates | Apply product to a cloth, not directly into the switch | Use the contact time listed without soaking the plate | Do not rinse unless the label explicitly allows it | Over-wetting the opening or using an unapproved spray |
| Drawer pulls | Metal or coated hardware | Wipe grease and fingerprints from the grip and back edge | Sanitize for routine cleaning | Run the cloth around the pull where fingers land most often | Surface must stay visibly wet for the label dwell time | Rinse only if the label says to do so | Only cleaning the front and skipping the underside |
| Soap dispenser button | Plastic | Remove soap crust and drips first | Sanitize if the label allows plastic dispenser parts | Use a lightly damp cloth so product reaches seams | Reapply if the button dries before the stated time | Rinse only when the product directions require it | Leaving crust in the seam where the button moves |
| Sealed countertop near sink | Sealed stone, solid surface, or laminate | Clean soap residue and water spots first | Sanitize or disinfect if the label lists the material | Wipe in sections so the surface stays wet | Keep the section wet for the printed contact time | Rinse if the label says the surface needs a post-treatment rinse | Using a product not listed for that surface |
| Glazed tile | Glazed ceramic | Clean grout edges and splatter first | Sanitize or disinfect as the label directs | Apply with a cloth or spray only where allowed | Watch grout lines; they can dry faster than flat tile | Rinse if the label requires it, especially near grout | Assuming glossy tile and grout need the same wet time |
| Door handles and knobs | Metal, painted metal, or coated hardware | Remove fingerprints and grime before treatment | Sanitize for routine use; disinfect after illness or heavy sharing | Wipe the grip, back edge, and latch side carefully | Keep the entire contact zone wet for the full label time | Rinse only if the product directions specify it | Skipping the underside where fingers land most often |
| Shower controls | Metal, plastic, or mixed hardware | Remove soap residue, hard-water film, and splash buildup first | Sanitize for routine cleaning; disinfect if the bathroom has had illness | Use a cloth so liquid does not run into seams or trim | Keep knobs and edges wet for the stated time | Rinse only when required by the label | Letting product pool behind trim pieces |
| Cabinet pulls | Metal or coated hardware | Clean the grip and underside where hands make contact | Sanitize for routine use | Wipe both sides of the pull and the mounting points | Leave visibly wet until the contact time ends | Rinse if the label says to do so | Only wiping the front face |
| Touchscreen or electronic bidet controls | Screen, plastic, or sealed electronic panel | Dust lightly and remove fingerprints with minimal liquid | Use the safest product labeled for electronics; sanitize only if the label allows it | Apply product to a cloth, never directly to the control surface or openings | Keep the surface lightly wet for the labeled time without dripping | Do not rinse unless the manufacturer or product label says to do so | Spraying into buttons, seams, or charging ports |
How do you sanitize each surface safely?
Use only a product that is labeled for the surface and follow the label directions exactly. Sanitizing lowers certain germs on a cleaned surface to safer levels, while disinfecting makes a stronger claim. The label should tell you the surface, any dilution instructions, whether rinsing is needed, and the wet contact time. EPA-registered products are the right starting point for bathroom touchpoints because the label is the instructions.
- Read the label before you start, and keep the product in its original container.
- Check that the product is listed for chrome, plastic, glazed tile, sealed countertops, electronics, or the specific surface you are treating.
- Apply the product the way the label says, either by spraying the cloth or by direct application if allowed.
- Work one zone at a time so the surface stays visibly wet for the full contact time.
- Rewet edges, seams, and faucet bases before the product dries out.
Contact time is the period the product must stay visibly wet, and it can range from seconds to several minutes depending on the label. That wet period is not optional. If the surface dries early, you have cut the process short, even if the room still smells clean.
When should you disinfect instead of sanitize?
Disinfect when the label allows it and the situation calls for a stronger claim, such as after illness, heavy shared use, or a higher contamination risk. For ordinary daily maintenance, sanitizing may be enough on approved nonporous surfaces. Choose the stronger product only when the surface and label both support it.
Bathroom faucets, flush levers, and door hardware are common candidates for disinfection after sickness in the home. Clean them first, then use an EPA-registered disinfectant that is labeled for that material. Keep the area ventilated, because stronger products can create more fumes in a small bathroom.
Suppose a guest bathroom saw repeated use during a family gathering and the toilet lever, sink handles, and door knob all have visible smudges. That is a better time to disinfect than to use a lighter sanitizer. The key is still the same: clean first, then keep each surface wet for the full dwell time.
What cleaner should you use before sanitizing?
Use a mild cleaner or soap-and-water step that removes visible soil without leaving a heavy residue. The goal is not to “sanitize twice”; it is to strip away film so the sanitizer can contact the surface. A cleaner that leaves a greasy or sticky finish can interfere with the next step, especially on handles, switch plates, and faucet bases.
How often should you repeat this?
Daily touchpoints such as faucets, flush levers, light switches, and door handles need the most regular attention. Less frequently touched items can be handled on a weekly schedule unless the bathroom sees guests, illness, or heavy use. Increase frequency when several people share the space or when contamination risk rises.
For routine upkeep, a quick clean followed by sanitizing is often enough on approved nonporous surfaces. After illness or a heavy-use period, move the same touchpoints into the disinfecting schedule. Ventilation matters either way when you use stronger products.
What should you not mix when sanitizing surfaces?
Do not mix bleach with ammonia, vinegar, or other cleaners, and do not combine products in a way the label does not allow. Use one labeled product at a time. If the label calls for dilution, measure it exactly, because changing the mix can reduce effectiveness or create a safety hazard. (WA)
How should you adjust the frequency by bathroom use level?
Use a simple frequency framework: light use bathrooms can stay on a routine weekly-plus-touchpoint schedule, normal family bathrooms usually need daily high-touch cleaning, and guest-heavy or illness-exposed bathrooms need more frequent sanitizing or disinfection. The more hands, the more often you should treat the touchpoints, especially on handles, switches, and controls.
Frequently asked questions
How do you properly sanitize surfaces?
Clean the surface first, then use an EPA-registered sanitizer that is labeled for that material. Apply it by the label directions and keep the surface visibly wet for the full contact time. If the product dries early, reapply it so the dwell time is completed.
What bathroom surfaces count as high-touch?
Common high-touch bathroom surfaces include faucet handles, toilet flush levers, light switches, drawer pulls, soap dispenser buttons, door knobs, shower controls, cabinet pulls, touchscreen bidet controls, and the faucet base. These are touched often by multiple people or repeatedly by the same person, so they need more attention than low-contact surfaces.
Do you clean or sanitize first?
Clean first. Cleaning removes visible dust, crumbs, grease, fingerprints, and other buildup that can block the product from reaching the surface evenly. After the surface is clear, sanitize or disinfect it according to the label and keep it wet for the full contact time.
How long should sanitizer stay wet on a surface?
The exact time depends on the product label, and some products must stay visibly wet for several minutes. Follow the printed contact time rather than guessing. If a handle, seam, or faucet base starts drying early, add more product and reset the wet period as directed.
Can you use disinfectant on bathroom faucets and handles?
Yes, if the disinfectant is labeled for that surface and the material is compatible. Clean the faucet or handle first, then apply the disinfectant exactly as directed. Keep ventilation going in the bathroom, because stronger products can create more fumes during use.
What is the safest way to sanitize electronics or switches?
Use a product labeled for the switch plate or electronics, and apply it to a cloth instead of spraying directly into the device. Use only enough liquid to keep the surface wet without dripping into openings. Wipe the plate carefully, then let it stay wet for the required time.
Sponsored / affiliate links. As an Amazon Associate I earn from qualifying purchases. I may earn additional commission from eligible campaigns.