Frozen Pipes: How to Prevent, Thaw and Fix Them
Shut off water at once if a pipe is split or bulging, otherwise open the faucet on that line and warm the pipe from the faucet end back toward the ice until water runs again. Done poorly, thawing can split copper, deform PVC, or turn a hidden freeze into a large wall or ceiling leak. This guide covers the first about 10 minutes, the next hour, and the rest of the cold snap for visible, hidden, and burst-pipe cases.
The first decision comes before you add heat. Sort the problem by location and risk first: an exposed basement line can often be thawed while you watch it, while a pipe inside a wall, crawl space, or exterior wall often calls for a shut-off-first plan and an earlier plumber call. After flow returns, leak checks matter just as much as the thaw.
What should you do in the first 10 minutes?


Open the affected faucet, find the main water shut-off valve, and decide whether the frozen section is visible, hidden, or already leaking. Do not start heating until that triage is done. If the pipe is bulging, nearby drywall is stained, or the line may be split, shut off the main first and keep watching the area.
Open the affected faucet and confirm the symptom
- Turn on the faucet served by the suspected line, on both hot and cold if it is a mixer faucet, and see which side is affected.
- Note whether there is no flow, reduced flow, sputtering, or normal pressure.
- Check nearby fixtures on the same floor or wall, such as the sink beside it, the tub in the same bathroom, or the hose bib on that exterior wall if it is winterized and safe to inspect.
- Look for frost on exposed pipe, a swollen section, or dripping once the line starts warming.
An open faucet does two jobs. It shows you when thawing starts to work, and it relieves pressure between the ice blockage and the fixture. Frozen pipes do not always burst, but pressure can build behind the blockage, especially if the faucet stays closed.
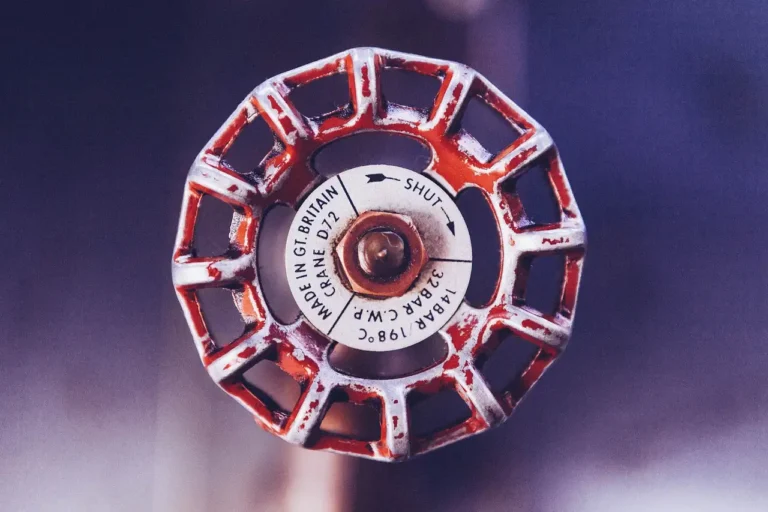
Find the main shut-off before any thawing
Locate the main water shut-off valve now, not after water starts running. In many houses, start where the service line enters the building: common spots include the basement front wall facing the street, beside the water meter, at the crawl-space entry, in the utility room, or in the garage near the water heater in slab homes.
If the pipe may already be split, if it is hidden inside a wall, or if nobody can stay there through the thaw, shut off the main before applying heat. A thawed frozen pipe may dump up to 8 gallons of water per minute.
Visible and accessible means you can see and reach most of the frozen section, such as a basement run, garage pipe, or under-sink trap arm area. Hidden means the line is likely in a wall, ceiling, soffit, or enclosed crawl-space bay. Burst-risk means bulging pipe, staining, active leakage, or sounds of running water behind a wall.
That sort drives the next hour. Visible lines can often be thawed with low, moving heat. Hidden or burst-risk lines need a slower, more cautious plan.
How do you know if a pipe is frozen or burst?
A frozen pipe usually shows no water or weak flow at one fixture, often after a hard freeze, and may show frost or a very cold section on an exposed run. A burst pipe adds stains, dripping, bulging, falling pressure, or running-water sounds behind walls. Start your check at the highest-risk locations.
Signs of a frozen line
No flow at one faucet is the classic sign, but reduced flow matters too. A partial ice blockage can still pass some water. Exposed metal may show frost. Plastic lines may not frost over, so location tells you more than appearance in those cases.
Check the places that freeze first: pipes in exterior walls, crawl spaces, attics, garages, sink cabinets on outside walls, rim-joist areas in basements, and lines above garage ceilings or near foundation vents. Those sections usually freeze before pipes inside heated rooms.
Signs of a split or burst line
Look for a bulging section, wet drywall, ceiling discoloration, fresh drips, or puddling under cabinets. If a frozen line is hidden, a hiss or running-water sound behind a wall after thawing starts can mean a split has opened.
Suppose an upstairs bathroom sink has no water in the morning, and an hour later a brown ceiling spot appears in the room below after the heat comes up. That points away from a simple fixture issue and toward a hidden split line that should push the job out of DIY mode fast.
When the issue may be the fixture instead
If only one faucet is affected and nearby hot and cold lines both run normally, check the aerator for debris or ice at the tip. If a toilet fills normally but the lavatory faucet does not, the branch or faucet may be the issue rather than the main trunk line.
Still, during a freeze event, assume the supply line is involved until you rule it out. Exterior-wall bathrooms and kitchen sinks on outside walls are common problem spots.
Do Frozen Pipes Always Burst?
No—frozen pipes do not always burst, but they can split when ice blocks the line and pressure has nowhere to go. The supporting guide explains why some freezes stay contained while others turn into leaks, including the role of pipe material, where the pipe is located, and whether pressure can escape during thawing.
It also shows how to tell a frozen pipe from a cracked or burst one and what to do first before you thaw anything. That matters because the wrong next step can turn a simple freeze into water damage, so this frozen pipe guide helps you judge the risk and respond more safely.
Early Warning Signs of Frozen Pipes
Frozen pipes usually give you a few warning signs before they burst: water pressure drops, faucets slow to a trickle, and one stretch of pipe may feel much colder than the rest. In very cold weather, a sudden stop in flow should be treated as an urgent freeze risk, not a minor plumbing hiccup.
The frozen pipe warning signs guide explains how to spot a partial freeze, recognize clues like pipe noises or unusual drain smells, and decide what needs immediate action. That matters because catching the problem early can help you avoid a burst line, water damage, and expensive repairs.
What to do after a pipe bursts in winter
If a pipe has already split or burst, the priority is to stop the water fast, protect people and wiring, and limit the damage before help arrives. The supporting guide explains the first 15 minutes in plain order: shut off the main water valve, use a fixture valve only if that is the fastest stopgap, and reduce electrical risk around wet areas. It also shows how to contain spreading water, when a quick patch is or isn’t worth trying, and what to do about hot water systems and other affected fixtures. For a practical emergency sequence, see pipe burst winter guide.
How to confirm a frozen pipe has burst
The quickest way to separate a simple freeze from a broken line is to check water flow and then look for meter movement with every fixture off. If nothing comes out of the tap but the meter still advances, the pipe has likely split somewhere in the line. The supporting article on frozen pipe burst signs walks through those clues step by step, including what hidden damage can look like when water never reaches the surface.
That matters because a burst can keep leaking behind walls, under floors, or in a crawl space long after the freeze seems to have passed. Knowing the difference helps you act fast, shut off water if needed, and avoid turning a small crack into structural and mold damage.
How to spot a frozen sewer line before it backs up
If several drains slow down at once, toilets gurgle, or wastewater backs up after a hard freeze, the problem may be a frozen sewer line rather than a single clog. That matters because ice in the main line can stop the whole drainage system and increase the risk of sewage backing up into tubs, showers, or a basement.
The frozen sewer line guide breaks down the warning signs, the first steps to take, and how to tell ice apart from a clog or damaged pipe. Knowing the difference helps you avoid unnecessary digging, reduce contamination risk, and decide when the situation needs a plumber right away.
Should you shut off the main water before thawing?
Yes, shut off the main before thawing if the pipe is hidden, may already be split, shows bulging, or cannot be watched through the whole thaw. If the pipe is fully visible and shows no leak signs, monitored thawing can begin with the main left on, provided you have already found the shut-off.
Cases where the answer is yes immediately
Shut off the main at once when you see a crack, bulge, active drip, water stain that is spreading, or running-water sounds inside a wall. Do the same when the frozen section is in a wall cavity, beneath insulation in a crawl space, or under a mobile home belly where you cannot see the whole run well.
Open nearby faucets after shutting off the main to relieve pressure and help drain what the system can release.
Cases where monitored thawing can start first
If the frozen section is exposed, reachable, and dry, with no sign of swelling or leakage, thawing can begin while the main remains on. Keep the affected faucet open. Stay in the area. Watch for drips the moment flow returns.
Bob Vila lists the project skill level as beginner, but that rating fits accessible pipes best, not hidden lines or active leaks.
Where to find the shut-off in most homes
Look first where the water service enters the house: beside the meter in the basement, on the front foundation wall facing the street, at the crawl-space access, in a utility room, or on the garage-side wall in many slab homes. It may also be near the water heater if that is close to the incoming service line.
If nobody in the house can point to it quickly, label it after this event. Frozen-pipe work gets harder when the shut-off is still a mystery.
How to Check the Meter Before Thawing
If every faucet is dry but the problem is outside at the meter box, this guide helps you tell whether the meter, the service line, or the shutoff is the real issue. It walks through the fastest winter checks: looking for a cold, hard lid, standing water in the pit, a split meter body, or signs that the utility side is involved. That matters because the wrong fix can crack parts or flood the box. For a step-by-step diagnostic overview, see frozen water meter.
Deciding Whether to Shut Off Water for a Winter Vacation
If you’ll be away for more than a few days and the indoor temperature could drop below 55 °F, the safest move is to shut off water at the main supply; this prevents a frozen pipe from bursting and flooding walls, floors, and framing. When the home stays heated, monitored, and the temperature stays above that threshold, leaving the water on can be acceptable, though you should still protect high‑risk fixtures. The article provides a decision matrix, exceptions for wells and water heaters, and a step‑by‑step shutdown checklist so you can avoid costly damage while you enjoy your trip.
Do you need to disconnect garden hoses before winter?
Yes—disconnecting the hose before the first hard freeze helps prevent both the hose and the outdoor faucet from cracking. The supporting article explains the shutoff order in plain terms: drain the hose, leave the spigot empty, and store the hose so trapped water can’t freeze at the connection. That matters because damage often starts where water sits unseen, then shows up later as a split hose or a failed hose bib in spring.
It also covers when extra protection is worth adding, such as insulation or a heated hose in colder climates. For a step-by-step winter checklist, see garden hose winter care.
How do you thaw an accessible frozen pipe safely?
The safest DIY thaw uses low, moving heat on an exposed pipe while the faucet stays open. Start near the faucet end and work back toward the blockage. A hair dryer, warm towels, or a carefully placed heat lamp are suitable for many visible lines, while open flame and direct high heat are not.
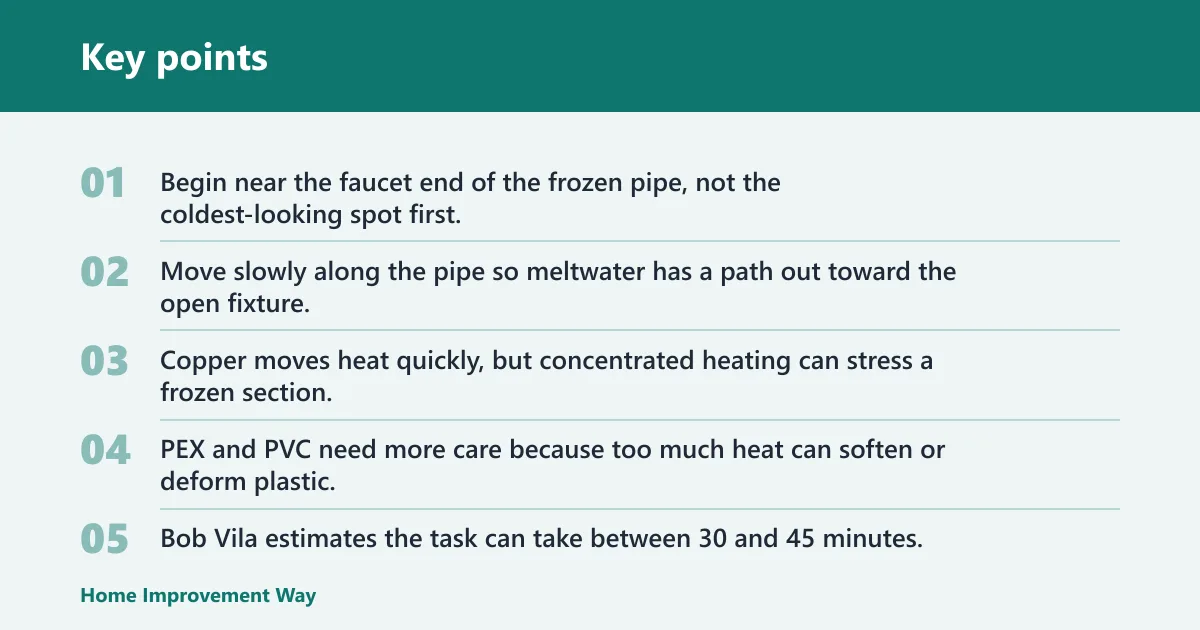
Hair dryer method from faucet end to blockage
Set a hair dryer to low heat. Begin near the faucet end of the frozen pipe, not the coldest-looking spot first. Move slowly along the pipe so meltwater has a path out toward the open fixture.
Do not hold heat in one place. Copper moves heat quickly, but concentrated heating can stress a frozen section. PEX and PVC need more care because too much heat can soften or deform plastic.
Bob Vila estimates the task can take between 30 and 45 minutes, and also lists a working time and total time of 1 hour for thawing. Treat that as a reminder not to rush with hotter tools.
Warm towels, heat lamp, and space-heater limits
Warm towels work best on short exposed sections under sinks or in a basement. Re-wet them with warm water as they cool. They are slow, but low risk for plastic piping.
A heat lamp can work on accessible piping when it is placed carefully with clear distance from combustibles. It is safer than open flame only if it stays aimed at the pipe and does not shift. A space heater can warm the surrounding air in a small room or under a sink, but only with clearance, supervision, and no contact with insulation, paper goods, or stored items.
Heat-source safety by pipe material
| Pipe material | Lower-risk heat sources | Use with extra caution | Avoid |
|---|---|---|---|
| Copper | Hair dryer on low, warm towels, indirect room heat, carefully placed heat lamp | Space heater warming the area, not the pipe directly | Torch, propane flame, charcoal device, direct concentrated high heat |
| PEX | Warm towels, indirect room heat, hair dryer on low and moving | Heat lamp only with generous distance and constant watching | Heat gun, open flame, any fixed hot spot |
| PVC | Warm towels, indirect room heat, careful low hair dryer passes | Heat lamp only if the pipe is fully visible and the lamp is well back | Heat gun, torch, flame, aggressive direct heat |
Can a heat gun be used? It should not be the standard choice. It is easy to overheat a small area, and plastic piping is the first loser in that mistake.
How do you thaw a frozen underground service line safely?
Start by treating a frozen underground line as a location-and-material problem, not just a heat problem. The supporting guide on frozen underground lines explains how to identify where the blockage is likely forming, what tools are appropriate, and why the thawing method changes for copper, plastic, and PEX. That matters because the wrong heat source can crack fittings, deform pipe, or make a hidden leak worse.
It also covers what to check after flow returns, common DIY mistakes to avoid, and when the safest move is to stop and call a plumber. For buried service lines, careful triage saves time, reduces damage, and helps prevent a repeat freeze.
How to Thaw a Frozen Drain Pipe Without Damaging It
If a drain stops working during a cold snap, this guide explains how to confirm the pipe is frozen, not clogged, and how to thaw it safely with controlled heat. It walks through the best ways to warm an accessible pipe, including where to start, what tools are appropriate, and why open flame can cause cracked PVC, warped fittings, or hidden leaks.
You’ll also learn the common mistakes that make thawing riskier and the quick checks that help you tell when flow has returned. For a step-by-step breakdown, see frozen drain pipe thawing.
When boiling water is safe for a frozen drain
Boiling water can help a frozen drain, but only in a narrow set of cases. The supporting guide explains when heat is appropriate, which pipe materials can handle it, and when pouring hot water could crack fittings or cause a hidden leak. It also helps you tell a freeze from a simple clog, so you do not waste time using the wrong fix.
If you need the short answer before you try anything, this boiling water guide lays out the safe cases, the risky ones, and what to do next if heat does not clear the blockage.
How do you dry the house after a pipe break?
After the water is shut off, the priority is to remove moisture fast: use dehumidifiers, run fans for air movement, and open up damp areas if materials stayed wet too long. The supporting guide walks through the right order for drying, including what to do with drywall, insulation, and flooring when water has soaked in beyond 24–48 hours.
That matters because hidden moisture can keep feeding mold and leave you with warped materials or a much larger repair bill. For a clear step-by-step plan, see drying after burst pipe.
What if the frozen pipe is inside a wall or crawl space?
If the pipe is inside a wall or crawl space, keep the faucet open, warm the space indirectly, and lean toward shutting off the main first if the line cannot be watched. Hidden piping raises the odds that you will find the problem only after a leak starts, so DIY limits show up sooner.
Inside-wall steps that stay low risk
Raise the room temperature. Open cabinet doors if the pipe serves a sink on an exterior wall. If there is a removable access panel, use it. Warm the wall area indirectly with room heat or a supervised space heater aimed into the room, not pressed against the wall.
Do not cut open drywall unless there is a strong reason and a plan for immediate shut-off if water appears. If leakage shows up or the pipe location is uncertain, stop and call a plumber.
Picture a kitchen sink on an exterior wall with no cold-water flow, but the basement lines below are fine. Opening the cabinet doors and warming the room may thaw the short wall section. If a drip appears at the cabinet floor seam, the right next move is the main shut-off, not more heat.
Crawl-space and exterior-wall response
Crawl spaces, attics, garages, and pipes under a mobile home are commonly higher-risk locations because cold air moves around them freely. If the area is safely reachable and dry, warm the air around the pipe first, then use low direct heat only on exposed sections you can watch.
Exterior-wall runs often refreeze the same night if the space stays cold. That is where insulation, air sealing, and sometimes heat tape matter more than a one-time thaw.
Stop DIY if the pipe cannot be reached, if part of the run disappears into a wall where stains are forming, if flow returns only partly and then drops again, or if the same spot keeps refreezing during the cold snap. Many quick guides skip these failure cases, but these are the ones that often turn into repair calls.
How do you find a burst pipe inside a wall?
The fastest way to narrow a hidden wall leak is to confirm it is active, then use the water meter, sound, pressure changes, and timing to pinpoint the most likely section before cutting drywall. The guide on burst pipe detection explains what to check first, how to tell if the leak is on a supply line or drain line, and which clues help separate a real burst from unrelated moisture.
That matters because finding the spot early can limit demolition, reduce water damage to framing and insulation, and help you decide whether a plumber needs to open the wall or if the leak is closer to a fixture, valve, or adjacent room than it first appears.
Are Exterior-Wall Pipes More Likely to Freeze?
Yes—pipes in exterior walls are typically at higher risk because those wall cavities are colder, often have less insulation, and can leak cold air around outlets, framing gaps, or sheathing. The supporting article explains which exterior-wall runs freeze first, how pipe material affects damage, and the warning signs that a pipe is starting to freeze before it bursts.
That matters because a small freeze can quickly turn into a burst pipe, hidden wall damage, or a flooded cabinet or floor. If you want a clear breakdown of the riskiest locations and the best ways to prevent trouble before the next cold snap, see pipes in exterior walls.
Why a Frost-Free Spigot Can Leak Indoors
A frost-free spigot can still leak inside the house when the washer, packing nut, or valve stem fails—or when freezing water splits the pipe behind the wall. The key question is whether the leak stops when the water is shut off. If it does not, the problem is more likely hidden freeze damage than a simple exterior faucet issue.
This frost-free spigot leak guide explains how to tell those failures apart, what to inspect inside first, and when repair is possible versus when replacement is the safer choice. That matters because lingering leaks can soak insulation, damage drywall, and rot framing before the problem is obvious.
How to tell vent frost from a real problem
A light frost on a plumbing vent is usually harmless, but a pipe that stays white, packs with ice, or comes with sewer odors can signal a blocked vent or a roof flashing issue. The supporting guide on plumbing vent frost explains how to separate normal winter condensation from conditions that need attention, so you do not chase the wrong fix.
That matters because a frozen vent can slow drainage, dry out traps, and let sewer gas into the home, while a damaged roof boot can send water into the attic. The article walks through what to check first, when frost points to a leak, and when to call a plumber or roofer.
What if the pipe starts leaking or has already burst?
If leaking starts during thawing, or if the pipe has already burst, shut off the main water immediately, open faucets to relieve pressure, and stop applying heat. Then contain the water, move belongings, and call a plumber. Repairing a split line is no longer a thawing problem, it is a plumbing repair and drying problem.
Shut down water and relieve pressure
Turn off the main water shut-off valve. Open the affected faucet and a lower fixture if possible so trapped water can drain. If the leak is near electrical wiring, cut power to that area only if it is safe to reach the panel without stepping into water.
Contain water and protect finishes
Use buckets, towels, and plastic bins to catch drips. Move rugs, boxes, and furniture away from the wet area. If water is entering a ceiling cavity, puncturing a low point in the drywall is sometimes used to control spread, but many homeowners are better off waiting for a plumber or restoration pro unless the ceiling is actively bulging.
What repair work belongs to a plumber
A split section, cracked valve body, leaking fitting inside a wall, or damaged exterior-wall branch line needs proper replacement or repair after the system is shut down. Temporary wraps can slow drips, but they do not count as a safe fix for a pressurized line.
How do you make a burst pipe safe long enough for repairs?
If a pipe has already burst, the priority is to stop the water and choose a temporary fix that matches the damage. The supporting guide on burst pipe repairs explains how to use the right short-term seal for a pressurized leak, a split pipe, or a problem section that needs replacement. That matters because the wrong patch can fail under pressure and flood walls, floors, and cabinets.
It also shows what tools are needed, when a clamp-and-patch approach is acceptable, and when the damage is too severe for a temporary repair. Use it to decide what to do now, what to avoid, and when to move straight to a permanent fix.
Pipe response matrix table
How to use the matrix by location and symptom
Match the pipe location and the first clear symptom, then follow the safest first action before choosing a thaw method. The last two columns rank prevention by payoff for a short cold snap versus a multi-day freeze, because those are different planning problems.
| Pipe location | Symptom | Safest first action | Best thaw method | When to stop DIY | Call a plumber? | Short snap priority | Long freeze priority |
|---|---|---|---|---|---|---|---|
| Exposed basement or garage pipe | No flow or weak flow, pipe visible, no leak signs | Open faucet, locate main shut-off, inspect full visible run | Hair dryer on low from faucet end; warm towels for short sections | Bulging, drip starts, or no progress after sustained supervised warming | Maybe; yes if leak or no access to full run | Insulate exposed run; close garage door | Add insulation plus heat tape or heating cable on accessible section |
| Under sink on exterior wall | Kitchen or bath faucet affected, cabinet area cold | Open faucet, open cabinet doors, clear stored items away | Warm room air, warm towels, low hair dryer passes | Water appears in cabinet base or wall seam | Yes if leak, repeat freeze, or line disappears into wall | Open cabinet doors; room heat | Insulate wall-side run if accessible; use faucet trickle during very low temperatures |
| Inside wall | No flow, stains, or running-water sounds behind wall | Open faucet; shut off main if leak is possible or location uncertain | Indirect room heat only; limited access through panel if present | Any stain growth, drip, or uncertain pipe path | Usually yes | Raise indoor temperature | Air-seal and insulate wall cavity during repair; maintain warmer indoor setting |
| Crawl-space run | Whole branch cold, area unheated, pipe partly reachable | Open faucet, locate shut-off, verify footing and electrical safety | Warm crawl-space air; low direct heat only on exposed reachable pipe | Wet insulation, inaccessible section, repeat freeze, or suspected split | Often yes | Close vents if appropriate to home design; insulate pipe | Insulate pipe and crawl-space perimeter as needed; add heat cable on exposed section |
| Exterior-wall branch | Single fixture affected after overnight cold | Open faucet, warm room, monitor wall and cabinet seams | Indirect room heat; low hair dryer only on exposed stub-out | Partial thaw followed by repeat freeze or signs of leakage | Yes if recurring | Faucet trickle in severe overnight cold | Reroute or insulate accessible portions; correct cold-air leaks |
How do you keep pipes from freezing again?
The best prevention depends on how long the cold lasts and where the pipe sits. For a short cold snap, keeping indoor heat steady, opening vulnerable cabinets, and using a faucet trickle on high-risk branches may be enough. For longer freezes, insulation, air sealing, and heat tape on exposed sections move to the top.
Highest-payoff steps for the next day or two
Keep the thermostat steady. The Old Farmer’s Almanac advises a thermostat setting of at least 55°F. That matters most if the house will be vacant, or if a room near exterior-wall plumbing tends to run cold.
Prepared States says pipes can freeze when temperatures are 32°F or below, but risk rises sooner in real houses when wind, air leaks, and poor insulation put cold air directly on the pipe. Sustained exposure around 20°F or below is where many vulnerable runs start showing trouble.
The same source says very cold-weather prevention includes keeping garage doors closed. That is especially useful when supply lines run through the garage wall or ceiling.
When pipe insulation is enough, and when it is not
Foam sleeves and similar pipe insulation reduce heat loss. They are worth installing on vulnerable lines in basements, crawl spaces, attics, garages, and exterior-wall runs that are accessible. Insulation slows heat loss, it does not create heat.
For a brief overnight freeze, insulation alone may prevent a repeat on a basement branch or garage ceiling run. It is less likely to solve a pipe that sits in a vented crawl space or an exterior wall exposed to repeated subfreezing air.
When to add heat tape or a faucet trickle
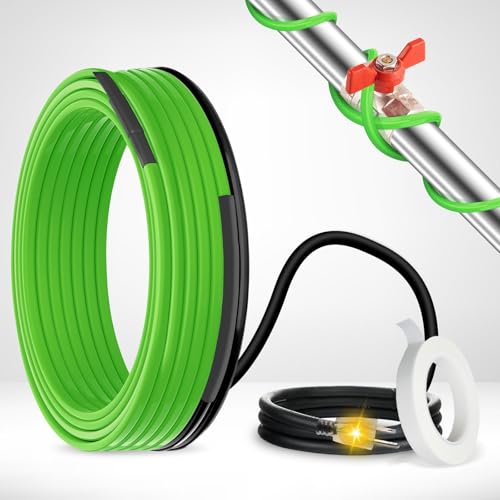
Heat tape or heating cable fits accessible exposed sections that freeze again despite insulation. Look for UL-listed or thermostat-controlled products and follow the maker’s spacing and overlap rules. Use them only where the cable is approved for the pipe material and installation location.
The faucet drip strategy is most useful during very low temperatures or long freezes on known trouble lines. The Almanac recommends opening faucets to just a trickle. Moving water resists freezing better than standing water, though it is a backstop, not a substitute for fixing the cold location.
How to Prevent a Sump Discharge Line From Freezing
If a sump pump is running but water is not leaving the house, the discharge line may be frozen. This article explains why freeze-ups happen, how to tell whether the problem is in the outdoor run, wall penetration, or outlet, and which fix makes sense for your setup.
You’ll also learn practical ways to reduce repeat freezing, including sloped routing, insulation, larger pipe options where allowed, and moving the discharge farther from frost-prone areas. For a focused breakdown of the causes and fixes, see sump discharge freezing.
How to Prevent a Tankless Heater From Freezing
Protecting a tankless water heater from freezing starts with the built-in freeze mode, continuous power, and insulation on any exposed supply lines. For outdoor units, the article explains when to use a manufacturer-approved cover or drain-down kit, and why those steps matter before the temperature falls below 32°F. It also breaks down the differences between indoor, garage, outdoor, power-vented, and recirculating setups so you can match the protection to the installation.
If you want a practical winter prep checklist, the full tankless freeze guide shows what to check before the first hard freeze and the common mistakes that can crack components or leave you without hot water.
How do you winterize cabin plumbing before a seasonal shutdown?
If a cabin sits empty in freezing weather, the plumbing needs a full shutdown, not just a thermostat adjustment. The cabin plumbing winterization guide explains how to turn off the water, drain supply lines, protect fixtures, and treat traps and toilets so hidden water does not freeze and expand.
It also covers the parts people often miss: water heaters, well equipment, exterior lines, and cabins used only on weekends. That matters because one missed low spot or appliance can crack a pipe, flood the cabin on thaw, and turn reopening into a repair job instead of a quick restart.
How to drain your plumbing before a hard freeze
Draining the plumbing is the safest next step when a home will sit unused through freezing weather. The process starts with shutting off the main water, then opening fixtures, draining the water heater, and clearing low points so trapped water does not expand and split a pipe.
The full drain house plumbing winter guide walks through the order that matters most, including the spots people often miss, like branch lines, toilets, and other low sections. That matters because even a small pocket of water can freeze, crack a line, and turn a winterizing task into a costly leak when the system is turned back on.
Which pipe material is most likely to freeze?
If you’re trying to judge freeze risk quickly, the short answer is that pipe material matters, but location matters more. The supporting guide compares copper, PEX, and PVC and explains why exposed runs, airflow, insulation, and standing water can change the outcome more than the pipe label alone. It also shows why copper often cools fastest, why PEX usually handles freezing better, and why PVC can be unpredictable depending on where it’s installed.
That makes the article useful when you’re deciding which lines need the most attention before a cold snap. Use this pipe freeze ranking to understand which materials are most vulnerable and what really drives burst risk in real homes.
When antifreeze belongs in winterized plumbing
Antifreeze is not a blanket winterizing step for every toilet or drain line. The right choice depends on whether the fixture can be fully drained, whether it still holds standing water in the bowl or trap, and whether the plumbing is an RV-style setup or a standard home system. The wrong product or unnecessary use can do more harm than good.
This toilet and trap antifreeze guide explains when RV/boat antifreeze is useful, when it should be skipped, and what failures to avoid so you do not crack porcelain, damage traps, or create leaks at spring startup.
Why a Shower Drain Freezes in Winter
When a shower backs up in cold weather, the drain is often not actually frozen. This section points you to the most common causes behind the symptoms, including a clog, a dry P-trap, or a venting issue, so you can avoid chasing the wrong fix. The supporting guide explains how to tell a true freeze from a blockage, what the signs mean, and which problems need immediate attention before they lead to standing water, odors, or damage.
For a clear breakdown of the likely causes and the safest next step, see shower drain freezing.
How to Insulate Exposed Water Pipes with Foam
Foam pipe insulation is the fastest way to reduce freeze risk on exposed indoor lines, but it only works when it fits snugly and seals every gap. The supporting guide walks through the full wrap process: cleaning the pipe, cutting sleeves to length, taping joints, and checking elbows, tees, and valves so cold air does not sneak in. It also explains when foam alone is enough and when a more vulnerable line needs heat tape or another added protection.
That decision matters because missed weak spots can still lead to frozen, burst pipes and costly water damage. If you want the step-by-step method and a simple risk check, see the foam pipe wrap guide.
What to do if your well pump freezes
If your well pump freezes, the first step is to cut power at the breaker, open a faucet to relieve pressure, and warm only the exposed pipe or switch area with safe heat. The supporting guide explains how to tell whether the freeze is in the pump, pressure switch, or a buried line, and why that matters before you try to restart anything.
That distinction is important because forcing a frozen system back on can crack pipes, damage the motor, or leave you without water longer. For a clear step-by-step overview of safe thawing and when to stop and call a pro, see well pump freeze steps.
Why PEX Can Survive a Freeze
PEX is more forgiving than rigid pipe when water freezes, but that does not make it damage-proof. The main risk is usually at fittings, crimp rings, valves, and other rigid connections, where ice pressure can split parts even if the tubing itself stays intact. This matters because a line can look fine while frozen, then start leaking after it thaws and pressure returns. The supporting guide on PEX freeze failures explains where breaks are most likely, what to check after thawing, and when a small freeze has become a plumbing problem.
Why a frost-free hose bib can still freeze
A frost-free hose bib is designed to keep the shutoff valve deeper in the wall, but it is not freeze-proof. The supporting guide on frost-free hose bib freezing explains the most common failure points: a hose left attached, a tube that cannot drain, incorrect pitch, or a damaged internal stem. Those details matter because a hidden freeze can split plumbing inside the wall and leak long after the weather warms up. If you are trying to figure out whether the issue is installation, drainage, or damage, this article helps narrow it down quickly.
Why a faucet drips after a freeze
A faucet that keeps dripping after a freeze usually points to one of three problems: a damaged washer or seat, a frost-free sillcock that did not drain, or a split supply pipe. The supporting guide breaks down how to tell which issue is most likely, starting with simple checks at the hose end and faucet body before moving to the shutoff and drain path. It matters because a slow drip can signal a hidden leak inside the wall, which can waste water and damage framing long before you see staining. For a step-by-step diagnosis, see outside faucet dripping.
What temperature puts pipes at risk?
Pipes can start freezing before the air reaches a single exact number, so the real answer is a range shaped by exposure, insulation, wind, and whether the pipe runs through an unheated space. The supporting article on pipe freeze temperatures explains why two homes at the same thermostat setting can have very different risk levels, which is why temperature alone is not enough to judge safety.
It also covers the signs a pipe may already be frozen and what to do when freezing weather is coming tonight. That matters because spotting risk early helps you protect vulnerable runs, avoid burst damage, and decide whether a plumber is needed before water loss or leaks start.
When 55°F Is Enough to Protect Pipes
In many homes, 55°F can be a workable minimum, but it is not a universal guarantee against frozen pipes. This supporting guide explains the real decision rule: which pipe locations are most vulnerable, why exposed plumbing can freeze even when indoor air stays above 32°F, and when a higher thermostat setting or extra protection is needed.
It also shows what to do before a cold snap, including simple steps that reduce risk and a quick check for situations where 55°F is too low. If you want a practical way to judge your own home, see 55 degree pipe safety.
Which Heat Cable Should You Use on Pipes?
For most freeze-protection jobs, self-regulating heat cable is the safer, simpler choice because it adjusts its heat output along the pipe. Constant wattage cable can still work, but it is better suited to short, uniform runs where the cable can be installed evenly and controlled carefully. Choosing the wrong type can lead to cold spots, overheating, or avoidable breaker trips.
This guide compares the two options by pipe layout, insulation, pipe material, exposure, and thermostat needs so you can match the cable to the job. For a clear side-by-side breakdown, see heat cable comparison.
How to Install Heat Tape on Water Pipes Safely
Installing heat tape starts with matching the cable to the pipe material, measuring the full run, and making sure the label allows the layout you plan to use. The supporting guide on heat tape installation explains how to inspect the pipe, place the thermostat where it can read temperature accurately, and secure the cable without crossing or overlapping it unless the manufacturer explicitly allows that. Those details matter because the wrong tape or sloppy placement can create hot spots, wasted power, or a system that still leaves sections vulnerable to freezing.
How safe is it to leave heat tape on all winter?
The short answer: only leave heat tape energized all winter if it is specifically rated for continuous use, installed exactly as the manufacturer directs, and protected as required by the product instructions or local code. The supporting guide on heat tape safety explains when that is acceptable and when you should shut it off once freezing risk passes. It also outlines the warning signs of a bad setup, such as overheating, breaker trips, damaged insulation, or a cord that looks worn or improperly routed.
This matters because the wrong product or installation can create a fire hazard while still failing to protect the pipe. Knowing the difference helps you keep plumbing protected without leaving a risky system plugged in longer than needed.
Why Hot Water Takes Longer in Winter
In winter the water entering your heater is much colder, the longer pipe runs lose heat, and the tank’s recovery rate drops, so you may wait 15‑30 minutes for a hot shower. The article explains these three root causes, shows how to differentiate a normal seasonal delay from a failing heater or pipe issue, and offers quick checks to prevent higher energy bills and premature equipment failure.
Understanding the water heater slowdown helps you decide when a simple insulation fix is enough or when a professional repair is needed.
When is it safe to cover heat tape with insulation?
It can be safe to insulate heat tape, but only when the product label allows it and the insulation matches the cable’s requirements. The supporting guide explains how to tell whether your heat tape can be covered, which insulation materials are typically acceptable, and what thickness or installation limits matter most. That matters because the wrong setup can trap too much heat, shorten the cable’s life, or leave the pipe unprotected in freezing weather. If you’re deciding whether your pipe wrap is compatible, this heat tape insulation guide shows the key checks before you cover anything.
Can you safely use heat tape on PVC pipe?
If you’re trying to protect PVC from freezing, the key question is not just whether heat tape can be used, but whether the specific product is rated for plastic pipe. The supporting guide explains when PVC is compatible, why self-regulating cable is usually the safer option, and how constant-wattage tape can create too much heat for plastic. It also covers installation details that prevent warping, damaged fittings, and avoidable leaks. For a practical breakdown of product choice and setup, see heat tape on PVC.
When should you call a plumber?
Call a plumber when the pipe is hidden, inaccessible, repeatedly refreezes, leaks during thawing, or stays blocked after a careful supervised thaw. Burst pipes always belong on the call list. The more unknowns there are about the pipe path or damage, the less value DIY time has.
Partial thaw is a common trap. Water begins to trickle, then slows again because ice remains deeper in the run. If that pattern repeats, or if the same crawl-space or exterior-wall section refreezes overnight, there is a location problem to solve, not just an ice plug.
A common first-timer mistake is stopping at the first weak stream from a 1/2-inch branch line under a sink, then closing the faucet and walking away. If more ice remains upstream, pressure can build again and the pipe can still leak once the rest melts.
Emergency response for active leaks and burst lines
Call promptly when there is active leakage, wet drywall, a soaked crawl space, or a split in copper, PVC, or PEX. Shut off the main first. Then gather the details that help the service call move faster.
What information to gather before you call
- Which fixtures lost flow, and whether hot, cold, or both are affected
- Whether the pipe is exposed, inside a wall, in a crawl space, or under a mobile home
- Whether the main is already shut off
- Whether water stains, drips, or running-water sounds are present
- What thawing method was tried, if any
When a faucet cover helps—and when it won’t
Outdoor faucet covers are useful for exposed bibs during short cold snaps, but they are not a fix for a water-filled pipe that can still freeze. The supporting guide on outdoor faucet covers explains how these covers work, which types are worth buying, and the limits of insulation when the line behind the spigot is still full of water.
This matters because the wrong assumption can leave a pipe or valve vulnerable to cracking, leaks, and costly repairs. The article also helps you decide when a cover is enough and when you need to shut off, drain, or add protection beyond the faucet itself.
Frequently asked questions
What is the safest way to thaw a frozen pipe?
The safest DIY method is low, moving heat on an exposed pipe with the faucet left open. Start at the faucet end and work toward the blockage using a hair dryer, warm towels, or indirect room heat. Avoid open flame, and avoid heat guns on PVC or PEX because overheating is easy.
What temperature do pipes freeze at?
The same source says pipes can freeze when temperatures are 32°F or below, but that is not the whole decision point. Pipes freeze faster when cold air reaches them in crawl spaces, garages, attics, and exterior walls. Sustained exposure near 20°F or below raises the odds sharply in weak spots.
Will letting faucets drip prevent pipes from freezing?
Sometimes, yes. A small moving stream can help a known trouble line resist freezing during very low temperatures or a multi-day cold snap. The Almanac recommends opening faucets to just a trickle. Use it on high-risk branches, especially exterior-wall fixtures, while also keeping the house warm.
Can I use a heat gun on frozen pipes?
It is a poor default choice. Heat guns can overheat one spot quickly, which can damage PVC or PEX and stress fittings even on copper. For homeowners, a hair dryer on low, warm towels, indirect room heat, or a carefully placed heat lamp on accessible pipe are lower-risk options.
Do frozen pipes always burst?
No. Some thaw without damage. The risk comes from pressure building between the ice blockage and a closed faucet or trapped section. That is why opening the faucet matters during thawing. Even after flow returns, check closely for drips, swelling, stains, or pressure loss before assuming the line is sound.
When should I call a plumber for a frozen pipe?
Call when the pipe is inside a wall, under a floor, in a crawl space you cannot inspect well, leaking during thawing, or still blocked after a careful attempt. Call immediately for a burst line. Accessible exposed pipes are the best DIY candidates, hidden and repeat-freeze cases are not.
Sponsored / affiliate links. As an Amazon Associate I earn from qualifying purchases. I may earn additional commission from eligible campaigns.