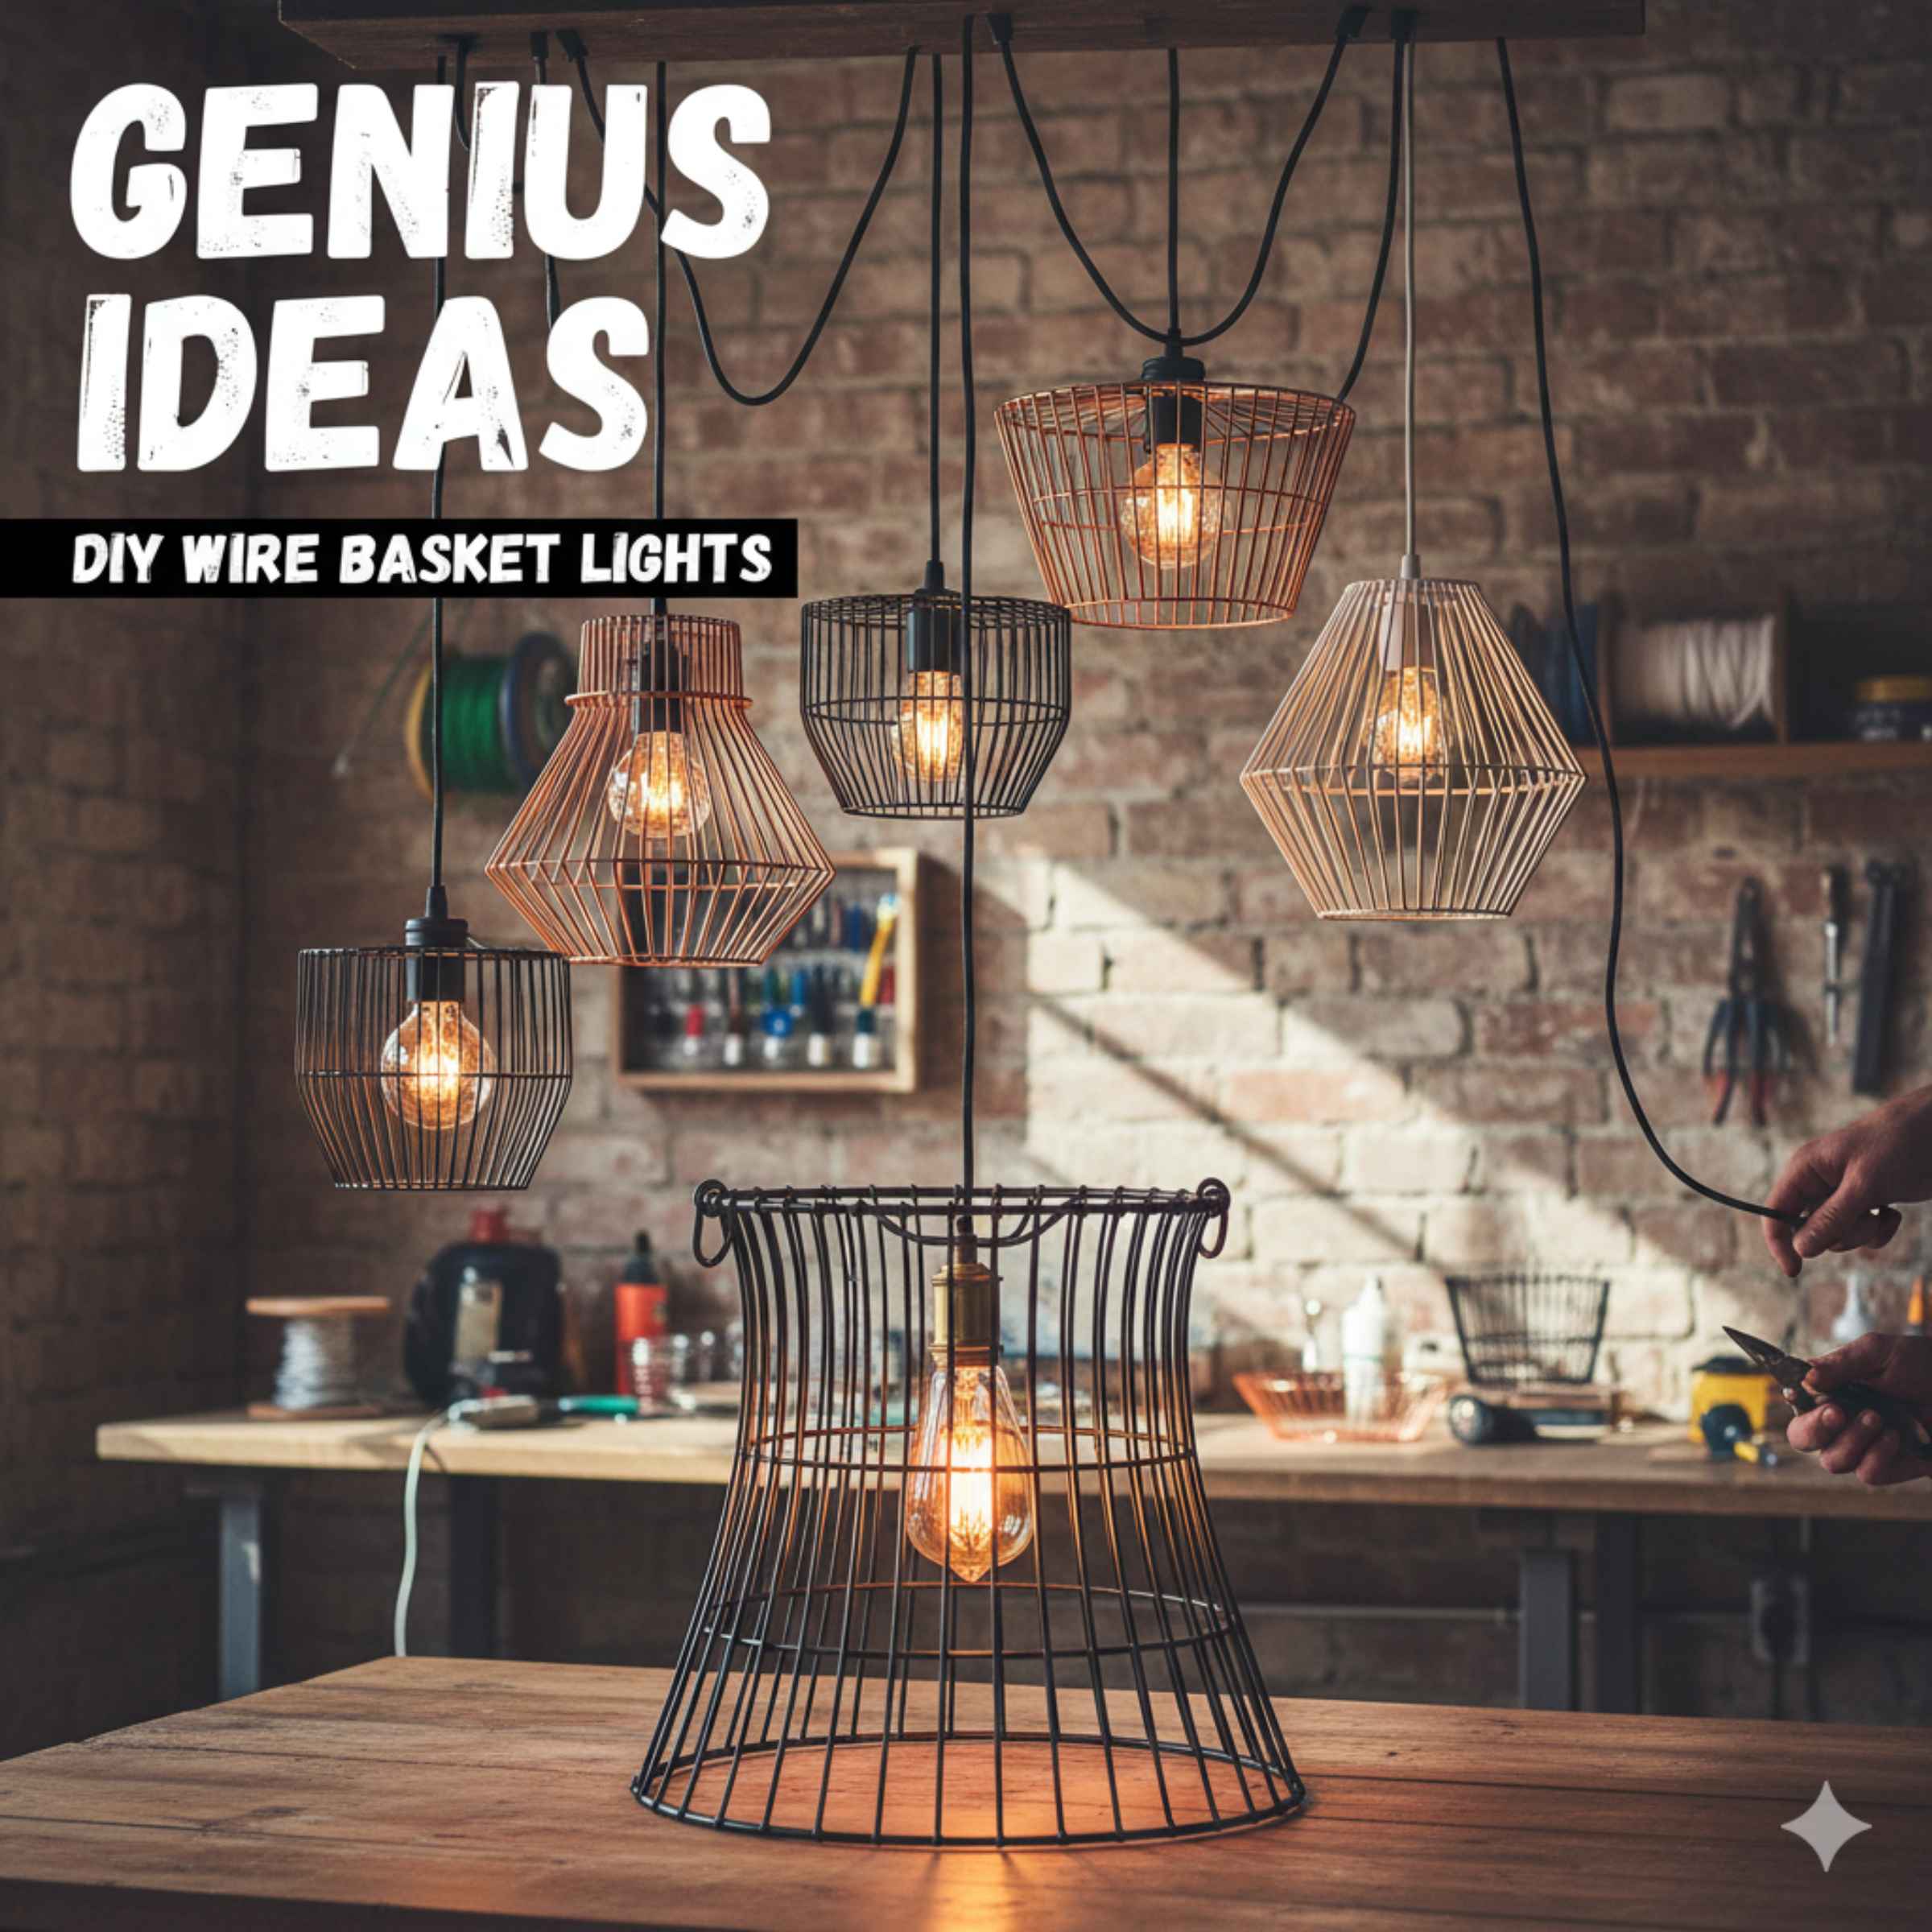
How to Make Light Fixture From Wire Baskets: Genius Ideas
Make a stunning wire basket light fixture yourself! This beginner-friendly guide shows you simple, creative ways to transform ordinary wire baskets into unique hanging lamps, adding style and a personal touch to any room.
Ever look at a simple wire basket and think, “This could be so much more”? You’re not alone! Many of us have spotted everyday items with hidden potential, especially when it comes to home decor. Creating your own light fixtures can seem daunting, but with a few basic tools and some creative flair, you can easily craft beautiful, custom lighting that’s both affordable and stylish. This guide will walk you through turning humble wire baskets into eye-catching lamps, perfect for adding a touch of DIY charm to your home. Let’s get started and light up your space!
Why Wire Baskets for Lighting?
Wire baskets are fantastic for DIY lighting projects for several reasons. Their open structure allows light to diffuse beautifully, creating a warm and inviting ambiance. They are also readily available in various shapes and sizes at affordable prices from home goods stores, craft shops, or even secondhand markets. Plus, their sturdy construction makes them a great base for hanging lights.
Getting Started: What You’ll Need
Before we dive into the creative part, let’s gather our supplies. Safety is key when working with electrical components, so always ensure you’re working with a turned-off power source and follow instructions carefully.
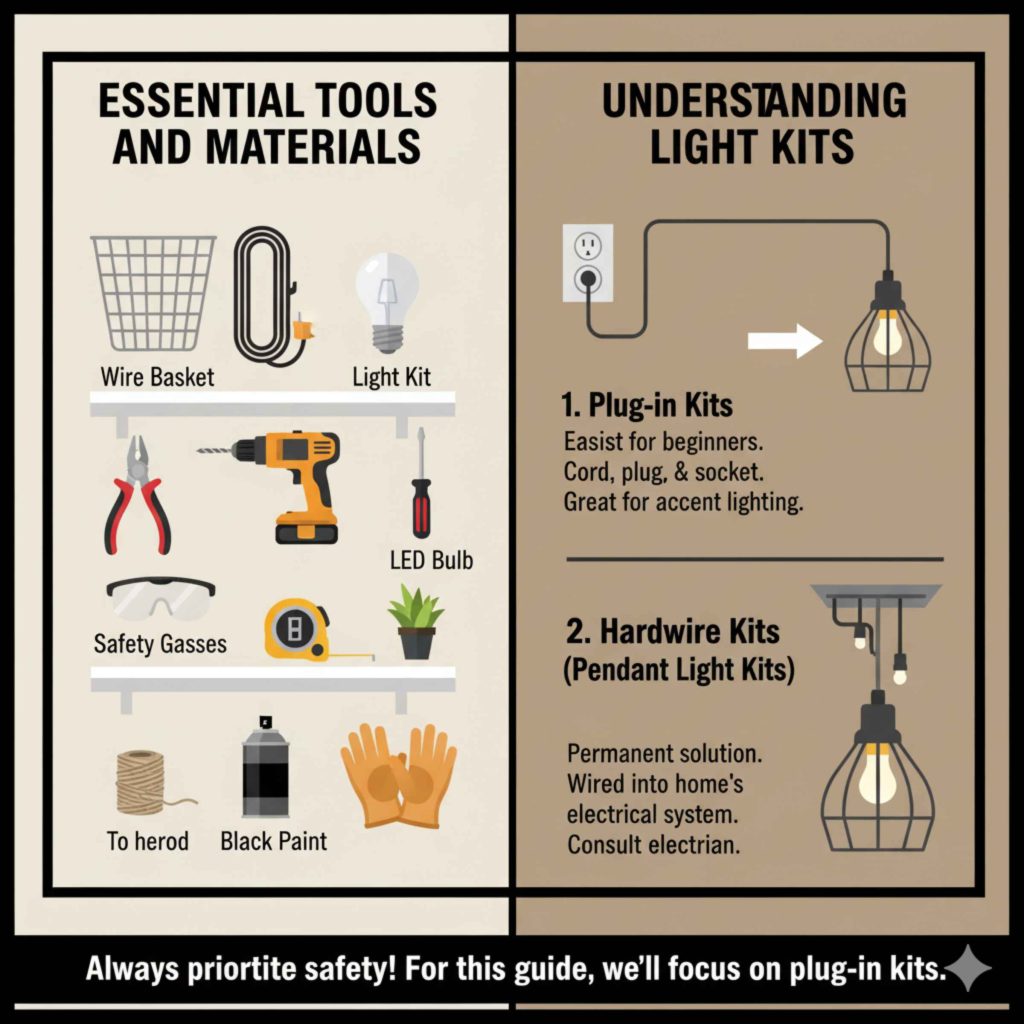
Essential Tools and Materials
Wire Basket(s): Choose the size and shape that best fits your vision. Look for baskets with a sturdy rim.
Light Kit: This typically includes a socket, cord, and plug. You can buy these pre-assembled at hardware stores or online. For a more permanent installation, consider a pendant light kit that hardwires into your ceiling.
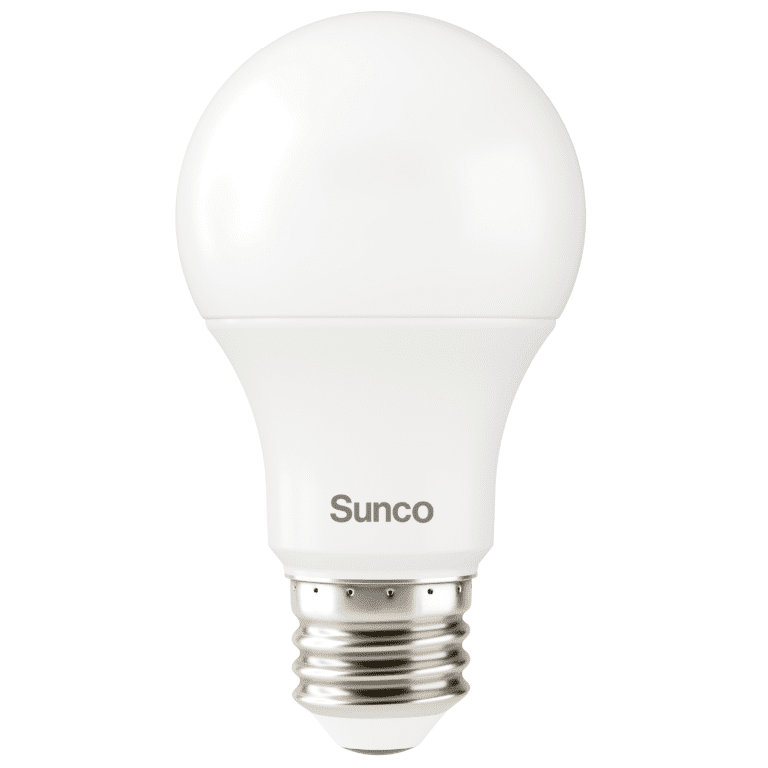
Light Bulb: An LED bulb is recommended for safety, as they generate less heat.
Wire Cutters/Strippers: For any necessary adjustments to the wire kit.
Screwdriver: To secure connections if needed.
Drill with Metal Drill Bit: For creating holes if your basket doesn’t have them.
Measuring Tape: For precise placement.
Safety Glasses: Always protect your eyes!
Gloves: To protect your hands.
Optional Decorative Elements: Spray paint, twine, fabric, faux greenery, etc.
Understanding Light Kits
There are two main types of light kits you’ll encounter:
1. Plug-in Kits: These are the easiest for beginners. They come with a cord, a plug, and a socket. You simply screw in the bulb and plug it into an outlet. They are great for accent lighting or areas where you don’t have a ceiling fixture.
2. Hardwire Kits (Pendant Light Kits): These are designed to be wired directly into your home’s electrical system. This is a more permanent solution and requires some basic electrical knowledge or the help of an electrician. For this beginner’s guide, we’ll focus on plug-in kits for simplicity and safety.
If you’re considering a hardwired fixture, it’s always best to consult with a qualified electrician. For more information on safe electrical practices, the Occupational Safety and Health Administration (OSHA) offers valuable resources.
Genius Idea 1: The Simple Pendant Light
This is the most straightforward approach, perfect for a quick weekend project.
Steps:
1. Prepare Your Basket: Clean the wire basket thoroughly. If you plan to paint it, do so now and let it dry completely.
2. Attach the Light Kit: Most plug-in light kits have a threaded nipple that passes through the top of the socket.
If your basket has a hole in the center of its base (or you can drill one), thread this nipple through the hole.
Secure the socket to the basket using the provided locknut. Ensure it’s snug but not so tight that you damage the basket.
If there’s no central hole, you can often loop the cord over the rim of the basket and secure the socket to the inside or outside using zip ties or wire, ensuring it’s stable and hangs straight.
3. Install the Light Bulb: Screw in your chosen LED bulb.
4. Hang Your Fixture: Use a sturdy ceiling hook or an existing light fixture mount. Ensure the hook is rated for the weight of your fixture.
5. Plug In and Enjoy: Plug the cord into a nearby outlet.
This method creates a charming, industrial-chic look that works well in kitchens, dining areas, or even bedrooms.
Genius Idea 2: The Layered Basket Chandelier
Want to make a bigger statement? Layering multiple baskets can create a dramatic chandelier effect.
Steps:
1. Select Your Baskets: Choose 2-3 wire baskets of varying sizes. They can be the same style or complementary ones.
2. Prepare Baskets for Connection:
For the top basket, ensure it has a sturdy rim. You might need to drill small holes around the rim if they aren’t present, about 2-3 inches apart.
For the lower baskets, you’ll need to attach them to the basket above. You can do this by drilling corresponding holes in their rims.
3. Wire the Light Kits:
Decide how many lights you want. For a 2-basket fixture, one light in the top basket might suffice, with the second basket hanging below. For 3 baskets, you might use two light kits, one in the top and one in the middle basket, or even three if you want more light.
Install your plug-in light kits into the top basket(s) as described in Idea 1.
4. Connect the Baskets:
Use sturdy wire, chain, or strong twine to connect the baskets. Thread these connectors through the pre-drilled holes.
For a tiered look, hang the second basket below the first, ensuring it’s centered. The connectors should be adjustable so you can get the spacing just right.
If using multiple light kits, ensure the cords are managed neatly, perhaps bundled together.
5. Hang and Light: Attach the top basket to a strong ceiling hook and plug in the lights.
This layered approach adds depth and visual interest, creating a unique centerpiece for a dining room or living area.
Genius Idea 3: The Rustic Twine-Wrapped Fixture
Add a touch of natural warmth and texture by wrapping your wire basket in twine.
Steps:
1. Prepare the Basket: Clean the basket. If painting, do it before wrapping.
2. Start Wrapping: Secure the end of your twine to the basket using a knot or a dab of hot glue. Begin tightly wrapping the twine around the wire, working your way around the basket.
3. Continue Wrapping: Keep the twine taut and wrap it closely, ensuring no wire shows through. You can wrap the entire basket or just sections for a more varied look.
4. Secure the End: Once you’ve covered the desired area, tie off the twine securely or use hot glue.
5. Install Light Kit: Install your plug-in light kit into the twine-wrapped basket as described in Idea 1.
6. Hang and Enjoy: Hang your beautifully textured fixture and plug it in.
This technique adds a cozy, bohemian, or farmhouse feel, making the light fixture a true piece of art.
Genius Idea 4: The Geometric Wire Basket Lamp
Combine multiple wire baskets to create a striking geometric statement lamp.
Steps:
1. Choose Baskets: Select two identical wire baskets.
2. Prepare for Connection:
Decide how they will connect. You might want them to meet rim-to-rim, or have one slightly overlap the other.
Drill small holes around the rims of both baskets where they will be joined.
3. Install Light Kit: Install a plug-in light kit into one of the baskets.
4. Join the Baskets: Use sturdy wire or zip ties to securely fasten the two baskets together along the drilled holes. Ensure they are aligned and stable.
5. Hang Your Geometric Lamp: Suspend the combined fixture using a strong hook.
6. Plug In: Connect to power.
This design offers a modern, industrial vibe that can be a real conversation starter.
Table: Basket Types and Their Lighting Potential
Different types of wire baskets can lend themselves to unique lighting styles.
| Basket Type | Ideal For | Style Notes | Example Usage |
|---|---|---|---|
| Round Woven Baskets | Soft, diffused light; cozy ambiance | Farmhouse, bohemian, coastal | Kitchen island pendant, bedroom accent light |
| Square or Rectangular Baskets | Modern, geometric looks; can house multiple bulbs | Industrial, contemporary | Living room statement piece, hallway lighting |
| Deep Baskets | Creating a contained, dramatic light effect; hiding the bulb | Industrial, modern | Entryway focal point, dining room chandelier |
| Shallow Baskets/Wire Bowls | Open, airy feel; good for showcasing decorative bulbs | Minimalist, industrial | Reading nook light, bedside lamp |
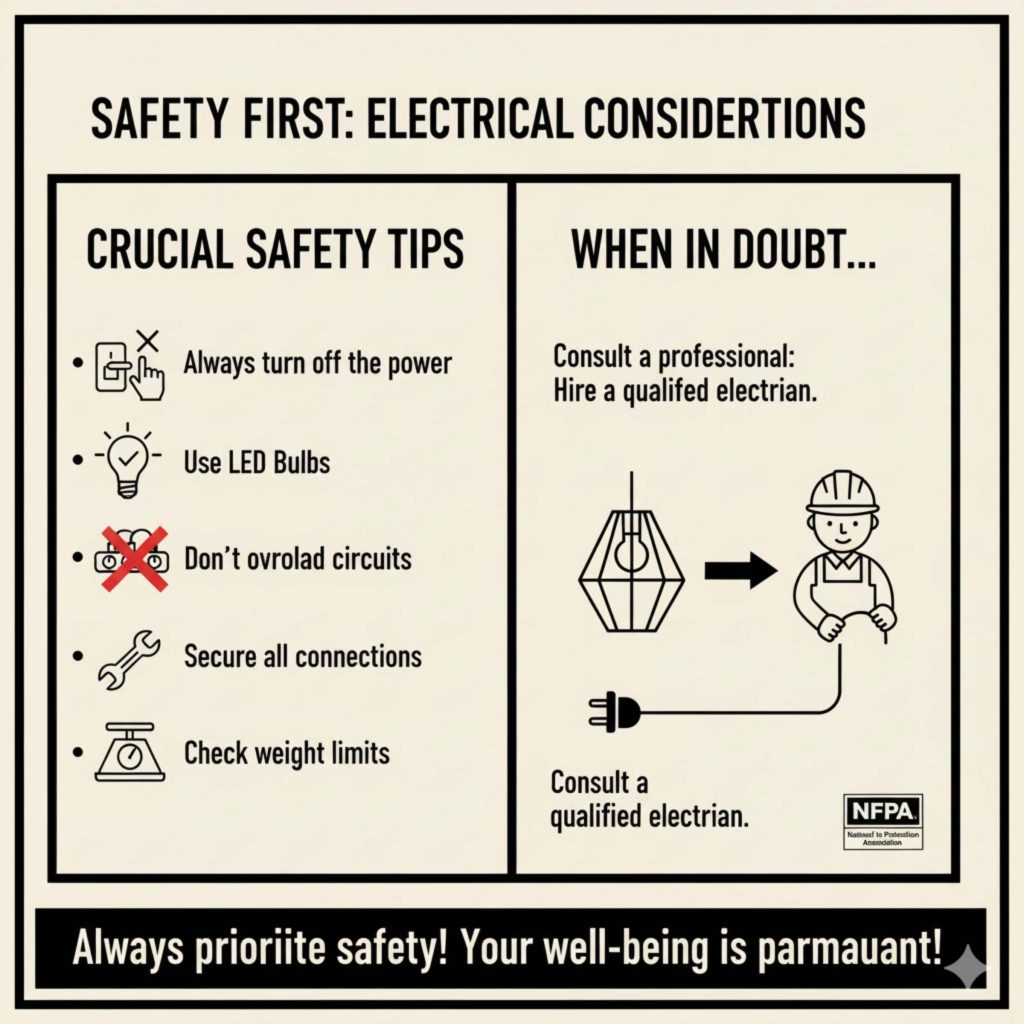
Safety First: Electrical Considerations
Working with electricity requires caution. Here are some crucial safety tips:
Always turn off the power at the circuit breaker before attempting any hardwiring. For plug-in fixtures, ensure the lamp is unplugged.
Use LED bulbs: They produce less heat than incandescent bulbs, significantly reducing fire risk, especially in enclosed fixtures.
Don’t overload circuits: Be mindful of how many high-wattage devices are on a single circuit.
Secure all connections: Ensure wires are properly insulated and connections are tight.
Check weight limits: Make sure your ceiling hook or mounting hardware can support the weight of your fixture.
Consult a professional: If you’re ever unsure about electrical work, hire a qualified electrician. The National Fire Protection Association (NFPA) provides excellent safety information on electrical hazards.
Customization Ideas to Elevate Your Design
Once you’ve mastered the basic assembly, get creative with customization!
spray painting: Give your basket a fresh, modern look with metallic, matte, or vibrant spray paint.
Twine or Rope Wrapping: As seen in Idea 3, this adds texture and warmth.
Fabric Lining: Drape a sheer fabric inside the basket for a softer, diffused glow.
Adding Greenery: Weave faux vines or leaves through the wire for a natural, whimsical touch.
Decorative Bulbs: Use Edison bulbs or other vintage-style LED bulbs to enhance the aesthetic.
Multiple Fixtures: Hang several small wire basket lights in a cluster for a unique chandelier effect.
Frequently Asked Questions (FAQ)
Q1: Can I use any wire basket for a light fixture?
Generally, yes! Look for baskets with a sturdy rim that can support the weight of a light kit and bulb. Ensure there are no sharp edges that could damage the wiring.
Q2: How do I hang a wire basket light fixture safely?
Use a sturdy ceiling hook that is screwed securely into a ceiling joist or a specialized light fixture mounting bracket. Ensure the hook’s weight rating is sufficient for your fixture.
Q3: What kind of light bulb is best for a wire basket light?
LED bulbs are highly recommended. They produce very little heat, which is crucial for safety when working with materials like wire and potentially flammable decorations. They also save energy.
Q4: Do I need to be an electrician to make this light fixture?
If you are using a simple plug-in light kit, you do not need to be an electrician. You are essentially assembling pre-made components. If you plan to hardwire a fixture into your home’s electrical system, it’s strongly advised to hire a qualified electrician.
Q5: How can I make my wire basket light fixture more unique?
Get creative with customization! You can spray paint the basket, wrap it with twine or rope, add decorative elements like faux plants, or even line it with fabric for a softer light. The possibilities are endless.
Q6: What if my basket doesn’t have a hole for the light kit?
You can often drill a hole in the center of the basket’s base using a metal drill bit. Alternatively, you can secure the light socket to the inside or outside of the basket using strong zip ties or wire, ensuring it’s stable and hangs straight.
Conclusion
Transforming ordinary wire baskets into stylish light fixtures is a rewarding DIY project that can add a personal touch and significant charm to your home. Whether you opt for a simple pendant, a layered chandelier, or a creatively decorated piece, the process is accessible to beginners. Remember to prioritize safety by using LED bulbs and ensuring secure mounting. With these ideas and a little imagination, you can illuminate your living spaces with beautiful, custom-made lighting that reflects your unique style. So gather your supplies, get inspired, and start creating!