How To Make Wood Burning Fireplace More Efficient
To make a wood burning fireplace more efficient, focus on using dry, seasoned wood, ensuring proper air control through the damper, improving the seal around the unit, and installing efficiency upgrades like glass doors or an insert. These simple steps maximize heat and minimize wasted energy.
Do you love the cozy glow of your wood-burning fireplace but hate how much wood it eats? Are you surprised by how little actual warmth reaches your living room? You are definitely not alone! Many homeowners feel like they are paying to heat the chimney more than their home. The good news is that making your wood-burning fireplace run better doesn’t require tearing down walls. With a few easy checks and smart adjustments, you can boost your fire’s heat output and save wood. We’ll walk through simple, hands-on steps to turn your drafty old fireplace into a real heat source. Let’s get your fire working smarter for you!
Understanding Why Fireplaces Lose Heat
Before we dive into fixing the problem, let’s understand why traditional masonry fireplaces are naturally inefficient. Think of an open fireplace as a hole in your house designed to suck air out. Even when the fire isn’t burning, this is often true!
When you build a fire, the rising heat carries a huge amount of warm room air up the chimney with it. This draft pulls cold outside air into the house through cracks around windows and doors to replace the lost air. This constant exchange means you are constantly losing the heat you just paid for.
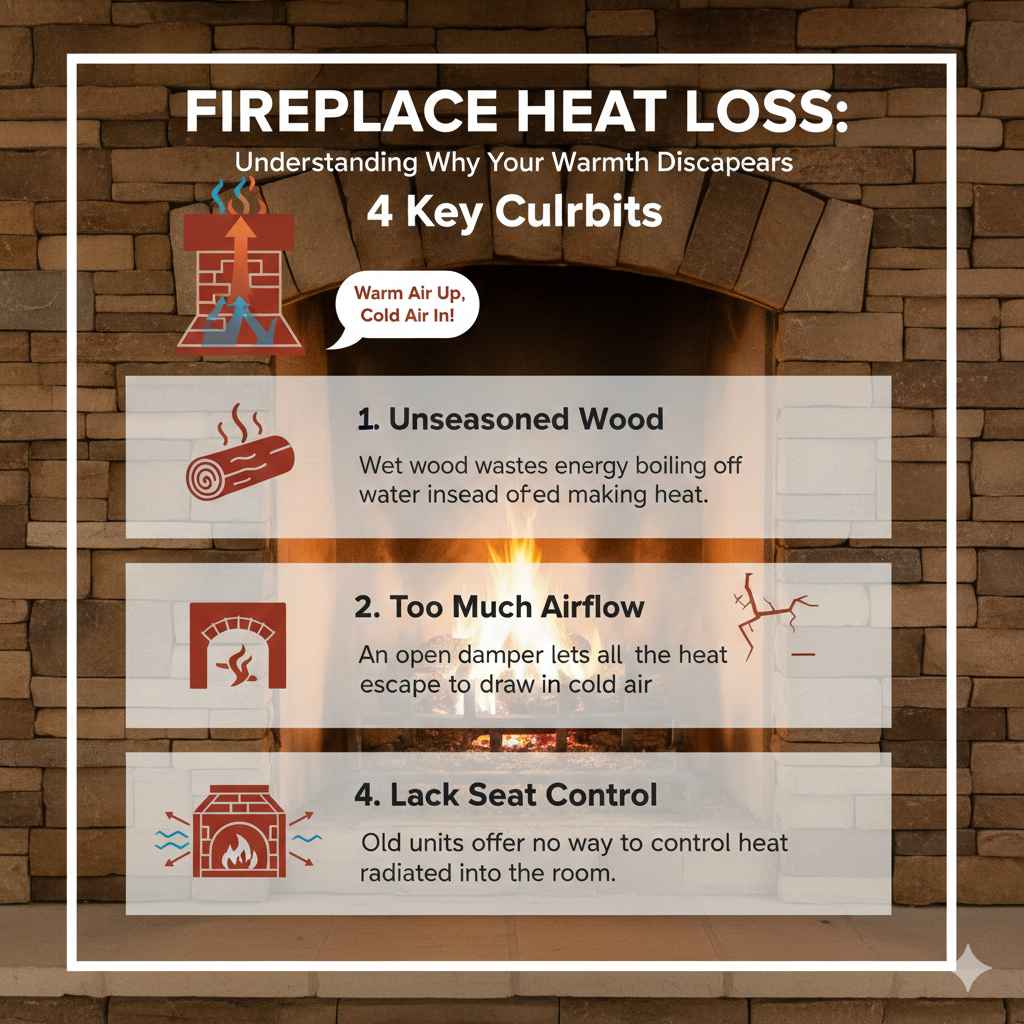
Here are the main culprits for heat loss:
- Unseasoned Wood: Wet wood wastes energy boiling off water instead of making heat.
- Too Much Airflow: An open damper lets all the heat escape too quickly.
- Poor Seals: Gaps around the firebox or chimney draw in cold air.
- Lack of Control: Old units offer no way to control how much heat radiates into the room versus escaping.
Phase 1: Fuel Quality – Start with the Best Wood
The single biggest factor you control for immediate improvement is what you burn. Using the right fuel is the cornerstone of an efficient fire. We aren’t just talking about what kind of tree it is; we are talking about how dry it is.
The Secret is Seasoned Firewood
Seasoned wood—wood that has been properly dried—burns hotter, cleaner, and produces significantly more usable heat than “green” (wet) wood. When wood has too much moisture, your fire spends most of its energy turning that water into steam. This steam leaves up the chimney, taking heat with it, and it creates smoke and creosote buildup.
How to Tell if Wood is Seasoned
Aim for wood with a moisture content below 20%. Here are simple, non-technical ways to check:
- The Weight Test: Seasoned wood feels much lighter than fresh-cut wood of the same size.
- The Sound Test: Clap two logs together. Seasoned wood makes a sharp “clack” sound. Wet wood makes a dull “thud.”
- The Appearance Test: Look at the ends of the logs. Seasoned wood often shows cracks or splits radiating from the center, and the ends look dull or grayish, not bright and fresh.
Proper Wood Storage is Essential
Even if you buy perfectly seasoned wood, improper storage can reintroduce moisture. Think like a craftsman protecting your valuable lumber.
- Get it Off the Ground: Stack wood on pallets, concrete blocks, or wood runners to allow air to circulate underneath and prevent ground moisture from wicking up.
- Keep it Covered (But Ventilated): Cover the top of the stack to shield it from rain and snow, but leave the sides open for airflow. A simple roof overhang works perfectly.
- Location Matters: Store wood near, but not touching, your home. Bringing wood inside just before burning helps dry the outer layer a little more.
Phase 2: Controlling the Airflow
Your fireplace needs air (oxygen) to burn, but too much air acts like a vacuum cleaner, sucking all your expensive heat up the chimney. Mastering your damper and vents is key to controlling this exchange.
Mastering the Damper
The damper is the metal plate inside the throat of your chimney that opens and closes. It is your primary air control device.
- During the Burn: You must have the damper open enough to vent smoke, but you want it as restricted as possible while still drawing smoke cleanly up the flue. If you see smoke wafting into the room, open it slightly more. If the fire seems too hot and roaring without adding much warmth to the room, try closing it down just a touch.
- When Not Burning: This is crucial for efficiency! When the fire is completely out and the ashes are cool, you MUST close the damper completely. Leaving it open is like leaving a large window wide open, wasting conditioned air 24/7.
The Secondary Air Control (If Applicable)
Many modern zero-clearance or insert fireplaces have dedicated air intake controls (sometimes slides or knobs) located usually near the door or below the firebox. These controls feed outside air directly into the fire, allowing you to fine-tune the burn rate.
A good rule of thumb for these controls, according to many fire safety resources, is to maintain a slow, steady burn rather than a raging inferno. Slower burns often mean less overall heat loss through the flue. For more technical details on air intake and combustion efficiency, resources like those from the EPA on home heating offer good background reading.
Checking the Throat and Smoke Shelf
The area where the firebox meets the chimney flue is called the throat. Many older fireplaces have a “smoke shelf” here. This shelf is designed to deflect cold downdrafts away from the opening, but debris buildup can block its function.
While deep chimney cleaning is best left to pros, you can check visually for major blockages. If you notice that smoke consistently rolls into the room, the issue might be related to the size or design of the smoke shelf or a blocked flue further up. This usually signals a professional inspection is needed.
Phase 3: Sealing Leaks and Improving Structure
Even with perfect wood and a correctly positioned damper, drafts can sneak in through gaps around your fireplace structure, pulling in cold air from your basement or crawl space.
Addressing Door and Glass Seals
If your fireplace has glass doors, they are usually sealed with fiberglass rope gaskets around the frame. Over time, these gaskets compress and lose their sealing power.
DIY Gasket Replacement: This is a straightforward and very satisfying DIY job:
- Remove the old, worn gasket. Scrape off any old adhesive residue using a plastic scraper or wire brush (be gentle with the metal frame).
- Purchase a high-temperature fiberglass rope gasket designed for wood stoves/fireplaces (available at most hardware stores). Ensure the diameter matches what you removed.
- Apply the high-temperature silicone adhesive (usually sold with the rope) to the channel where the rope sits.
- Press the new rope firmly into the channel, allowing it to cure fully before operating the fireplace again.
Sealing the Fireplace Surround
Check the brickwork or metal facing around the firebox opening. Over years of expansion and contraction from heat, masonry can develop hairline cracks or gaps where the fireplace meets the wall.
Use a high-temperature sealant or fireplace caulk to carefully fill any visible cracks in the mortar joints around the firebox opening. Standard wall caulk will dry out and crack instantly from the heat.
Phase 4: Efficiency Upgrades You Can Install Yourself
For homeowners looking for significant gains in heating performance without replacing the entire unit, there are fantastic aftermarket upgrades available. These options essentially transform your open-hearth fireplace into a much more contained heating appliance.
Installing Fireplace Glass Doors
Glass doors are perhaps the most popular upgrade. They act like a protective shield, allowing you to enjoy the fire while drastically cutting down on heated room air loss.
How They Help:
- When the fire is low or out, the doors close, sealing the flue opening and preventing cold air infiltration.
- When burning, you can adjust the small ventilation gaps in the door frame (if equipped) rather than relying solely on the main damper, giving you finer control.
The Amazing Fireplace Heat Exchanger (Blower)
This device looks like a set of metal tubes that sit inside your firebox, underneath the grate. Cool room air is drawn into these tubes, circulated around the hot fire and through the chimney walls, and then blown back into the room as warm air.
Pros and Cons of Heat Exchangers:
| Pro | Con |
|---|---|
| Dramatically increases usable heat radiated into the room. | Requires electricity for the fan/blower to operate. |
| Relatively simple installation (often just sliding it in). | The tubes inside the firebox take up space where you could place larger logs. |
| Can recoup initial cost quickly through wood savings. | May require occasional cleaning of the internal tubes. |
The Ultimate Upgrade: A Fireplace Insert
A fireplace insert is a self-contained wood-burning appliance (usually steel or cast iron) that slides directly into your existing masonry firebox. Inserts are factory-built to exacting standards for combustion efficiency, often reaching efficiencies over 70%—compared to the 10–15% efficiency of an open hearth.
While this is a larger project, it offers the best return on efficiency. It uses its own dedicated liner up the chimney, dramatically increasing heat output while drawing much less room air for combustion.
Phase 5: Safe Operation and Maintenance for Efficiency
Efficiency isn’t just about equipment; it’s about habits. Regular maintenance ensures everything is operating as designed.
Grates and Airflow Under the Fire
You might think piling logs directly on the hearth is efficient, but it chokes the fire’s bottom air supply. Wood needs air from below to burn hot.
- Use a Sturdy Grate: A strong metal grate lifts the burning wood 4 to 6 inches off the hearth floor. This allows primary combustion air to flow up around and under the wood, leading to a hotter, cleaner burn.
- Maintain the Ash Bed: Do not rake out all the ashes. A shallow bed (about 1 to 2 inches deep) acts as insulation, radiating heat back up toward the base of your logs, which helps sustain the coals better. Rake excessive ash away, but leave a good base.
Regular Chimney Inspections and Cleaning
Creosote, a black, tarry residue, builds up from incomplete combustion (often caused by wet wood or choking the fire). Creosote buildup reduces the chimney’s diameter, restricting draft and creating a serious fire hazard.
A clean flue draws better. A better draft means smoke gets out faster, and you can run the fire more efficiently. Even if you don’t burn often, have your chimney inspected annually by a Certified Chimney Sweep (look for CSIA certification). They can also assess the health of your firebrick and smoke chamber, which affects how heat is radiated.
Optimizing Fire Lay for Maximum Heat Transfer
The way you stack your wood directly impacts how long the fire burns and how much heat it transfers to the room versus sending up the chimney.
The Top-Down Burn Method (Reverse Fire Lay)
While counter-intuitive to those who grew up starting fires from the bottom, the top-down burn is extremely efficient and cleaner, especially for starting a fire that will sustain itself:
- Place the largest, thickest pieces of seasoned wood on the bottom, parallel to each other.
- Lay a second layer of medium-sized wood across the first layer.
- Place your kindling (small, dry sticks) on top of the medium layer.
- Place your tinder (dryer lint, birch bark, or commercial fire starter) on the very top.
Light the tinder on top. As the fire burns down, the heat slowly dries the wood beneath it before igniting it fully. This produces less smoke initially, allows for slower, more controlled heat release, and requires less fiddling once it’s going.
Avoid Overloading the Firebox
Packing logs tightly together smothers the fire by limiting necessary airflow between pieces. Aim for space so air can circulate freely around the burning wood.
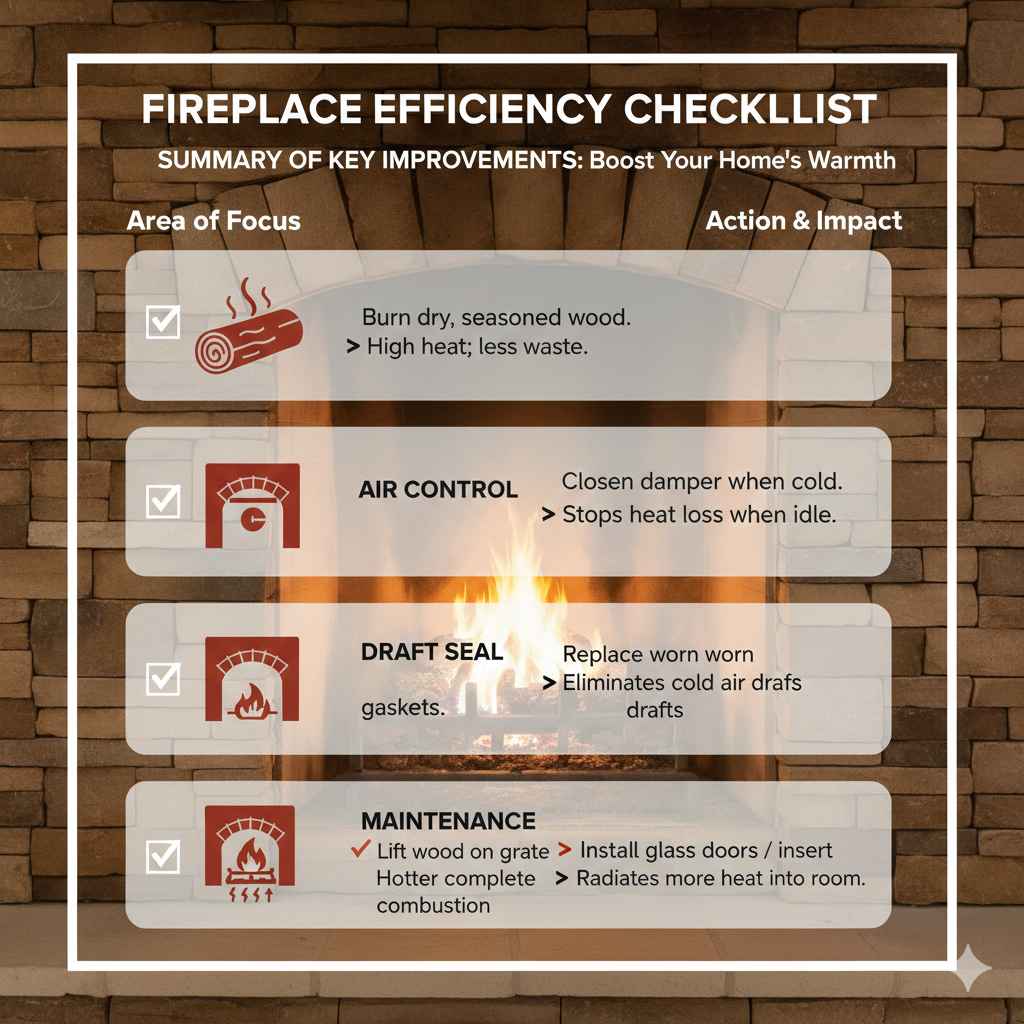
Summary of Key Efficiency Checkpoints
To help you keep track, here is a simple checklist incorporating all the advice we’ve covered. Tackling these items one by one will provide noticeable improvements quickly.
| Area of Focus | Action Item | Impact on Efficiency |
|---|---|---|
| Fuel Management | Burn only dry, seasoned wood (under 20% moisture). | High heat output; less wasted energy on steam. |
| Air Control | Close the damper completely when the fire is cold. | Stops heat loss when the fireplace is idle. |
| Draft Management | Check and replace worn door/glass gaskets regularly. | Eliminates cold air infiltration around the firebox. |
| Maintenance | Ensure the grate keeps wood lifted for under-fire airflow. | Promotes complete, hot combustion. |
| Upgrades | Consider installing glass doors or a heat exchanger/insert. | Captures and radiates significantly more heat into the room. |
Frequently Asked Questions (FAQ) for Beginners
Q1: Can I use my fireplace damper when I’m not actively burning a fire?
A: Yes, absolutely! This is one of the most important steps. You must close the damper tightly once the ashes are completely cool. An open damper is the biggest source of uncontrolled heat loss from your home.
Q2: How long does firewood need to dry (season) before it’s good to burn?
A: Most hardwoods (like oak or maple) need at least 6 to 12 months to season properly, depending on your climate and how they are stacked. Softer woods like pine might be ready in 6 months. Always test for dryness (light weight, sharp clacking sound).
Q3: Is it okay to burn large amounts of paper or cardboard to start the fire quickly?
A: While paper is excellent tinder, using too much glossy cardboard or thick junk mail is not recommended. They burn too fast, create a huge rush of air (wasting heat), and can send excessive embers up the chimney before the main logs catch properly.
Q4: What should I do if smoke keeps coming into the room even with the damper open?
A: This is called a downdraft. First, ensure the damper is fully open. If the issue persists, the problem is usually related to negative pressure in the house (too many things sucking air out, like an exhaust fan) or an obstruction/design flaw in the chimney throat. Make sure a window is cracked open slightly to feed the fire fresh air, which often solves minor draft issues.
Q5: Are electric blowers attached to heat exchangers noisy?
A: Modern fireplace blowers are generally quieter than older models. They often produce a steady, low hum that moves air well. While you will certainly hear them when they are running on high speed, they are typically much less intrusive than a loud furnace fan.
Q6: Do fire logs (the compressed paper kind) burn more efficiently than natural wood?
A: Manufactured fire logs are designed to burn consistently and usually generate a specific amount of heat, but they often cannot match the total heat output or sustained burn time of a well-built fire using perfectly seasoned, split hardwood. They are best used for quick, easy fires or when your supply of seasoned wood is low.
Conclusion: Enjoying a Warmer, Smarter Fire
You don’t have to resign yourself to a fireplace that primarily cools your home while only providing a little ambient light. By focusing on the basics—using dry wood, mastering the damper, and keeping your unit sealed tight—you have already taken massive strides toward efficiency. Remember, making your wood-burning fireplace more efficient is an ongoing relationship, not a one-time fix. By treating your fuel with respect, paying attention to airflow, and performing simple seasonal checks on your seals, you are building confidence and ensuring that every log you chop and carry provides maximum warmth for your home.
Take pride in your cozy, efficient fire. You now have the knowledge and the easy steps to make sure your beautiful fireplace is adding real value—and real warmth—to your home this winter!