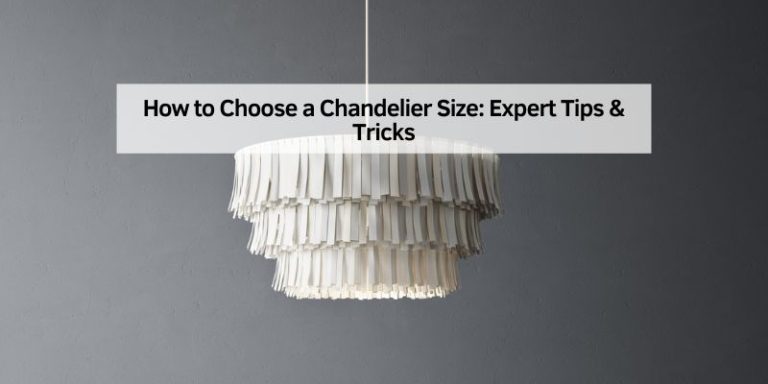
How to Move a Ceiling Light Fixture: Step-by-Step Guide
Are you staring at that outdated ceiling light fixture, thinking it’s time for a change? Perhaps you’re dreaming of a chic chandelier or a sleek, modern lamp to transform your space.
Moving a ceiling light fixture might seem like a daunting task, especially if you’re not an experienced DIY enthusiast. But here’s the good news: with the right guidance, you can do it yourself! Imagine the satisfaction of looking up and seeing a beautiful, new fixture, knowing you installed it with your own hands.
We’ll walk you through the process, step by step, ensuring you have all the confidence and knowledge to tackle this project safely and efficiently. So, let’s get started and make your vision a reality!
Credit: www.younghouselove.com
Preparation And Safety
Start by collecting all needed tools. A screwdriver is a must. You will need a voltage tester. It checks if power is off. Get a ladder for reaching the ceiling. A wire cutter helps cut wires safely. Don’t forget a drill for making holes. Lastly, gather some wire nuts. They connect new wires securely. Keep all tools nearby. This saves time during work.
Safety is very important. Turn off the power at the circuit breaker. This prevents accidents. Use a voltage tester to check wires. Make sure there is no power. Never touch wires with bare hands. Always wear insulated gloves for protection. Stay on the ladder carefully. Ask someone to hold it if needed. Follow these steps to stay safe.
Removing The Existing Fixture
First, find the circuit breaker in your home. Switch it off to cut power. This step keeps you safe from electric shocks. Always double-check with a voltage tester. This ensures the power is truly off. Never skip this step for safety.
Carefully unscrew the light bulb first. Next, remove the cover or shade. Use a screwdriver to take out the screws. Hold the fixture with one hand while doing this. Avoid dropping it. Once screws are out, gently pull the fixture down. See the wires behind it? Remember their places. This helps during reinstallation. Lastly, disconnect the wires. Now the fixture is free.
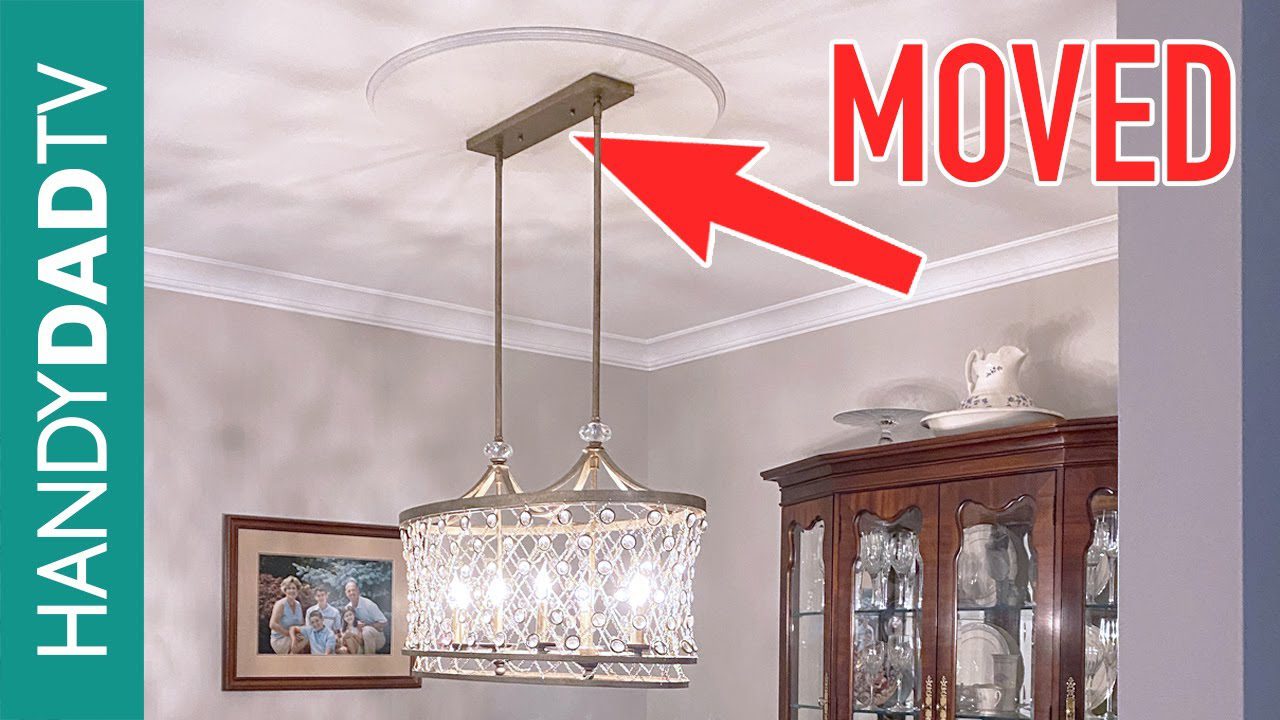
Planning New Location
Moving a ceiling light fixture requires careful planning and consideration of wiring and support. Begin by turning off the electricity and gathering necessary tools. Follow instructions closely to ensure a safe and successful relocation of the fixture.
Choosing Optimal Position
The best spot for a ceiling light matters. Light must spread evenly. Avoid placing it too close to walls. Center of the room often works best. Ensure the light won’t glare in people’s eyes. Consider room’s purpose. Living rooms need different light than kitchens. Measure the space. Make sure the fixture fits.
Considering Wiring Pathways
Wiring paths are crucial. Check the current wiring. Find the shortest path to the new spot. Avoid crossing beams. Keep wires away from water pipes. Safety is key. Ensure wires are secure. Seek professional help if unsure. Electricians can guide you. Test the new setup before use. Protect wires with conduits.
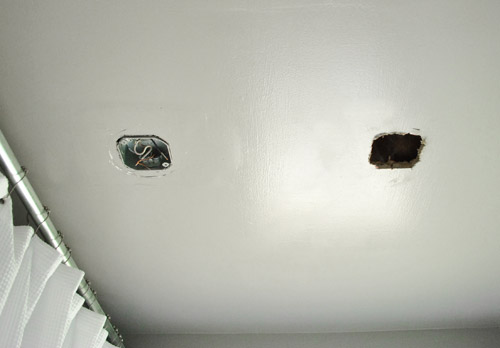
Installing Electrical Wiring
Running new wires is a key step. First, turn off the power. This keeps you safe. Next, use a fish tape to guide wires. Push it through the wall. This tool makes the job easier. Attach the wires to the fish tape. Then, pull them through. Be gentle. Wires can break. Follow the path carefully. Use a voltage tester to check. Make sure the wires are live.
Securing Connections
Securing connections is very important. Use wire nuts to join wires. Twist them tight. Loose wires are unsafe. Tape the connections for extra safety. Electrical tape works well. Connect the wires to the fixture. Black to black. White to white. Match the colors. Screw the fixture into the ceiling. Make sure it is tight. A loose fixture can fall. Turn the power on again. Check if the light works. If not, check connections.
Mounting The New Fixture
Secure the fixture to the ceiling. Use screws for strong support. Align holes on the fixture and ceiling. Make sure everything fits well. Tighten screws until the fixture is snug. Avoid overtightening. It might break parts. Check for loose pieces. Ensure all wires are tucked away safely. Double-check connections to avoid sparks.
Attaching To Ceiling
Lift the fixture to the ceiling. Hold it steady. Attach mounting plate first. Ensure it’s level. Fit the fixture onto the plate. Check alignment again. Secure with screws. Tighten them gently. Ensure the fixture doesn’t move. Test stability by shaking lightly. It should stay firm. Inspect all parts for safety. Make sure it looks neat.
Testing Stability
Check the fixture by pushing gently. It should stay in place. Look for movement or wobbling. Ensure no wires hang loose. Test light by turning it on. No flicker means good connections. Inspect screws again for tightness. Adjust if needed. Final check ensures everything is safe.
Finalizing Installation
Secure the ceiling light fixture in its new location by tightening all screws. Confirm the connections are snug and safe. Ensure the fixture is aligned properly for optimal lighting.
Restoring Power
First, find the circuit breaker. Turn the power back on. Make sure the switch is set to the correct position. This will restore power to the light. Be careful to avoid touching any wires. Safety is very important.
Testing Light Functionality
Switch the light on to test it. Check if the light works properly. If it does not, you may need to check the wiring. Make sure every connection is tight. A loose wire can cause problems. Double-check everything if needed.
Troubleshooting Common Issues
Shifting a ceiling light fixture demands precision and care. Ensure electricity is off before disconnecting wires. Follow safety measures to prevent accidents during installation.
Addressing Wiring Errors
Wiring errors can make your light not work. Check the wires carefully. Sometimes the wires are loose or not connected. Tighten them with a screwdriver. Make sure the colors match. Black with black. White with white. If wires are wrong, the light might flicker. Turn off the power first. Safety is important. Use a flashlight to see better. If unsure, ask an adult for help.
Fixing Fixture Misalignment
A light fixture might hang crooked. This happens if screws are not tight. Check each screw on the fixture. Use a screwdriver to tighten them. If the fixture is still not straight, adjust the bracket. The bracket holds the fixture to the ceiling. Make sure it’s even. Sometimes you need a level tool. This helps make the fixture straight. Ask a friend to hold it while you fix it.

Credit: www.youtube.com
Frequently Asked Questions
Can A Ceiling Light Be Moved?
Yes, you can move a ceiling light. Ensure the power is off before starting. Consult a professional electrician for safe relocation. Proper planning and wiring adjustments may be necessary. This task requires careful execution to avoid electrical hazards. Always prioritize safety and compliance with electrical codes.
How Do I Move A Light Fixture Without A Moving Box?
Turn off power to the fixture. Disconnect wiring. Unscrew and remove the fixture from its mount. Safely transport it using padding or a sturdy bag. Reinstall at the new location by reversing the removal steps. Ensure secure connections and test functionality.
Always prioritize safety throughout the process.
Do You Need An Electrician To Move A Light Fixture?
Yes, hiring an electrician to move a light fixture is recommended. They ensure safe installation and compliance with electrical codes. Electricians have the expertise to handle wiring and potential hazards, providing peace of mind. Attempting it yourself can lead to safety risks and electrical issues.
How Much Does It Cost To Move A Ceiling Light Fixture?
Moving a ceiling light fixture costs between $100 and $500. Prices vary based on labor, materials, and complexity. Electrician rates and local fees impact the final cost. Always hire a licensed professional for safety and quality assurance. Check for additional charges like disposal or permits before proceeding.
Conclusion
Moving a ceiling light fixture requires patience and careful planning. Following each step ensures safety and success. Start by turning off the power. Gather your tools and prepare the workspace. Remove the old fixture with caution. Install the new fixture securely.
Double-check all connections. Finally, restore power and test your new light. Completing this task brings satisfaction and a brighter room. Practice makes perfect. With each project, skills grow and confidence increases. Enjoy your new lighting and the fresh look it brings.
Keep learning and improving your DIY abilities. Your home shines with each successful update.