How to Change a Ceiling Light Bulb (Base Type + LED Guide)
Changing a ceiling fixture bulb takes 5 minutes: cut power at the switch, remove the cover, twist out the old bulb counterclockwise, and twist in the replacement – matched to the fixture’s base type (E26 standard, E12 candelabra) and enclosed-fixture rating if the cover fully encloses the bulb. Using a non-rated LED in an enclosed fixture traps heat and can cut its lifespan short. This guide covers bulb and base selection, the swap itself, and troubleshooting a bulb that won’t light.
Safety Precautions
Make sure to turn off the power before starting. Find the light switch and flip it off. For extra safety, turn off the circuit breaker. This step helps avoid any electric shock. Always check the light is off before proceeding. Safety first!
You will need a few simple tools. Get a sturdy ladder to reach the ceiling. Have a new light bulb ready. Check the bulb type before buying. A cloth or gloves will protect your hands. These tools will make the task easy.
Removing The Old Bulb
Stand on a sturdy ladder or chair. Make sure it is stable. Turn off the power to the light. Safety first. You do not want any accidents. Check the fixture to see how it opens.
Unscrew Or Unclip The Cover
Many fixtures have a cover. Some covers unscrew. Others have clips. Gently unscrew or unclip the cover. Do not force it. It may break. Hold the cover so it does not fall. Place it safely aside.
Take Out The Old Bulb
Look at how the bulb is fixed. Twist the bulb counterclockwise. It should come out easily. Be careful, it might be hot. Dispose of the old bulb properly. Some stores recycle bulbs.
Choosing The Right Bulb
Check Wattage and Type before buying a new bulb. A bulb with the wrong wattage can cause problems. It might burn out fast or even cause damage. Look at the fixture for a label. It shows the correct wattage needed. The bulb type is also crucial. Some fixtures need specific bulbs. Others can use any bulb size. The right type ensures it fits well.
“Brightness is a description of light output, which is measured in lumens (not watts).”
Match The Base Type
E26 is the standard medium screw base found in nearly all US ceiling fixtures – if the old bulb screws in and out with a normal twist, it’s E26. Smaller decorative fixtures and chandeliers sometimes use the narrower E12 candelabra base instead. Check the old bulb’s base width before buying – the two are not interchangeable.
Enclosed Fixtures Need An Enclosed-Rated LED
If the fixture’s cover fully encloses the bulb (no venting), use an LED bulb rated for enclosed fixtures. Trapped heat inside a sealed cover degrades an unrated LED’s driver electronics faster, shortening its lifespan well below the rated hours – manufacturers sell enclosed-fixture-rated versions specifically to handle this.
Consider Energy Efficiency when picking a bulb. Energy-saving bulbs use less power and last longer, which saves money over time. LED bulbs are the most efficient screw-in option available – use the lumens (not watts) to compare brightness: a 60W incandescent puts out about 800 lumens, 75W about 1,100 lumens, and 100W about 1,600 lumens.
Best Enclosed-Fixture LED Pick
MaxLite A19 LED, Enclosed Fixture Rated – $14.99
Built for the exact enclosed-fixture heat issue this guide covers – E26 base, 800 lumens (60W equivalent), dimmable.
- Best for: flush-mount and enclosed ceiling fixtures
- Why we picked it: rated for the trapped-heat problem that shortens unrated LED life
- Main drawback: costs more than a basic unrated LED bulb
Compare more bulb-changing essentials
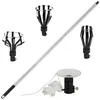 Option 1 Femitu 12ft Bulb Changer Pole – $29.36
|
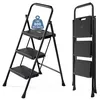 Option 2 DUMOS 3-Step Ladder – $29.97
|
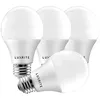 Option 3 LUXRITE 60W Equivalent LED – $11.99
|
As an Amazon Associate we earn from qualifying purchases.
Installing The New Bulb
Changing a light bulb in a ceiling fixture requires careful steps. First, turn off the power to avoid any accidents. Carefully remove the old bulb and replace it with a new one, ensuring it’s securely fitted.
Position The New Bulb
Hold the new bulb firmly. Align it with the socket. Ensure it’s straight. Gently twist the bulb into the socket. If the bulb doesn’t fit, don’t force it. Check the size or type again. Make sure the bulb is snug and secure. This prevents it from falling later.
Secure The Cover Back
Check if the cover is clean. Place the cover over the fixture. Align it with the screws or clips. Tighten the screws to hold it in place. Use a screwdriver if needed. Ensure the cover is tight. This keeps the bulb safe. Test the light by turning on the switch. If it lights up, you did it right. Always ensure safety when working with electricity.
Testing The New Bulb
Turn the power back on. Use the switch on the wall. Or use the circuit breaker. Make sure the power flows to the fixture. This is crucial for testing.
Observe the bulb. See if it lights up. A working bulb will shine brightly. No flickering should occur. Flickering can mean a problem. If it doesn’t light, check the socket. Make sure the bulb is tight. Loose bulbs might not work.
Troubleshooting Common Issues
Changing a light bulb in a ceiling fixture can seem tricky. Ensure safety by switching off the power first. Gently remove the old bulb, insert the new one, and turn it securely.
Bulb Doesn’t Light Up
First, check if the light bulb is properly screwed. Sometimes, it’s not tight enough. Also, ensure the light switch is on. If it’s still dark, try another bulb. Maybe the bulb is burned out. Finally, inspect the fixture. It could be a wiring problem.
Flickering Or Dim Light
Flickering lights are often annoying. Loose bulbs can cause flickering. Tighten the bulb carefully. If the light is dim, check if the bulb is compatible. Some fixtures need special bulbs. Try a different bulb if needed. If flickering continues, there might be an electrical issue. Call an electrician for help.
Maintenance Tips
Changing a light bulb in a ceiling fixture involves safety and precision. Turn off the power switch. Gently remove the fixture cover and unscrew the bulb. Replace with a new bulb, ensuring compatibility with the fixture. Secure the cover back in place.
Turn on the switch to test the bulb.
Regular Cleaning
Dust builds up on fixtures over time. It can dim the light. A soft cloth can help remove dust. Use a gentle cleaner for sticky dirt. Be careful with water and electricity. Safety first. Turn off the power before cleaning. Clean fixtures once a month. It keeps them bright and safe.
Periodic Fixture Checks
Check fixtures for damage. Loose wires can be a problem. Look for cracks or broken parts. They can cause trouble. Tighten loose screws or bolts. Fixtures should be sturdy. Inspect bulbs regularly. Replace worn-out bulbs quickly. Keep your lights shining brightly. Safe and sound.
Frequently Asked Questions
How To Replace A Light Bulb In A Ceiling Fixture?
Turn off the power. Remove the fixture cover carefully. Unscrew the old bulb counterclockwise. Insert the new bulb clockwise. Replace the cover and turn on the power.
How To Remove Flush Ceiling Light Cover?
Turn off the power to the light. Locate the screws or clips holding the cover. Unscrew or unclip them carefully. Gently lower the cover, ensuring not to damage it. Clean or replace as needed. Reassemble by reversing the steps. Ensure everything is secure before turning the power back on.
Can I Replace A Ceiling Light Fixture Myself?
Yes, you can replace a ceiling light fixture yourself. Ensure the power is off for safety. Follow the manufacturer’s instructions and use the appropriate tools. If unsure, consult a professional electrician.
How To Replace A 4 Pin Light Bulb?
Turn off the power first. Grip the bulb gently and pull it straight out of the socket. Align the new bulb’s pins with the socket holes. Push the bulb in firmly until secure. Turn the power back on and test the light.
Always ensure safety while handling light bulbs.
Conclusion
Changing a light bulb can seem tricky. But, with simple steps, it’s easy. Safety first: always turn off the power. Use a sturdy ladder for height. Gently remove the old bulb. Carefully screw in the new bulb. Ensure it’s secure, but not too tight.
Turn the power back on and check the bulb lights up without flickering. Match the base type and enclosed-fixture rating next time and the whole swap takes under 5 minutes.
Sponsored / affiliate links. As an Amazon Associate I earn from qualifying purchases. I may earn additional commission from eligible campaigns.