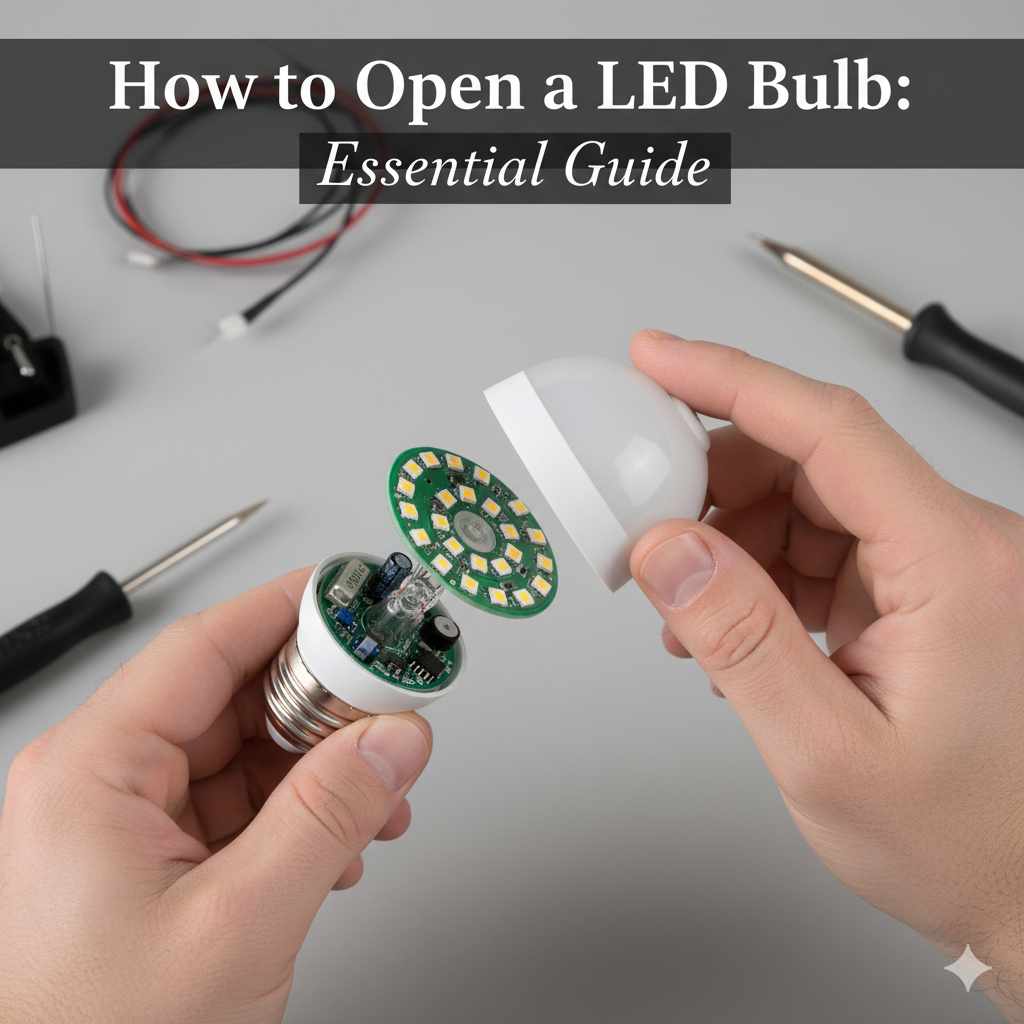
How to Open a LED Bulb: Essential Guide
Quick Summary:
Opening an LED bulb is usually not recommended for DIY repair due to safety risks and complex components. If absolutely necessary for specific projects, proceed with extreme caution after ensuring power is off. This guide outlines the general process and crucial safety considerations for those needing to access the internal parts of an LED bulb.
Ever found yourself staring at a burnt-out LED bulb, wondering what’s inside? Or perhaps you’re a DIY enthusiast with a creative project in mind that requires repurposing an old LED bulb. It’s natural to be curious about these modern lighting marvels. While most LED bulbs are designed to be sealed units and not user-serviceable, understanding how they are constructed can be fascinating and, in rare cases, useful for specific hobbyist endeavors. This guide will walk you through the general process of opening an LED bulb, focusing on safety and the components you might encounter. We’ll keep things simple and straightforward, just like a good DIY project should be!
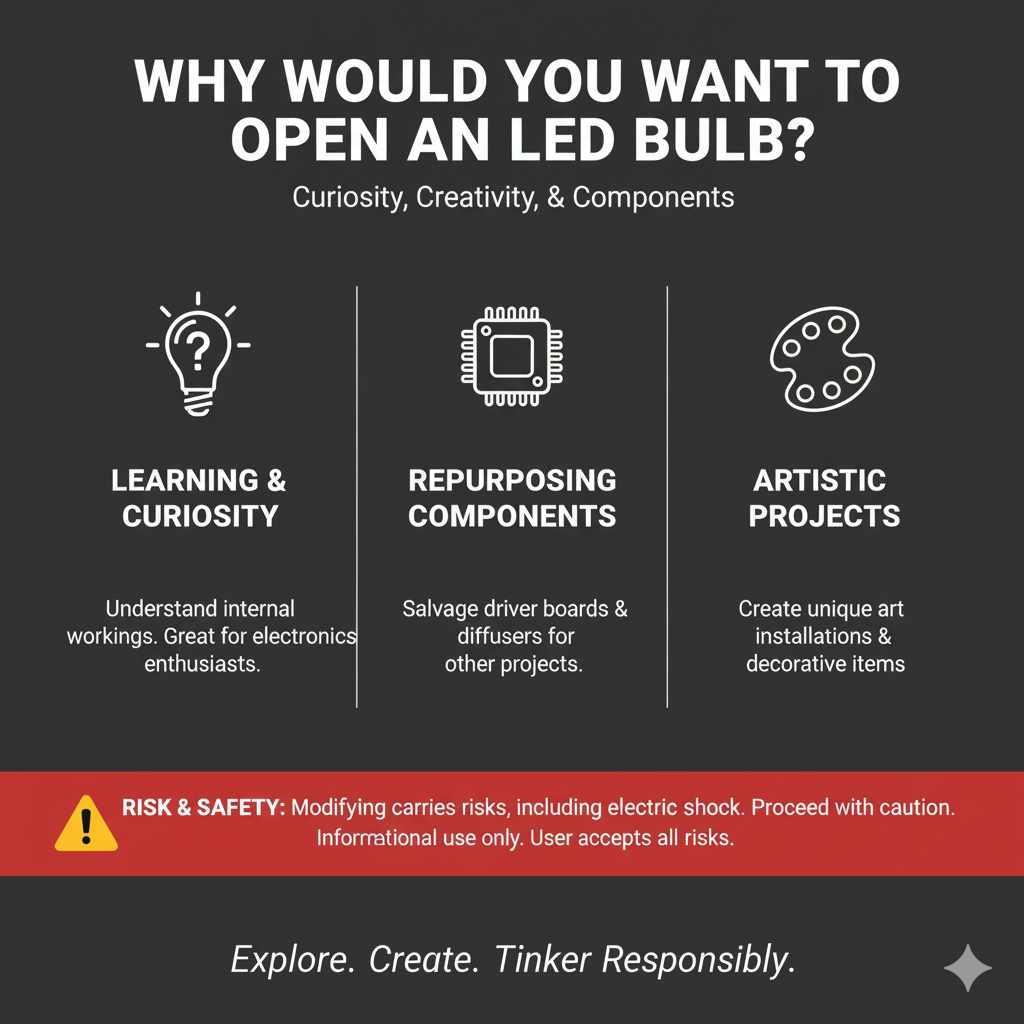
Why Would You Want to Open an LED Bulb?
Before we dive into the “how,” let’s touch on the “why.” For most homeowners, the answer is simple: a burnt-out bulb. However, you can’t (and shouldn’t) try to repair a standard LED bulb at home. They are designed to be replaced, not fixed. But for tinkerers, artists, and electronics hobbyists, there are a few reasons you might consider opening one:
Learning and Curiosity: Understanding the internal workings of modern electronics is a great way to learn.
Repurposing Components: Some hobbyists might want to salvage specific parts, like the LED driver board or the diffuser, for other electronic projects.
* Artistic Projects: Creative individuals might use the transparent casing or internal components for unique art installations or decorative items.
It’s crucial to remember that attempting to open and modify LED bulbs carries risks, including electrical shock and potential damage to components. This guide is for informational purposes and for those who understand and accept these risks.
Safety First! Essential Precautions Before You Begin
This is the most important part, folks. Electricity is no joke, and even a seemingly dead bulb can hold a residual charge. Always, always, always prioritize safety.
Before you even think about touching an LED bulb with tools, follow these non-negotiable safety steps:
- Disconnect Power Completely: Ensure the light fixture where the bulb was installed is switched OFF at the wall switch. For extra safety, you can also turn off the corresponding breaker at your home’s electrical panel. If you’re unsure about your home’s wiring, it’s best to consult a qualified electrician. You can learn more about electrical safety basics from reputable sources like the U.S. Consumer Product Safety Commission (CPSC).
- Let it Cool Down: LED bulbs, while cooler than incandescent bulbs, can still get warm. Let the bulb sit for at least 15-20 minutes after it’s been turned off to cool down completely.
- Wear Safety Gear: Always wear safety glasses to protect your eyes from any small pieces of plastic or glass that might fly off. Consider wearing gloves, especially if you’re concerned about sharp edges.
- Work in a Well-Lit, Stable Area: Choose a clean, well-lit workbench or table where the bulb won’t roll away.
- Use Insulated Tools: If possible, use tools with insulated handles. This adds an extra layer of protection against accidental electrical contact.
Tools You Might Need
Opening an LED bulb usually requires a bit of gentle persuasion and the right tools. The exact tools can vary depending on the bulb’s construction, but here’s a common set that will likely help:
- Safety Glasses: As mentioned, absolutely essential.
- Gloves: For grip and protection from sharp edges.
- Pry Tool Set (Plastic or Nylon): These are ideal because they are less likely to scratch or damage the plastic casing compared to metal tools. They are perfect for getting into small gaps.
- Small Flathead Screwdriver: A small one can be useful for gently prying or manipulating small parts.
- Pliers (Needle-nose): Might be helpful for gripping or carefully removing components once the bulb is open.
- Utility Knife or Craft Knife: Use with extreme caution for scoring or cutting through adhesive.
- Hair Dryer or Heat Gun (Optional): Some bulbs are sealed with adhesive that can be softened with gentle heat.
Understanding LED Bulb Construction
Before we start prying, let’s look at the typical parts of an LED bulb. This will give you an idea of what you might find inside.
Most LED bulbs consist of these main components:
| Component | Description | Purpose |
|---|---|---|
| Base (Edison Screw or Bayonet) | The metal part that screws into the light socket. Contains electrical contacts. | Connects the bulb to the power source. |
| Driver Housing | Often integrated into the base or a separate small component. | Contains the electronics that convert AC power to the DC power LEDs need. |
| Heat Sink | A finned or solid metal component, usually aluminum, attached to the LED board. | Dissipates the heat generated by the LEDs to prevent overheating and prolong their life. |
| LED Board (PCB) | A printed circuit board holding the Light Emitting Diodes (LEDs). | The source of light. Contains multiple small LED chips. |
| Diffuser/Lens | A plastic or frosted glass cover that spreads the light evenly and reduces glare. | Shapes and softens the light output. |
| Outer Casing | The main body of the bulb, often made of plastic or glass. | Houses and protects all internal components. |
Step-by-Step: How to Open a Typical LED Bulb
Okay, safety checked, tools ready, and you understand the parts. Let’s get to it. Remember, patience and a gentle touch are key here. We’ll focus on common types, usually those with a plastic dome or casing.
Step 1: Inspect the Bulb and Identify Sealing Points
Look closely at your LED bulb. Most are sealed in a few key areas:
- Where the plastic diffuser meets the base/heat sink.
- Sometimes, the base itself might be screwed or glued to the heat sink.
The most common point of entry is usually where the plastic cover (diffuser) joins the main body or heat sink.
Step 2: Gently Pry or Separate the Diffuser
This is where your pry tools or a small flathead screwdriver come in handy.
- Look for a Seam: Carefully examine the edge where the plastic diffuser meets the rest of the bulb’s body. You’re looking for a small gap or seam.
- Insert the Pry Tool: Gently insert the tip of a plastic pry tool or a very thin flathead screwdriver into this seam.
- Work Around the Seam: Slowly and carefully work the tool around the circumference of the bulb. You might hear small clicks as plastic clips release or feel the adhesive starting to give way. Avoid forcing it. If it feels like you’re applying too much pressure and something might break, stop and reassess.
- Softening Adhesive (Optional): If the diffuser is heavily glued and prying isn’t working, you can try gently heating the seam with a hairdryer on a low setting for a minute or two. This can soften some adhesives, making them easier to separate. Be careful not to overheat the plastic or any internal components.
- Lift the Diffuser: Once the seam is sufficiently loosened, you should be able to gently lift or pull the diffuser away from the bulb’s body. It might still be attached by a few wires, especially if the LED board is directly beneath it.
Step 3: Accessing the Internal Components
Once the diffuser is off, you’ll likely see the LED board and possibly the heat sink. The next steps depend on how the rest of the bulb is assembled.
- If the LED Board is Exposed: You’ve successfully accessed the light-emitting part! Be careful not to touch the LED chips directly, as oils from your skin can affect their performance.
- If the LED Board is Under a Heat Sink: The heat sink is usually attached to the base with screws or clips. You might need to unscrew these to remove the heat sink and access the LED board. Again, be gentle and observe how everything is connected.
- Dealing with the Driver: The driver circuit is often located in the base of the bulb. It might be integrated into the heat sink assembly or have its own housing. Sometimes, the base is screwed or glued together. If you need to access the driver, you’ll need to carefully separate the base from the rest of the bulb, which can be tricky as it often involves dealing with the metal screw threads and internal wiring.
Step 4: Disconnecting Components (If Necessary)
If your project requires removing specific parts, you’ll need to be mindful of how they are connected.
- Wires: LEDs and the driver are usually connected by thin wires. These might be soldered, or in some cheaper bulbs, they might be held by small connectors. If they are soldered, you would need a soldering iron to disconnect them.
- Screws and Clips: Pay attention to any screws or plastic clips holding components together. Keep them in a safe place if you plan to reassemble anything.
Common LED Bulb Types and Their Differences
Not all LED bulbs are created equal. The way they are constructed can vary significantly, impacting how easy they are to open.
A-Shape Bulbs (Standard Household Bulbs)
These are the most common bulbs you’ll find. They usually have a plastic diffuser dome and a metal base. The diffuser is often the primary point where you’ll need to pry. The heat sink is typically integrated into the lower half of the bulb.
Spotlights and Downlights
These often have more robust construction. The lenses might be screwed in, or the entire unit might be sealed with strong adhesive. They can be more challenging to open without causing damage.
Specialty Bulbs (e.g., G-Shaped, Candle Bulbs)
These come in various shapes and sizes. Some might have glass enclosures that are harder to open without breaking. Others might have plastic casings similar to A-shape bulbs.
Sealed Units
Be aware that some LED bulbs are designed as completely sealed units, often to protect against moisture or dust (e.g., some outdoor or industrial lights). These are extremely difficult to open without destruction and are not suitable for DIY disassembly.
What You Might Find Inside: A Closer Look
Once opened, you’ll get a clearer picture of the technology at play.
Here’s what you’ll likely encounter:
- LED Chips: Small, often rectangular or square components mounted on the PCB. They emit light when electricity passes through them.
- Resistors and Capacitors: Small electronic components on the driver board that help regulate voltage and current.
- ICs (Integrated Circuits): The “brains” of the driver, controlling the power supply for the LEDs.
- Heat Sink Material: Usually aluminum, designed to draw heat away from the LEDs.
Can You Repair an LED Bulb?
For the vast majority of homeowners, the answer is no. LED bulbs are not designed for repair. Here’s why:
- Complexity: The internal components, especially the driver circuit, are small and intricate.
- Specialized Tools: Repairing would require advanced electronics knowledge and tools like soldering irons, multimeters, and oscilloscopes.
- Safety Risks: Working with electrical components, even low-voltage ones, carries a risk of shock or damage if done incorrectly.
- Cost-Effectiveness: New LED bulbs are relatively inexpensive. The cost and effort to repair one often outweigh the cost of replacement.
- Fragility: The components are delicate and can be easily damaged during disassembly or attempted repair.
If your LED bulb is not working, the safest and most practical solution is to replace it with a new one. You can find excellent guides on choosing the right LED bulb for your needs from resources like Energy.gov’s LED Lighting page, which offers great advice on efficiency and features.
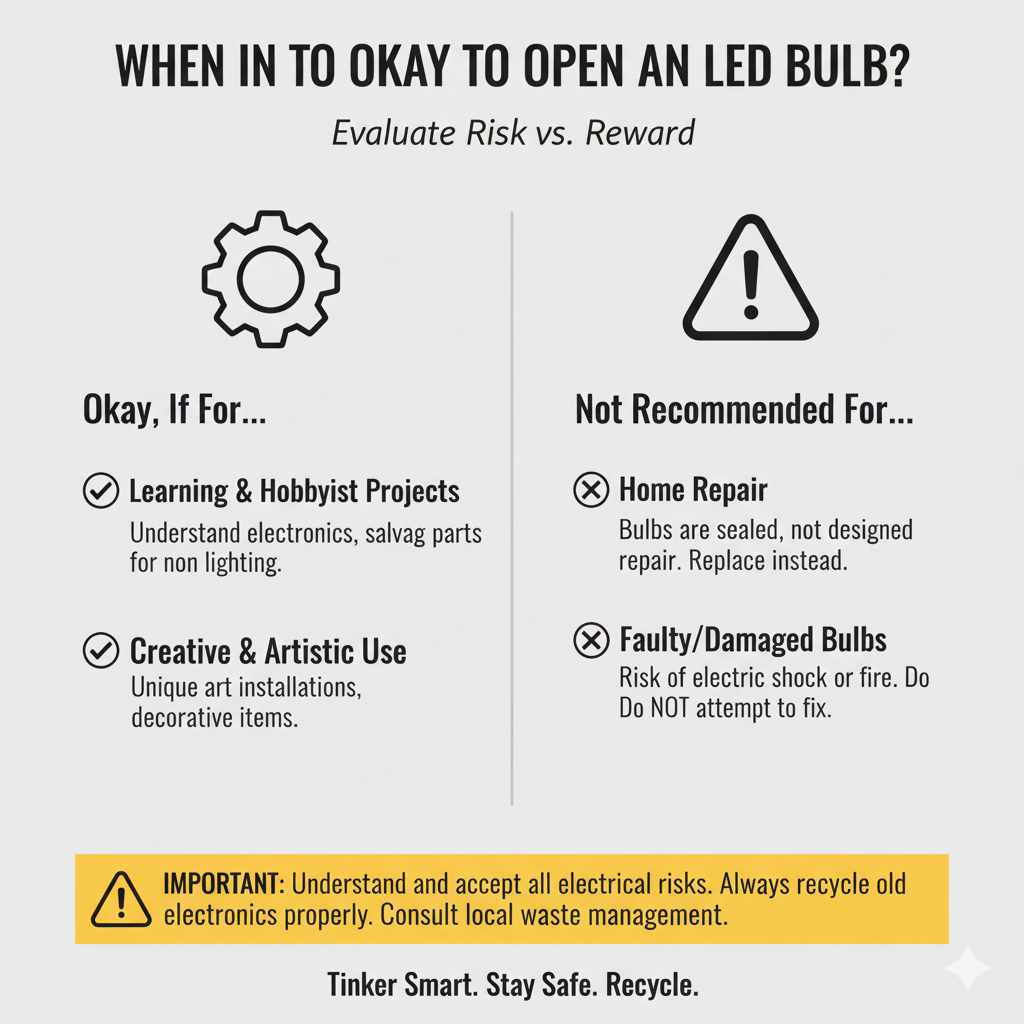
When is it Okay to Open an LED Bulb?
As mentioned earlier, the primary reasons are educational or for creative projects. If you’re a hobbyist looking to understand electronics, salvage specific parts for a non-lighting project, or create art, opening a bulb can be a rewarding experience.
However, always consider:
- The Risk vs. Reward: Is the knowledge or component worth the potential risk of electric shock or injury?
- Disposal: Old LED bulbs contain electronic components. Do not simply throw them in the regular trash. Check with your local waste management for electronics recycling options.
Frequently Asked Questions (FAQ)
Q1: Is it safe to open an LED bulb?
It can be safe if you follow strict precautions, like ensuring the power is completely off and wearing safety gear. However, there are inherent risks of electric shock and injury due to sharp edges or broken components. It’s generally not recommended for repair purposes.
Q2: Will opening an LED bulb void its warranty?
Yes, almost certainly. Tampering with the bulb’s seal or casing will void any manufacturer’s warranty. If the bulb is still under warranty, it’s best to contact the manufacturer or retailer for a replacement.
Q3: What if the bulb breaks while I’m trying to open it?
If the bulb breaks, stop immediately. Carefully clean up any broken glass or plastic pieces, wearing gloves and eye protection. Ensure no small fragments are left behind, especially in the light fixture. If you are unsure about cleaning it up safely, it’s best to call a professional.
Q4: Can I replace the LEDs if one is out?
No, this is not feasible for most users. The LEDs are soldered onto a circuit board, and the driver board is complex. Replacing individual LEDs or the driver requires specialized tools, knowledge, and is often more difficult than replacing the entire bulb.
Q5: What are the main parts inside an LED bulb that I might see?
You’ll typically see the base with the electrical contacts, a driver circuit (electronics), a heat sink (often metal), a circuit board (PCB) with multiple LED chips mounted on it, and a plastic diffuser or lens to spread the light.
Q6: Are there any LED bulbs that are designed to be opened?
Very few consumer LED bulbs are designed for easy user access. Some high-end or specialized LED fixtures might have modular components that can be accessed for maintenance, but standard household bulbs are sealed units.
Q7: What should I do with an old LED bulb after opening it?
Even after opening, the components should be disposed of responsibly. Check with your local recycling center or waste management authority for guidelines on electronic waste (e-waste) recycling. Do not put them in your regular household trash.
Conclusion: Curiosity Satisfied, Safety Maintained
So, there you have it – a step-by-step look at how you might go about opening an LED bulb. While it’s a fascinating process that can satisfy your curiosity or fuel a creative project, it’s vital to remember that these bulbs are not meant for home repair. The complexity, safety risks, and cost-effectiveness all point towards replacement rather than repair.
If you do decide to proceed with opening a bulb for educational or artistic purposes, please, please prioritize safety above all else. Ensure the power is off, wear your protective gear, and work with patience and care. Understanding the inner workings of our everyday technology is a wonderful thing, and with the right approach, you can explore it safely. For all your standard lighting needs, however, remember that a new, efficient LED bulb is always the best and safest choice.