How to Paint Light Fixture: Effortless Guide
Quick Summary:
Transforming your home’s look is easy! This guide shows you how to paint a light fixture without taking it down, making it a simple, affordable DIY project. Get a fresh, updated style in no time with these straightforward steps and tips.
Ever looked at your light fixtures and thought, “These need a serious update”? You’re not alone! Dated or worn-out light fixtures can really bring down the vibe of a room. But the thought of replacing them or dealing with complicated DIY projects can feel overwhelming. What if I told you there’s a way to give them a stunning makeover without the hassle of removing them or hiring an expensive professional? You can! Painting your light fixtures is a fantastic way to refresh your space, match your decor, and add a touch of your personal style. It’s a surprisingly simple project that yields impressive results. Stick with me, and I’ll walk you through everything you need to know to paint your light fixtures like a pro, even if you’ve never picked up a paintbrush for this kind of job before.
Why Paint Your Light Fixtures?
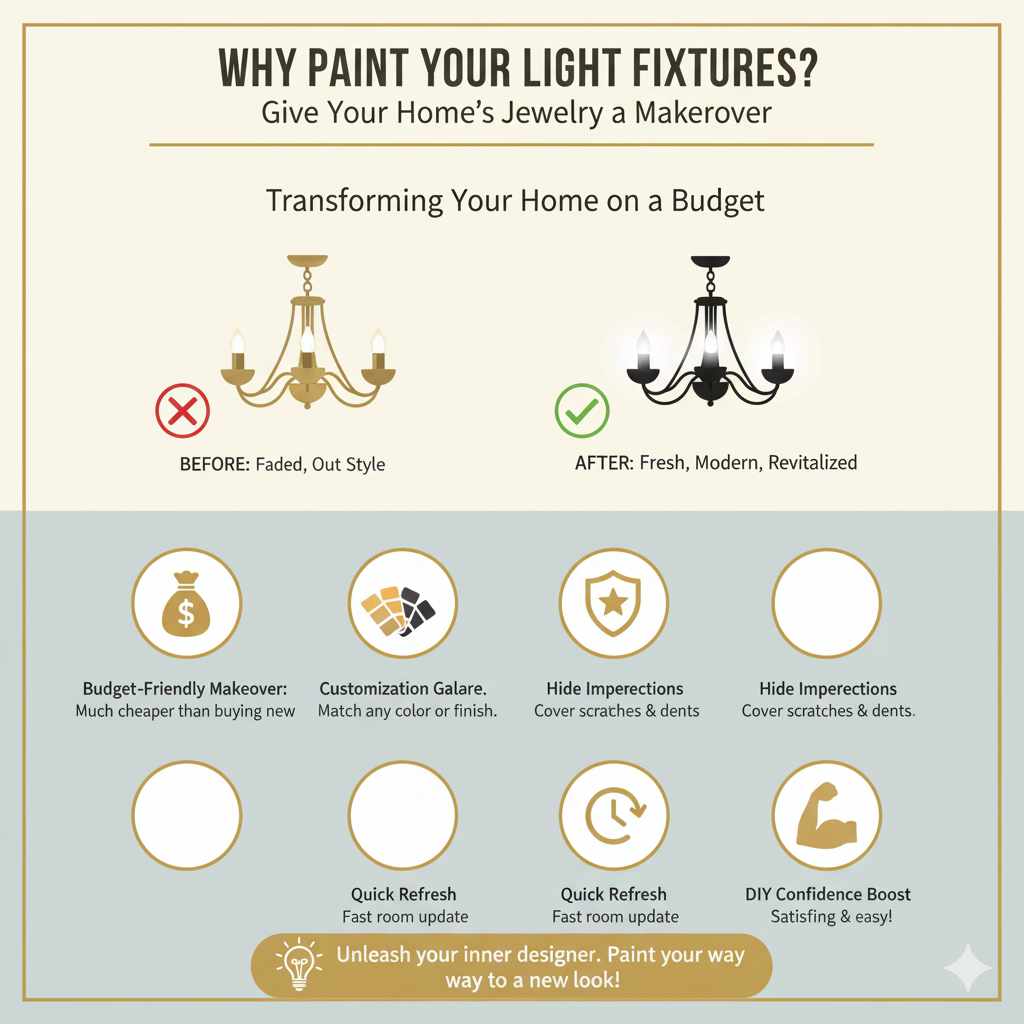
Light fixtures are like the jewelry of your home. They catch the eye and can significantly impact the overall aesthetic of a room. Over time, finishes can fade, get scratched, or simply go out of style. Instead of spending a fortune on new fixtures, a fresh coat of paint can breathe new life into your existing ones. It’s an incredibly cost-effective solution that allows for endless customization. Whether you want to match a new color scheme, add a metallic sheen, or simply cover up imperfections, painting is your go-to method.
Think about it:
- Budget-Friendly Makeover: It’s much cheaper than buying new fixtures.
- Customization Galore: Match any color or finish you desire.
- Hide Imperfections: Cover up scratches, dents, or faded finishes.
- Quick Refresh: A fast way to update the look of a room.
- DIY Confidence Boost: A satisfying project that’s easy to achieve.
Choosing the Right Paint and Primer
This is a crucial step, and getting it right means your painted fixture will look great and last a long time. Not just any paint will do for metal and certain plastic surfaces found in light fixtures. You need something that will adhere well, withstand heat (especially for fixtures close to bulbs), and provide a durable finish.
The Best Paint Types
For most light fixtures, especially those made of metal, you’ll want to use spray paint. Spray paint offers a smooth, even finish that’s hard to achieve with a brush on intricate designs. It’s also quick and easy to apply.
- Spray Paint for Metal: Look for spray paints specifically designed for metal surfaces. Brands like Rust-Oleum and Krylon offer excellent options. Many of these are also designed to handle heat, which is important for fixtures near bulbs.
- Heat-Resistant Spray Paint: If your fixture is a pendant light or chandelier that gets quite warm, opt for paints labeled “high-heat” or “fireplace and stove” paint. These can withstand higher temperatures, preventing the paint from blistering or peeling.
- Enamel Spray Paint: Enamel paints offer a very durable and glossy finish. They are a great choice for metal fixtures that you want to last.
- Matte vs. Glossy: Consider the finish you want. Matte finishes hide imperfections better, while glossy finishes are easier to clean and offer a more reflective look.
Why Primer is Your Best Friend
Primer is essential for ensuring your paint adheres properly and for achieving a uniform color. It acts as a base coat, creating a surface that paint can easily stick to, especially on tricky materials like glossy metal or plastic. Without primer, your paint might chip or scratch off easily.
- Metal Primer: Use a spray primer specifically made for metal. This will prevent rust and give your topcoat something to grip.
- Adhesion Primer: If you’re unsure about the material of your fixture or if it has a slick surface, an adhesion primer is a good bet.
- Color of Primer: White primer is generally versatile. If you’re painting a dark fixture a light color, white primer is essential for good coverage. If you’re painting a light fixture a dark color, a gray primer can sometimes help with coverage.
Pro Tip: Always check the paint and primer compatibility. Most spray paints will mention what types of primers they work best with.
Gather Your Supplies
Before you start, having all your supplies ready will make the process smooth and efficient. You don’t want to be halfway through and realize you’re missing something!
Essential Tools and Materials:
- Spray Paint: Your chosen color and finish.
- Spray Primer: Compatible with your paint and fixture material.
- Drop Cloth or Newspaper: To protect your work surface and surrounding areas.
- Painter’s Tape: High-quality tape for masking off areas you don’t want to paint.
- Screwdriver/Tools: If you need to remove any glass shades or decorative elements (optional, but recommended for best results).
- Gloves: To keep your hands clean.
- Mask/Respirator: Essential for protecting yourself from paint fumes. A simple dust mask isn’t enough for spray paint.
- Safety Glasses: To protect your eyes from any stray paint mist.
- Rags or Paper Towels: For wiping down surfaces and cleaning up small messes.
- Degreaser or All-Purpose Cleaner: To thoroughly clean the fixture.
- Fine-Grit Sandpaper (e.g., 220-grit): For scuffing the surface if needed.
- Optional: Clear Protective Coat: A clear spray sealant for extra durability.
Step-by-Step Guide: How to Paint a Light Fixture Without Taking It Down
This method focuses on painting the fixture in place. While removing it can offer a more thorough job, painting in place is perfectly achievable and saves a lot of time and effort. Let’s get started!
Step 1: Safety First! Turn Off the Power
This is the most critical step. Before you touch anything, ensure the power to the light fixture is completely turned off. Go to your home’s electrical panel (breaker box) and flip the breaker that controls the light you’ll be working on. If you’re unsure which breaker it is, turn off the main breaker for the entire house. It’s always better to be safe than sorry. Double-check that the light switch is also in the “off” position.
How to Check: After flipping the breaker, try turning the light on. If it doesn’t come on, you’ve successfully cut the power. For extra peace of mind, you can use a non-contact voltage tester to confirm there’s no power running to the fixture.
Step 2: Clean the Fixture Thoroughly
Paint won’t stick well to dirt, dust, grease, or grime. A clean surface is essential for a smooth, lasting finish. Use a degreaser or an all-purpose cleaner and a soft cloth to wipe down the entire fixture. Pay close attention to areas that might have accumulated cooking grease (if it’s in the kitchen) or dust. Rinse with a damp cloth to remove any cleaner residue and let it dry completely.
Tip: If your fixture has glass shades, it’s often easiest to remove them for cleaning and painting. If you can’t remove them, carefully tape them off.
Step 3: Disassemble and Mask (If Necessary)
Examine your light fixture. Are there any parts you can easily remove, like glass shades, decorative finials, or bulbs? Removing these will give you a cleaner paint job. If you can’t remove them, or if you’re painting the entire fixture without disassembly, you’ll need to mask off carefully.
Use painter’s tape to cover:
- Bulbs: Remove bulbs and tape over the socket opening to prevent paint from getting inside.
- Glass Shades: If you can’t remove them, use painter’s tape to cover the edges where they meet the fixture.
- Electrical Components: Any exposed wires or electrical connections must be covered and protected.
- Ceiling or Wall: Carefully tape around the base of the fixture where it meets the ceiling or wall. This is crucial for a clean finish and to avoid paint splatter on your surfaces. Use a wide tape or a combination of tape and paper.
Why Masking is Important: Good masking prevents unwanted paint from landing on surfaces you want to keep clean. It also helps create crisp lines between painted and unpainted areas.
Step 4: Lightly Sand the Surface (Optional but Recommended)
For most metal fixtures, a light sanding can significantly improve paint adhesion. You don’t need to remove the old finish, just create a slightly rough surface for the primer to grip. Use fine-grit sandpaper (around 220-grit) and gently scuff the entire surface you plan to paint. After sanding, wipe away all dust with a clean, dry cloth or a tack cloth.
When to Skip Sanding: If your fixture is made of plastic and has a very smooth, glossy finish, sanding is highly recommended. If it’s a very delicate or antique fixture where you’re concerned about damage, you might skip this step, but be aware that adhesion might be less robust.
Step 5: Apply the Primer
Now it’s time for the primer. Work in a well-ventilated area. You should be wearing your mask and safety glasses. Hold the spray can about 8-12 inches away from the fixture. Apply the primer in light, even coats, using a steady back-and-forth motion. Overlap each stroke slightly.
Key Primer Tips:
- Light Coats are Key: Don’t try to cover everything in one thick coat. Multiple thin coats are better than one heavy one.
- Allow Drying Time: Let each coat dry for the time recommended on the can, usually 10-20 minutes.
- Rotate and Spray: Turn the can and your body to ensure you reach all angles and sides of the fixture.
- Check for Coverage: Ensure all areas are covered with a thin, even layer of primer.
Let the primer dry completely according to the manufacturer’s instructions. This usually takes at least an hour, and sometimes longer. Proper drying ensures the best adhesion for your paint.
Step 6: Apply the Paint
Once the primer is fully dry, it’s time for your chosen paint color. Shake the spray paint can well. Again, hold the can 8-12 inches away and apply in light, even coats, using the same back-and-forth motion. Overlap each stroke.
Painting Techniques for a Smooth Finish:
- Thin, Even Coats: Just like with the primer, avoid heavy, drippy coats.
- Multiple Passes: You’ll likely need 2-3 thin coats (or more, depending on the color and coverage) to achieve a solid, opaque finish.
- Drying Between Coats: Allow adequate drying time between each coat of paint. Check the paint can for recommended drying times, typically 15-30 minutes.
- Work from Different Angles: Rotate the fixture (or your position) to get paint into all the nooks and crannies.
- Final Coat Direction: For the final coat, try to spray in one consistent direction to minimize any visible brush strokes or unevenness from the spray pattern.
Heat Consideration: If you’re painting a fixture that will have a bulb very close to the painted surface, ensure your paint is heat-resistant. If not, consider painting the outside of a glass shade and leaving the inside unpainted, or ensuring there’s good airflow.
Step 7: Apply a Clear Protective Coat (Optional)
For added durability and to protect your paint job from scuffs and scratches, you can apply a clear spray sealant. This is especially recommended for fixtures in high-traffic areas or those that might be bumped. Use a clear coat in the finish you desire (matte, satin, or gloss).
Apply the clear coat just like you applied the primer and paint – in light, even coats, allowing proper drying time between applications. Typically, one or two coats are sufficient.
Step 8: Remove Tape and Reassemble
This is the moment of truth! Once the final coat of paint (and clear coat, if used) is completely dry and cured (check the can, often 24 hours or more for full curing, though it might feel dry to the touch much sooner), carefully remove all the painter’s tape. Peel the tape back slowly and at an angle. If you find any small areas where paint has bled, you can carefully touch them up with a small artist’s brush and touch-up paint, or sometimes gently scrape away excess with a craft knife.
If you removed glass shades or other components, reassemble them carefully. Make sure everything is secure.
Step 9: Restore Power and Admire!
Go back to your electrical panel and flip the breaker back on. Install new bulbs if needed. Turn on the light switch and admire your beautifully transformed light fixture! You’ve just completed a significant home upgrade all by yourself.
Painting Different Types of Light Fixtures
The basic principles apply to most fixtures, but here are a few specifics to consider:
Pendant Lights and Chandeliers
These often have more intricate designs and multiple arms. Painting these requires extra care with masking and getting into all the nooks and crannies. Removing any hanging crystals or decorative elements before painting is highly recommended. For chandeliers, consider painting each arm individually if it makes access easier.
Flush Mount Fixtures
These are typically simpler and easier to paint in place. The main challenge is masking off the ceiling or wall precisely. Ensure you get good coverage on the canopy that attaches to the ceiling.
Sconces
Wall sconces are usually straightforward. The key is to protect the wall behind and around the sconce with painter’s tape and a drop cloth. If the sconce has a shade, decide if you want to paint the shade itself or just the metal components.
Table and Floor Lamp Bases
While not technically “light fixtures” in the ceiling sense, lamp bases can often be painted using the same techniques. Ensure the paint is suitable for the material (metal, wood, ceramic) and consider a clear coat for durability.
Table: Paint Durability Factors
Here’s a quick look at what affects how long your painted fixture will last:
| Factor | Impact on Durability | How to Maximize It |
|---|---|---|
| Surface Preparation | High | Thorough cleaning, degreasing, and light sanding for adhesion. |
| Primer Quality | High | Use a primer specifically designed for the material (e.g., metal primer). |
| Paint Quality | High | Use spray paint designed for metal, consider heat-resistant if needed. |
| Number of Coats | Medium | Multiple thin coats of primer and paint are better than one thick coat. |
| Clear Coat Application | Medium | Adds a protective layer against scratches and wear. |
| Heat Exposure | Variable | Use heat-resistant paint for fixtures close to bulbs. Ensure ventilation. |
| Environmental Factors | Variable | Humid or salty environments might require more robust sealing. |
Tips for a Professional Finish
Achieving a smooth, professional-looking finish is all about attention to detail. Here are some extra tips:
- Work in Good Lighting: Make sure you can see what you’re doing clearly, especially when masking and spraying.
- Practice Spraying: If you’re new to spray paint, practice on a piece of cardboard or scrap material first to get a feel for the spray pattern and distance.
- Avoid Over-Spraying: Too much paint in one spot will cause drips and an uneven finish.
- Ventilation is Non-Negotiable: Always paint in a well-ventilated area. Open windows, doors, or work outdoors if possible.
- Patience is a Virtue: Don’t rush the drying times between coats. This is where many DIY paint jobs go wrong.
- Touch-Ups: Keep a small amount of your spray paint (or a compatible brush-on paint) for any minor touch-ups needed after reassembly.
- Consider the Bulb: The type of bulb you use can affect how hot the fixture gets. LED bulbs tend to run cooler than incandescent bulbs, which is good for painted fixtures.
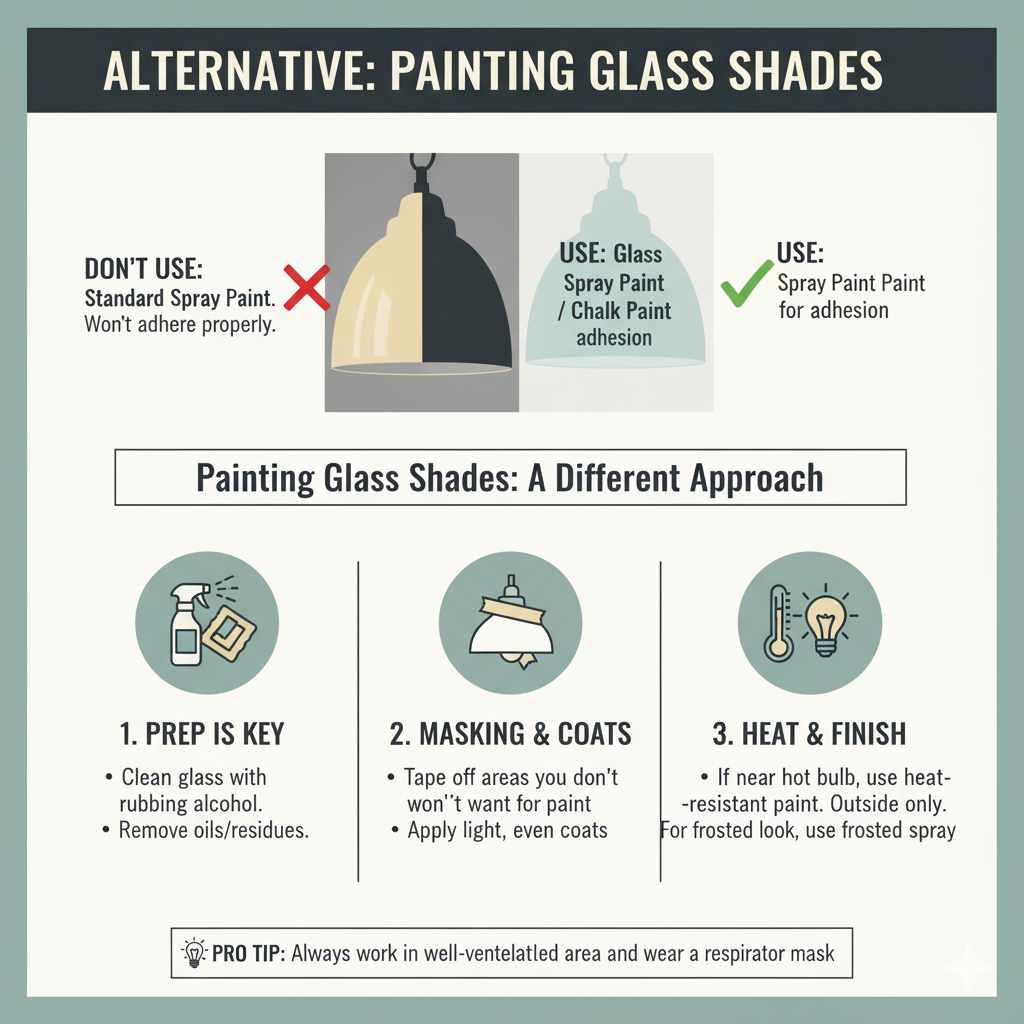
Alternative: Painting Glass Shades
Sometimes, you might want to paint glass shades. This is a bit different:
- Use Glass Paint: Standard spray paint won’t adhere to glass. You’ll need spray paint specifically formulated for glass, or chalk paint which can adhere to glass with proper prep.
- Prep is Key: Clean the glass thoroughly with rubbing alcohol to remove any oils or residues.
- Masking: Tape off the areas of the glass you don’t want to paint.
- Light Coats: Apply very light coats, as glass can be tricky to get even coverage on.
- Heat Considerations: If the shade is close to a hot bulb, ensure the paint is heat-resistant or consider painting the outside only.
For a frosted look on glass, you can use a frosted glass spray paint. This is often applied directly without primer.
Frequently Asked Questions (FAQ)
Q1: Can I paint a light fixture without taking it down?
A1: Yes, absolutely! This guide focuses on painting light fixtures while they are still installed. With careful masking and preparation, you can achieve a professional-looking finish without the hassle of removal.
Q2: What kind of paint should I use for metal light fixtures?
A2: Spray paint designed for metal is best. Look for brands like Rust-Oleum or Krylon. If the fixture gets warm, opt for heat-resistant spray paint. A metal primer is also highly recommended for adhesion and rust prevention.
Q3: Do I need to use primer?
A3: Yes, using a primer is highly recommended. It ensures better adhesion of the paint, provides a uniform base color, and can help prevent rust on metal fixtures, leading to a more durable and professional finish.
Q4: How many coats of paint do I need?
A4: Typically, 2-3 thin coats of spray paint are sufficient for good coverage. You might need more coats if you’re painting a dark fixture a very light color, or if the paint doesn’t have great coverage. Always allow adequate drying time between coats.
Q5: How long does it take for the paint to dry and cure?
A5: Spray paint usually feels dry to the touch within 15-30 minutes and can be recoated after that. However, full curing (when the paint is hardened and most durable) can take 24 hours or longer, depending on the product and environmental conditions. Avoid touching or cleaning the fixture for at least 24-72 hours.
Q6: What if I get paint on the ceiling or wall?
A6: Careful masking with high-quality painter’s tape is the best prevention. If a small amount of paint does get on the wall or ceiling, try to wipe it gently with a damp cloth while it’s still wet. If it’s dry, you might be able to gently scrape it with a plastic scraper or craft knife, or touch up the surrounding paint.
Q7: Can I paint plastic light fixtures?
A7: Yes, you can paint plastic light fixtures, but preparation is key. Clean the surface thoroughly and use a spray primer designed for plastic or an adhesion-promoting primer. Then, apply your chosen spray paint, ensuring it’s compatible with plastic.
Conclusion
There you have it – a comprehensive, beginner-friendly guide on how to paint your light fixtures without the stress of taking them down. It’s a project that proves you don’t need to be a seasoned pro to make significant improvements to your home’s appearance. By following these steps, using the right materials, and taking your time with preparation and application, you can achieve a beautiful, durable finish that updates your space and reflects your personal style. So, next time you feel like your lighting is looking a little tired, remember the power of a fresh coat of paint. You’ve got this!