How to Make a Paper Lampshade: 6 Steps + LED Fire-Safety Tips
A paper lampshade is made by wrapping cardstock, vellum, or parchment paper around a wire frame with craft glue — but it must pair with a cool-running LED bulb, never incandescent or halogen. The CPSC has recorded paper igniting on a bulb in as little as six minutes, making bulb choice a safety decision, not just a style one. This guide covers frame prep, paper selection by weight, step-by-step attachment, and the bulb clearance that keeps it safe.
Why Make Your Own Paper Lampshade?
Making your own paper lampshade is budget-friendly compared to designer store-bought shades, and it lets you match the exact color, pattern, and texture to your home lighting setup instead of settling for “close enough.” It’s also a practical way to upcycle materials you already have — old maps, sheet music, or leftover wrapping paper all work as shade paper.
Beyond the cost savings, it’s a project you can finish in an afternoon with a result you’ll actually use every day. If you’re weighing this against buying new, it helps to know why lampshades cost so much at retail before you decide.
Materials You’ll Need
Gathering your supplies is the first step. Most of these items come from a craft store, office supply store, or your own recycling bin.
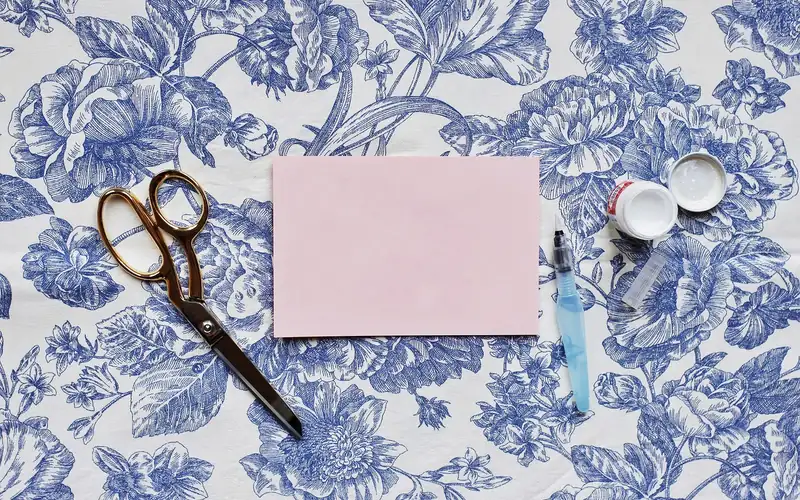
Essential Supplies:
-
Paper: This is your star ingredient! You can use various types of paper, depending on the look you want. Consider:
- Cardstock: Sturdy and holds its shape well. Available in a huge range of colors and textures.
- Craft Paper/Parchment Paper: Offers a more diffused light.
- Decorative Papers: Scrapbook paper, wrapping paper, wallpaper samples, or even printed designs.
- Vellum: For a translucent, elegant glow.
- Lampshade Frame: You can repurpose an old lampshade frame (remove the old fabric carefully) or purchase a new one from a craft store. These usually come with a top and bottom ring and vertical supports.
-
Adhesive: Depending on your paper and desired finish, you might use:
- Craft glue (PVA glue): Good for most papers, but allow ample drying time.
- Spray adhesive: For even coverage on larger areas.
- Double-sided tape: Quick and clean, especially for edges.
- Hot glue gun: For quick, strong bonds, but be careful not to melt thinner papers.
- Scissors or Craft Knife: For precise cutting. A craft knife and cutting mat are ideal for cleaner edges.
- Ruler or Measuring Tape: For accurate measurements.
- Pencil: For marking your paper.
- Optional: Embellishments: Ribbons, lace, beads, fabric scraps, paint, stencils – whatever you wish to use to decorate your shade.
- Light Bulb: Use an LED bulb only. Incandescent and halogen bulbs run hot enough to scorch or ignite paper — see the Safety section below for the exact numbers.
Best Cool-Running LED Bulb Pick
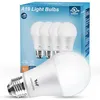
WOWLUMEN Cool White LED Bulb 4-Pack (9W) – $6.99
This guide specifies LED as the only safe bulb for a paper shade — this 5000K cool-white 4-pack is sized for a standard drum or empire frame and stays cool at the clearance distance covered in the Safety section.
- Best for: Standard drum or empire paper shades on table and floor lamps
- Why we picked it: 5000K cool-running LED stays safe near paper per this guide’s clearance rule; 4-pack covers multiple lamps
- Main drawback: Non-dimmable, so brightness is fixed
Compare more LED bulb options for paper shades
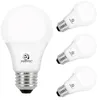 Option 1 Energetic Lighting A19 LED Bulb, Cool White 4000K – $8.99
|
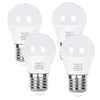 Option 2 Vgogfly LED Bulb 3W, Warm White 2700K (Nightstand) – $8.99
|
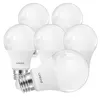 Option 3 Linkind Dimmable A19 LED Bulb, 2700K – $9.99
|
As an Amazon Associate we earn from qualifying purchases.
Choosing the Right Paper and Design
The paper you choose will significantly impact the final look and feel of your lampshade. Think about the light you want to cast and the style of your room.
Paper weight matters as much as pattern. Folded or pleated shades hold a crisp crease best in 160–200 GSM paper — thick enough to keep its shape once mounted, thin enough to fold without cracking. Standard printer paper (about 80 GSM) is too flimsy for a structural shade and will sag within days.
Paper Properties and Light Diffusion:
- Opaque Papers (e.g., cardstock, thicker decorative paper): These will create a more defined pattern of light and shadow. The light will be directed more downwards and upwards, with less diffusion through the sides.
- Translucent Papers (e.g., vellum, parchment paper, thin craft paper): These papers allow more light to pass through, creating a softer, more ambient glow that fills the room evenly.
- Textured Papers: Adds visual interest even when the light is off. The texture can also play with the light, creating subtle shadows.
Design Considerations:
- Solid Colors: A classic choice that can match any decor.
- Patterns: Geometric, floral, abstract – the possibilities are endless with patterned papers. Ensure the pattern isn’t too busy for the size of your lampshade.
- Textural Contrast: Combine smooth paper with textured elements or even small fabric appliques. If you’d rather skip paper entirely, covering a lampshade with fabric uses the same frame-wrapping technique.
- Layering: You could create a layered effect by attaching smaller cut-out shapes onto a base paper.
For your first lampshade, starting with a sturdy cardstock or a decorative scrapbook paper is a great idea. They are forgiving and easy to work with.
Step-by-Step Guide: How to Make a Paper Lampshade
Let’s get crafting! This method focuses on covering a pre-existing frame, which is the easiest way for beginners. We’ll assume you have a standard drum or empire lampshade frame.
Step 1: Prepare the Lampshade Frame
If you’re reusing an old lampshade frame, carefully remove the old fabric. You might need scissors or a seam ripper. Clean off any old glue or residue. Ensure the wire frame is clean, straight, and sturdy. If you’re using a new frame, it should be ready to go.
Step 2: Measure and Cut Your Paper
This is where precision matters. You need to cover the entire surface of the frame — if you’re unsure how frame dimensions translate to a flat paper pattern, see our guide on measuring a lampshade first.
- Measure the Circumference: Wrap a flexible measuring tape around the widest part of your lampshade frame (if it’s a drum shape) or along the slanted edge (if it’s an empire shape). Add about 1 inch (2.5 cm) for overlap.
- Measure the Height: Measure the vertical distance between the top and bottom rings of the frame. Add about 0.5 inches (1.25 cm) to the top and bottom for trimming and attaching.
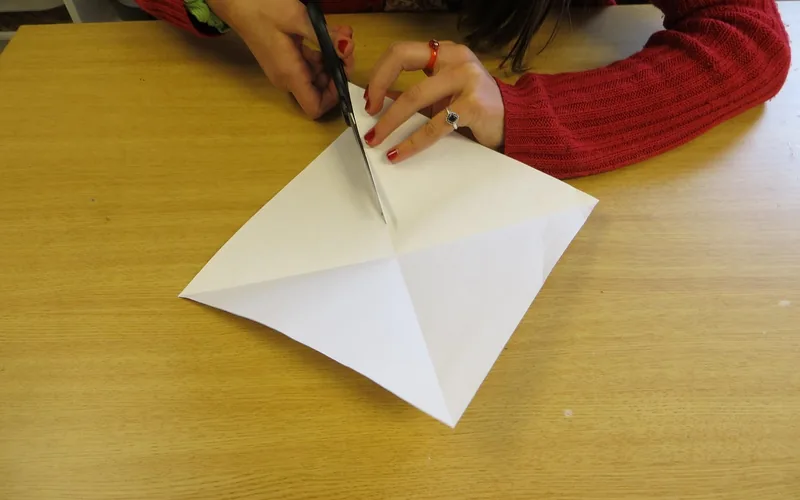
- Cut Your Paper: Lay your chosen paper flat. Using your ruler and pencil, mark out a rectangle with the dimensions you just calculated. Carefully cut out the rectangle using scissors or a craft knife. If your paper isn’t wide enough to go all the way around, you’ll need to cut multiple panels and join them.
Step 3: Attach the Paper to the Frame
There are a few ways to do this, depending on the shape of your frame and the type of paper. For a drum shade:
- Apply Adhesive: Lay your paper rectangle flat, good side down. Along one of the long edges, apply a strip of your chosen adhesive (spray adhesive or double-sided tape works well here).
- Attach to Frame: Carefully align the edge of the paper with the bottom ring of the lampshade frame and begin wrapping the paper around. Press firmly to secure the adhesive to the frame.
- Continue Wrapping: Continue to wrap the paper around the frame, applying adhesive as you go, ensuring it’s smooth and taut.
- Overlap and Secure: When you reach the starting edge, the paper should overlap by about 1 inch. Apply adhesive to this overlapping edge and press it down firmly to create a seamless join.
For empire or tapered shades, you might need to cut the paper into a trapezoid shape, or cut many thin strips and attach them individually. Covering the frame with many thin strips, overlapping them slightly, is a popular technique that provides excellent coverage and a unique look.
Step 4: Secure the Top and Bottom Edges
Now, you need to neatly finish the top and bottom edges where the paper meets the rings.
- Trim Excess: If you added extra height to your paper, carefully trim it to about 0.5 inches (1.25 cm) above the top and bottom rings.
- Apply Adhesive: Apply adhesive to the inside of the top and bottom rings of the frame.
- Fold and Press: Gently fold the excess paper over the rings to the inside of the lampshade. Press firmly to ensure it sticks. You might need to make small cuts or pleats in the paper to help it lie flat around the curves of the rings.
- Alternative: Bias Tape/Ribbon: For a very neat finish, you can cover the raw edges with bias tape or ribbon. Apply glue to the raw edge of the paper, then carefully attach the bias tape or ribbon, folding it over the edge to cover it completely.
Step 5: Add Embellishments (Optional)
This is where you can really let your creativity shine!
- Decorate: Add ribbons, lace, cut-out shapes, paint, or stencils. Use fabric glue or hot glue for attaching heavier embellishments.
- Layering: Glue smaller pieces of paper or decorative elements onto the main lampshade surface.
- Fringe: Cut strips into the bottom edge of your paper before attaching it to create a fringe effect.
Step 6: Final Touches and Safety Check
Once everything is dry and secure, give your lampshade a gentle inspection. Make sure all edges are firmly attached and there are no loose pieces. Importantly, ensure you are using a cool-running LED bulb. Check the wattage recommendations for your lampshade frame or bulb socket to ensure you don’t overload it.
Alternative Techniques: The Rolled or Pleated Lampshade
While covering a frame is a great starting point, there are other popular ways to make paper lampshades that offer different aesthetics — some of these techniques carry over directly if you later want to try a DIY pendant lamp using the same rolled-paper method.
Rolled Lampshade
This technique involves creating a cylindrical shade by rolling a single sheet of paper or several joined sheets into a tube. The key is to have a clean, straight seam where the edges meet.
- Cut Paper: Cut a rectangle of paper that is the desired height of your shade and long enough to wrap around the circumference of where it will sit.
- Create a Seam: You can join the paper edges with a strong adhesive or by creating a neat folded seam.
- Attach to Clips: This type of shade often uses clip-on fittings that attach to standard light bulbs, or it might be designed to sit on a specific base with a fitting.
This method is excellent for creating a clean, minimalist look, especially with patterned or textured papers.
Pleated Lampshade
This is a more intricate but stunning technique. It involves folding paper into pleats before attaching it to the frame. You can buy pre-pleated fabric or paper, or create your own folds.
- Prepare Paper Strips: Cut long strips of paper.
- Create Pleats: Fold the paper strips at regular intervals to create sharp pleats. You can use a scoring tool and ruler for precision.
- Attach to Frame: Carefully glue or tape the pleated strips onto the lampshade frame, working from top to bottom or bottom to top, ensuring the pleats align evenly.
This method creates a sophisticated, textured look reminiscent of traditional fabric lampshades.
Safety First: Lighting and Fire Prevention
When working with paper, especially around heat and electricity, safety is paramount. Paper is flammable, so it’s crucial to take precautions to prevent any fire hazards.
📊 A 150-watt incandescent bulb runs at roughly 340°F and a 75-watt bulb at about 260°F — both hot enough to scorch paper on contact. LED bulbs stay dramatically cooler, which is why this guide specifies LED only. Source: U.S. Consumer Product Safety Commission, Lighting Products Hazard Analysis
“Tests indicate that paper wrapped around a 100-watt incandescent bulb will ignite in about six minutes.”
Key Safety Guidelines:
- Use LED Bulbs: This is the single most important safety tip. LED bulbs produce very little heat compared to incandescent or halogen bulbs. They are cool to the touch and significantly reduce the risk of ignition. Always check that your bulb is LED.
- Check Wattage Limits: Even with LED bulbs, be mindful of the recommended wattage for your lamp base and socket. Overloading can still be a hazard.
- Maintain Clearance: Ensure the paper lampshade is not too close to the bulb. There should be at least a few inches of space between the bulb and any paper surface. If your lampshade frame is very close to the bulb, consider using a shade extender or a different type of bulb.
- Never Leave Unattended: As with any lamp, never leave a paper lampshade unattended for extended periods, especially when it’s on.
- Avoid Open Flames: Never place a paper lampshade near open flames, such as candles or fireplaces.
- Regular Inspection: Periodically check your lampshade for any signs of scorching, discoloration, or damage, especially around the area closest to the bulb. If you notice any issues, stop using the lampshade immediately.
Adhering to these safety guidelines will help you enjoy your handmade paper lampshade with peace of mind. For more detailed guidance on electrical safety in the home, see the Electrical Safety Foundation International (ESFI) and the U.S. Fire Administration.
Troubleshooting Common Issues
Even with the best intentions, sometimes things don’t go exactly as planned. Here are a few common hiccups and how to fix them:
Issue: Paper is Wrinkling or Bubbling
Cause: Too much adhesive, uneven application, or paper not being stretched taut.
- If the adhesive is still wet, try to gently smooth out the wrinkles with a clean cloth or a credit card.
- If using spray adhesive, ensure you’re applying it in thin, even coats from the recommended distance.
- For future attempts, practice applying adhesive on scrap paper.
Issue: Seams are Not Lined Up
Cause: Paper shifted during wrapping, or measurements were slightly off.
- If the adhesive is still workable, gently peel back and re-align the seam.
- For a cleaner look, you can strategically place a decorative ribbon or trim over the seam to hide any imperfections.
Issue: Paper is Tearing
Cause: Paper is too thin, or too much force is being applied during wrapping or folding.
- Use a stronger, thicker paper for your next project.
- Be extra gentle when folding edges or working around the frame.
- If a small tear occurs, you can often repair it from the inside with a piece of clear tape or a small patch of matching paper.
Issue: Lampshade is Wobbly
Cause: Frame is bent, or paper isn’t attached securely to all points of the frame.
- Gently try to straighten any bent parts of the frame.
- Go back and reinforce the adhesive points, especially where the paper meets the top and bottom rings.
Table: Paper Types and Their Properties
Choosing the right paper is key to achieving the desired effect. Here’s a quick comparison of popular choices:
| Paper Type | Thickness | Light Diffusion | Durability | Best For |
|---|---|---|---|---|
| Cardstock | Medium to Heavy | Low (casts shadows) | High | Bold designs, geometric patterns, structured shades. |
| Vellum | Light | High (soft glow) | Medium | Elegant, modern shades, diffused lighting. |
| Parchment Paper | Light | High (warm glow) | Medium | Rustic or bohemian styles, soft ambient light. |
| Scrapbook Paper | Medium | Varies (depends on print) | Medium to High | Decorative, patterned, and colorful lampshades. |
| Wallpaper Samples | Medium to Heavy | Low to Medium | High | Unique patterns, durable shades, coordinating with room decor. |
Frequently Asked Questions
Here are answers to some common questions beginner crafters have about making paper lampshades:
Can I use any kind of paper for a lampshade?
No. Select paper that isn’t overly flammable and always pair it with a cool-running LED bulb. Avoid very thin tissue papers that could easily scorch, even with an LED bulb. Cardstock, decorative papers, vellum, and some thin plastic sheets are good options.
How do I make sure the paper doesn’t catch fire?
Use only LED bulbs, which produce minimal heat compared to incandescent or halogen bulbs. Keep a few inches of clearance between the bulb and the paper, and never leave a lamp on unattended for long periods. Inspect the shade regularly for scorching or discoloration.
My paper is wrinkling. How can I fix it?
Wrinkles usually happen from uneven adhesive application or stretching the paper too tightly. If the adhesive is still wet, smooth it out with a soft cloth or a credit card. For future projects, apply adhesive evenly and avoid pulling the paper too taut.
Can I make a paper lampshade without a frame?
Yes. One method is a freestanding shape made from folded or joined paper panels with internal supports. Another is a rolled shade that attaches directly to the bulb socket with clips, skipping the wire frame entirely.
How do I clean a paper lampshade?
Use a soft brush or a feather duster to remove dust. Avoid water or cleaning solutions, since they can damage the paper. For stubborn spots, use a slightly damp cloth on an inconspicuous area first, and be very gentle.
What’s the best adhesive for attaching paper to a lampshade frame?
A good craft glue (like PVA) or a strong double-sided tape works well for most paper types and frames. Spray adhesive gives even coverage on large areas in a well-ventilated space. Hot glue works for quick, strong bonds, but can melt thinner papers.
What GSM (paper weight) is best for a lampshade?
For folded or pleated shades, use 160–200 GSM paper — thick enough to hold a crease, thin enough to fold without cracking. Standard 80 GSM printer paper is too thin for a structural shade and will sag or tear within days of use.
Conclusion
You now have what you need to build a paper lampshade from a bare frame: the right paper weight, a safe adhesive, and — most importantly — a cool-running LED bulb instead of incandescent or halogen. Start with sturdy cardstock or scrapbook paper for your first attempt, keep the bulb clearance the Safety section covers, and don’t be afraid to experiment with pattern and texture once the basic wrap is second nature.
Sponsored / affiliate links. As an Amazon Associate I earn from qualifying purchases. I may earn additional commission from eligible campaigns.