How To Put Eyelets In A Tarp: A Beginner’s Guide To Tough Tarps
My first camping trip was a mess. I tied a cheap tarp over my tent, but the wind ripped it right off because the eyelets tore out. Sound familiar? Adding eyelets to a tarp can make it stronger and more versatile for camping, gardening, or home projects. This guide will show you how to put eyelets in a tarp with easy steps, tools, and tips. Whether you’re a beginner or a pro, you’ll learn to make your tarp tough as nails. Let’s dive in!
What Are Eyelets, And Why Add Them To A Tarp?
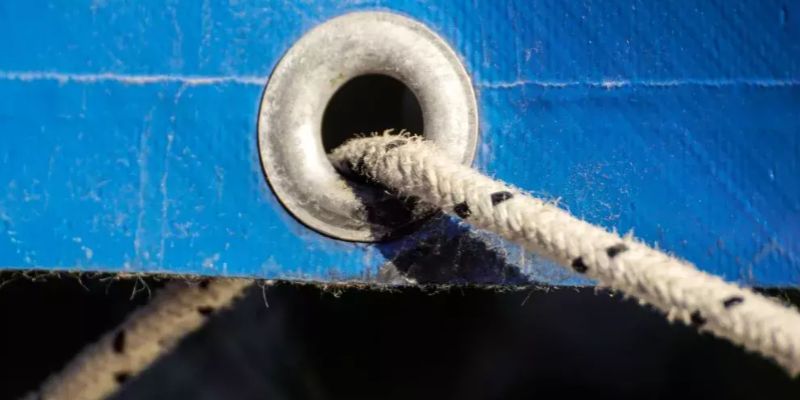
Eyelets are small metal or plastic rings that reinforce holes in a tarp. They let you tie ropes or hooks securely without tearing the material.
Why Eyelets Matter
Eyelets make tarps stronger for tasks like camping or covering gear. Without them, ropes can rip through the fabric. My first tarp failed because it lacked enough eyelets. Adding them saved my next trip!
Common Uses For Eyeleted Tarps
- Camping: Secure tarps over tents or as windbreaks.
- Gardening: Cover plants or build greenhouse frames.
- Home Projects: Protect furniture or create shade.
Tools And Materials You’ll Need
You don’t need fancy gear to add eyelets. Here’s what I use, based on my camping fixes.
Basic Tools
- Hole Punch: Cuts clean holes in the tarp.
- Hammer: Secures eyelets with a few taps.
- Eyelet Setting Tool: Crimps eyelets in place (often comes in kits).
- Measuring Tape: Ensures even spacing.
- Marker: Marks where eyelets go.
Materials
- Tarps: Polyethylene, canvas, or vinyl work well.
- Eyelets: Metal (brass or steel) for durability, plastic for lightweight tarps.
- Reinforcement Tape: Duct tape or grommet tape to prevent tearing.
Cost Comparison
| Item | Budget Option | Mid-Range Option | High-End Option |
|---|---|---|---|
| Eyelet Kit | $5 (10 plastic eyelets) | $15 (50 metal eyelets) | $30 (100 brass eyelets) |
| Hole Punch | $3 (basic) | $10 (adjustable) | $20 (heavy-duty) |
| Hammer | $5 (small) | $12 (rubber mallet) | $25 (precision) |
| Caption: Compare costs to pick tools that fit your budget and project size. |
Step-By-Step Guide: How To Put Eyelets In A Tarp
Here’s how I add eyelets to my tarps, whether I’m using a hammer or a machine. It’s easier than it looks!
Manual Method (Hammer And Eyelet Kit)
This is perfect for small projects, like fixing a camping tarp.
- Mark Your Spots: Lay the tarp flat. Use a measuring tape and marker to mark eyelet spots, 12-36 inches apart, along edges or where needed.
- Reinforce The Area: Stick duct tape or grommet tape on both sides of each mark to prevent tearing.
- Punch A Hole: Place the tarp on a hard surface (like wood). Use a hole punch to cut a hole slightly smaller than your eyelet.
- Insert The Eyelet: Push the “male” eyelet (the tall part) through the hole from the tarp’s top side. Place the “female” washer on the bottom.
- Set The Eyelet: Put the setting tool over the eyelet. Tap gently with a hammer until it’s secure. Don’t smash too hard—it can damage the tarp!
Automatic Machine Method
For bigger projects, like a greenhouse tarp, a machine is faster.
- Set Up The Machine: Load the correct eyelet size into an eyelet punching machine. Adjust for tarp thickness.
- Test First: Try it on scrap tarp to check alignment and pressure.
- Feed The Tarp: Place the marked spot under the machine’s die. Press the button or handle to punch and set the eyelet.
- Repeat: Move to the next mark, keeping spacing even.
Visual Ideas
- Diagram 1: Show tarp with marked spots 12 inches apart along edges.
- Diagram 2: Illustrate eyelet parts (male, female, washer) and how they fit.
- Diagram 3: Display a finished tarp tied to tent stakes.
Benefits And Drawbacks Of Eyelets
Eyelets are great, but they’re not perfect. Here’s what I’ve learned.
Benefits
- Strength: Eyelets prevent tears when tying ropes.
- Versatility: Use tarps for shelters, covers, or shade.
- Cost-Effective: A $15 eyelet kit can save you from buying a new tarp.
Drawbacks
- Tearing Risk: Poorly installed eyelets can rip out, especially on thin tarps.
- Time: Manual installation takes effort for large tarps.
- Weight: Metal eyelets add slight bulk for backpacking.
Alternatives To Eyelets
- Tarp Clips: These grip the tarp without holes. I use them when I don’t want to cut my tarp.
- Sewn Loops: Sew webbing loops for ultra-strong tie-downs. I did this for a silnylon tarp, and it’s held up for years.
- Pebble Method: Wrap a small stone in the tarp and tie a rope around it. It’s a quick fix but less secure.
My Top Tips For Eyelet Success
After ruining a few tarps, I’ve got some tricks to share.
- Reinforce Thin Tarps: Always add duct tape or extra fabric before punching holes. It saved my lightweight tarp in a storm.
- Space Evenly: Measure twice to keep eyelets neat. Uneven spacing looks sloppy and weakens the tarp.
- Test Your Tools: Practice on scrap material first. My first eyelet was a crooked mess!
- Use Bungee Cords: They absorb wind stress, reducing tear risk. I learned this after losing a tarp to a gust.
Common Mistakes To Avoid
- Too-Big Holes: Cut holes slightly smaller than the eyelet for a snug fit.
- Over-Hammering: Gentle taps are enough. Smashing too hard bends the eyelet.
- Skipping Reinforcement: Without tape or fabric patches, thin tarps tear easily.
Tool Comparison
| Tool | Pros | Cons | Best For |
|---|---|---|---|
| Hammer Kit | Cheap, portable | Slow for big projects | Small repairs |
| Eyelet Pliers | Easy to use | Weak for thick tarps | Lightweight tarps |
| Punching Machine | Fast, precise | Expensive | Large projects |
| Caption: Choose the right tool for your tarp project to save time and effort. |
Safety Tips For Eyelet Installation
Safety is key when working with tools. Here’s what I do to stay safe.
- Protect Your Hands: Wear gloves when punching holes to avoid cuts.
- Use A Stable Surface: Set tarps on a sturdy workbench or concrete floor to prevent slips.
- Watch The Hammer: Tap lightly to avoid smashing fingers. Trust me, it hurts!
Cost-Saving Ideas
Eyelets don’t have to break the bank. Here’s how I keep costs low.
- Buy In Bulk: A $15 kit with 50 eyelets is cheaper than $5 for 10.
- Reuse Old Tarps: Add eyelets to repair tears instead of buying new tarps.
- DIY Reinforcement: Use leftover duct tape instead of pricey grommet tape.
Budget vs. Premium Eyelets
| Type | Cost | Durability | Best Use |
|---|---|---|---|
| Plastic Eyelets | $0.10 each | Moderate | Lightweight tarps, indoor use |
| Brass Eyelets | $0.30 each | High | Heavy-duty tarps, outdoor use |
| Steel Eyelets | $0.50 each | Very high | Extreme weather, long-term use |
| Caption: Pick eyelets based on your tarp’s use and budget. |
My Camping Tarp Story
Last summer, I took a cheap tarp to a windy campsite. By day two, the corner eyelets tore out, leaving my gear soaked. I grabbed a $10 eyelet kit from a hardware store, added duct tape for reinforcement, and installed new eyelets. It took 20 minutes, and the tarp held strong for the rest of the trip. Now, I always add extra eyelets before camping. It’s a game-changer!
Frequently Asked Questions
What Size Eyelets Should I Use For A Tarp?
For lightweight tarps, 3/8-inch eyelets work great. Heavy-duty tarps need 5/8-inch or larger. Match the size to your rope or hooks for a secure fit.
Can I Add Eyelets To A Thin Tarp Without Tearing It?
Yes, reinforce with duct tape or fabric patches before punching holes. This strengthens the area and prevents rips, even on thin tarps.
Do I Need A Special Machine To Install Eyelets?
No, a hammer and eyelet kit work for small projects. Machines are faster for big tarps but aren’t necessary for beginners.
How Do I Stop Eyelets From Ripping Out?
Use reinforcement tape, space eyelets evenly, and tie with bungee cords to reduce stress. This keeps eyelets secure in windy conditions.
Are Plastic Eyelets Good For Outdoor Tarps?
Plastic eyelets are okay for indoor or light use but can crack in harsh weather. Metal eyelets, like brass, are better for outdoor durability.
Can I Reuse Old Eyelets?
It’s tough to reuse eyelets once they’re crimped. Buy a cheap kit for new ones—it’s easier and ensures a strong hold.
What’s The Best Way To Space Eyelets?
Space eyelets 12-36 inches apart, depending on the tarp’s size and use. Measure carefully for even tension and a neat look.
Conclusion
Adding eyelets to a tarp is a simple way to make it stronger and more useful. With a few tools and some practice, you can create secure tie-down points for camping, gardening, or home projects. My tarp disasters taught me to reinforce holes and use bungee cords for extra strength. Try adding eyelets to an old tarp this weekend—it’s a fun, quick project! Share your tarp tips or ask questions in the comments. Happy tarping!
Links to trusted resources: REI Camping Gear, Camping World Tarps, GoldStar Tool Grommets.