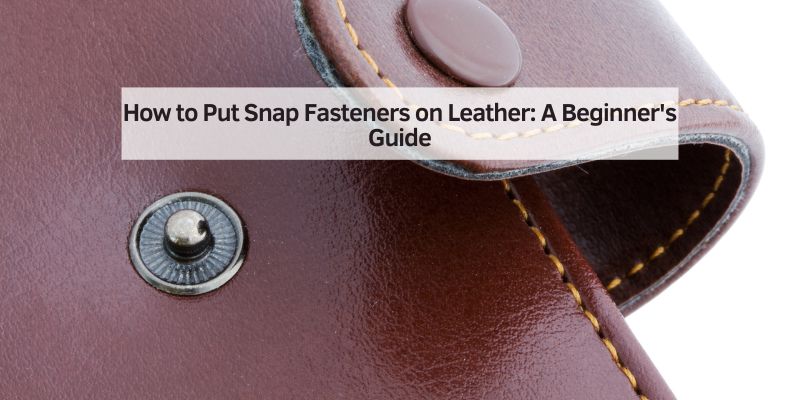
How to Put Snap Fasteners on Leather: A Beginner’s Guide
My first try at putting snap fasteners on leather was a total flop. The snap wobbled, and one even fell off! But with some practice, I got the hang of it, and now it’s as easy as pie. This guide will walk you through adding snap fasteners to leather projects like wallets, bracelets, or bags. Whether you’re a beginner, a crafty enthusiast, or a seasoned pro in the USA, you’ll find simple steps, practical tips, and fun examples to make your leatherwork shine. Let’s dive in!
What Are Snap Fasteners and Why Use Them?
Snap fasteners are small metal closures that snap together to hold leather pieces in place. Think of them like buttons, but sturdier and easier to use. They’re perfect for bags, wallets, or jackets because they’re secure, look neat, and are simple to open and close.
Why They’re Awesome
- Quick to Use: Snap them shut in a second.
- Strong: They hold tight, even on heavy leather.
- Cool Look: They give projects a pro finish.
I love using snaps on my leather bracelets because they’re both practical and stylish. They’re great for beginners since they don’t need fancy skills to set.
Tools and Materials You’ll Need
To get started, grab these basic tools and materials. Most are cheap and easy to find at craft stores or online.
Must-Have Tools
- Rotary Hole Punch: Makes clean holes in leather. Get one with adjustable sizes (about $15-$25).
- Snap Setter and Anvil: Sets snaps securely. A basic set costs around $10.
- Hammer: A small one works fine for tapping snaps.
- Pencil: For marking where snaps go.
- Sandpaper or Needle File: Smooths snap posts if needed.
Materials
- Snap Fasteners: Choose Line 20 or Line 24 snaps (Line 20 for medium leather, Line 24 for thicker). A pack of 10 costs about $5-$10.
- Leather: Any thickness works, but start with 2-3mm for ease.
- Optional Leather Washer: Adds extra grip for thin leather.
Table 1: Tool Cost Comparison
| Tool | Price Range | Where to Buy |
|---|---|---|
| Rotary Hole Punch | $15-$25 | Amazon, Tandy Leather |
| Snap Setter | $10-$20 | Craft Stores, Leathersmith Designs |
| Hammer | $5-$15 | Hardware Stores, Walmart |
Caption: Compare tool costs to find budget-friendly options for your leather projects.
Step-by-Step Guide to Putting Snap Fasteners on Leather
Here’s a simple, foolproof way to add snaps to your leather project. I’ll use a leather bracelet as an example, but this works for wallets, bags, or belts too.
Step 1: Plan Your Snap Placement
Grab your leather piece and decide where the snap will go. For a bracelet, I mark one end for the cap (the top part) and the other for the stud (the bottom part). Use a pencil to mark spots lightly.
Step 2: Punch Holes
Adjust your rotary hole punch to match your snap’s tube size (usually 3-4mm). Place the punch over your pencil mark and squeeze hard to make a clean hole. Do this for both snap pieces. Tip: Test the punch on scrap leather first to avoid mistakes.
Step 3: Set the Cap and Socket
Place the snap cap’s tube through the hole from the leather’s finished (smooth) side. On the back, slide the socket over the tube. Set the leather on the anvil (concave side up) so the cap rests in it. Use the snap setter tool and hammer to tap lightly until the socket locks onto the cap. Don’t hit too hard—it can bend the snap!
Step 4: Set the Stud and Eyelet
For the other side, push the eyelet’s tube through the hole from the back side. Place the stud on the finished side. Use the anvil and setter again, tapping gently to secure it. Roll the setter slightly as you tap for a smooth finish.
Step 5: Test Your Snap
Snap the pieces together. They should click easily and hold tight. If they’re loose, you may need a shorter post or a leather washer for extra thickness.
Visual Idea: A diagram showing the four snap parts (cap, socket, stud, eyelet) and their placement on leather would make this super clear.
Benefits and Drawbacks of Snap Fasteners
Benefits
- Easy to Use: Even kids can snap them shut.
- Durable: Steel snaps last for years. For wet environments, try brass or stainless steel to avoid rust.
- Versatile: Great for bags, bracelets, or jackets.
Drawbacks
- Tricky at First: Setting snaps takes practice to avoid wobbly results.
- Limited Sizes: You might need to sand posts for thin leather.
- Cost: Snaps are pricier than buttons but worth it for strength.
Table 2: Snap Types Comparison
| Snap Type | Best For | Pros | Cons |
|---|---|---|---|
| Line 20 | Medium leather | Easy to set, affordable | Not for super thick leather |
| Line 24 | Thick leather | Very strong | Bigger, less delicate look |
| Brass/Stainless | Wet environments | Rust-proof | More expensive |
Caption: Choose the right snap for your leather project based on thickness and use.
My Top Tips for Perfect Snaps
After ruining a few projects, I’ve learned some tricks to make snap-setting a breeze:
- Start Small: Practice on scrap leather before your big project.
- Light Taps: Use many soft hammer taps instead of one hard whack to avoid bending.
- Sand Long Posts: If your snap post is too long, sand it down to 1/16 inch above the leather for a snug fit.
- Add a Washer: For thin leather, a leather washer under the snap adds strength.
- Check Alignment: Double-check hole placement so snaps line up perfectly.
Visual Idea: A step-by-step photo guide showing each snap part being set would help beginners visualize the process.
Common Mistakes to Avoid
Here are some goofs I made (so you don’t have to):
- Wrong Hole Size: Too big, and the snap is loose; too small, and it won’t fit. Test on scrap first.
- Hitting Too Hard: This bends the snap tube. Use light taps and roll the setter.
- Backwards Snaps: Always put the cap on the finished side, or your project will look inside-out.
Fun Project Idea: Leather Keychain with Snaps
Try making a simple leather keychain to practice snaps. Cut a 6-inch by 1-inch leather strip. Punch holes at both ends, set a Line 20 snap, and loop it through a keyring. It’s a quick, fun way to learn, and you’ll have a cool keychain to show off!
Visual Idea: A sketch of a keychain with labeled snap parts would inspire readers to try it.

Frequently Asked Questions
What Are Snap Fasteners Made Of?
Most snaps are steel, but brass or stainless steel options resist rust for outdoor projects. They have four parts: cap, socket, stud, and eyelet.
Can I Use Snaps on Thin Leather?
Yes! Use a leather washer or sand the snap post to fit thin leather snugly. Line 20 snaps work best for thin leather.
How Do I Avoid Bent Snaps?
Tap lightly with a hammer and roll the setter tool to spread force evenly. Practice on scrap leather first.
Where Can I Buy Snap Fasteners?
Check Tandy Leather, Amazon, or Leathersmith Designs for affordable snap kits. Prices start at $5 for a pack of 10.
Are There Alternatives to Snap Fasteners?
Buttons or magnetic clasps work but are less secure. Snaps are best for a sturdy, pro look on leather.
How Do I Fix a Loose Snap?
Add a leather washer for extra thickness or replace it with a shorter-post snap. Always test the fit before setting.
Can Kids Try This?
With adult help, kids can set snaps. It’s a fun craft, but watch out for sharp tools like the hole punch.
Conclusion
Adding snap fasteners to leather is a fun, easy way to make your projects look pro. With a few tools and some practice, you can create wallets, bracelets, or bags that snap shut perfectly. Start with a simple project like a keychain to build your skills. Don’t worry if your first try flops—mine did too! Grab some leather, try it out, and share your creations with friends. Happy crafting!