How to Redo a Lampshade: A Step-by-Step Guide to Refresh Your Home Decor
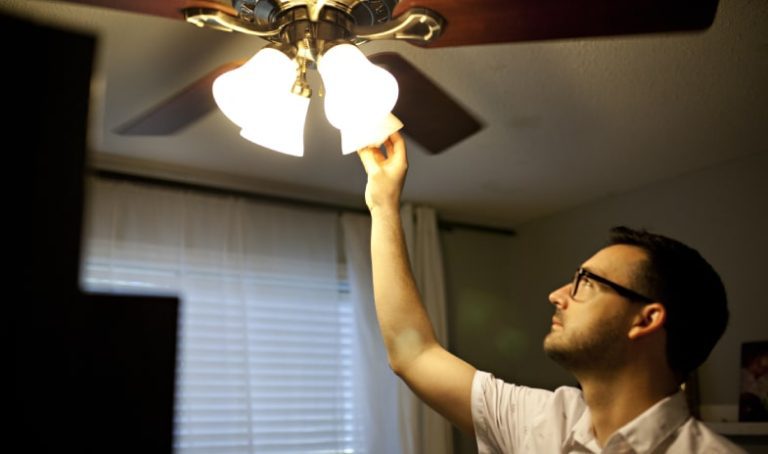
Hey there! If you’re looking to breathe new life into your home without breaking the bank, redoing a lampshade is one of those fun, creative projects that can make a big difference. I’ve always loved how a simple lampshade makeover can transform a room’s vibe. Whether it’s an old, dusty shade sitting in your attic or a thrifted find that’s seen better days, you can turn it into something beautiful with a little effort. I’ve redone plenty of lampshades myself, and let me tell you, it’s so rewarding to see the final result light up a space.
In this guide, I’ll walk you through everything you need to know about how to redo a lampshade, from picking the right materials to adding your personal flair. Let’s dive in and make something amazing together!
Why Redo a Lampshade?
Let’s start with why this project is worth your time. Lampshades are like the unsung heroes of home decor. They don’t just diffuse light; they set the mood of a room. But over time, they can get stained, faded, or just plain outdated. Instead of tossing them out, redoing a lampshade lets you save money and create something unique. I once had a boring beige shade that didn’t match my living room’s vibe. With some fabric and a bit of creativity, I turned it into a vibrant centerpiece that my friends couldn’t stop complimenting.
Plus, this is a beginner-friendly project. You don’t need to be a crafting pro to make it work. It’s also eco-friendly since you’re upcycling instead of buying new. And who doesn’t love a project that’s kind to both your wallet and the planet?
Choosing the Right Lampshade for Your Project
Not all lampshades are created equal, and picking the right one is key to a successful redo. When I started, I made the mistake of choosing a shade with a weird shape, and let me tell you, it made things harder than they needed to be. Look for a lampshade with a simple structure, like a drum or tapered shape. These are easier to work with, especially if you’re covering them with fabric or paper. Check the frame too. It should be sturdy, with no rust or broken wires. If the shade is a bit dingy, don’t worry—that’s what you’re fixing! Also, think about the lamp’s purpose.
Is it for soft, cozy lighting in your bedroom or a bold statement piece for your living room? The answer will guide your design choices. I like to hunt for lampshades at thrift stores or garage sales because you can find unique shapes for a steal.
Gathering Your Materials and Tools
Before you start, you’ll need to grab some supplies. I learned the hard way that having everything ready makes the process so much smoother. Here’s what you’ll need for most lampshade redo projects:
| Item | Purpose |
|---|---|
| Fabric or decorative paper | To cover the lampshade and give it a fresh look. |
| Spray adhesive or fabric glue | To secure the new covering to the shade. |
| Scissors | For cutting fabric, paper, or trim to size. |
| Measuring tape | To measure your lampshade and materials accurately. |
| Hot glue gun | For attaching trims or securing edges. |
| Trims (ribbon, fringe, etc.) | To add decorative flair to the edges. |
| Spray paint (optional) | To refresh the frame or add a pop of color. |
| Paintbrush (optional) | For painting or applying glue in tight spots. |
| Pencil and paper | For sketching patterns or marking measurements. |
I usually pick a fabric that complements my room’s color scheme. Cotton or linen works great because they’re easy to handle and let light through nicely. If you want a bolder look, try wallpaper or even wrapping paper for a unique texture. Just make sure your material isn’t too thick, or it’ll block too much light. I keep a small toolbox with these items so I’m always ready for a quick project. Pro tip: test your fabric by holding it up to a lightbulb to see how it diffuses light before you commit.
Preparing Your Lampshade
Prep work is where the magic starts. First, take the lampshade off the lamp and give it a good clean. I use a damp cloth to wipe away dust and grime. If the old fabric is peeling or damaged, remove it carefully. I’ve found that a pair of scissors or a seam ripper works well for this. If the frame is rusty or scratched, you can spray paint it to freshen it up. I once painted a frame gold for a touch of elegance, and it completely changed the vibe of the shade. Make sure the frame is dry before moving on.
If you’re keeping the original fabric as a base, check for stains or tears. You can usually cover minor flaws, but big rips might need patching. This step feels tedious, but trust me, it sets you up for a polished final product.
Measuring and Cutting Your Material
This part can feel a bit like math class, but it’s not as scary as it seems. To cover your lampshade, you need to measure its dimensions. For a drum-shaped shade, measure the circumference (around the widest part) and the height. Add an extra inch to both measurements for overlap. For tapered shades, you’ll need to create a pattern. I do this by laying a large piece of paper (like butcher paper) flat and rolling the shade along it while tracing the edge with a pencil.
It’s like making a map of your lampshade. Once you have your pattern, cut your fabric or paper to match. I always double-check my measurements before cutting because there’s nothing worse than wasting a gorgeous piece of fabric. If you’re using patterned fabric, make sure the design lines up the way you want when you wrap it around the shade.
Covering the Lampshade
Now comes the fun part—giving your lampshade its new look! Lay your fabric or paper flat and apply spray adhesive or fabric glue to the back. Work in small sections to avoid a mess. I made the rookie mistake of spraying too much adhesive once, and it got everywhere. Start at one edge of the lampshade and slowly wrap the material around, smoothing it as you go. For drum shades, it’s pretty straightforward. For tapered shades, you’ll need to ease the material around the curves.
If you get wrinkles, don’t panic—just peel back and try again. Once the material is in place, fold the edges over the top and bottom rims and secure them with hot glue. I like to use a butter knife to tuck the fabric neatly under the rim. This step takes patience, but it’s so satisfying to see the shade come together.
Adding Decorative Touches
This is where you can let your personality shine. I love adding trims like ribbon, fringe, or braid to the top and bottom edges. It’s like putting the perfect frame on a picture. Use a hot glue gun to attach the trim, working in small sections to keep it neat. I once added a boho-style fringe to a lampshade, and it became the focal point of my bedroom.
You can also experiment with paint. Try stenciling a pattern or adding a metallic border for a modern look. If you’re feeling extra creative, glue on beads or sequins for some sparkle. Just be careful not to overdo it less is often more when it comes to lighting. The goal is to enhance the shade, not overwhelm it.
Testing and Adjusting Your Lampshade
Before you call it done, pop the lampshade back on the lamp and turn it on. This is the moment of truth! Check how the light filters through the new covering. Is it too dim? Too bright? If the light is too harsh, you might need a thinner fabric or a lighter color. If it’s too dim, consider a material that lets more light through. I once used a dark velvet fabric that looked amazing but made my room feel like a cave. Live and learn! Also, make sure the shade sits securely on the lamp base. If it’s wobbly, double-check the frame and make any adjustments. This step is all about fine-tuning to get the perfect balance of style and function.
Caring for Your Redone Lampshade
Your newly redone lampshade deserves some TLC to keep it looking great. Dust it regularly with a soft cloth or a duster to prevent buildup. If you used fabric, avoid getting it wet, as it can cause the glue to loosen. For stubborn stains, I use a damp cloth with a tiny bit of mild soap, but I’m super careful not to soak it. If you’ve got pets or kids, you might want to place the lamp in a low-traffic area to avoid accidents.
I learned this the hard way when my cat decided my new lampshade was a scratching post. Also, use the right bulb wattage to prevent heat damage. Most shades do fine with LED bulbs, which stay cool and last forever.
Creative Ideas for Lampshade Redos
If you’re looking for inspiration, here are a few ideas I’ve tried or seen that turned out amazing:
- Fabric with Texture: Use burlap or linen for a rustic look. I did this for a farmhouse-style lamp, and it’s still one of my favorites.
- Wallpaper Magic: Cover the shade with leftover wallpaper for a bold, patterned look. It’s perfect for a modern or eclectic vibe.
- Painted Patterns: Use acrylic paint to add stripes, polka dots, or even a watercolor effect. I painted a chevron pattern once, and it was a showstopper.
- Photo Collage: Glue printed photos or magazine cutouts for a personalized touch. This works great for a kid’s room.
- Nature-Inspired: Attach dried flowers or leaves for a bohemian feel. Just make sure they’re not too close to the bulb.
The possibilities are endless, so don’t be afraid to experiment. Your lampshade is a blank canvas, and you’re the artist!
Troubleshooting Common Issues
Even with the best planning, things can go wrong. Here’s how to handle some common hiccups I’ve run into:
- Wrinkles in the Fabric: If your material won’t smooth out, try peeling it back and reapplying with less glue. A hairdryer on low heat can help relax the fabric.
- Glue Showing Through: Use less adhesive or switch to a glue stick for thinner materials. I’ve had luck with double-sided tape in a pinch.
- Uneven Edges: Trim carefully with small scissors and use hot glue to secure loose bits. Patience is your friend here.
- Frame Showing: If the frame peeks through, add an extra layer of fabric or paint it to blend in.
Mistakes happen, but they’re usually fixable with a little creativity. Don’t give up if it’s not perfect on the first try.
Why This Project Is So Rewarding
Redoing a lampshade isn’t just about saving money or updating your decor—it’s about creating something that’s uniquely yours. Every time I walk into a room and see a lampshade I’ve redone, I feel a little burst of pride. It’s a small project that makes a big impact, and it’s something anyone can do with a bit of time and effort. Plus, it’s a great way to flex your creative muscles and try something new. Whether you’re going for a sleek, modern look or a cozy, vintage vibe, your lampshade can tell a story about your style.
Conclusion
Redoing a lampshade is one of those projects that feels like a mini adventure. From picking out the perfect fabric to adding those final decorative touches, every step is a chance to make something beautiful for your home. I’ve loved sharing my experiences with you, and I hope you’re as excited as I am to get started. This project is all about taking something old or ordinary and turning it into a statement piece that lights up your space—literally and figuratively. So grab that dusty lampshade, gather your supplies, and let your creativity shine. You’ve got this, and I can’t wait for you to see the results!
FAQs
Can I redo a lampshade without sewing?
Absolutely! Most lampshade redo projects don’t require sewing at all. I use glue or adhesive to secure the fabric or paper, and it holds up great. If you’re worried about durability, a hot glue gun is your best friend for a strong bond.
What kind of fabric works best for a lampshade?
Lightweight fabrics like cotton, linen, or polyester blends are my go-to choices. They let light through nicely and are easy to work with. Avoid heavy fabrics like velvet or denim, as they can block too much light and be hard to glue down.
How do I know if my lampshade is safe to redo?
Check the frame for damage like rust or bent wires. If it’s sturdy, you’re good to go. Also, make sure your covering material isn’t too thick or flammable. I always use LED bulbs to keep things safe and cool.
Can I paint a lampshade instead of covering it?
Yes, painting is a great option! I’ve used acrylic paint or spray paint for a quick refresh. Just make sure to clean the shade first and use thin layers to avoid clumping. It’s a fun way to add patterns or color without fabric.
How long does it take to redo a lampshade?
It depends on your design, but most projects take me about 2-4 hours, including prep and drying time. If you’re adding lots of details like trim or paint, it might take a bit longer. Take your time to get it just right!