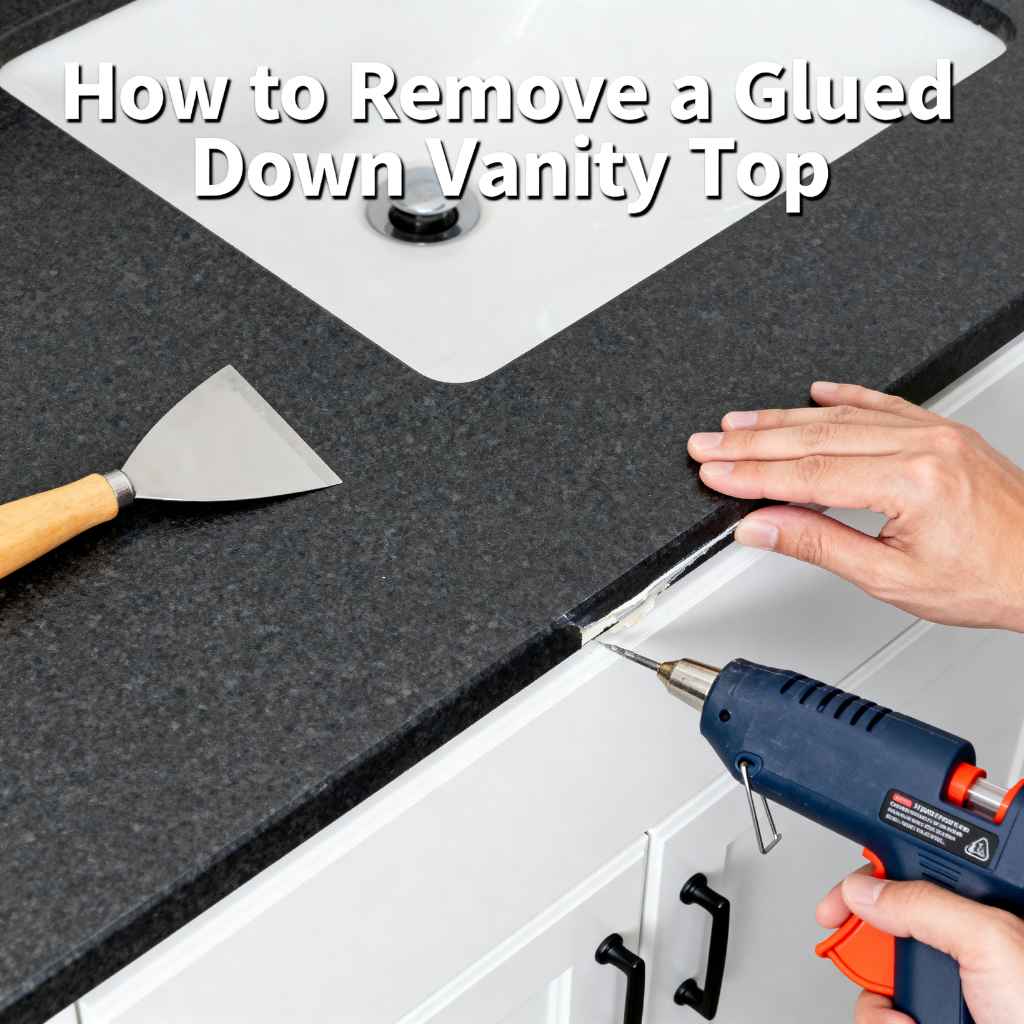
How to Remove a Glued Down Vanity Top
Removing a vanity top that’s glued down can seem tricky, especially if you haven’t done it before. Many homeowners find themselves facing this challenge during bathroom renovations or when replacing an old vanity. The adhesive used to secure these tops can be quite strong, making it feel like a permanent fixture. Don’t worry, though. This guide will walk you through the process step-by-step, making it simple and manageable for anyone. We’ll cover everything you need to know to safely and effectively tackle this common DIY task.
Preparing for Vanity Top Removal
Getting ready is key to a smooth and successful removal process. This section covers what you need to gather and what safety steps to take before you even touch the vanity top. Proper preparation will save you time, frustration, and potential injury. It’s about making sure you have the right tools and are protected while you work. Think of this as setting the stage for a successful project.
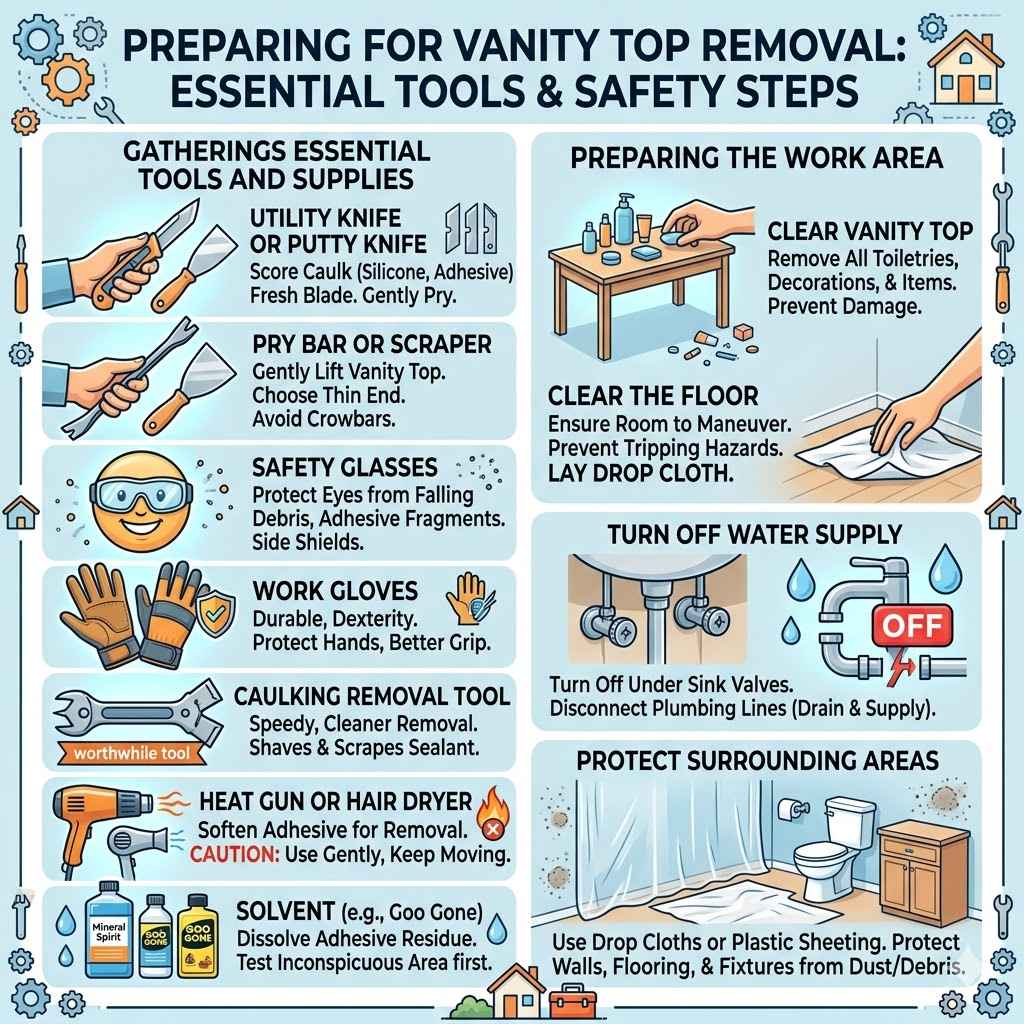
Gathering Essential Tools and Supplies
Before you start, ensure you have all the necessary tools. Having everything on hand prevents interruptions and keeps the project moving forward. This will make the job much easier and safer.
Utility Knife or Putty Knife: A sharp utility knife with a fresh blade is crucial for scoring the caulk around the vanity top. A putty knife can also be useful for gently prying. The blade of a utility knife needs to be able to cut through silicone or adhesive caulk effectively. A dull blade will just push the caulk around and make the job harder. For tougher adhesives, a wider putty knife or even a paint scraper might be needed, but start with the utility knife. Make sure you have plenty of replacement blades as you may go through a few.
Pry Bar or Scraper: A flat pry bar or a sturdy scraper is needed to gently lift the vanity top once it’s free. Be cautious not to damage the vanity base or the countertop itself during this step. Choose a pry bar with a thin, flat end that can slip under the edge of the countertop. Avoid using a crowbar, as it’s too heavy-duty and likely to cause damage. A good quality scraper can also help loosen stubborn glued areas.
Safety Glasses: Protect your eyes from falling debris or adhesive fragments. This is non-negotiable for any DIY project involving potential flying particles. Safety glasses with side shields offer the best protection. Make sure they fit snugly so nothing can get around the edges.
Work Gloves: Gloves protect your hands from sharp edges and chemicals. They also provide a better grip on tools and the vanity top. Look for gloves that are durable and provide good dexterity so you can handle tools precisely. Leather or heavy-duty synthetic gloves are usually a good choice.
Caulking Removal Tool: This specialized tool can make removing old caulk much faster and cleaner. Some are designed to shave off caulk, while others have different blades for various types of sealant. If you do a lot of home improvement, this is a worthwhile tool to have in your arsenal.
Heat Gun or Hair Dryer: Sometimes, applying a little heat can soften the adhesive, making it easier to break free. Use this with caution, as too much heat can damage certain countertop materials or the vanity cabinet. A heat gun is more powerful and can speed up the process, but a powerful hair dryer can also do the job for less stubborn adhesives. Be sure to keep the heat moving to avoid scorching or melting.
Solvent (e.g., Goo Gone, Mineral Spirits): After the top is removed, you might have adhesive residue. A solvent can help dissolve this. Always test the solvent in an inconspicuous area first to ensure it doesn’t damage the countertop or vanity. Read the product label carefully for instructions and safety precautions.
Preparing the Work Area
Clearing the area around the vanity is important for safety and ease of movement. This means removing any items from the countertop and floor. You’ll need space to work and potentially lay the vanity top down if you’re removing it in one piece.
Clear the Vanity Top: Remove everything from the surface of the vanity top. This includes toiletries, decorations, and any other items. This ensures nothing gets knocked over or damaged.
Clear the Floor: Make sure the floor around the vanity is clear of clutter. This gives you room to maneuver and prevents tripping hazards. Consider laying down a drop cloth or old blankets on the floor to protect it from scratches or spills, especially if you plan to set the removed top on the floor temporarily.
Turn Off Water Supply: If your vanity has a faucet, you’ll need to turn off the water supply valves located under the sink. This prevents accidental leaks or flooding when you disconnect the plumbing. You should also disconnect the drain trap and supply lines.
Protect Surrounding Areas: Use drop cloths or plastic sheeting to protect walls, flooring, and nearby fixtures from dust and debris. This is especially important if you are cutting or breaking any materials.
Step-by-Step Guide to Removal
Now that you’re prepared, it’s time to get to work. This guide breaks down the process into manageable steps, focusing on careful execution to achieve the best results. Each step builds upon the last, leading you from a secured vanity top to a successfully removed one.
Step 1 Scoring the Caulk Seal
The first physical step is to break the seal that’s holding the vanity top to the vanity cabinet. This is usually done with caulk. You need to cut through this caulk all the way around.
Locate the Caulk Line: Examine where the vanity top meets the backsplash or the cabinet. You’ll see a line of caulk, typically silicone or acrylic latex.
Use a Utility Knife: Carefully insert the blade of your utility knife into this caulk line. Use a steady, firm pressure to cut through the caulk. Work your way around the entire perimeter of the vanity top, making sure to cut as deep as possible.
Re-score if Necessary: If the caulk is thick or very hardened, you may need to go over it multiple times. A flexible putty knife can sometimes help to further separate the caulk after you’ve cut it. The goal is to create a clean break in the seal.
Step 2 Loosening the Vanity Top
Once the caulk is cut, you need to start separating the top from the cabinet. This is where you might need to apply some gentle force or heat. Patience is key here; don’t rush the process.
Apply Gentle Pressure: Try to gently lift or rock the vanity top from different points. You might hear or feel some resistance. If it moves slightly, that’s a good sign.
Use a Pry Bar (Carefully): If gentle pressure isn’t enough, carefully insert a thin pry bar or scraper between the vanity top and the cabinet. Work slowly and gently, prying upwards a little at a time.
Focus on One Area at a Time: Don’t try to lift the whole top at once. Focus on loosening one section, then move to the next. This helps prevent cracking or damaging the countertop. You’re trying to break the bond of the adhesive underneath.
Consider Heat (Optional): If the top is still very stubborn, use a heat gun or hair dryer on a medium setting. Hold it a few inches away from the edge, moving it constantly. This can soften adhesive. After a minute or two of heating, try prying again.
Step 3 Removing the Vanity Top
With the adhesive bond broken, you can now lift the vanity top off. This step requires care, especially if the top is heavy.
Lift Carefully: With an assistant, if possible, carefully lift the vanity top straight up and away from the cabinet. If you are working alone, lift one end first, then the other.
Watch for Remaining Adhesive: Be aware that there might be small spots of adhesive still clinging. Gently wiggle the top to break these last bonds.
Set Aside Safely: Once removed, place the vanity top on a protected surface, like old blankets or cardboard, to prevent scratching. Ensure it’s stable and won’t fall.
Dealing with Stubborn Adhesives
Sometimes, the glue is incredibly strong, and the standard methods might not be enough. In these cases, you might need to employ a few extra techniques. These are for when you’ve tried the basic steps and the top just won’t budge.
Advanced Loosening Techniques
When the adhesive is particularly tough, these methods can help. They involve a bit more effort and sometimes more specialized tools.
Specialized Adhesive Removers: For very strong glues, you might need a more potent solvent. Products like Goof Off or WD-40 can be effective. Always follow the product instructions precisely and ensure good ventilation. Apply the solvent to a cloth and then place the cloth on the stubborn adhesive area. Let it soak for the time recommended on the product.
Thinning the Adhesive with Heat and Prying: Combine heat and prying more aggressively. Use the heat gun to warm a larger section of the adhesive. Then, use your pry bar or scraper to work underneath the loosened area. You may need to repeat this process several times. Patience here is vital; forcing it can lead to breakage.
Cutting Through Embedded Adhesive: In some cases, the adhesive might be a thin film that’s very hard to get under. You might need to use a long, thin blade, like a drywall saw blade or a specialized laminate flooring tool, to cut through the adhesive layer. Be very careful not to cut into the vanity cabinet itself.
Removing Adhesive Residue
After the vanity top is off, you’ll likely have some adhesive left on the cabinet or the underside of the top. This needs to be cleaned up.
Scraping and Solvents: Use a scraper to remove as much of the bulk adhesive as possible. Then, apply a solvent like mineral spirits, acetone (use with caution and good ventilation, as it’s flammable), or a dedicated adhesive remover. Let the solvent soak for a few minutes to break down the residue.
Wiping and Buffing: Use a clean cloth to wipe away the softened adhesive. You might need to repeat this process several times. For a smooth finish, you can buff the area with a soft cloth once all residue is gone.
Test Cleaning Products: Before using any cleaner on your vanity cabinet or countertop, test it in a small, hidden area to make sure it doesn’t cause discoloration or damage.
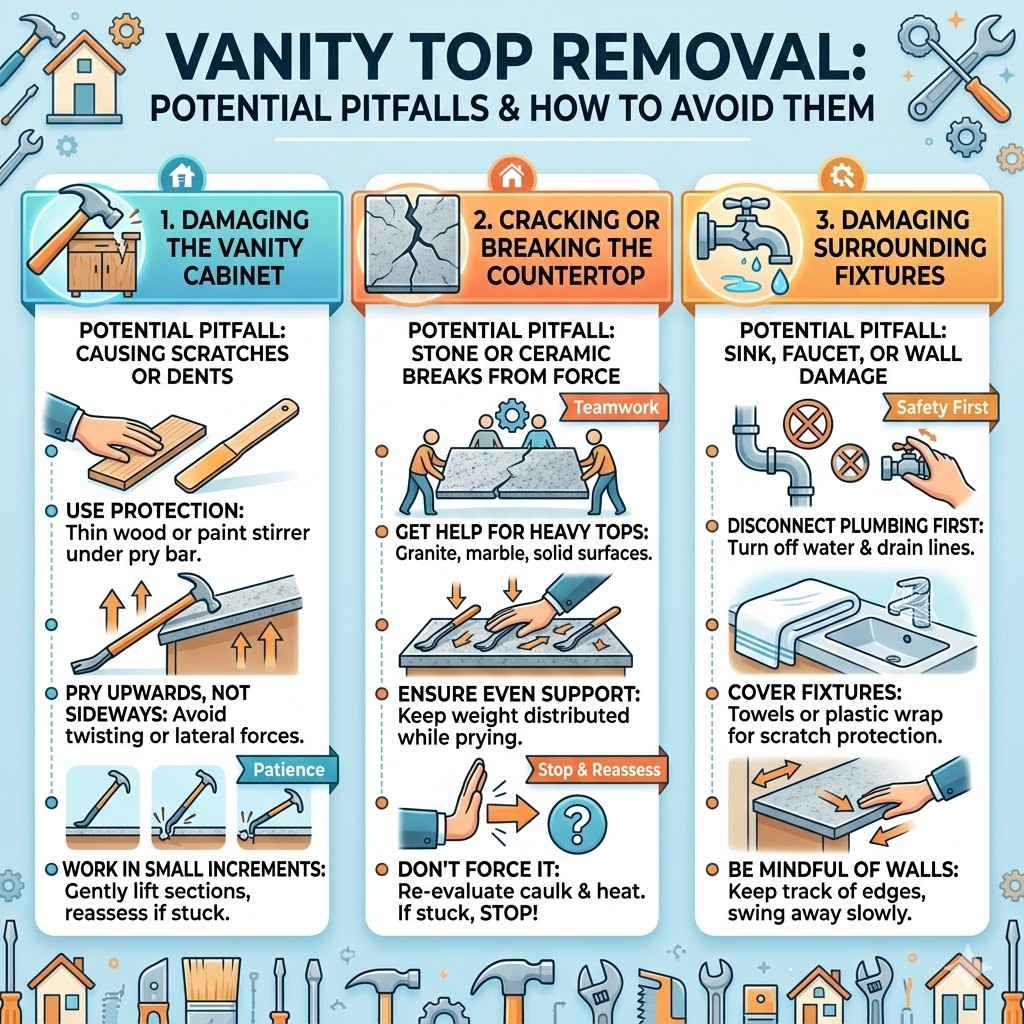
Potential Pitfalls and How to Avoid Them
Even with the best intentions, things can go wrong. Being aware of common problems can help you prevent them. This section highlights potential issues and offers advice on how to sidestep them for a smoother DIY experience.
Damaging the Vanity Cabinet
The cabinet is often made of less durable material than the countertop. When prying, it’s easy to scratch or dent the wood.
Use Protection: Always place a thin piece of wood, like a scrap of plywood or a paint stirrer, between your pry bar and the cabinet. This distributes the force and protects the wood surface from direct contact with the metal tool.
Pry Upwards, Not Sideways: When using a pry bar, focus on lifting the countertop upwards. Avoid twisting or lateral movements, which are more likely to gouge or break the cabinet material.
Work in Small Increments: Don’t try to force the entire top up at once. Gently pry in small sections. If you feel significant resistance, reassess your approach or apply a little more heat.
Cracking or Breaking the Countertop
Vanity tops, especially those made of stone or ceramic, can be brittle. Applying too much force in the wrong spot can cause them to crack.
Get Help for Heavy Tops: If you have a granite, marble, or solid surface countertop, it’s likely very heavy. Always have at least one other person to help lift. Uneven lifting can put stress on the material.
Ensure Even Support: As you pry, try to keep the weight of the countertop as evenly distributed as possible. Avoid concentrating force on a single small area, which can lead to stress fractures.
Don’t Force It: If the top isn’t moving, stop and re-evaluate. Is there more caulk to cut? Do you need more heat? Forcing a stuck top is a common cause of breakage.
Damaging Surrounding Fixtures
The sink, faucet, or surrounding walls can also be at risk during removal.
Disconnect Plumbing First: Ensure all water lines and drain pipes are disconnected before attempting to lift the top. A dangling pipe can snag on something and cause damage or a flood.
Cover Fixtures: Protect your sink and faucet with towels or plastic wrap. This prevents scratches from tools or debris falling onto them.
Be Mindful of Walls: Keep track of where the edges of the vanity top are in relation to the walls. As you lift, swing the top away from the wall slowly and carefully.
Frequently Asked Questions
Question: How do I know if my vanity top is glued down
Answer: Most vanity tops are installed with a bead of caulk around the top edge where they meet the backsplash or the cabinet. If you see this caulk line and the top doesn’t seem to lift easily, it’s likely glued down. You can try gently pushing down on the top; if there’s no give, it’s probably adhered.
Question: What is the best tool to cut caulk
Answer: A sharp utility knife with a fresh blade is the most effective tool for cutting caulk. A specialized caulk removal tool can also be very helpful for getting a clean cut and scraping away excess caulk.
Question: Can I remove a vanity top by myself
Answer: It depends on the size and material of the vanity top. Lighter laminate or particleboard tops might be removable by one person if they are careful and have a way to support the top. However, heavier materials like granite or marble require at least two people to lift safely.
Question: How long does it take to remove a glued down vanity top
Answer: For a standard vanity top that isn’t excessively glued, it can take anywhere from 30 minutes to a couple of hours. If the adhesive is particularly stubborn or you encounter unexpected issues, it might take longer.
Question: What should I do if I crack the vanity top during removal
Answer: If you crack the vanity top, assess the severity of the damage. For minor chips or hairline cracks, you might be able to repair them with epoxy or a specialized repair kit. For larger cracks, the top may need to be replaced.
Summary
Removing a vanity top that’s glued down involves carefully cutting caulk, gently prying the top loose, and lifting it with assistance if needed. Always prepare your tools and work area, and take precautions to avoid damaging the vanity cabinet or the countertop itself. Dealing with stubborn adhesives may require patience and specific solvents or heat.
This article has detailed the process of removing a vanity top that is glued down. You’ve learned about the necessary tools, preparation steps, and the actual removal process. We’ve also covered how to handle tough adhesives and avoid common mistakes. With these steps, you can confidently tackle this project yourself.