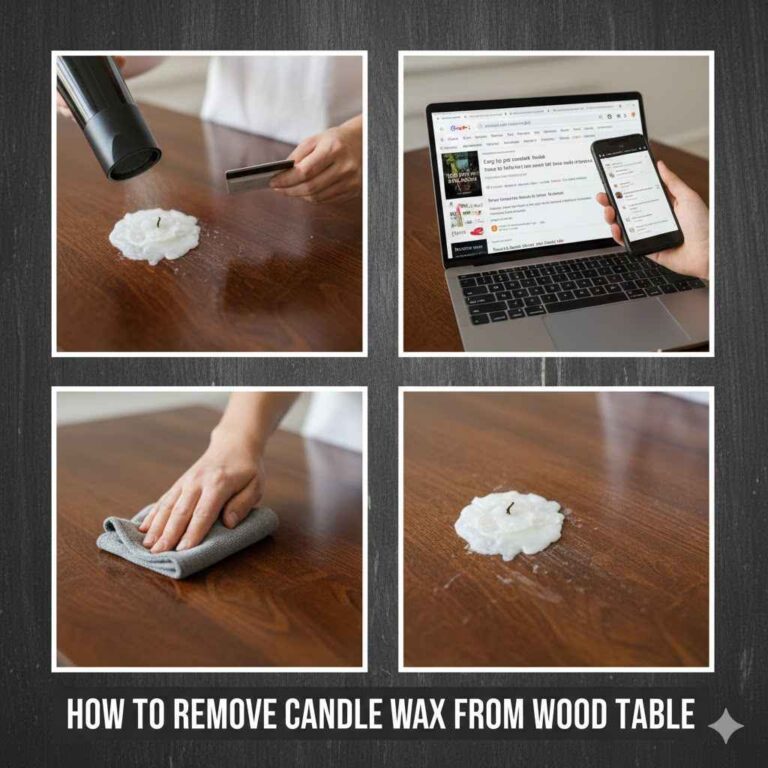
How To Remove Candle Wax From Wood Furniture Safely
Spilling candle wax on your favorite wood furniture can be a little worrying. Many folks wonder if they’ll damage the finish or leave a permanent mark. It’s a common issue for anyone who enjoys candles.
But don’t fret! Getting rid of that waxy mess is actually quite simple. We’ll walk you through exactly How to Remove Candle Wax from Wood Furniture Safely with easy steps.
Safely Removing Candle Wax from Wood Furniture
This section will cover the main methods for safely removing candle wax from your wooden surfaces. We will explore gentle techniques that protect your furniture’s finish while effectively dissolving or lifting the wax. Understanding these core approaches is key to preventing any accidental damage.
Gentle Heat Method
The heat method is a very popular and effective way to lift wax. It uses common household items to gently melt the wax so it can be absorbed.
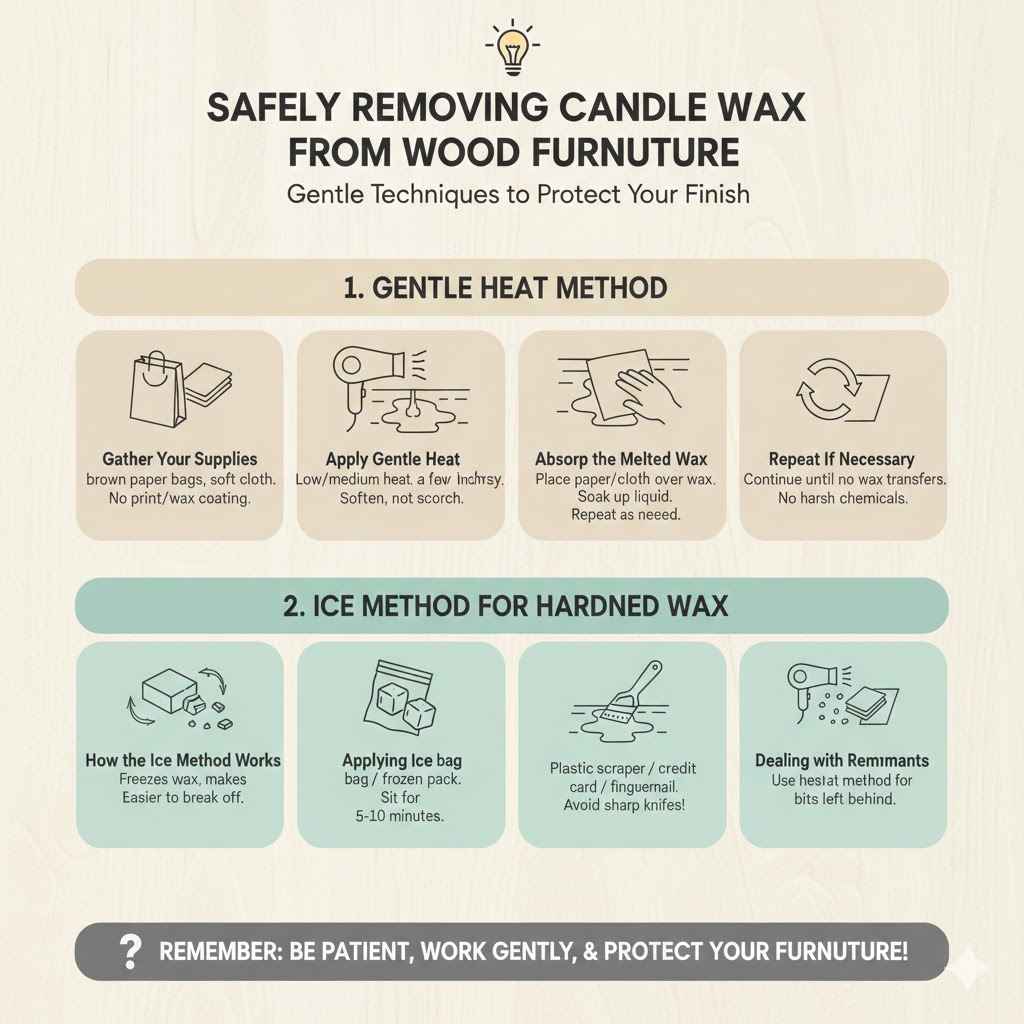
Gather Your Supplies
You’ll need a hairdryer, some plain brown paper bags (the kind without any print or wax coating), and a soft cloth. Make sure the paper bags are clean. If you don’t have paper bags, you can also use a clean cotton cloth or even paper towels.
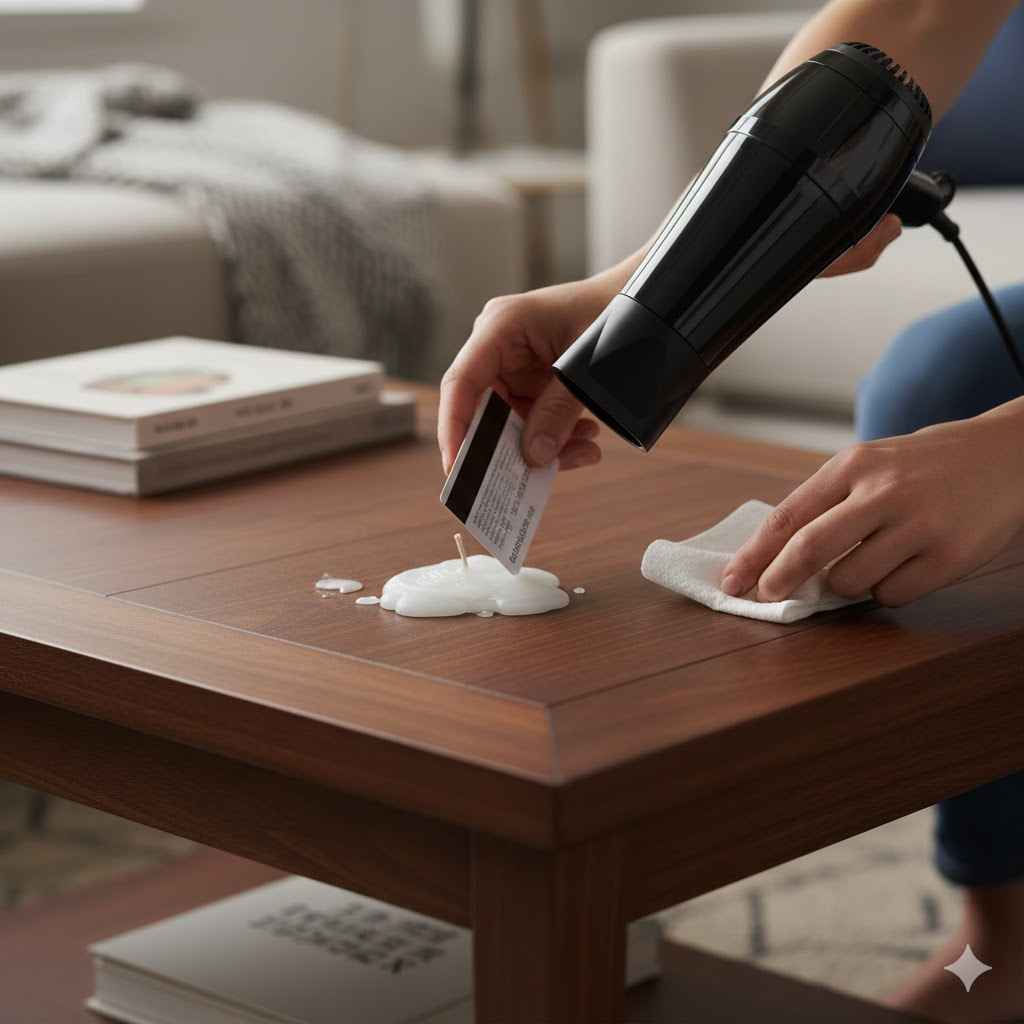
Apply Gentle Heat
Set your hairdryer to a low or medium heat setting. Hold it a few inches away from the wax spill. Move the hairdryer back and forth slowly over the wax to warm it up.
The goal is to soften the wax, not to scorch or dry out the wood.
Absorb the Melted Wax
As the wax begins to melt, place a piece of brown paper bag or a clean cotton cloth over the softened wax. The paper or cloth will soak up the liquid wax. Press down gently with your hand or a warm (not hot) iron on a low setting over the paper to help absorb more wax.
Keep moving the paper to a clean section as it absorbs the wax, or use a fresh piece.
Repeat If Necessary
You might need to repeat the heating and absorbing process a few times to remove all the wax. Be patient and work in small sections. Continue until no more wax transfers to the paper.
This method is great because it doesn’t involve harsh chemicals.
Ice Method for Hardened Wax
If the wax has hardened completely and feels solid, the ice method is a great first step. It makes the wax brittle and easier to break off.
How the Ice Method Works
By freezing the wax, you make it less flexible. This allows you to chip it away more cleanly. It’s like making brittle candy easier to snap.
Applying Ice
Take an ice cube and place it in a plastic bag. You can also use a small frozen ice pack. Put the bagged ice directly on top of the wax spill.
Let it sit there for about 5 to 10 minutes. This will make the wax very cold and hard.
Gentle Removal
Once the wax is frozen, carefully try to lift or scrape it off with a plastic scraper, a credit card, or even your fingernail. Work from the edges of the wax spot inwards. Avoid using anything sharp like a knife, as this can scratch the wood.
If the wax breaks into pieces, that’s good!
Dealing with Remnants
After removing the bulk of the hardened wax, you might have small bits left behind. You can then use the gentle heat method described earlier to melt and absorb these remaining pieces.
Cleaning Up Wax Residue and Protecting Wood
After the bulk of the wax is gone, there might be a slight residue or a dull spot left. This section focuses on how to clean that up and make your wood furniture look like new again.
Using a Wood Cleaner
A good wood cleaner can help remove any lingering wax and restore the shine.
Choose the Right Cleaner
Select a cleaner specifically designed for wood furniture. Avoid harsh cleaners, solvents, or abrasive pads. A mild soap and water solution can work in some cases, but a dedicated wood cleaner is often best.
Always test any cleaner on an inconspicuous area first, like the underside of a table.
Application Technique
Apply a small amount of wood cleaner to a soft, lint-free cloth. Gently wipe the area where the wax spill was. Work in the direction of the wood grain.
This helps to lift any remaining wax residue without pushing it further into the wood.
Buffing for Shine
After cleaning, use a dry, clean soft cloth to buff the area. This will bring back the natural sheen of the wood and remove any streaks left by the cleaner. Your furniture should look smooth and clean.
Using Vinegar and Oil (Natural Options)
For a more natural approach, a mixture of vinegar and oil can be effective for cleaning up wax residue.
White Vinegar Solution
Mix one part white vinegar with one part water. Vinegar is a mild acid that can help break down sticky residues. Dampen a soft cloth with this solution, wring it out well so it’s not dripping, and gently wipe the affected area.
Again, always test this in a hidden spot first.
Follow Up with Oil
After using the vinegar solution, you might want to apply a little bit of furniture polish or a specialized wood oil to the spot. This replenishes the wood’s moisture and helps blend the cleaned area with the rest of the finish. Use a clean cloth and apply sparingly.
Wipe away any excess.
Benefits of Natural Methods
These natural methods are less likely to strip the wood’s finish compared to harsher chemicals. They are good for regular maintenance and light cleaning. They also smell nice!
Dealing with Different Wood Finishes
The type of finish on your wood furniture affects how you should approach wax removal. Some finishes are more delicate than others.
Varnished or Lacquered Wood
These finishes are pretty durable. The gentle heat method and standard wood cleaners work well. Be cautious with very high heat, as it could potentially dull or damage the finish.
Oiled or Waxed Wood
Furniture with an oiled or waxed finish is often more absorbent. You’ll need to be extra careful. The ice method is a good starting point.
After removing the wax, you might need to reapply a small amount of wood oil or wax to the spot to restore the finish. The goal is to blend the repair.
Unfinished Wood
Unfinished wood is rare on furniture but can stain easily. If you have unfinished wood, be very gentle. Blot up as much wax as possible.
Avoid getting the wood too wet, as it can cause water stains. For any remaining marks, light sanding might be an option if you plan to refinish the area.
Preventing Future Candle Wax Accidents
Accidents happen, but there are ways to reduce the chances of wax spills on your precious wood furniture. This section offers tips to keep your furniture pristine.
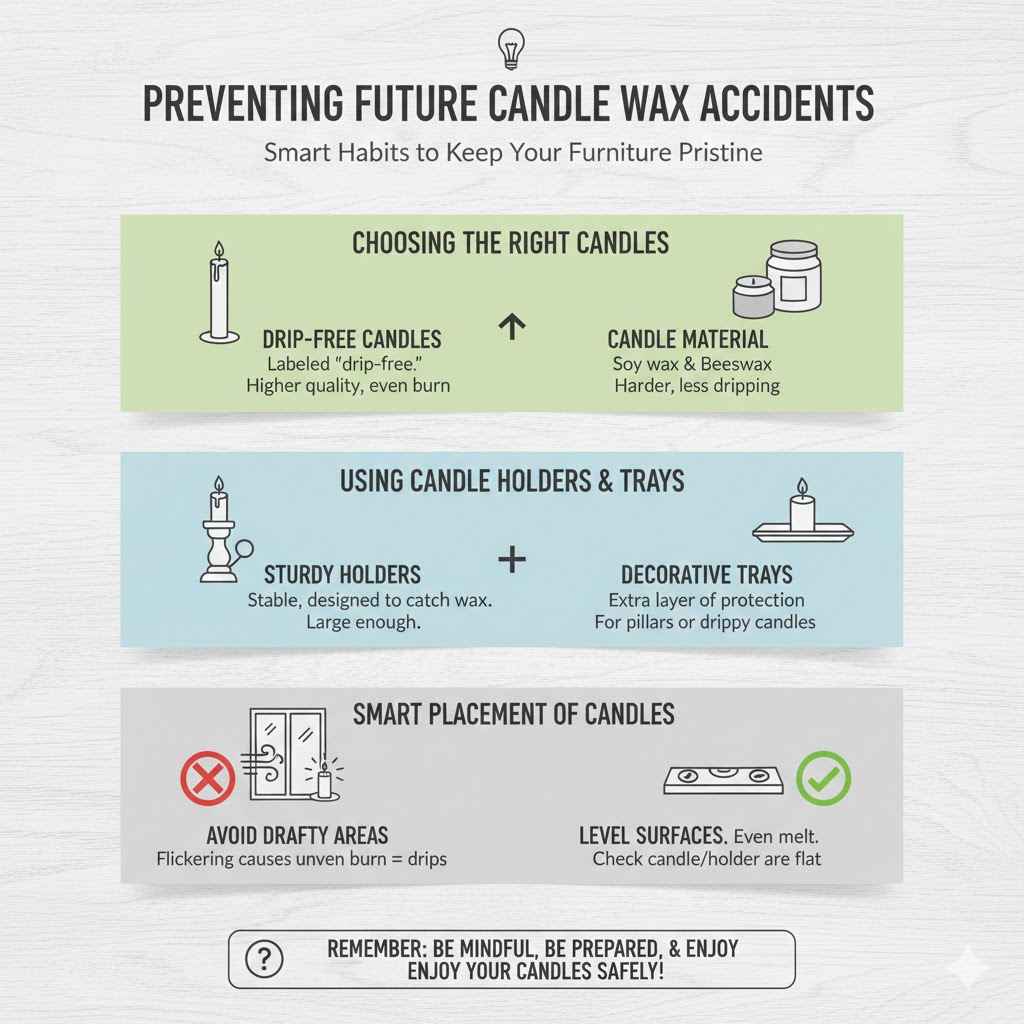
Choosing the Right Candles
Some candles are more prone to dripping than others.
Drip-Free Candles
Opt for candles that are specifically labeled as “drip-free” or “low-drip.” These are often made with higher quality wax and have wicks that burn more evenly. Taper candles, for example, are designed to burn downwards and catch their own wax.
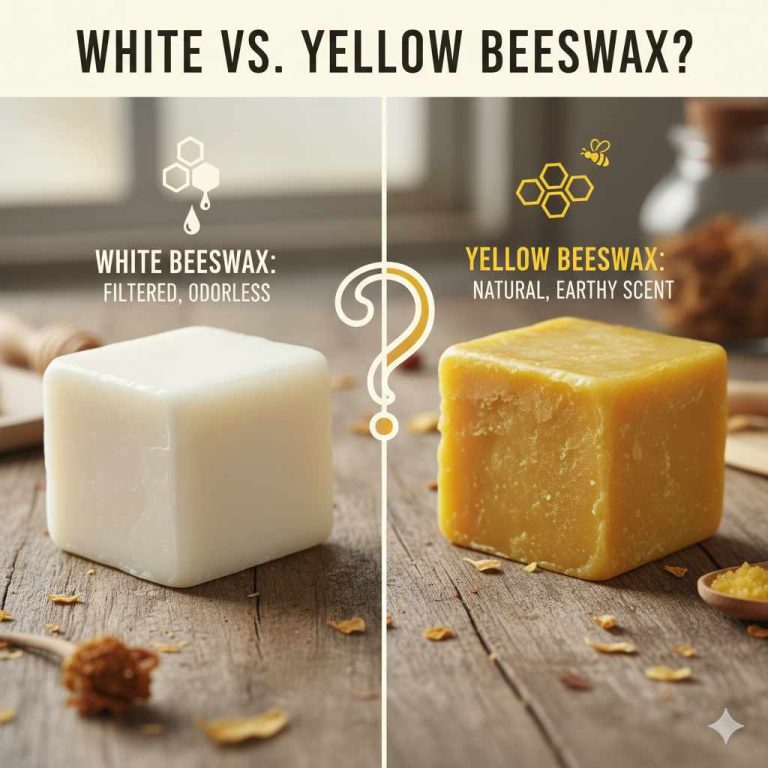
Candle Material Matters
Soy wax and beeswax candles tend to be harder and less prone to melting rapidly and dripping than paraffin wax candles. While not all beeswax or soy candles are drip-free, they generally perform better.
Using Candle Holders and Trays
Simple accessories can save a lot of trouble.
Sturdy Candle Holders
Always use a candle holder that is stable and designed to catch wax. Make sure the holder is large enough to contain any drips. Avoid placing candles directly on wood surfaces, even in holders, if you’re concerned about spills.
Decorative Trays
Placing your candle holder on a decorative tray or a coaster provides an extra layer of protection. This is especially useful for pillar candles or any candle that might have a tendency to drip.
Smart Placement of Candles
Where you put your candles makes a big difference.
Avoid Drafty Areas
Candles placed in drafty areas tend to flicker more, which can cause uneven burning and lead to dripping wax. Try to place candles away from open windows, fans, or air vents.
Level Surfaces
Ensure the surface where you place your candle is perfectly level. An uneven surface can cause the wax to melt and flow to one side, increasing the likelihood of drips. Always check that the candle and its holder are sitting flat.
Frequently Asked Questions
Question: Can I use a regular iron to remove candle wax from wood?
Answer: Yes, you can use a regular iron, but it must be on its lowest heat setting and have the steam function turned OFF. Place a brown paper bag or a cotton cloth between the iron and the wax. Move the iron quickly to avoid overheating the wood.
Question: What if the wax has colored my wood furniture?
Answer: If the wax left a stain, especially colored wax, you might need to use a mild wood stain remover or a very fine steel wool (grade 0000) with a bit of furniture polish. Always test any stain removal method on an inconspicuous spot first to ensure it doesn’t damage the finish.
Question: Is it safe to use rubbing alcohol on wood?
Answer: Rubbing alcohol can be effective at removing wax residue, but it can also strip the finish from some types of wood. It’s best to use it as a last resort and dilute it with water. Always test in a hidden area first, and follow up with a wood polish.
Question: How can I tell if my wood furniture is sealed or unfinished?
Answer: A simple water test can help. Drop a tiny bit of water on an inconspicuous spot. If the water beads up, the finish is sealed.
If the water soaks in quickly and darkens the wood, it’s likely unfinished or has a very absorbent finish.
Question: Should I try to scrape off the wax with a knife?
Answer: No, it’s strongly advised not to use sharp objects like knives to scrape off candle wax. Knives can easily scratch or gouge the wood surface, causing more damage than the wax itself. Stick to plastic scrapers, credit cards, or your fingernail for hardened wax.
Wrap Up
Removing candle wax from your wood furniture is straightforward. By using gentle heat, ice, or mild cleaners, you can tackle spills without harm. Always test methods first and work patiently.
Enjoy your beautiful, clean furniture knowing you can handle any wax mishap with these simple techniques.