How to Effortlessly Remove Wallpaper Border: Simple Steps
To remove the wallpaper border, start by scoring the edges with a putty knife and peeling it away. Then, apply a wallpaper removal solution and scrape off the remaining adhesive with a scraper.
Step 1: Gathering The Necessary Tools
Removing wallpaper borders can be a daunting task, especially if you don’t have the right tools. The key to a successful removal process lies in having the necessary tools at your disposal. Not only will they make the job easier, but they will also ensure that you don’t damage the walls or spend endless hours struggling with the task at hand.
List Of Tools Required
Before you begin the wallpaper border removal process, make sure you have the following tools:
| Tools | Description |
|---|---|
| Scoring tool | This tool is used to create small perforations in the wallpaper, allowing the removal solution to penetrate and loosen the adhesive. |
| Wallpaper removal solution | An effective solution that helps to dissolve the wallpaper adhesive and make it easier to peel off. |
| Putty knife or scraper | These tools will assist in scrapping off the wallpaper once it has been loosened. |
| Spray bottle | Used to apply the wallpaper removal solution onto the wallpaper border. |
| Protective gear | Wearing gloves and safety glasses is essential to keep yourself protected from any potential injury. |
| Plastic drop cloth or old newspapers | Place these to protect your floor or any furniture from the wallpaper removal solution. |
| Clean cloth or sponge | Use this to wipe down the walls and remove any residue remaining after removing the wallpaper border. |
| Sandpaper | This will come handy if there are any stubborn spots left on the wall after removing the wallpaper border. |
Importance Of Having The Right Tools
Having the right tools when removing wallpaper border is crucial for a number of reasons:
- Efficiency: The appropriate tools will help you complete the task quickly and efficiently, saving you time and effort.
- Effectiveness: Using the correct tools ensures that you remove the wallpaper border without causing any damage to the walls.
- Safe and Clean: With the right tools, you can work in a safe environment and minimize any mess or potential hazards.
Now that you have gathered all the necessary tools, you are ready to move on to the next step of the wallpaper border removal process.

Step 2: Preparing The Area
Prepare the area for wallpaper border removal by gathering the necessary tools and covering the surrounding furniture and floors. Clear the space to ensure a smooth and hassle-free process.
Once you have gathered the necessary tools for removing the wallpaper border, it is important to prepare the area for a mess-free and efficient process. Taking the time to properly cover the floor and nearby furniture and protect the walls will save you from unnecessary clean-up and potential damage. Follow these steps to ensure a smooth removal process.
1. Covering The Floor And Nearby Furniture
To protect your floor and nearby furniture from any damage or drips, it’s important to cover them properly. Here’s what you need to do:
- Cover the floor with a drop cloth or plastic sheeting. Secure the edges of the drop cloth to prevent it from moving during the process.
- If you have furniture near the wallpaper border, move it away from the walls if possible. Otherwise, cover it with plastic sheeting or old bedsheets to prevent any accidental splatters or damage from falling debris.
This simple step will save you from hours of cleaning and potential damage to your valuable belongings.
2. Protecting The Walls
To avoid any damage to the walls during the wallpaper border removal process, take the necessary precautions. Follow these guidelines:
- Apply painter’s tape along the edges of the walls where the wallpaper border meets the painted surface. This will create a protective barrier and prevent any accidental scratches or gouges when using tools.
- If you are using a liquid wallpaper remover, it’s a good idea to test it on a small, inconspicuous area of the wall first. This will help you ensure that it does not cause any discoloration or damage to the wall surface.
- For extra protection, you can also apply a thin layer of wallpaper primer or sizing solution to the wall before starting the removal process. This will create a barrier between the wall and the wallpaper border, making it easier to remove without damaging the underlying surface.
Taking these precautions will not only protect your walls but also make the removal process smoother and more efficient.
Preparing the area is a crucial step in removing the wallpaper border. By properly covering the floor and nearby furniture and protecting the walls, you can ensure a mess-free and damage-free process. Following these simple steps will save you time, effort, and the headache of cleaning up afterward.
Step 3: Loosening The Wallpaper Border
Now that you have adequately prepared the area, it’s time to focus on loosening the wallpaper border. There are two effective methods you can use for this step: using a hot water and soap mixture or using a wallpaper steamer.
Using Hot Water And Soap Mixture
To start with, you can try using a hot water and soap mixture to soften the wallpaper adhesive. This method is simple and doesn’t require any special tools. Follow these steps:
- Fill a bucket or spray bottle with hot water. Add a few drops of dish soap and mix it well.
- Using a paint roller or sponge, saturate the wallpaper border with the hot water and soap mixture. Make sure to apply it generously and ensure the entire border is covered.
- Allow the mixture to penetrate the wallpaper for about 15-20 minutes. This will help in loosening the adhesive and making it easier to remove.
- Use a putty knife or scraper to gently lift the wallpaper border from one corner. Start peeling it off slowly and continue working your way along the border.
- If you encounter any stubborn spots, you can reapply the hot water and soap mixture to further loosen the adhesive.
Using A Wallpaper Steamer
If the hot water and soap mixture doesn’t provide satisfactory results, using a wallpaper steamer is an effective alternative. A wallpaper steamer applies heat and moisture to the wallpaper, making it easier to remove. Here’s how you can use a wallpaper steamer:
- Fill the wallpaper steamer with water and let it heat up according to the manufacturer’s instructions.
- Hold the steamer plate against the wallpaper border for a few seconds to allow the steam to penetrate. Move the steamer in a circular motion to cover the entire area.
- Continue steaming the wallpaper border section by section, making sure to keep the steamer plate in contact with the wallpaper for a sufficient amount of time.
- Once the adhesive is sufficiently loosened, use a putty knife or scraper to lift and remove the wallpaper border. Start from one corner and work your way along the border.
- Remember to be cautious while working with the steamer, as it can produce hot steam. Take necessary safety precautions by wearing gloves and keeping your face away from the steam.
By following either of these methods, you can effectively loosen the wallpaper border and make the removal process much easier. Remember to work slowly and carefully to avoid damaging the underlying wall surface. Once you have successfully removed the wallpaper border, move on to the next step: eliminating any remaining residue.
Step 4: Removing The Wallpaper Border
Learn how to efficiently remove wallpaper borders with these step-by-step instructions, ensuring a smooth transition for your redecorating project.
Once you have completed the necessary preparation and scoring steps, it is time to tackle the actual removal of the wallpaper border. This step requires a combination of patience and precision to ensure the border comes off cleanly and without damaging the underlying surface. Follow these methods:
Peeling The Border Off By Hand
Start by trying to peel off the wallpaper border with your hands. Begin at one corner or edge and gently pull the border away from the wall. If the border is old or hasn’t been properly attached, it might come off easily in one piece. However, if it resists your efforts or starts to tear, it’s time to switch to a different approach.
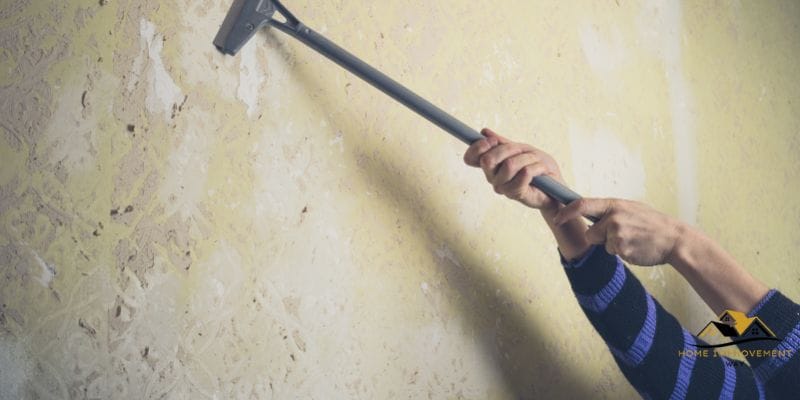
Using A Putty Knife To Scrape Off Stubborn Sections
If the wallpaper border proves to be stubborn, a putty knife can be a valuable tool. Choose a putty knife with a flat, wide blade to minimize the risk of surface damage. Start by inserting the knife’s blade under a corner or edge of the border and carefully work it along, using gentle pressure to scrape the border off. Be careful not to gouge or scrape too hard, as this can harm the wall surface underneath.
If there are stubborn sections that resist the putty knife, try heating them with a hairdryer set to a low heat setting. The warm air can help loosen the adhesive, making it easier to scrape off the wallpaper border. Always keep the hairdryer in motion to avoid overheating the wall or causing any damage.
Important tips:
- Work slowly and carefully to avoid damaging the wall beneath the border
- Use light pressure when scraping or peeling to prevent accidents
- If the wallpaper border has multiple layers, start with the top layer and work your way down
- Dispose of the removed border in a trash bag or garbage bin
By following these steps, you can efficiently remove an unwanted wallpaper border and restore a clean, fresh look to your walls. Remember to always take your time and be cautious to avoid unintended damage.
Step 5: Cleaning Up And Finishing Touches
In the final step of removing the wallpaper border, it is important to thoroughly clean and add finishing touches to the wall surface. This ensures a smooth and polished appearance after the removal process. Following these steps will leave your wall looking fresh and ready for a new coat of paint or new wallpaper.
After successfully removing the wallpaper border, it’s time to tackle the final steps of cleaning up and adding those all-important finishing touches to ensure your walls look flawless. Here’s what you need to do to complete the process:
Removing Any Remaining Adhesive
1. Spray warm water and vinegar mixture: Create a simple solution of warm water and vinegar (equal parts) in a spray bottle. Spray the mixture onto any leftover wallpaper adhesive.
2. Scrape off the adhesive: Using a plastic putty knife or a wallpaper scraper, gently scrape off the remaining adhesive. Be careful not to damage the wall surface while doing so.
3. Clean with soapy water: Prepare a bucket of warm soapy water using mild dish soap. Dip a sponge or cloth into the soapy water and scrub the wall, removing any residue left from the adhesive.
4. Rinse with clean water: Fill another bucket with clean water and use a sponge or cloth to rinse the wall, removing any soapy residue.
Inspecting For Any Damage And Making Repairs
1. Examine the wall surface: Once the adhesive is removed, carefully inspect the wall for any signs of damage, such as scratches, dents, or holes.
2. Fill in any holes or damage: If you find any damage, use a patching compound or spackle to fill in these areas. Apply the compound with a putty knife, smoothing it out until it is level with the wall surface. Allow it to dry completely.
3. Sand the repaired areas: After the patching compound has dried, use fine-grit sandpaper to smooth out the repaired areas until they are seamless with the rest of the wall.
4. Prime and paint: To ensure a seamless finish, apply a coat of primer to the repaired areas. Once dry, you can paint the entire wall with your chosen color, blending the repaired sections with the rest of the wall.
With these final cleaning and repairing steps, you can confidently say goodbye to the wallpaper border and enjoy freshly painted, immaculate walls in your space.
Conclusion
Removing wallpaper border can be a challenging task, but with these tips, it can become a breeze. By following the step-by-step guide in this blog post, you can successfully remove wallpaper borders without damaging your walls. Remember to use the right tools, be patient, and take necessary precautions.
With a little effort and careful execution, you can achieve a clean and refreshed look for your walls. So, roll up your sleeves and get ready to bid farewell to that outdated wallpaper border!