How to Remove Wood Glue from Wood: A Complete Guide for DIY Enthusiasts
Hey there, fellow DIYer! If you’re reading this, I bet you’ve got a woodworking project that’s hit a snag—maybe some stubborn wood glue that’s refusing to budge from your beautiful piece of oak or pine. Don’t worry, I’ve been there, and I’m here to share everything I’ve learned about how to remove wood glue from wood. As someone who’s spent countless hours in my garage workshop, sanding, gluing, and sometimes cursing at glue stains, I know the frustration of trying to keep your project looking pristine.
Whether you’re a seasoned carpenter or just starting out with your first furniture build, this guide is packed with practical, tried-and-true methods to get that glue off without damaging your wood. Let’s dive in and get your project back on track!
Why Wood Glue Sticks So Well (and Why It’s a Pain to Remove)
Wood glue is designed to create a bond stronger than the wood itself, which is great for holding your projects together but not so great when it ends up where it doesn’t belong. I remember the first time I spilled some Titebond glue on a cherry tabletop I was building—it dried into an ugly, glossy patch that mocked me every time I looked at it. The secret behind wood glue’s tenacity lies in its chemical makeup. Most wood glues, like polyvinyl acetate (PVA) or polyurethane-based glues, penetrate the wood’s pores and harden, creating a grip that’s tough to break.
Removing it isn’t just about aesthetics; dried glue can interfere with staining or finishing, leaving uneven patches that ruin your hard work. The trick is to tackle the glue without harming the wood’s surface or grain. Patience and the right tools are your best friends here, and I’ll walk you through every step.
Act Fast: Removing Wet Wood Glue
If you catch the glue while it’s still wet, you’re in luck—it’s way easier to deal with. I’ve learned this the hard way after letting glue sit too long on a project. Here’s what I do when I notice a fresh spill:
- Grab a damp cloth: Use a clean, lint-free cloth soaked in warm water. Wring it out so it’s not dripping, and gently wipe the glue away. The water softens the glue, making it easier to remove.
- Keep wiping: You might need to rinse and repeat a few times to get all the glue off. Don’t let water sit on the wood too long, though—it can raise the grain or cause swelling.
- Dry immediately: Use a dry cloth to soak up any moisture. I always follow up with a quick once-over to make sure no glue residue is left behind.
This method works best for PVA glues, like the classic yellow wood glue you probably have in your workshop. For polyurethane glues, which foam up when wet, you might need to act even faster and use a bit of mineral spirits on the cloth to break down the glue.
Tackling Dried Wood Glue: My Go-To Methods
Dried wood glue is where things get tricky, but don’t panic—I’ve got a toolbox full of solutions that have saved my projects time and again. Depending on how much glue you’re dealing with and the type of wood, here are the methods I swear by:
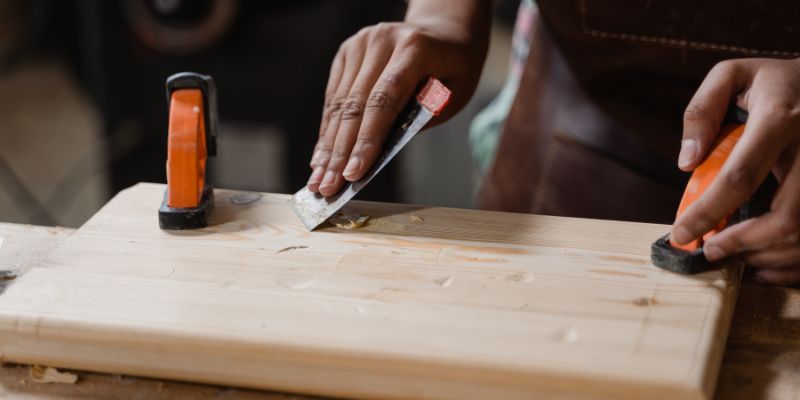
Scraping It Off with Care
When I’m dealing with a thick blob of dried glue, my first instinct is to reach for a scraper. A plastic putty knife or an old credit card works wonders because they’re gentle on the wood. Here’s how I do it:
- Hold the scraper at a low angle to avoid gouging the wood.
- Gently push or pull the scraper across the glue, letting it lift off in flakes.
- If the glue is stubborn, I soften it first (more on that below) to make scraping easier.
For delicate woods like cedar or thin veneers, I’m extra careful to avoid scratches. If you’re nervous about scraping, practice on a scrap piece of wood first to get the feel of it.
Softening Glue with Heat
Heat is a game-changer for loosening dried glue, and I discovered this trick when I was restoring an old dresser. A hairdryer or heat gun set to low can soften the glue just enough to make it peelable. Here’s my process:
- Set the hairdryer to medium heat and hold it about 6 inches from the glue.
- Move it back and forth for 20-30 seconds to warm the glue without scorching the wood.
- Test with a scraper—if the glue feels tacky, it’s ready to come off.
Be cautious with heat guns; they can get hot enough to burn the wood if you’re not careful. I always keep a damp cloth nearby to cool the wood if it gets too warm.
Using Solvents to Dissolve Glue
For glue that’s seeped into the wood grain or spread thin, solvents are my secret weapon. Over the years, I’ve tested a few, and here’s what works for different glues:
- White vinegar: Perfect for PVA glues. I soak a cloth in warm vinegar, lay it over the glue for 10-15 minutes, then wipe or scrape it off. The vinegar breaks down the glue without harming most woods.
- Acetone: Great for polyurethane or CA (super) glues. I dab a small amount on a cloth and rub gently, then wipe clean with a damp cloth. Acetone can strip finishes, so test it in an inconspicuous spot first.
- Mineral spirits: These work well for hide glue or stubborn PVA residue. Apply with a cloth, let it sit for a minute, then scrub lightly with a soft-bristled brush.
Always work in a well-ventilated area when using solvents, and wear gloves to protect your skin. I learned this after a long day of glue removal left my hands feeling like sandpaper!
Sanding as a Last Resort
If all else fails, sanding can smooth out glue stains, but it’s my least favorite method because it removes some of the wood’s surface. I’ve used this on a pine bookshelf when glue soaked too deep to scrape. Here’s how I approach it:
- Start with coarse sandpaper (80-120 grit) to remove the bulk of the glue.
- Switch to finer grits (150-220) to smooth the surface and blend it with the surrounding wood.
- Sand in the direction of the grain to avoid scratches.
Sanding can change the wood’s texture or color, so I always test my stain or finish afterward to make sure it matches. If you’re working on a finished piece, you’ll need to refinish the sanded area to blend it in.
Comparing Glue Removal Methods
To help you choose the best method for your project, here’s a quick comparison of the techniques I’ve shared:
| Method | Best For | Pros | Cons |
|---|---|---|---|
| Damp Cloth (Wet Glue) | Fresh spills of PVA glue | Fast, no chemicals, safe for wood | Doesn’t work on dried glue |
| Scraping | Thick, dried glue blobs | No cost, precise control | Risk of scratching delicate wood |
| Heat | Surface-level dried glue | No solvents, quick | Can burn wood if not careful |
| Solvents | Glue in wood grain or thin residue | Effective on tough glues | May strip finishes, needs ventilation |
| Sanding | Deep glue stains | Smooths surface completely | Removes wood, may need refinishing |
This table has saved me time when I’m staring at a glue mess, unsure where to start. Pick the method that matches your glue type and wood condition, and you’ll be golden.
Protecting Your Wood During Glue Removal
I’ve learned the hard way that removing glue can sometimes do more harm than good if you’re not careful. Here are my top tips for keeping your wood safe:
- Test first: Always try your method on a hidden part of the wood or a scrap piece to check for damage.
- Work gently: Rushing can lead to scratches or dents. Take your time, especially with soft woods like pine.
- Clean up residue: After removing glue, wipe the area with a damp cloth to remove any leftover solvent or dust.
- Check for damage: Inspect the wood under good lighting to make sure you haven’t raised the grain or stripped the finish.
If you’re working on a finished piece, you might need to touch up with polish or wax after glue removal to restore the shine. I keep a can of furniture polish in my workshop for just this purpose.
Preventing Glue Mishaps in Future Projects
After dealing with my fair share of glue spills, I’ve gotten smarter about preventing them. Here are some habits I’ve picked up:
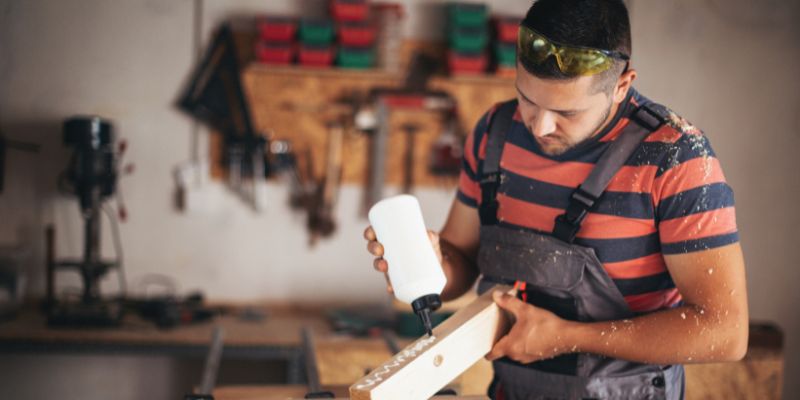
- Use less glue: A thin, even layer is usually enough. I use a brush or spreader to avoid globs.
- Tape off edges: Painter’s tape along joints keeps glue from spreading to visible surfaces.
- Clean as you go: Keep a damp cloth handy during assembly to wipe up squeezes before they dry.
- Work in stages: Glue up smaller sections of a project to control where the glue goes.
These tricks have cut down on my glue cleanup time, letting me focus on the fun parts of woodworking.
Special Cases: Removing Glue from Finished or Delicate Wood
If you’re working on a finished piece or a delicate wood like walnut veneer, you need to tread lightly. I once had to clean glue off an antique chair without ruining its varnish, and it was nerve-wracking! Here’s what I recommend:
- Stick to vinegar or mineral spirits: These are less likely to damage finishes than acetone.
- Use a soft cloth: Avoid abrasive tools like scrapers or sandpaper.
- Work in small sections: Apply solvent sparingly and wipe it off quickly to minimize contact with the finish.
- Polish afterward: A bit of furniture polish can hide minor dulling from solvent use.
For veneers, I avoid heat and heavy scraping, as they can lift or crack the thin layer. Patience is key here—slow and steady wins the race.
When to Call in a Professional
Most glue messes can be handled at home, but there are times when I’ve had to admit defeat and call a pro. If you’re dealing with a valuable antique, a complex inlay, or a large glued-up panel that’s part of a custom piece, a professional restorer might be worth the investment. They have specialized tools and chemicals that can tackle glue without risking your wood. I found a local furniture restorer through a quick Google search when I was out of my depth with a family heirloom, and it was money well spent.
Wrapping It Up: Glue-Free Wood, Stress-Free You
There you have it—everything I’ve learned about how to remove wood glue from wood, from quick fixes for wet glue to heavy-duty solutions for dried-on disasters. Woodworking is all about problem-solving, and glue messes are just part of the journey. With a little patience and the right technique, you can keep your projects looking flawless. I hope this guide saves you some headaches and helps you fall even more in love with creating beautiful things from wood. Now, grab that scraper or vinegar bottle and get back to your masterpiece—I’m rooting for you!
Frequently Asked Questions
Can I remove wood glue without damaging the wood’s finish?
Yes, you can! I’ve had success using white vinegar or mineral spirits on finished wood. Dab a small amount on a soft cloth, apply it to the glue, and wipe it off quickly. Always test in a hidden spot first to make sure the solvent doesn’t dull the finish. If the finish looks cloudy afterward, a quick swipe of furniture polish usually brings back the shine.
What’s the fastest way to remove dried wood glue?
In my experience, softening the glue with a hairdryer and then scraping it off with a plastic putty knife is the quickest method. Heat the glue for about 20 seconds, then gently scrape while it’s still tacky. It’s fast and doesn’t require chemicals, but be careful not to overheat the wood.
Will acetone ruin my wood project?
Acetone can strip some wood finishes, like varnish or lacquer, so I always use it sparingly and test it first. It’s great for polyurethane or super glue, but I apply it with a cloth and wipe it off immediately. If you’re working on unfinished wood, acetone is usually safe but can dry out the surface, so follow up with a damp cloth.
How do I prevent wood glue from staining my wood?
The best way is to act fast and wipe up wet glue with a damp cloth before it dries. I also like to use painter’s tape along edges to catch squeeze-out. Applying a thin layer of glue with a brush helps avoid excess that can seep into the grain and cause stains.
Is sanding a good way to remove wood glue?
Sanding works, but I save it for last because it removes some of the wood’s surface. Start with coarse sandpaper to get rid of the glue, then switch to finer grits to smooth things out. Just know you might need to refinish the area to match the rest of your project.