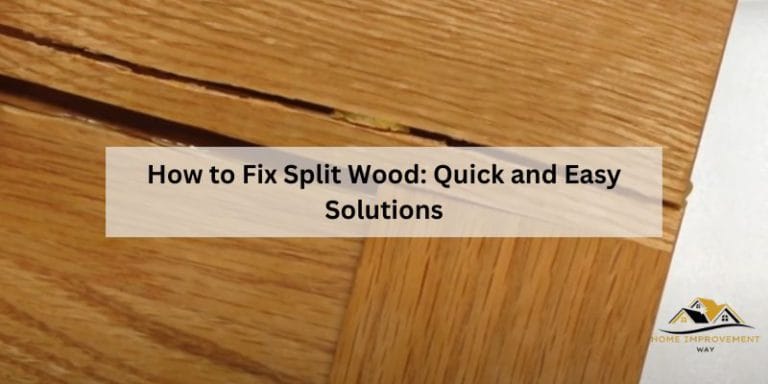
How to Repair Drywall Quickly and Easily: Expert Tips and Tricks
To repair drywall, start by preparing the damaged area and filling it with joint compound. Smooth out the surface, let it dry, and then sand it.
When it comes to repairing drywall, the process involves a few simple steps. By following these steps, you can easily fix any holes or cracks in your drywall and restore it to its original condition. We will guide you through the process of repairing drywall, from preparing the damaged area to finishing touches.
Whether you are a DIY enthusiast or a beginner, this guide will help you tackle the task effectively. So let’s get started and learn how to repair drywall like a pro.
Understanding Drywall Damage
Drywall damage can be frustrating, but with the right know-how, you can easily repair it. Learn how to fix drywall and restore your walls to their former glory.
When it comes to maintaining your home, it’s important to understand the different types of damage that can occur to your drywall. Knowing the causes of these damages will help you take the necessary steps to repair them effectively. In this section, we will explore the common types of drywall damage and their causes.
Common Types Of Drywall Damage
Drywall damage can vary in severity, from minor cracks to larger holes. Below are the most common types of drywall damage you may come across:
1. Cracks: Cracks are one of the most common types of drywall damage. They can be small hairline fractures or larger, more significant cracks that extend across the wall. Cracks can occur due to settling, temperature changes, or improper installation.
2. Nail Pops: Nail pops are when the heads of nails or screws start to protrude through the drywall surface. They can be caused by the natural shifting and settling of your home or improper installation.
3. Holes: Holes in drywall can range from small punctures to large openings. They can be caused by accidents, furniture impacts, or even pests.
4. Water Damage: Water damage is a common issue, especially in areas prone to high humidity or leaks. It can cause the drywall to become soft, discolored, or even moldy.
Causes Of Drywall Damage
Understanding the causes of drywall damage is crucial in order to prevent future issues. Here are some of the most common causes of drywall damage:
1. Settlement: As a house settles over time, it can cause stress on the drywall, resulting in cracks and nail pops. This settling can be natural or caused by changes in the foundation.
2. Poor Installation: Drywall that has been improperly installed is more likely to experience damage. This could include using insufficient screws or nails, inadequate joint compound application, or incorrect taping techniques.
3. Accidents: Accidents happen, and sometimes they involve your walls. Holes can be created from a swinging door, moving furniture, or even an energetic game indoors.
4. Moisture: Exposure to excessive moisture can cause drywall to deteriorate. This can occur from leaky pipes, roof leaks, or even high humidity levels in bathrooms or kitchens.
Understanding the common types and causes of drywall damage is the first step in addressing the issues you may encounter in your home. In the next section, we will delve into the step-by-step process of repairing different types of drywall damage.
Tools And Materials For Repair
Repairing drywall doesn’t have to be a daunting task, especially when you have the right tools and materials at your disposal. Whether you’re tackling small holes or larger cracks, having the essential tools and recommended materials will make the process quick and easy. In this section, we will cover the must-have tools for drywall repair and the materials that will help you achieve a seamless finish.
Essential Tools For Drywall Repair
When it comes to repairing drywall, having the right tools will significantly simplify the project. Here are some essential tools you’ll need:
- A utility knife: This tool will allow you to score and cut the drywall accurately.
- A putty knife: Ideal for applying joint compound and smoothing out any imperfections.
- A drywall saw: If you need to cut larger sections of drywall, a drywall saw is a must-have.
- Sandpaper: Essential for smoothing out the patched areas and achieving a seamless finish.
- A mud pan: This handy tool is perfect for holding joint compound while you’re working.
- A drywall screwdriver: Specifically designed for inserting and securing drywall screws.
- Tape measure: To ensure precise measurements when cutting and installing drywall patches.
- A sanding block: Makes sanding easier and more efficient, giving you a smooth surface to work with.
Recommended Materials For Quick And Easy Repair
To ensure a quick and easy drywall repair, it’s important to have the right materials on hand. Here are some materials that can help you achieve a seamless finish:
- Drywall joint compound: Used for filling cracks, seams, and holes in the drywall.
- Drywall tape: Reinforces joints and prevents cracks from reappearing.
- Drywall screws: Essential for securing the drywall patches in place.
- Self-adhesive mesh patch: Ideal for repairing small holes and cracks.
- Primer: Preparing the repaired area with primer ensures a smooth and even paint finish.
- Paint: Choose a paint color that matches your existing wall to complete the repair seamlessly.
With these essential tools and recommended materials, you’ll be well-equipped to tackle any drywall repair job. By following the proper techniques and using the right supplies, you can achieve professional-looking results without the hassle. Stay tuned for the next section where we’ll guide you through the step-by-step process of repairing drywall.
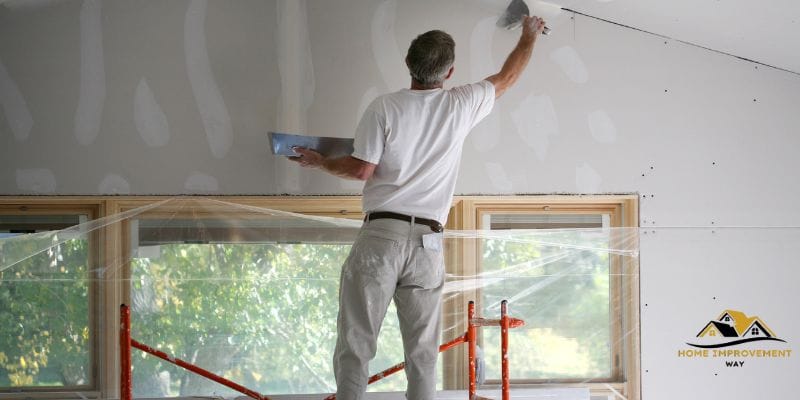
Step-by-step Drywall Repair Process
Repairing drywall may seem intimidating, but with the right tools and a step-by-step process, you can restore your damaged walls to their former glory. In this article, we will guide you through the entire drywall repair process, from preparing the damaged area to priming and painting the patch.
Preparing The Damaged Area
Before you can begin repairing your drywall, you need to properly prepare the damaged area. Here’s how:
- Start by removing any loose or damaged drywall material using a utility knife or a caulk removal tool.
- Ensure the area is clean and free from dust and debris by thoroughly wiping it down with a damp cloth.
- If there are any holes or gaps, fill them with a quick-setting joint compound, using a putty knife to smooth it out.
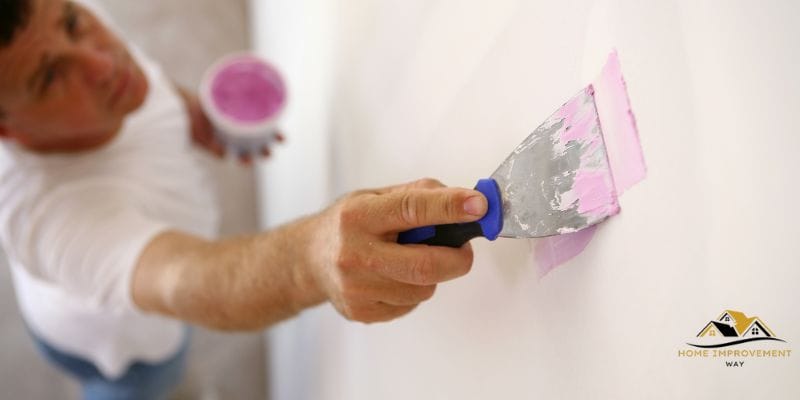
Applying The Patching Compound
Once the damaged area is prepared, you can begin applying the patching compound to restore the integrity of the drywall:
- Take a self-adhesive mesh patch and place it over the damaged area, ensuring it covers the entire hole or crack.
- Apply a thin layer of joint compound over the mesh patch, using a putty knife to spread it evenly.
- Allow the compound to dry completely, typically overnight, before moving on to the next step.
Sand And Smoothen The Repaired Area
After the patching compound is dry, it’s time to sand and smoothen the repaired area:
- Use a fine-grit sandpaper or a sanding block to gently sand the repaired area, feathering the edges as you go.
- Wipe down the area with a clean cloth to remove any dust or debris.
- Inspect the repaired area to ensure it is smooth and flush with the surrounding drywall. If necessary, repeat the sanding process until you achieve a seamless finish.
Priming And Painting The Patch
The final step in the drywall repair process is priming and painting the patch to match the rest of the wall:
- Apply a coat of primer to the repaired area using a paint roller or brush, ensuring complete coverage.
- Allow the primer to dry according to the manufacturer’s instructions.
- Once the primer is dry, you can paint the patch using a paint color that matches the rest of the wall.
- Apply one or two coats of paint, allowing each coat to dry before adding the next.
- Inspect the area to ensure the repair is seamless and blends in with the surrounding wall.
By following this step-by-step drywall repair process, you can effectively repair any damage to your walls and create a smooth, flawless finish. Remember, practice makes perfect, so don’t be discouraged if your first attempt isn’t perfect. With time and experience, you’ll become a pro at repairing drywall!
Conclusion
Damaged drywall can be a pesky problem to deal with, but with the right knowledge and tools, you can easily repair it yourself. By following the step-by-step instructions in this blog post, you’ll be able to fix those unsightly holes and cracks in no time.
Remember to take your time, be patient, and always prioritize safety. With a little effort, your drywall will be looking good as new!