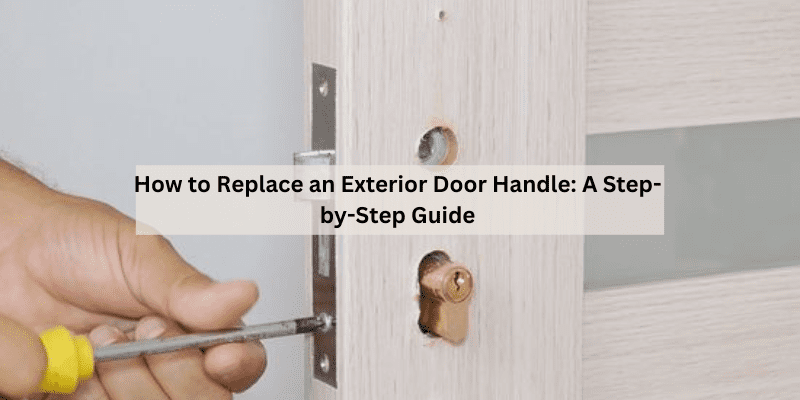
How to Replace an Exterior Door Handle: A Step-by-Step Guide
Hey there! So, you’re thinking about replacing the exterior door handle on your car? I get why you’d want to tackle this yourself. A couple of years ago, the handle on my old sedan started sticking, and I was tired of wrestling with it every time I wanted to get in.
I decided to roll up my sleeves and replace it myself, and let me tell you, it was way easier than I thought! Not only did I save some cash, but I also felt like a bit of a car hero. In this guide, I’m going to walk you through how to replace an exterior door handle step by step, sharing everything I’ve learned from my own experience. Whether you’re a DIY newbie or a seasoned gearhead, this article is written for folks across the USA who want to fix their car door handle without breaking a sweat. Let’s dive in and get that handle working like new!
Why Replace an Exterior Door Handle?
Let’s start with why you might need to replace your car’s exterior door handle. For me, it all started when my driver’s side handle got loose and felt like it was going to snap off. Over time, handles can wear out, crack, or just stop working smoothly. Maybe the handle feels stiff, or it doesn’t open the door properly anymore. Sometimes, it’s just about looks—if your handle is faded or scratched, a new one can freshen up your car’s appearance.
I also learned that a broken handle isn’t just annoying; it can be a security issue. If the handle doesn’t work right, it might make it easier for someone to mess with your car, or worse, it could trap you inside in an emergency. Replacing it yourself is a great way to save money—dealerships and mechanics can charge a pretty penny for this job. Plus, it’s a satisfying project that makes you feel like you’ve got your car under control.
Tools and Materials You’ll Need
Before we get started, let’s talk about what you’ll need. I made the mistake of diving into my first handle replacement without all the tools ready, and I ended up running to the garage mid-project. Here’s what you’ll need to make this smooth:
- New exterior door handle: Make sure it’s the right one for your car’s make, model, and year. I got mine online after checking my car’s manual.
- Screwdrivers: A Phillips and a flathead screwdriver for removing screws and prying off panels.
- Socket wrench set: Usually, a 10mm socket works for most cars, but check your model.
- Trim removal tool: This plastic tool helps pop off the door panel without scratching anything. I used a flathead screwdriver once, but it left a small mark.
- Torx bits or Allen keys: Some cars use these for specific screws.
- Gloves: To keep your hands clean and avoid cuts from sharp edges.
- Optional: A small flashlight, painter’s tape (to protect the paint), and a towel to catch any dropped screws.
I always double-check that the replacement handle matches my car. For my 2008 Honda Civic, I found an OEM (original equipment manufacturer) handle that fit perfectly. If you’re not sure, check your car’s manual or call the parts store to confirm.
Understanding Your Car’s Door Handle Assembly
Before you start, it helps to know what’s inside your car door. When I first popped off my door panel, I was surprised by how many parts were hiding in there! The exterior door handle is connected to a latch mechanism inside the door. When you pull the handle, it moves a rod or cable that releases the latch, letting the door open. Over time, the handle or the linkage can wear out, causing issues.
Here’s a quick breakdown of the key parts:
| Part | What It Does |
|---|---|
| Exterior Door Handle | The part you pull to open the door. It’s usually plastic or metal. |
| Latch Mechanism | The internal system that locks or unlocks the door when the handle is pulled. |
| Linkage Rod or Cable | Connects the handle to the latch, transferring the motion to open the door. |
| Door Panel | The interior cover you’ll need to remove to access the handle assembly. |
| Clips and Screws | Hold the door panel and handle in place. Be careful not to lose these! |
When I opened my car door, I saw a plastic vapor barrier protecting the inner workings. You’ll need to carefully remove or peel it back to get to the handle. Knowing these parts made the process less intimidating for me.
Preparing for the Replacement
Okay, let’s get ready to replace that handle. First, park your car on a flat surface and turn off the ignition. I always disconnect the car battery’s negative terminal to avoid any electrical issues, especially if your door has power windows or locks. Just loosen the negative cable with a wrench and set it aside.
Next, gather all your tools and the new handle. I like to lay everything out on a towel so I don’t lose anything. Open the car door you’re working on—it’s easier to access the panel when it’s fully open. If you’re worried about scratching the paint, put some painter’s tape around the handle area. I did this on my Civic, and it saved me from a few accidental nicks.
Finally, check your car’s manual or look up your model online to see if there are any specific quirks. Some cars, like certain Fords, have hidden screws that can trip you up if you don’t know where to look.
Step-by-Step Guide to Replacing the Exterior Door Handle
Now, let’s get to the good stuff—replacing that handle! I’ll walk you through the steps I followed to replace the driver’s side handle on my Civic. It took me about an hour the first time, but now I could probably do it in 30 minutes. Here’s how to do it:
Step 1: Remove the Interior Door Panel
Start by removing the interior door panel to access the handle assembly. Look for screws around the panel—check near the armrest, door handle, and along the edges. On my Civic, there were three screws: one behind a small cover near the handle, one under the armrest, and one at the bottom of the panel.
Use a Phillips screwdriver to remove the screws and set them aside in a safe spot. I put mine in a small cup so they wouldn’t roll away. Next, use a trim removal tool or flathead screwdriver to gently pop off the panel. Start at the bottom and work your way around, releasing the plastic clips. Be patient—those clips can be stubborn! Once the panel is loose, lift it up and off the door. If your car has power windows or locks, disconnect the wiring harnesses carefully.
Step 2: Peel Back the Vapor Barrier
Inside the door, you’ll see a plastic sheet called the vapor barrier. It protects the door’s internals from water. I carefully peeled mine back, starting at one corner, to expose the handle assembly. Don’t rip it—you’ll need to reattach it later. I used some tape to hold it out of the way while I worked.
Step 3: Remove the Old Door Handle
Now you can see the handle assembly. On most cars, the exterior handle is held in place by a couple of bolts or screws, usually 10mm. Look for them near the handle on the inside of the door. On my Civic, there were two bolts and a small clip holding the handle.
Use a socket wrench to remove the bolts. Then, find the linkage rod or cable connecting the handle to the latch. It might be a metal rod with a clip or a plastic connector. I had to wiggle the clip off with a flathead screwdriver. Once the linkage is disconnected, push the handle out from the inside. It should pop out of the door. If it’s stuck, check for any hidden screws or clips.
Step 4: Install the New Door Handle
Take your new handle and slide it into the slot where the old one was. Make sure it sits flush against the door. From the inside, reconnect the linkage rod or cable to the new handle. I found it helpful to test the connection by pulling the handle gently to make sure it moves the latch.
Secure the handle with the bolts or screws you removed earlier. Tighten them snugly, but don’t overtighten—I made that mistake once, and it made the handle feel stiff. If your handle came with a new gasket or seal, make sure it’s properly aligned to keep water out.
Step 5: Reattach the Vapor Barrier and Door Panel
Once the handle is secure, put the vapor barrier back in place. I pressed mine down firmly to make sure it stuck. If it’s damaged, you can use some automotive sealant to patch it up. Then, reattach the door panel. Line up the clips and push the panel into place until you hear them snap. Reconnect any wiring harnesses for power windows or locks, then screw in the panel screws.
Step 6: Test the New Handle
Close the door and test the handle from the outside. Pull it to make sure it opens the door smoothly. Lock and unlock the door with your key or remote to check the latch. When I tested mine, it felt so much better than the old, wobbly handle! If anything feels off, double-check the linkage or bolts inside the door.
Troubleshooting Common Issues
Sometimes, things don’t go perfectly. Here are some issues I ran into and how I fixed them:
- Handle Feels Loose: If the new handle wiggles, the bolts might not be tight enough. I went back and tightened mine a bit more, which solved it.
- Door won’t open: This usually means the linkage isn’t connected properly. I had to reopen the panel and make sure the rod was clipped in correctly.
- Panel won’t Snap Back On: If the clips aren’t lining up, you might have bent one. I replaced a broken clip with a spare from an auto parts store.
- Key Won’t Turn: If the lock cylinder is part of the handle, make sure it’s properly aligned. I had to adjust mine slightly to get the key to work smoothly.
If you’re stuck, check online forums or videos for your specific car model. I found a YouTube video for my Civic that showed me exactly where a hidden screw was hiding.
Tips for a Successful Replacement
Here are some tricks I learned to make the process easier:
- Work in a Clean Space: Lay down a towel to catch screws or clips. I dropped a screw once and spent 10 minutes looking for it!
- Take Pictures: Snap a photo of the door panel and linkage before you start. It helped me remember where everything went.
- Be Gentle with Clips: Door panel clips break easily. I used a trim tool to avoid snapping them.
- Check the Handle Fit: Before tightening everything, make sure the handle sits flush and moves freely.
- Test Early and Often: Test the handle and lock at each step to catch problems early.
Why DIY Matters
Replacing a door handle yourself isn’t just about saving money—it’s about taking control of your car’s maintenance. When I fixed my handle, I felt a sense of pride knowing I didn’t need to rely on a mechanic. Plus, it gave me confidence to tackle other small repairs, like changing my car’s air filter or brake pads. A new handle also makes your car look and feel better, which is a win for both function and style.
Maintaining Your New Door Handle
To keep your new handle working smoothly, a little maintenance goes a long way. I spray a bit of silicone lubricant into the lock cylinder every six months to prevent sticking. I also check the handle and screws periodically to make sure nothing’s loose. If you live in a snowy or salty area, rinse the handle occasionally to prevent corrosion—my friend in Michigan learned this the hard way when his handle rusted.
A Personal Story
When I replaced my door handle, I was nervous I’d mess something up. But once I got the panel off and saw how simple the setup was, I realized it was just a matter of following the steps. The best part? When my neighbor saw my new handle, he asked me to help him replace his. We had a blast working on it together, and now I’m the go-to guy in my cul-de-sac for car door fixes!

Conclusion
Replacing an exterior door handle is a totally doable DIY project, even if you’re not a car expert. From popping off the door panel to installing the new handle, each step is straightforward if you take your time and stay organized. I’ll never forget the satisfaction of opening my car door with a shiny new handle that worked perfectly—no more jiggling or struggling! Whether you’re fixing a broken handle or just upgrading for looks, this project is a great way to save money and boost your car’s functionality. So, grab your tools, pick up that replacement handle, and get to work. You’ll be amazed at how easy it is to make your car feel like new again. Here’s to smooth-opening doors and the pride of a job well done!
FAQs
What tools do I need to replace an exterior door handle?
You’ll need a Phillips and flathead screwdriver, a socket wrench (usually 10mm), a trim removal tool, and maybe some Torx bits or Allen keys. Gloves and a towel for screws are handy too.
How long does it take to replace a car door handle?
It usually takes about 45 minutes to an hour for a first-timer. I got faster with practice and can do it in about 30 minutes now.
Can I replace the handle on any car model?
Yes, but you need the right handle for your car’s make, model, and year. Check your manual or with the parts store to confirm.
What if the new handle doesn’t work properly?
Check the linkage connection inside the door. If it’s loose or misaligned, reattach it. Also, make sure the bolts are tight but not overtightened.
Do I need to disconnect the car battery?
It’s a good idea if your door has power windows or locks. I disconnect the negative terminal to avoid any electrical issues while working.