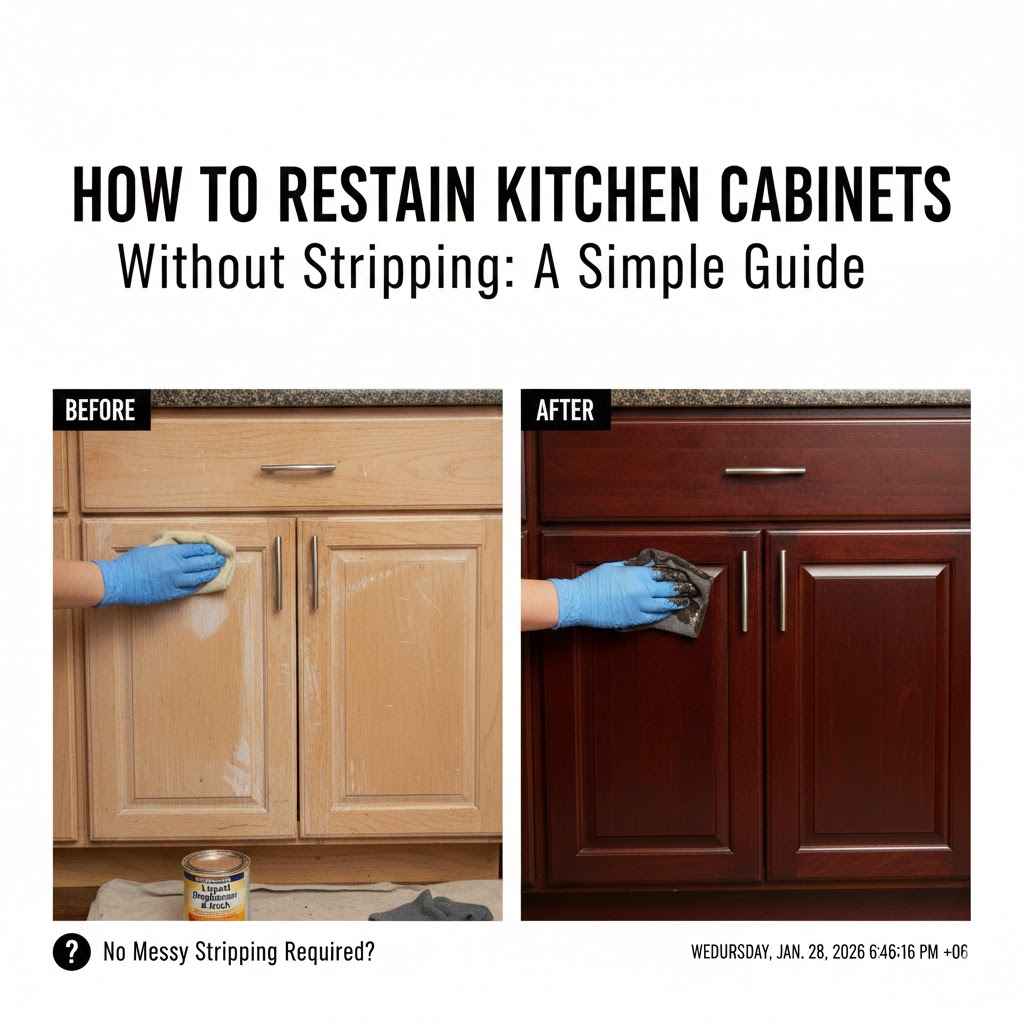
How to Restain Kitchen Cabinets Without Stripping: A Simple Guide
Thinking about updating your kitchen cabinets? You’re not alone! Many people want to give their kitchens a fresh look, and restaining the cabinets is a great way to do it. The idea of How to Restain Kitchen Cabinets Without Stripping can seem a little tricky, especially if you’re new to home projects. You might worry about making a mistake or not getting the results you want. But don’t worry! This guide will make the process simple and achievable. We’ll explore a straightforward, step-by-step method that avoids the time-consuming and often messy stripping process. Let’s get started!
Prepare Your Cabinets For Restaining
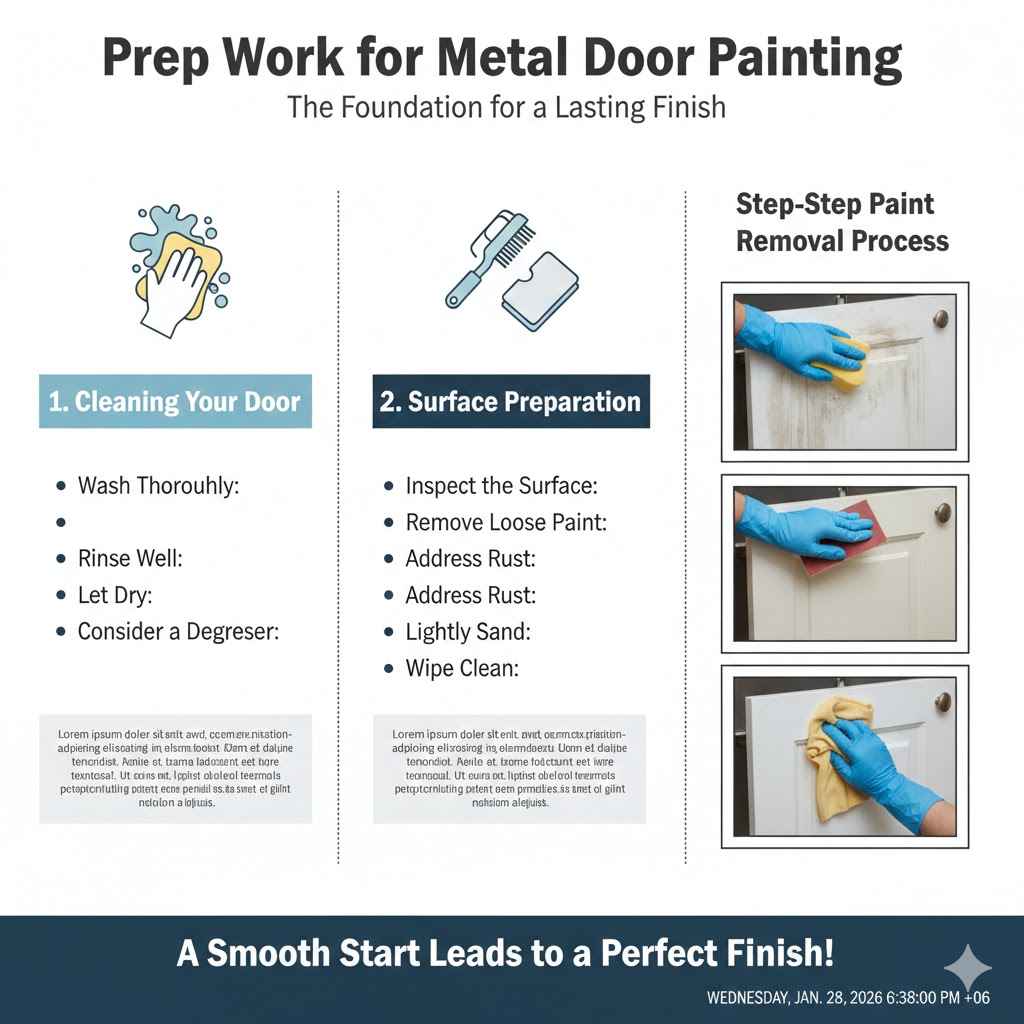
The first step in any successful restaining project is to get your cabinets ready. This involves a few key stages that ensure the new stain adheres properly and gives you the best possible outcome. This phase focuses on cleaning, degreasing, and lightly sanding the existing finish. It’s important to do this carefully so the new stain will look even and last a long time. These preparation steps are important for getting rid of any dirt, grease, or old finishes that might stop the stain from sticking correctly. This is your foundation for achieving beautiful, long-lasting results. Taking your time here makes all the difference.
Cleaning and Degreasing Cabinets
Before you even think about sanding or staining, your cabinets need a good cleaning. Kitchen cabinets can collect a lot of grime over time, from cooking splatters to everyday dust and fingerprints. It’s important to remove all this before you start. Use a degreasing cleaner specifically made for kitchen surfaces. This will get rid of any oily residue that might prevent the stain from adhering correctly. Clean the cabinets thoroughly, paying attention to areas around handles and frequently touched spots. Rinse with clean water and let the cabinets dry completely.
- Gather Your Supplies: Get your cleaning supplies, including a degreaser, a few soft cloths or sponges, and a bucket of clean water. Avoid using harsh chemicals that could damage the wood.This is your initial step. You are selecting the proper tools to ensure that the process is as easy as possible. You should avoid any products with harsh chemicals.
- Apply the Degreaser: Spray or apply the degreaser to a cloth or sponge, not directly onto the cabinets. This will help you control the amount and prevent dripping.Using a cloth or sponge to apply the cleaner will ensure you do not use too much. It is important to work slowly and be careful.
- Wipe Down the Cabinets: Wipe down each cabinet surface, including the fronts, sides, and any decorative details. Pay attention to areas with grease build-up.This is where you make sure you clean all parts of the cabinet. This ensures a clean surface ready for the next step.
- Rinse Thoroughly: After cleaning, rinse the cabinets with clean water to remove any remaining cleaner residue. Use a clean cloth or sponge to wipe them down.Remove any remaining residue from the cleaning. It’s essential to remove any cleaning residue as it could affect the stain’s adherence.
- Allow to Dry: Let the cabinets dry completely. The drying time can vary depending on the humidity and temperature of your space. Do not move on until they are completely dry.This drying process is essential before sanding to ensure the wood does not absorb water. The moisture can affect your staining.
Light Sanding for Better Adhesion
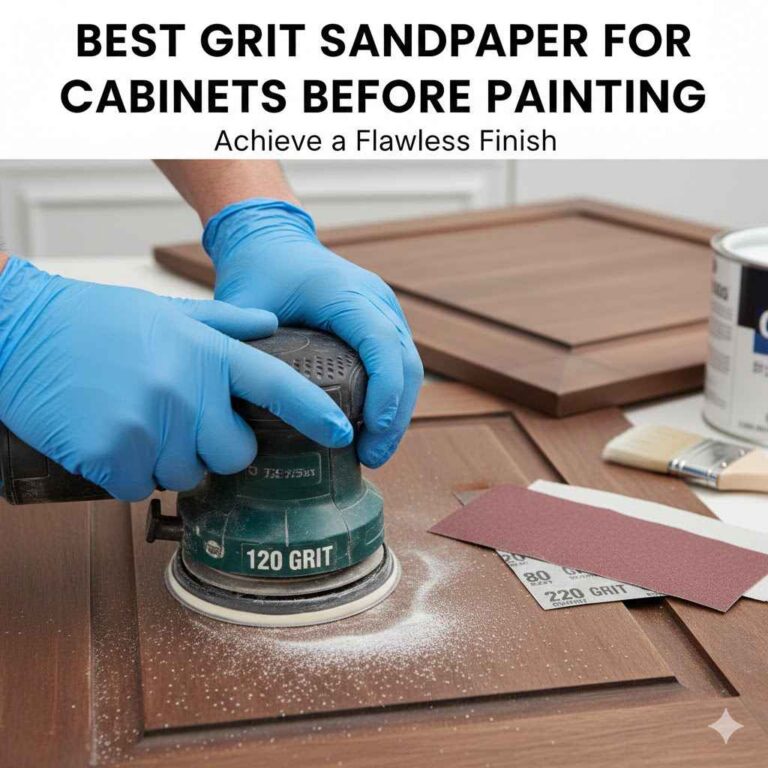
Once your cabinets are clean and dry, it’s time for sanding. This is a very light sanding, just enough to scuff up the surface and help the new stain stick. You don’t want to remove the existing finish completely, just create a slightly rough surface. Use fine-grit sandpaper (around 220-grit) and sand in the direction of the wood grain. This process opens up the wood’s pores and provides better grip for the stain. You can use a sanding block or a random orbital sander. Just be careful not to sand through to the bare wood if the existing finish is thin. After sanding, wipe away all dust with a tack cloth or a clean, damp cloth.
- Choose the Right Sandpaper: Select fine-grit sandpaper (220-grit or higher). This will gently scuff the surface without removing too much of the existing finish.Choosing the right grit is key to success. A fine grit ensures a good surface for the stain to bond to without damaging your original finish.
- Sand in the Direction of the Grain: Always sand in the direction of the wood grain. This helps prevent scratches that can be visible after staining.Sanding with the grain of the wood prevents any unwanted imperfections from showing after you stain the cabinets.
- Use a Sanding Block or Sander: A sanding block gives you more control and helps you apply even pressure. A random orbital sander is faster but can be too aggressive if you’re not careful.Both tools will get the job done. Depending on your preference, you can choose the best tool to make your sanding project easy.
- Sand Lightly: The goal isn’t to remove the existing finish completely, just to scuff it up. Apply light pressure to avoid sanding through to the bare wood.Remember, the goal of this step is just to create a surface for the new stain to bond to. Therefore, light sanding is the way to go.
- Wipe Away Dust: After sanding, wipe away all dust with a tack cloth or a clean, damp cloth to ensure a smooth surface for staining.Removing dust is an important step. Dust interferes with the staining process, and you should always remove any particles.
Why Is Proper Preparation Important?
Why do we go through all this preparation? Proper cleaning and sanding are vital to achieving a long-lasting, professional-looking finish. When you skip these steps, the stain may not adhere properly, leading to uneven coverage, peeling, or chipping over time. Good preparation creates a bond between the stain and the wood, and helps it sink into the surface. According to a study by the National Kitchen & Bath Association, professional cabinet refacing and refinishing have increased in popularity by 15% in the last 5 years. This increase highlights the growing importance of proper cabinet care and restoration.
Choosing the Right Stain and Materials
Picking the correct stain and materials is important for the success of your project. The color, type of stain, and the right tools make a big difference in how your cabinets look. Think about the style of your kitchen, the kind of wood your cabinets are made of, and the level of durability you want. The right stain will enhance the wood’s natural grain and give you the look you want, while the right tools will make the work easier. Exploring your options and gathering quality supplies is a great way to guarantee a beautiful result.
Types of Stains and Their Advantages
There are many stain options, so you can pick the one that best suits your needs and the look you want. Some popular choices include gel stains, oil-based stains, and water-based stains. Each type of stain has its own advantages and works a bit differently. Choosing the right stain means thinking about your cabinets and the look you’re going for. Do some research and think about what you are going for with your cabinets.
- Gel Stain: Gel stains are thick and work well on vertical surfaces. They are less likely to drip and are great for covering older finishes. They’re good at providing a consistent color and are generally easier for beginners to use.Gel stains are excellent for beginners because they are easy to control and less likely to drip.
- Oil-Based Stain: Oil-based stains soak into the wood well and provide rich, deep colors. They’re known for their durability and good coverage. They do take longer to dry and have a stronger smell, so good ventilation is important.Oil-based stains are known for their lasting qualities and the deep color they offer. However, ensure that you provide proper ventilation.
- Water-Based Stain: Water-based stains dry faster than oil-based stains and have a lower odor. They’re available in a wide range of colors and are easy to clean up with water. They often raise the wood grain more, so extra sanding may be required.Water-based stains are a good choice if you prefer quicker drying and easy cleanup, but be prepared for extra sanding.
- Penetrating Stain: Penetrating stains go into the wood and let the natural grain show through. They’re good for getting that classic wood look and can be very durable.Penetrating stains are good if you want the natural grain to show through.
- Solid Color Stain: Solid color stains are like paint and hide the wood’s grain. They are great for covering up imperfections and offering a uniform color.Solid color stains offer a uniform color and are suitable for covering imperfections.
Essential Tools and Supplies
Having the right tools is important for achieving a professional finish. Here’s what you’ll need: stain (of course!), applicators (like brushes, foam pads, or rags), painter’s tape, drop cloths, and safety gear. The tools you choose should match the stain you’re using. Brushes work best with oil-based stains, while foam pads or rags can be good for water-based or gel stains. Protecting your workspace with drop cloths and wearing gloves and a mask will help keep things clean and safe.
- Stain Applicators: High-quality brushes, foam brushes, or lint-free rags. The best choice depends on the type of stain you’re using.The applicator can affect your finish. Be sure to pick the right one for your stain type.
- Painter’s Tape: Use painter’s tape to protect any areas you don’t want to stain, like the inside of the cabinets or surrounding walls.Protecting areas where you do not want to stain will help avoid accidents and mistakes.
- Drop Cloths: Protect your floors and work surfaces from drips and spills. Use plastic or canvas drop cloths.Drop cloths help you keep your work area tidy and protect your floors.
- Gloves and a Mask: Wear gloves to protect your hands and a mask to avoid inhaling stain fumes. Safety first!Safety is key, and it is important to protect yourself from stains and fumes.
- Sandpaper: Fine-grit sandpaper (220-grit or higher) for prepping the surface. This is important for preparing your cabinets for the stain.Using the proper sandpaper will give you a good base for your stain and will help it adhere correctly.
How to Restain Kitchen Cabinets Without Stripping
Now, let’s go over the actual steps for How to Restain Kitchen Cabinets Without Stripping. We’ll start with the steps we just discussed – prep, and cleaning, then get into the staining process. By following these steps carefully, you’ll be well on your way to beautiful, restained cabinets without the hassle of stripping.
Applying the Stain Evenly
Getting a smooth, even finish is important. When applying the stain, remember to work in the direction of the wood grain. This ensures that the stain is absorbed evenly and the grain pattern is maintained. Don’t apply too much stain at once; thin, even coats are key to a beautiful result. Be careful not to leave puddles or drips. If you see any, wipe them up right away. This will help you get a professional look.
- Stir the Stain: Before you start, stir the stain thoroughly to make sure the color is consistent. Don’t shake it, as this can create bubbles.Stirring your stain is crucial to ensure an even color.
- Apply Thin, Even Coats: Use a brush, foam pad, or rag to apply the stain in thin, even coats. Avoid applying too much stain at once.Thin coats are important to prevent drips and ensure the stain soaks into the wood properly.
- Work with the Grain: Apply the stain in the direction of the wood grain. This helps maintain the natural look of the wood and ensures even absorption.The grain of the wood provides its natural character, so following its pattern is important for an attractive finish.
- Wipe Away Excess: If the stain instructions recommend it, wipe away any excess stain after a few minutes. This prevents the stain from becoming sticky or uneven.Wiping away excess stain helps to keep the finish smooth and prevent a sticky texture.
- Check for Drips: Be mindful of drips and runs, especially on vertical surfaces. Wipe them up immediately.Drips and runs can ruin the look of your cabinets, so catch them early.
Allowing the Stain to Dry and Cure Properly
Patience is important for this part. After applying the stain, the cabinets need time to dry completely. The drying time depends on the type of stain and the environmental conditions, so read the label. Once the first coat is dry, you might want to apply a second coat for a deeper color or to even out the finish. After the final coat, let the cabinets cure for the time recommended by the manufacturer. This curing period is when the stain hardens and becomes durable. Avoid using the cabinets during this time to prevent damage.
- Check the Label: Always follow the drying and curing times listed on the stain can. This will vary depending on the product you use.Each stain has its own instructions for drying and curing, so it’s always important to check them.
- Ensure Good Ventilation: Good ventilation helps the stain dry faster and reduces the strong fumes. Open windows and doors or use fans to circulate the air.Proper ventilation not only helps the stain dry but also clears away fumes.
- Apply Multiple Coats (Optional): Apply a second coat if desired, following the same application process as the first. This can deepen the color and improve the finish.Applying multiple coats will give your cabinets richer color.
- Allow to Cure: After the final coat, let the cabinets cure for the recommended time. Avoid touching or using the cabinets during this time.Curing is necessary to let the stain harden properly and to increase its durability.
- Check for Full Dryness: Before you use the cabinets, ensure they are completely dry and cured. Check by lightly touching an inconspicuous spot.It’s important to make sure the stain is completely dry before you start using your cabinets. This prevents any damage.
Sealing for Protection and Durability
Applying a protective sealant is a good idea. This step can protect the stain from everyday wear and tear and enhance the look of your cabinets. Sealants create a layer that prevents scratches, water damage, and other potential issues. They also make the cabinets easier to clean. There are different types of sealants, such as polyurethane and varnish. Apply a sealant after the stain has completely dried and cured. Follow the manufacturer’s instructions for application and drying times. This is the last step and will give you great-looking, protected cabinets.
- Choose the Right Sealer: Select a sealant that is compatible with your stain. Polyurethane and varnish are popular choices for their durability and protection.Sealants will provide an additional layer to protect your cabinets.
- Apply Even Coats: Apply the sealant in thin, even coats, using a brush or applicator recommended by the manufacturer.Be sure to apply even coats of sealant to make sure you protect all areas of your cabinets.
- Allow to Dry and Cure: Let each coat of sealant dry completely before applying the next coat. Follow the manufacturer’s instructions for drying and curing times.Drying and curing is just as important in the sealing process as it is in staining.
- Sand Lightly (Optional): Some sealants may require light sanding between coats to achieve a smooth finish. Always follow the manufacturer’s recommendations.Sanding in between the sealant applications may be necessary to give your cabinets a smoother finish.
- Final Check: Once the sealant is completely cured, inspect your cabinets. Make sure the finish is smooth, even, and provides the desired level of protection.After the sealant has been applied, give your cabinets one final look-over to make sure they are exactly what you wanted.
Real-life example: A homeowner named Sarah wanted to update her kitchen cabinets without the hassle of stripping. She used a gel stain in a dark walnut shade, which was ideal for covering the existing, outdated finish. Following the steps, she thoroughly cleaned and lightly sanded her cabinets, applied two coats of gel stain, and finished with a clear polyurethane sealant. The outcome was fantastic, and she saved both time and money. Sarah’s kitchen transformation showcases the effectiveness and simplicity of restaining, even without stripping.
Real-life example: Another homeowner, Mark, was dealing with water damage on his kitchen cabinets. Instead of replacing them, he opted to restain. After cleaning and sanding, Mark used a solid color stain to completely cover the damaged areas. After several coats of stain and a protective sealant, his cabinets looked completely new. This example highlights the capacity of restaining to resolve issues like water damage while improving the aesthetic appeal of your cabinets.
- Assess Your Existing Cabinets: Before you begin, examine your cabinets. Consider the current finish, the type of wood, and any damage. This assessment will help you select the appropriate stain and make the best decisions.Look carefully at your cabinets before starting this process. It will help you choose the best stain and the steps you want to take.
- Test Your Stain First: Before staining all your cabinets, test the stain on a hidden spot or a spare piece of wood. This lets you assess the color and ensure you like the result.Testing your stain is important to make sure it looks like you want.
- Consider Lighting: The lighting in your kitchen can impact how the stain appears. Test the stain in your kitchen to see how it looks under your lighting conditions.The lighting in your kitchen might change the way your cabinets look. Consider the lighting conditions when you make your choice.
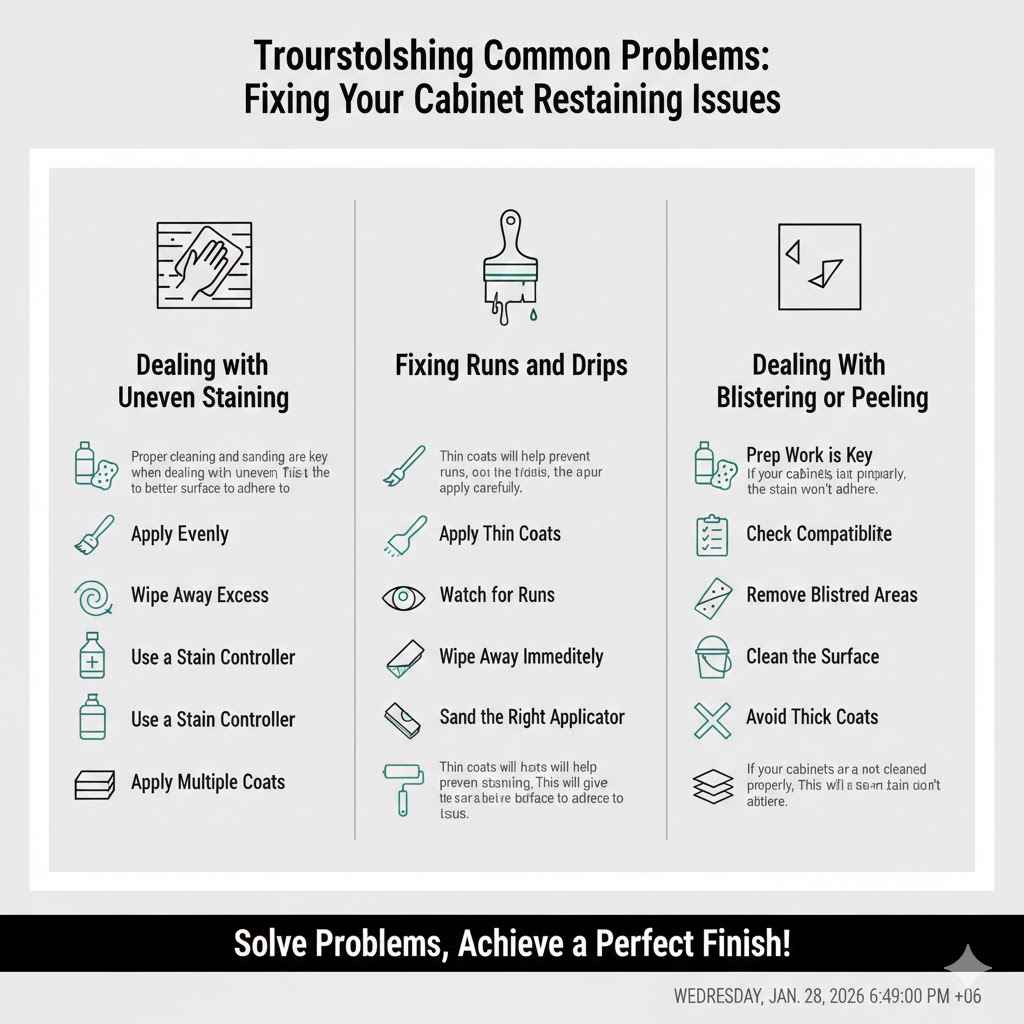
Troubleshooting Common Problems
When you’re restaining kitchen cabinets, you may run into a few issues. These problems are quite common, and knowing how to fix them will help you. We’ll go over some of the most frequent problems and how to deal with them. With a little patience and by paying attention to detail, you can handle these problems.
Dealing with Uneven Staining
Uneven staining is one of the most common issues. This might happen when the stain soaks into the wood at different rates or if the application isn’t even. The preparation is key here. Make sure your cabinets are cleaned properly, sanded evenly, and free of dust. Use consistent, even strokes and be sure to wipe away any excess stain. If the problem is still there, you might need to add another coat or apply a stain controller. With patience and care, you can fix this problem and achieve a beautiful finish.
- Preparation is Key: Ensure the surface is clean, properly sanded, and free of dust. This will improve stain absorption.Proper cleaning and sanding are key when dealing with uneven staining. This will give the stain a better surface to adhere to.
- Apply Evenly: Use consistent brush strokes and avoid applying too much stain at once. Thin, even coats help prevent uneven absorption.Even coats of stain help to ensure an even appearance.
- Wipe Away Excess: Wipe away any excess stain after a few minutes, following the product’s instructions. This prevents pooling and uneven color.Wiping away excess will give you an even finish, so be sure to follow instructions.
- Use a Stain Controller: If the wood absorbs the stain unevenly, consider using a stain controller. This helps to even out the absorption rate.A stain controller will help to improve the absorption of the stain and give you a more even finish.
- Apply Multiple Coats: Sometimes, a second coat of stain can help even out the color. Allow the first coat to dry completely before applying the second.In some cases, multiple coats of stain will give you the look you want.
Fixing Runs and Drips
Runs and drips are a natural part of staining, especially on vertical surfaces. The key is to catch them early and take action. When you see a run or drip, wipe it up immediately with a clean rag or brush. If the stain has already started to dry, you can gently sand the area after it’s dry and then apply another coat. Preventing runs and drips involves applying thin coats of stain and not overloading your brush. By watching out for these problems and fixing them quickly, you can get the best possible look.
- Apply Thin Coats: Apply the stain in thin, even coats to prevent drips and runs from forming in the first place.Thin coats will help prevent runs, so apply carefully.
- Watch for Runs: Regularly check the surface as you apply the stain, especially on vertical surfaces. This will help you catch drips immediately.Be sure to be mindful of your work while staining. This way, you can catch any issues quickly.
- Wipe Away Immediately: When you see a run or drip, wipe it away quickly with a clean rag or brush before it dries.The quicker you catch a run, the easier it is to fix it.
- Sand and Reapply: If the stain has already dried, sand the area gently and reapply a thin coat. This should blend the repair.If you miss a run, sand the area and add a coat of stain.
- Use the Right Applicator: Use a brush, foam pad, or rag suitable for the stain type. The right tool can help prevent runs.Using the right tools will make the process easier.
Dealing With Blistering or Peeling
Blistering or peeling can occur if the stain doesn’t adhere to the wood properly. This can happen if the cabinets are not cleaned or sanded well, or if the stain isn’t compatible with the existing finish. If you find blisters or peeling, you’ll need to remove the stain from those spots. You can lightly sand the areas, clean them again, and then reapply the stain and sealant. To avoid these issues, always make sure your cabinets are properly prepared before staining. Using quality products and following the steps closely will help you achieve a good-looking finish that lasts.
- Prep Work is Key: Ensure the cabinets are thoroughly cleaned, degreased, and properly sanded. This ensures better adhesion.If your cabinets are not cleaned properly, the stain won’t adhere.
- Check Compatibility: Make sure the stain is compatible with the existing finish. If you’re unsure, test on a hidden spot.Be sure to use compatible products for your project to avoid issues.
- Remove Blistered Areas: Gently sand away the blistered or peeling areas until the underlying surface is smooth.When you have issues with blistering, sand and remove the existing stain.
- Clean the Surface: After sanding, clean the surface to remove dust and residue. Reapply the stain and sealant.After you have sanded, you must clean your surface.
- Avoid Thick Coats: Apply thin, even coats to prevent the stain from building up and potentially causing adhesion problems.Avoid thick coats to prevent issues with adhesion.
According to a report from the Home Improvement Research Institute, the cabinet refinishing market has grown by 8% in the last year, proving people are choosing this solution more. This shift shows people’s willingness to invest in home improvements and their desire for cost-effective, impactful changes.
Frequently Asked Questions
Question: Do I need to remove the old finish before restaining?
Answer: No, it’s possible to restain your cabinets without removing the old finish. The key is to clean, sand, and prep the surface to ensure the new stain adheres correctly.
Question: What type of stain is best for kitchen cabinets?
Answer: Gel stains are popular for cabinets because they are less likely to drip. Oil-based stains offer rich color and durability, and water-based stains are known for their quick drying time and low odor.
Question: How much sanding is needed when restaining cabinets?
Answer: You only need to lightly sand the surface. The goal is to scuff up the existing finish to provide a good base for the new stain, not to remove the old finish completely.
Question: What kind of sealant should I use?
Answer: Polyurethane and varnish are excellent choices for sealants due to their durability and protective qualities. Always choose a sealant that is compatible with your stain.
Question: How long should I wait between coats of stain and sealant?
Answer: Always follow the manufacturer’s instructions for drying and curing times. This ensures each layer dries and hardens before the next is applied, and the finish lasts.
Final Thoughts
Restaining your kitchen cabinets without stripping is a satisfying home project. By following the easy steps described, you can achieve a new look without the difficulties of the more involved method. Remember that proper cleaning, gentle sanding, and the right stain are all key to success. Don’t forget to take your time, work methodically, and be patient.
It’s a great way to add value to your house while personalizing your space. If you’re feeling ready for a transformation, now is the perfect time to start! You can create stunning results and breathe new life into your kitchen. Embrace the process and revel in the amazing change you create.