How to Sand Concrete Flooring: Achieve a Polished Finish with These Proven Techniques
To sand concrete flooring, start by preparing the surface and cleaning it thoroughly. Use a power sander with coarse-grit sandpaper and work in small sections, moving the sander in a circular motion to remove any imperfections and smooth out the surface.
Understanding Concrete Flooring
Concrete flooring can be sanded to give it a smooth and polished finish. Learn how to sand concrete flooring effectively with these easy steps.
What Is Concrete Flooring?
Concrete flooring is a popular choice for both residential and commercial spaces due to its durability and versatility. It is made by mixing cement, sand, water, and aggregate to create a solid and strong surface. Concrete floors can be found in basements, garages, warehouses, and even polished and used as a decorative element in homes and offices. Understanding the basics of concrete flooring will help you make informed decisions when it comes to maintaining and enhancing your space.
Advantages of Concrete Flooring
Concrete flooring offers several advantages that make it a preferred option for many homeowners and business owners. By opting for concrete floors, you can enjoy the following benefits:
- Strength and Durability: Concrete floors are highly durable and can withstand heavy foot traffic, making them a long-lasting flooring option.
- Easy Maintenance: Concrete floors are low maintenance and can be easily cleaned with regular sweeping and occasional mopping.
- Versatility: Concrete floors can be customized and colored to match any design scheme, allowing for endless design possibilities.
- Cost-Effective: Concrete flooring is usually more affordable compared to other flooring options, making it a cost-effective choice.
- Environmentally Friendly: Concrete is an eco-friendly flooring material as it can be made with recycled materials and has a low impact on the environment.
Considering the many advantages that concrete flooring offers, it is no wonder that it remains a popular choice for various spaces. Whether you’re looking for a durable and easy-to-maintain flooring solution or want to add a touch of modernity to your interiors, concrete flooring can be the perfect choice for you!
Preparation For Sanding
Before you begin sanding your concrete flooring, it’s essential to properly prepare the area. This will ensure a smooth and successful sanding process. In this section, we will discuss the necessary steps you should take to clear the area, inspect for damage, repair any cracks or imperfections, and gather the equipment needed for the task. Additionally, we will address some safety precautions you should keep in mind while working on your concrete flooring.
Clearing The Area
To sand your concrete flooring effectively, you need to clear the area of any furniture, rugs, or decorative items that may obstruct the sanding process. Move them to another room or an out-of-the-way location to create a clean and clutter-free workspace. By doing this, you’ll have better access to the entire floor surface and ensure a more uniform sanding result.
Inspecting For Damage
Before diving into sanding your concrete flooring, it’s crucial to inspect the surface for any signs of damage. Look for cracks, pits, or areas of unevenness that may impact the sanding process. Take note of these areas as they will require repair before proceeding with sanding. This step is essential as sanding damaged concrete can worsen existing issues and lead to an unsatisfactory finished floor.
Repairing Cracks And Imperfections
Once you’ve identified any cracks or imperfections, it’s time to repair them. Fill any cracks or pits with an appropriate concrete filler, following the manufacturer’s instructions. For larger cracks or significant damage, consider seeking professional assistance to ensure proper repair. Smooth out the filled areas and allow them to dry completely before proceeding with the sanding process.
Equipment And Safety Precautions
Before you begin sanding your concrete flooring, gather the necessary equipment. You’ll need a floor sander with diamond-embedded abrasive disks, a dust mask or respirator, safety goggles, knee pads, and ear protection. These tools will help protect you from dust and debris, ensuring your safety while working. When operating the sander, always follow the manufacturer’s instructions and wear the appropriate protective equipment. Remember to keep the work area well-ventilated and take regular breaks to avoid fatigue.
Choosing The Right Sanding Technique
Sanding concrete flooring requires careful selection of the right technique to achieve optimal results. Discover effective methods to sand your concrete floors for a smooth and polished finish.
Surface Grinding
Surface grinding is a popular technique for sanding concrete flooring. This method involves using an industrial grinder with diamond grit attachments to smooth out the surface of the concrete.
During surface grinding, the diamond grit abrasives rotate at high speeds, grinding away the top layer of the concrete. This technique effectively removes any imperfections, stains, or unevenness, leaving you with a smooth and polished surface.
It is important to note that surface grinding is generally recommended for large areas and heavy-duty concrete floors, as it may be too aggressive for smaller projects.
Hand Sanding
If you have a smaller area to sand or require more precision, hand sanding is the ideal technique to choose. Hand sanding allows you to focus on specific spots that require attention, such as edges, corners, and tight spaces.
To hand sand concrete flooring, you will need sandpaper or sanding pads, which come in different grit sizes. Start with a coarser grit to remove any roughness or imperfections, and gradually move to finer grits for a smoother finish.
Hand sanding can be a time-consuming process, but it offers greater control and allows you to achieve the desired results in hard-to-reach areas.
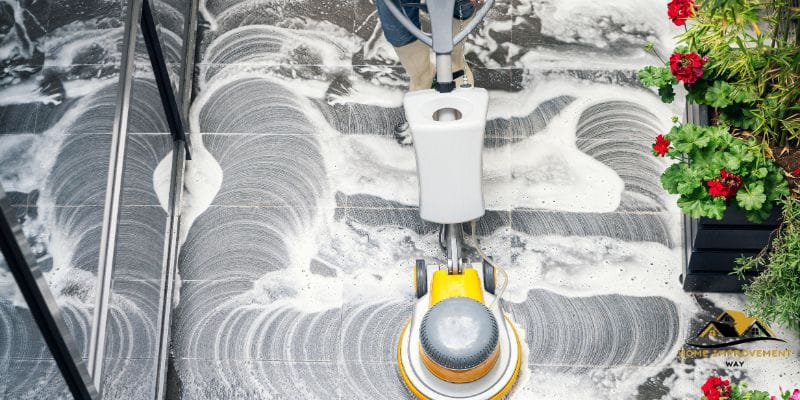
Using A Floor Sander
A floor sander is a powerful tool specifically designed for sanding large areas of concrete flooring. It consists of a large rotating drum that spins sandpaper at high speeds, effectively sanding the concrete surface.
Using a floor sander can significantly speed up the sanding process, making it ideal for larger projects. This technique ensures consistent results throughout the entire floor, giving you a smooth and even finish.
Before using a floor sander, it is important to ensure that you have the necessary safety equipment, such as ear protection and a dust mask. Additionally, be sure to follow the manufacturer’s instructions and guidelines for proper usage.
Wet Vs Dry Sanding
When it comes to sanding concrete flooring, you have the option of wet or dry sanding techniques.
Wet sanding involves spraying water onto the concrete surface while sanding, which helps to control dust and keep the surface cool. This method is commonly used to minimize dust exposure and maintain a smooth finish. However, it can take longer for the concrete to dry before further treatments or finishes can be applied.
Dry sanding, on the other hand, requires no water and allows for faster drying times. It is important to note that dry sanding generates more dust, so wearing a dust mask and ensuring proper ventilation is crucial.
Ultimately, the choice between wet and dry sanding depends on the specific requirements of your project and personal preference.

Step-by-step Sanding Process
When it comes to sanding concrete flooring, it’s essential to follow a step-by-step process to achieve the best results. By breaking down the sanding process into several stages, you can ensure a smooth and polished finish that enhances the overall look of your flooring. In this guide, we will walk you through the step-by-step process of sanding concrete flooring, from surface cleaning to buffing and polishing. So, let’s get started!
Surface Cleaning
Before you begin the sanding process, it’s important to thoroughly clean the surface of your concrete flooring. This step helps remove any debris, dirt, or loose particles that may affect the quality of the sanding. Here’s how you can clean the surface:
- Start by sweeping the floor with a broom to get rid of loose dust and dirt.
- Use a mild detergent mixed with water to mop the floor and remove any stubborn stains.
- Rinse the floor with clean water and allow it to dry completely. Drying may take 24-48 hours, so be patient.
Initial Coarse Sanding
Now that the surface is clean and dry, it’s time to start the sanding process. Initial coarse sanding helps to level the concrete floor and remove any imperfections. Follow these steps for effective initial coarse sanding:
- Equip yourself with a belt sander or floor grinder with coarse-grit sandpaper.
- Start by sanding the floor in one direction, moving from one end to the other.
- Apply even pressure and keep the sander moving to avoid uneven patches.
- Once you’ve covered the entire floor, repeat the process in the opposite direction to ensure uniformity.
- Clean the floor thoroughly to remove any dust or debris generated during the sanding process.
Intermediate Sanding
After the initial coarse sanding, it’s time to move on to intermediate sanding to further refine the surface of your concrete flooring. This step helps smooth out any rough patches left behind by the initial sanding process. Follow these steps for effective intermediate sanding:
- Switch to a medium-grit sandpaper suitable for concrete surfaces.
- Repeat the sanding process, moving in one direction and then in the opposite direction.
- Pay close attention to any uneven areas or imperfections, ensuring you sand them down appropriately.
- Clean the floor thoroughly to remove any dust or debris generated during the sanding process.
Fine Sanding
Now that the surface is relatively smoother, it’s time to move on to fine sanding. This step helps in achieving a polished and flawless finish on your concrete flooring. Follow these steps for effective fine sanding:
- Switch to a fine-grit sandpaper suitable for concrete surfaces.
- Repeat the sanding process, moving in one direction and then in the opposite direction.
- Focus on smoothing out any remaining imperfections and uneven spots.
- Clean the floor thoroughly to remove any dust or debris generated during the sanding process.
Buffing And Polishing
The final step in the sanding process is buffing and polishing your concrete flooring. This step helps to enhance the shine and smoothness of the surface, giving it a professional look. Follow these steps for effective buffing and polishing:
- Equip yourself with a floor buffer or polisher fitted with a fine-grit polishing pad.
- Apply a concrete floor polish or sealer to the pad.
- Work the buffer across the floor, moving in small circular motions.
- Ensure even coverage and pay attention to any areas that require extra polishing.
- Allow the polish or sealer to dry according to the manufacturer’s instructions.
Congratulations! You’ve completed the step-by-step sanding process for your concrete flooring. With regular maintenance and care, your polished concrete floor will continue to shine and impress for years to come.
Finishing And Maintenance
Once you have successfully sanded your concrete flooring, it is important to focus on the finishing touches and ongoing maintenance to ensure the longevity and appearance of your freshly sanded floors. In this section, we will cover two key aspects of finishing and maintaining concrete flooring: applying a sealant and regular cleaning and maintenance tips.
Applying A Sealant
Applying a sealant is a crucial step in the finishing process as it helps protect your newly sanded floors from stains, moisture, and other damage. This protective layer not only enhances the appearance of the flooring but also adds an extra layer of durability.
- Choosing the right sealant: There are different types of sealants available, including acrylic, epoxy, and polyurethane. Consider factors such as the level of foot traffic, desired sheen level, and maintenance requirements before selecting the appropriate sealant for your concrete flooring.
- Preparing the floor: Before applying the sealant, ensure that the floor is thoroughly cleaned and free from any dust or debris. If there are any cracks or imperfections, consider filling them with a suitable concrete filler and allowing it to dry completely.
- Applying the sealant: Follow the manufacturer’s instructions for the specific sealant you have chosen. Use a brush, roller, or sprayer to evenly apply the sealant, working in small sections at a time. Allow the sealant to dry as per the recommended drying time mentioned on the packaging.
Regular Cleaning And Maintenance Tips
Maintaining your sanded concrete flooring involves regular cleaning and proper care to keep it looking its best. By following these tips, you can extend the lifespan of your floors and preserve their appealing appearance:
- Regular sweeping and vacuuming: Remove loose dirt and debris by sweeping or vacuuming the floor regularly. This prevents the accumulation of abrasive particles that could scratch the surface.
- Using a neutral pH cleaner: Clean the floor using a neutral pH cleaner specifically designed for use on concrete surfaces. Avoid using harsh chemicals or acidic cleaners as they can damage the sealant and the floor itself.
- Avoiding excessive moisture: While concrete flooring is durable, it is susceptible to moisture-related issues. Promptly clean up any spills or water to prevent staining or potential damage. Use mats or rugs in areas prone to moisture, such as entryways or kitchens, to protect the floor.
- Preventing scratches: Place felt pads on the legs of furniture and avoid dragging heavy objects across the floor to prevent scratches or gouges.
- Regular inspections: Periodically inspect the flooring for any signs of wear, such as cracks or areas where the sealant has worn off. Address any issues promptly to prevent further damage.
Conclusion
To sum up, sanding concrete flooring is a vital step in enhancing its appearance and durability. By following the techniques mentioned in this post, you can achieve a smooth, level surface that is ready for staining, sealing, or any other finishing touch.
Remember to prioritize safety and use the appropriate tools throughout the process. With patience and practice, you can transform your concrete floors into stunning features that will leave a lasting impression.