How to Sew a Snap Fastener: Step-by-Step Guide
Sewing a snap fastener is simple and practical. It helps to secure fabric pieces together seamlessly.
Snap fasteners are popular in clothing, bags, and accessories. They offer a clean, professional finish that buttons cannot always provide. Knowing how to sew a snap fastener can elevate your sewing projects. It’s a valuable skill for any sewing enthusiast.
This introduction will guide you through the steps of sewing snap fasteners. Whether you are a beginner or experienced, this guide will be useful. Snap fasteners come in various sizes and materials. They add functionality and style to your creations. Learning this skill is not just about sewing. It’s about making your projects look polished and functional. So, grab your needle and thread. Let’s dive into the art of sewing snap fasteners!
Credit: www.doinaalexei.com
Choosing The Right Snap Fastener
Snap fasteners come in different types. Some are made of metal, others from plastic. Metal snaps are stronger. Plastic snaps are lighter. Choose based on your fabric. Light fabrics need light snaps. Heavy fabrics need strong snaps.
There are sew-on snaps and press-on snaps. Sew-on snaps need a needle and thread. Press-on snaps use special tools. Each type has its uses. Make sure to pick the right one.
- Snap fasteners – Choose metal or plastic.
- Needle – Use a sharp one.
- Thread – Match the fabric color.
- Scissors – For cutting thread.
- Marker – To mark snap positions.

Credit: www.youtube.com
Preparing Your Fabric
Clean fabric before sewing. Dirt can ruin your work. Wash the fabric gently. Use warm water. Dry the fabric properly. Iron the fabric flat. Remove all wrinkles. Wrinkles can be tricky. They make sewing hard. Neat fabric is easy to sew. Ironed fabric stays in place. It helps in sewing. Clean fabric looks great.
Decide where to place the snap. Use a pencil to mark the spot. Make small dots. Keep marks neat. Check the alignment. Both sides should match. Wrong placement can cause problems. Measure the distance between snaps. Ensure they are even. Double-check your marks. Accurate marks lead to better sewing.
Tools Required For Sewing Snaps
Every sewing project needs a few basic tools. A needle is the first tool you need. Make sure it’s strong. You will also need some thread. Choose a color that matches your fabric. A pair of scissors is also important. You will use it to cut the thread. Don’t forget a thimble. It protects your finger while sewing. Lastly, a ruler helps keep everything straight.
Some tools make sewing easier. A seam ripper can fix mistakes. An iron helps to press the fabric flat. A pin cushion keeps your pins organized. Fabric chalk can mark spots on fabric. And a measuring tape is useful for measuring longer pieces.
Credit: www.doinaalexei.com
Sewing The Snap Fastener
Learn to sew a snap fastener with ease. Begin by placing the snap parts on your fabric. Secure them with simple hand stitches for a sturdy hold. Enjoy the convenience of adding closures to your projects effortlessly.
Attaching The Snap Base
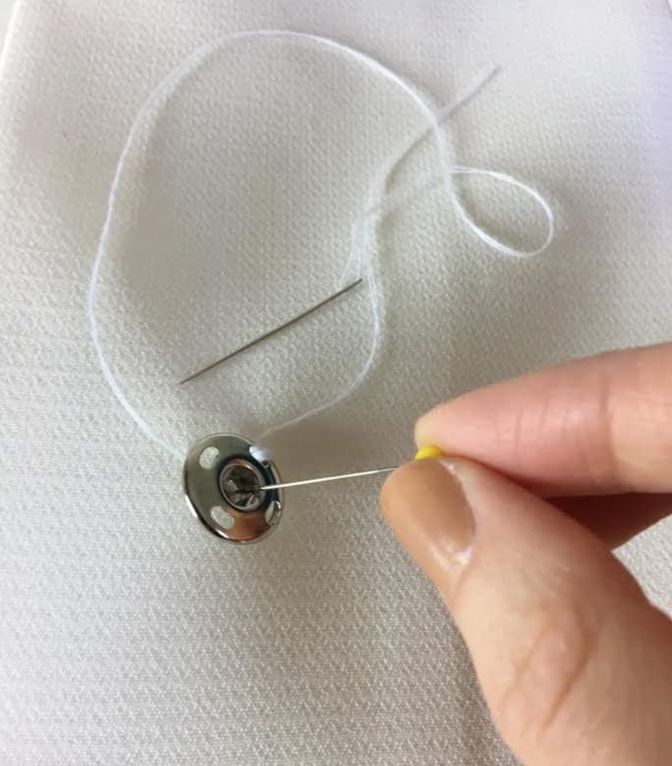
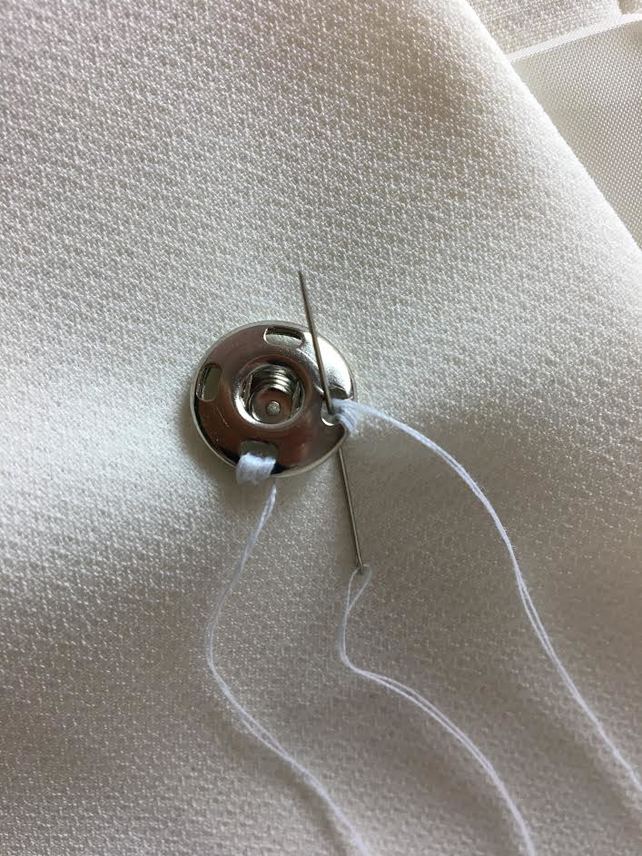
Start with the snap base. Place it on the fabric. Ensure it sits flat and centered. Use a pencil or chalk to mark the holes. Thread a needle with a matching thread. Pull the thread through each hole. Make sure it is tight and secure. Repeat this step for all holes. Check if the snap base is firmly attached.
Securing The Snap Cap
Next, take the snap cap. Align it with the snap base. Hold it in position. Mark the fabric for sewing. Use the needle and thread again. Sew through each hole tightly. Keep the stitches even and neat. Ensure the cap is securely fastened. Test by snapping the pieces together. Ensure they snap smoothly.
Testing The Snap Fastener
Ensuring Proper Functionality of your snap fastener is important. First, make sure the snaps are aligned. Close the snap and check if it fits well. If it does not, the alignment might be off. Try snapping it open and shut a few times. Listen for a clear click. This sound means the snap is working right. If it is too loose, it may fall off. If it is too tight, it might be hard to open.
Adjusting for Better Fit can be simple. If the snap is too tight, gently press around it. This can help loosen it a bit. For a loose snap, try using a small tool to press the edges in. Be careful not to damage the fabric. Testing and adjusting are key steps. They help ensure your snap fastener works well every time.
Troubleshooting Common Issues
Sewing snap fasteners can be tricky for beginners. Ensure the fabric is not too thick, allowing easy closure. Use a strong needle and thread to prevent snaps from coming loose over time.
Loose Snaps
Loose snaps can make clothes feel insecure. Check the snap size first. A snap too big might not hold well. Replace with a smaller snap if needed. Another reason might be weak stitching. Make sure stitches are tight around the snap. Use strong thread to sew the snap. Check fabric strength. Thin fabric might cause loose snaps. Reinforce fabric with extra layers. Test snaps after sewing. Ensure they click securely.
Misaligned Fasteners
Misaligned fasteners can cause frustration. Measure placement before sewing snaps. Mark spots carefully on fabric. Ensure both sides match. Use a ruler for precision. Double-check alignment before stitching. Adjust if needed. Misalignment could be due to fabric stretching. Handle fabric gently. Pin fabric securely to prevent shifts. Re-sew misaligned snaps if necessary. Check alignment after sewing. Ensure snaps close easily.
Creative Uses For Snap Fasteners
Snap fasteners are fun in fashion. They help make clothes easy to wear. Jackets, shirts, and dresses can have snaps. They replace buttons and zippers. Easy to close and open. Kids love them. They can use them on their coats. Snap fasteners are also found on bags. They make opening bags fast and simple. Designers use snaps for style. They add a fun look to clothes.
Snap fasteners are great for home decor. Use them on pillow covers. It makes washing easy. Curtains can have snaps. This makes hanging them simple. Snaps can also be on tablecloths. They keep them in place. It helps when the wind blows. Snaps can even make changing bed covers fun. They make house chores quick and fun!
Maintaining Snap Fasteners
Sewing a snap fastener requires precision and care. Start by positioning the snap on fabric, ensuring alignment. Secure it with small, tight stitches to maintain durability and functionality.
Cleaning And Care Tips
Snap fasteners need regular cleaning. Use a soft cloth to wipe them gently. This prevents dust and dirt buildup. Avoid using water as it might cause rust. For stubborn stains, a mild soap solution works well. Dry thoroughly before use. This keeps them shiny and new. Store clothes with snaps in a dry place. This reduces moisture exposure. Regular care extends their lifespan. Keep your snaps functioning perfectly.
Repairing Damaged Snaps
Sometimes snaps get loose or broken. Use a pair of pliers to tighten loose snaps. Be gentle to avoid damage. For broken snaps, replace with new ones. Carefully remove the old snap first. Align the new snap properly before fixing. Follow sewing instructions carefully. This ensures they stay secure. Always check your snaps before wearing. This prevents surprises or mishaps.
Frequently Asked Questions
How To Sew On Snap Fastenings?
Position the snap halves on fabric. Thread the needle with matching thread. Stitch through snap holes securely. Repeat for all halves. Ensure alignment for proper closure.
How To Sew A Snap With A Sewing Machine?
Use a zipper foot to sew snaps with a machine. Align snap, lower foot, and stitch around its edges. Secure by backstitching. Adjust machine tension if needed for smooth stitching. Ensure snap’s positioning is correct before sewing. This method ensures snaps are firmly attached.
What Is The Difference Between A Snap Fastener And A Press Stud?
Snap fasteners and press studs are terms for the same clothing fastener. They consist of interlocking male and female parts. Snap fasteners are commonly used in the U. S. , while press studs are popular in the UK. Both provide a secure closure for garments and accessories.
How To Attach A Snap Clip?
Open the snap clip by pressing both ends. Place the clip on hair. Snap it shut to secure it.
Conclusion
Sewing a snap fastener can be simple with practice. First, gather your materials. Next, follow the steps carefully. Take your time with each stitch. Precision matters for a secure fit. A well-sewn snap enhances your garment’s function. With patience, sewing becomes easier.
Soon, you’ll sew snaps like a pro. Experiment with different fabrics. Try various snap types. Keep improving your skills. Each project boosts confidence. Sewing is rewarding and creative. You make everyday clothes unique. Enjoy the process and the results. Crafting takes dedication and practice.
Happy sewing!