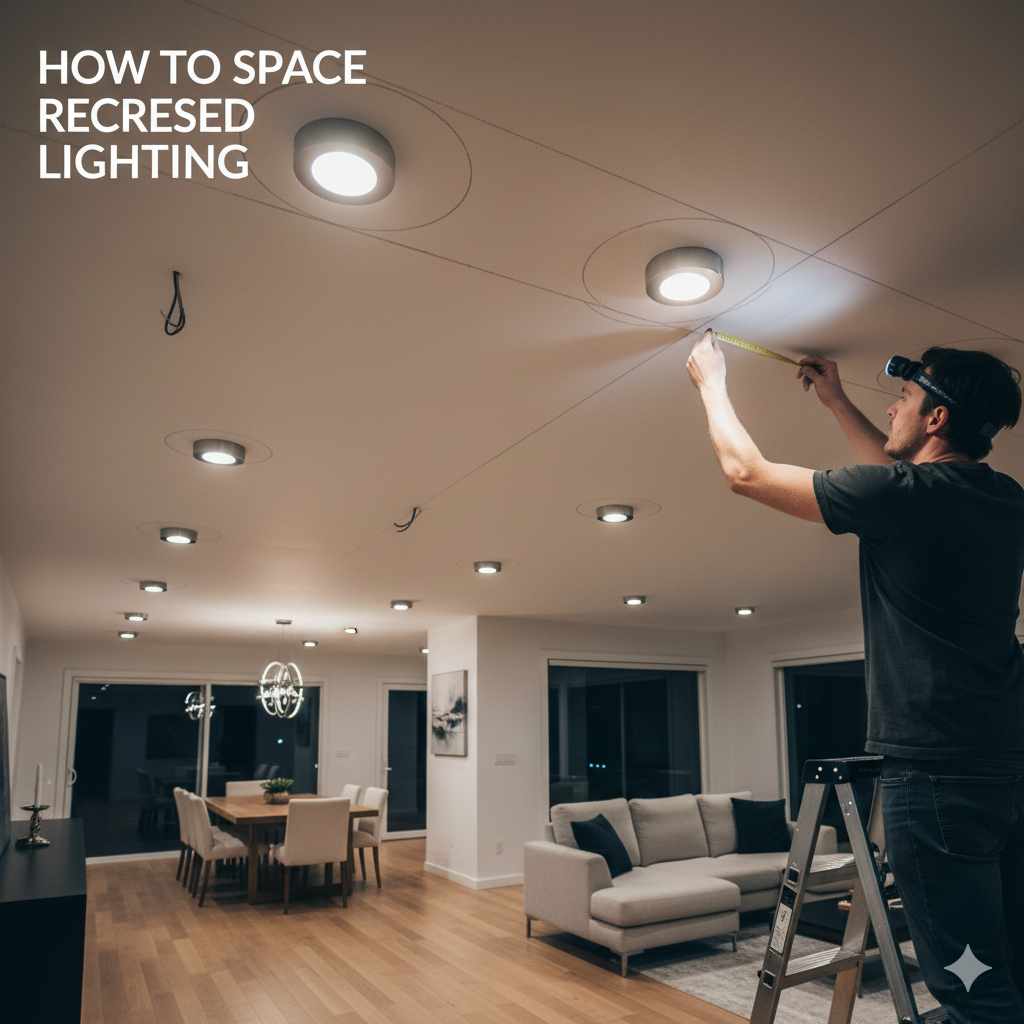
How To Space Recessed Lighting: Essential Guide
Quick Summary:
Spacing recessed lighting is simpler than you think! For even illumination, place lights about half the ceiling height away from walls and then space them evenly throughout the room, typically 4-8 feet apart, depending on the light’s beam angle and your desired brightness. This guide provides easy-to-follow steps to get it right.
Thinking about adding recessed lighting to your home? It’s a fantastic way to brighten up a room, create a modern look, and eliminate those annoying dark corners. But figuring out exactly where to put those lights can feel a bit tricky. Get the spacing wrong, and you might end up with lights that are too close together, creating a spotlight effect, or too far apart, leaving shadowy areas. Don’t worry, though! With a few simple tips and a bit of planning, you can achieve beautiful, even lighting that makes your space shine. We’ll walk through it step-by-step, making it easy for any DIYer.
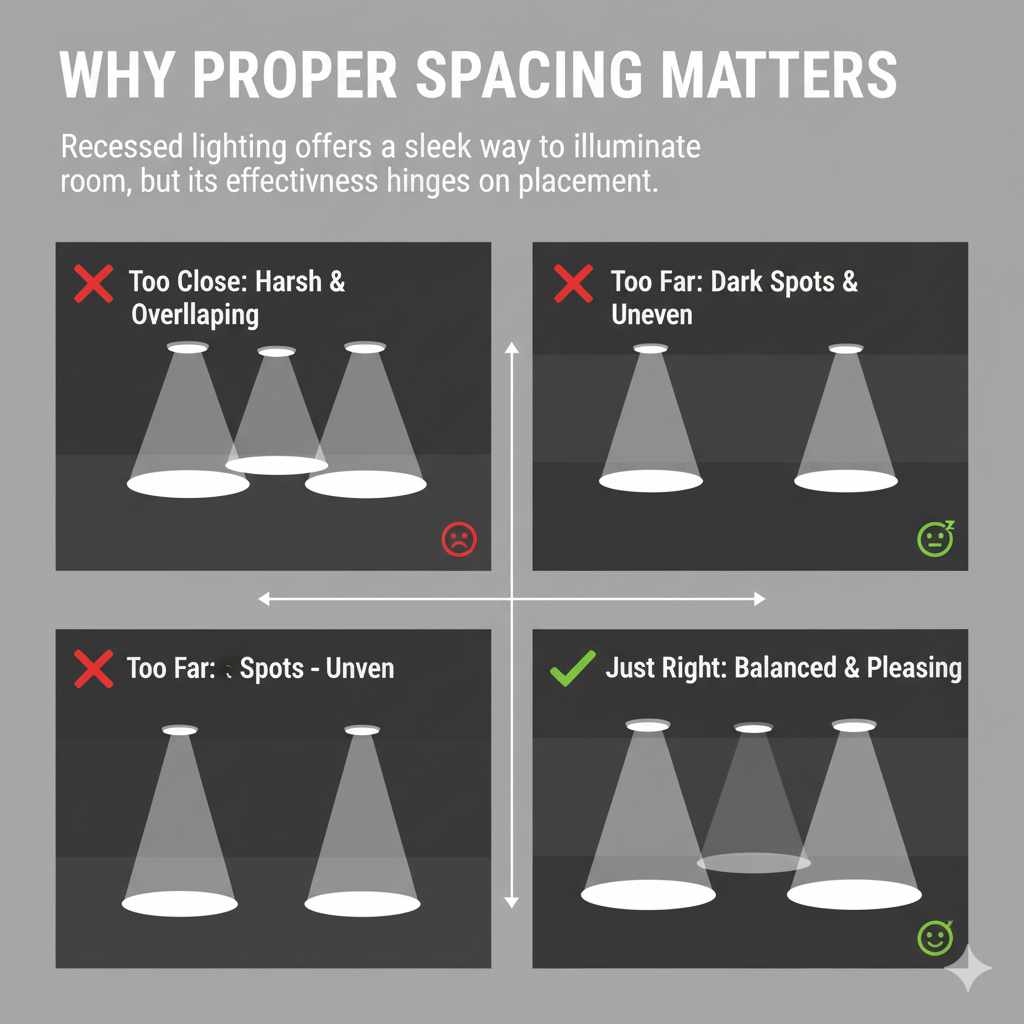
Why Proper Spacing Matters
Recessed lighting, often called “can lights” or “pot lights,” offers a sleek, modern way to illuminate a room. Unlike hanging fixtures, they sit flush with the ceiling, providing a clean look and freeing up visual space. However, their effectiveness hinges entirely on proper placement and spacing. If lights are too close, you get harsh, overlapping beams and an overly bright, potentially uncomfortable atmosphere. If they’re too far apart, you’ll have dark spots and uneven light, defeating the purpose of good illumination. Achieving the right balance ensures your room is well-lit, functional, and aesthetically pleasing.
Understanding Your Lighting Needs
Before you even think about measuring, let’s consider what you want your lights to do. Different rooms and different activities call for different lighting approaches.
General Ambient Lighting
This is the main source of light for a room. It should provide enough brightness for everyday tasks and make the entire space feel welcoming. For general lighting, you’ll want the lights to be evenly distributed across the ceiling.
Task Lighting
This is focused light for specific areas where you perform tasks, like a kitchen counter, a reading nook, or a workbench. You might need to place recessed lights closer together or use fixtures with a tighter beam spread in these zones.
Accent Lighting
Used to highlight architectural features, artwork, or plants. Accent lighting often uses directional spotlights and isn’t necessarily about even spacing across the whole ceiling but rather strategic placement to draw attention.
Key Factors in Recessed Lighting Spacing
Several elements influence how far apart your recessed lights should be. Understanding these will help you make informed decisions for your specific project.
Ceiling Height
This is one of the most crucial factors. The higher your ceiling, the further apart your lights can be. A common rule of thumb is to place lights about half the ceiling height away from walls and then space them evenly throughout the room.
- Low Ceilings (8 feet): Lights might be spaced 4-5 feet apart.
- Standard Ceilings (9-10 feet): Lights might be spaced 5-6 feet apart.
- High Ceilings (11+ feet): Lights might be spaced 6-8 feet apart, or even more, depending on the fixture.
Beam Spread/Angle
Recessed light fixtures come with different beam spreads, which is the angle at which the light is projected. This is usually measured in degrees.
- Narrow Beam (e.g., 25-30 degrees): Good for accent lighting or highlighting specific areas. Lights will need to be closer together for general illumination.
- Medium Beam (e.g., 40-60 degrees): A good all-around choice for general lighting in most rooms.
- Wide Beam (e.g., 70-90 degrees): Covers a larger area, useful for very large rooms or when fewer fixtures are desired.
The wider the beam spread, the further apart you can place your lights while still achieving overlap and even coverage. You can often find this information on the light fixture’s packaging or specifications.
Fixture Wattage/Lumens
While beam spread is key, the brightness of the bulb (measured in lumens) also plays a role. A brighter bulb can cover a larger area, potentially allowing for slightly wider spacing. However, it’s generally better to rely on beam spread and then adjust bulb brightness if needed.
Room Layout and Purpose
Consider how you use the room. A kitchen might need more lights over countertops than a bedroom. A living room might benefit from evenly spaced lights for general ambiance, with perhaps a few extra over a reading chair.
The “Half the Ceiling Height” Rule: A Starting Point
This is a fantastic and simple rule to get you started with spacing your recessed lights. It helps ensure that your lights aren’t too close to the walls, which can create harsh shadows and make the perimeter of your room feel dim.
How to Apply It:
- Measure your ceiling height. Let’s say your ceiling is 9 feet high.
- Divide the ceiling height by two. 9 feet / 2 = 4.5 feet.
- This measurement (4.5 feet) is your starting distance from the walls for the first row of lights.
So, for an 8-foot ceiling, your first row of lights would be 4 feet from the wall. For a 10-foot ceiling, they’d be 5 feet from the wall.
Calculating Spacing for Even Illumination
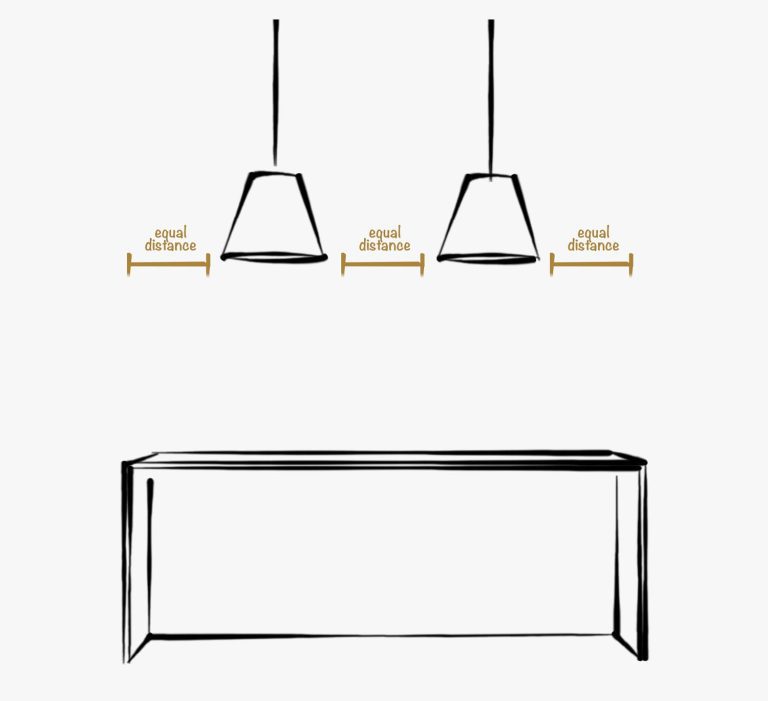
Once you’ve established the distance from the walls, you need to figure out how far apart the lights should be from each other. The goal is to have the light beams overlap slightly to create a smooth, consistent glow.
Using Beam Angle for Calculation:
A good way to calculate this is by considering the beam angle of your chosen lights. If you want the light from one fixture to just about meet the light from the next, you can use a simple formula:
Spacing = Beam Angle (in feet) / 2
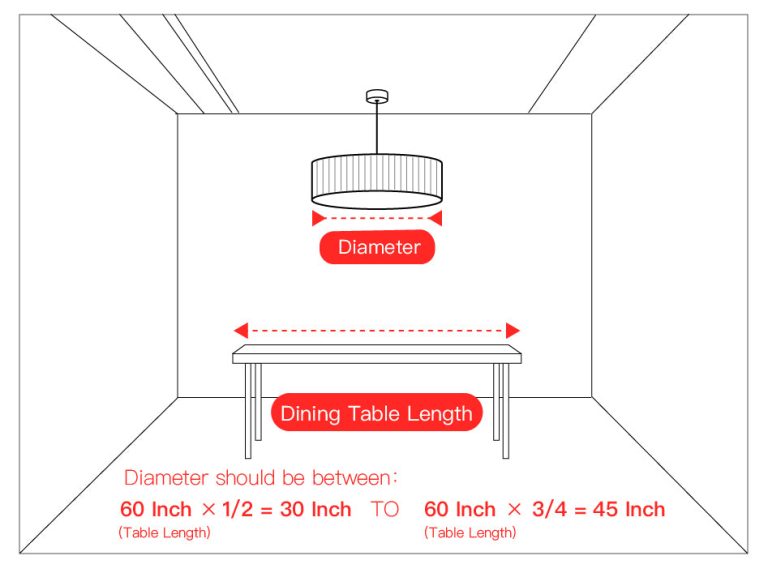
To get the beam angle in feet, you can often find charts or use an online calculator. A common 6-inch recessed light with a medium beam angle (around 60 degrees) might cover a diameter of about 6-8 feet at the ceiling level. For even coverage, you want the circles of light to overlap.
A Practical Approach:
For general lighting in most rooms, a spacing of 4 to 8 feet between fixtures is common. Here’s a table that offers general guidelines based on ceiling height and beam angle, but remember to always test your specific fixtures if possible!
| Ceiling Height | Typical Fixture Size | Beam Angle (Approx.) | Recommended Spacing (from wall & between fixtures) |
|---|---|---|---|
| 8 feet | 4-inch or 6-inch | Wide (70-90 degrees) | 3-4 feet from wall, 5-6 feet between fixtures |
| 8 feet | 4-inch or 6-inch | Medium (40-60 degrees) | 4 feet from wall, 4-5 feet between fixtures |
| 9-10 feet | 6-inch | Wide (70-90 degrees) | 4-5 feet from wall, 6-7 feet between fixtures |
| 9-10 feet | 6-inch | Medium (40-60 degrees) | 4.5-5 feet from wall, 5-6 feet between fixtures |
| 11+ feet | 6-inch | Wide (70-90 degrees) | 5-6 feet from wall, 7-8 feet between fixtures |
| 11+ feet | 6-inch | Medium (40-60 degrees) | 5-6 feet from wall, 6-7 feet between fixtures |
Note: These are general guidelines. Always refer to the manufacturer’s specifications for your specific recessed lighting fixtures and bulbs.
Step-by-Step Guide to Spacing Your Lights
Let’s break down the process into actionable steps. Grab your measuring tape, a pencil, and maybe a helper!
Step 1: Plan Your Layout
First, sketch out your room. Note any fixed furniture like cabinets, built-in shelves, or large appliances. Think about where you’ll be spending most of your time and what activities will occur in each area.
Step 2: Determine Distance from Walls
Use the “half the ceiling height” rule as your starting point. Measure and lightly mark this distance from each wall around the perimeter of the room. This is where your first row of lights will be centered.
Step 3: Measure the Room’s Width and Length
Get the exact dimensions of your room. This will help you divide the space evenly.
Step 4: Calculate Fixture Spacing
Decide on the spacing between your lights. If you’re using 6-inch fixtures with a medium beam spread in a 9-foot ceiling room, a spacing of about 5 feet between fixtures is a good starting point. You’ll also want to ensure the last fixture in a row is about the same distance from the wall as the spacing between fixtures (e.g., 5 feet from the wall if spacing is 5 feet).
Step 5: Mark Your Center Points
Using your measurements, mark the exact center point on the ceiling for each recessed light. You can use a chalk line or a laser level for accuracy, especially in larger rooms. Ensure your marks are centered within the joist bays if you’re installing new wiring, or plan your layout around existing joists.
Step 6: Consider Obstructions
Double-check your marked locations. Are there any ceiling fans, HVAC vents, or light fixtures you need to avoid? You may need to adjust your planned spacing slightly to work around these.
Step 7: Visualize and Adjust
Before cutting any holes, try to visualize the layout. You can use temporary markers or even hang string to get a feel for the spacing. It’s much easier to make adjustments now than after you’ve cut into the drywall!
Special Considerations for Different Rooms
Spacing might vary slightly depending on the room’s function and typical layout.
Kitchens
Kitchens often require more light, especially over countertops and islands.
- Over Countertops: Place lights about 2-3 feet from the backsplash wall. Spacing between these lights should be enough to illuminate the entire counter surface without shadows from your head when you’re standing there. A common spacing is 3-4 feet.
- Over Islands: If your island is wide, you might need two rows of lights. Space them to provide even light without creating glare on glossy surfaces.
- General Kitchen Lighting: Use the standard rules for the rest of the ceiling area.
Living Rooms and Bedrooms
These rooms generally focus on ambient lighting and comfort. Even spacing is key.
- Focus on the “half the ceiling height” rule for distance from walls.
- Space lights evenly across the main seating or sleeping areas.
- Consider placing lights near the perimeter to wash walls with light, which can make a room feel larger.
Hallways and Entryways
Hallways need to be well-lit for safety and to make a good first impression.
- Typically, lights are placed in the center of the hallway.
- Spacing can be generous, around 6-8 feet apart, depending on the hallway width and fixture type.
- Ensure the first and last light are not too close to the walls at the ends of the hallway.
Tools You Might Need
Having the right tools makes the job much smoother and safer.
- Measuring tape
- Pencil or chalk line
- Stud finder (if installing new wiring or mounting to joists)
- Laser level or chalk line
- Drill with appropriate bits (for pilot holes or cutting drywall circles)
- Reciprocating saw or drywall saw (for cutting holes)
- Wire strippers and pliers (if doing electrical work)
- Safety glasses
- Ladder
Always ensure you understand local electrical codes and safety practices. If you’re not comfortable with electrical work, it’s best to hire a qualified electrician. The National Electrical Code (NEC) provides comprehensive guidelines for safe electrical installations.
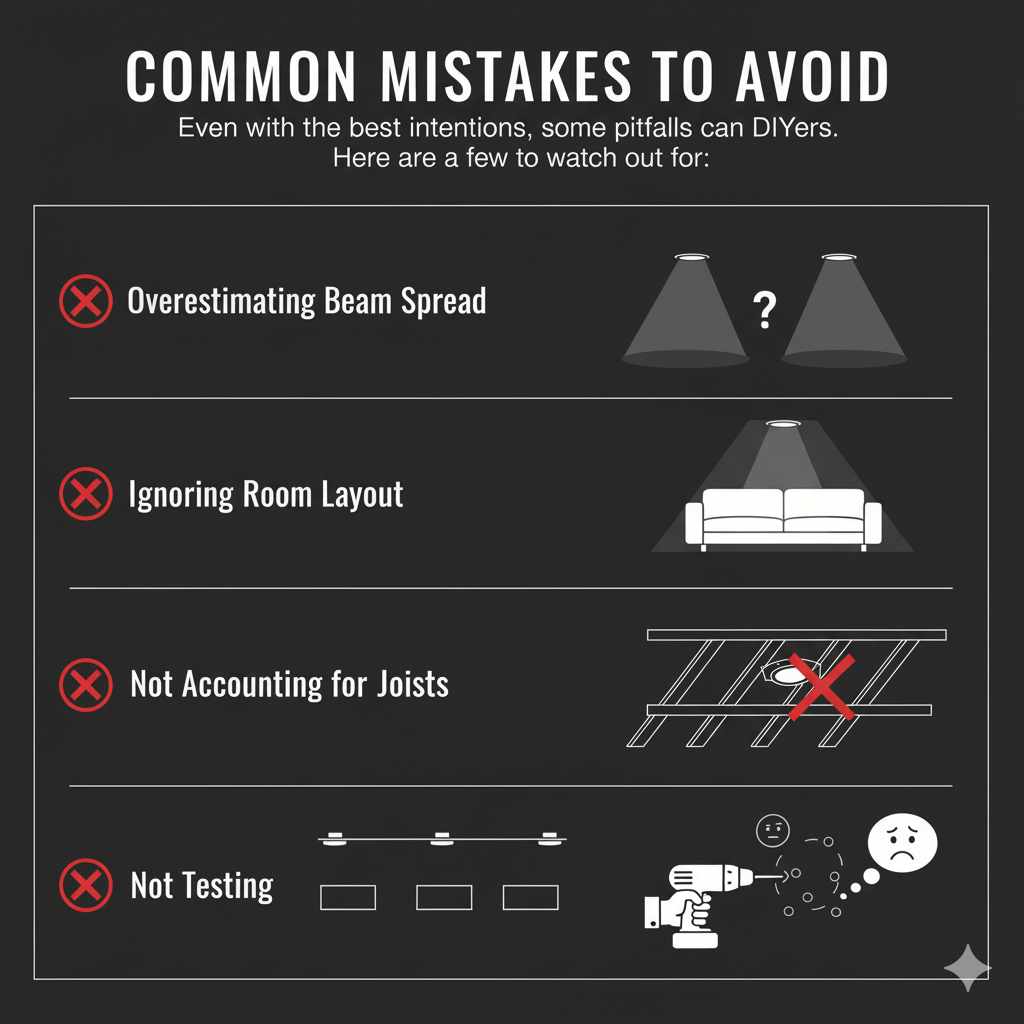
Common Mistakes to Avoid
Even with the best intentions, some pitfalls can trip up DIYers. Here are a few to watch out for:
- Overestimating beam spread: Assuming a light will cover more area than it actually does.
- Ignoring room layout: Placing lights where they’ll be directly over furniture or in awkward spots.
- Not accounting for joists: Trying to place a light directly where a ceiling joist runs.
- Uneven spacing: Making one gap wider or narrower than the others.
- Not testing: Cutting holes without a clear plan or without visualizing the light pattern.
Frequently Asked Questions (FAQ)
Q1: How far apart should recessed lights be in a 10×10 room?
For a 10×10 room with standard 8-foot ceilings and 6-inch lights with a medium beam spread, you’d typically place the first row about 4 feet from the wall. Then, space the lights about 4-5 feet apart from each other. This would likely mean two lights per row, with two rows, totaling four lights, spaced evenly.
Q2: Can I use fewer recessed lights if they are brighter?
While brighter bulbs (higher lumens) can cover more area, relying solely on brightness for spacing can lead to uneven light and glare. It’s better to use the recommended spacing for your fixture’s beam angle and then choose bulbs with appropriate lumen output for the desired brightness level. You can always dim brighter lights, but you can’t make dimmer lights brighter.
Q3: What if my ceiling joists are in the way?
Recessed lights are designed to fit between ceiling joists. When planning your layout, you’ll need to locate the joists using a stud finder. Your lights will need to be centered within the bays between the joists. This might mean adjusting your planned spacing slightly to accommodate the joist locations. Never cut into a joist.
Q4: How do I ensure lights are evenly spaced in a rectangular room?
First, determine the distance from the shorter walls using the “half ceiling height” rule. Then, divide the longer dimension of the room by the desired spacing to determine how many fixtures fit. For example, if your room is 20 feet long and you want 5-foot spacing, you’d fit 4 fixtures (20 / 5 = 4). Ensure the distance from the end walls to the first and last fixtures is also 5 feet. Repeat for the other dimension.
Q5: Do I need special lights for sloped or vaulted ceilings?
Yes, typically you’ll need special “sloped ceiling” or “vaulted ceiling” adapters or fixtures. These allow the light to hang straight down or adjust to the angle of the ceiling. Spacing on vaulted ceilings can be more complex, often requiring careful consideration of the angle and how light will fall on walls and floors.
Q6: What’s the difference between a 4-inch and a 6-inch recessed light for spacing?
A 6-inch recessed light generally has a wider beam spread and outputs more light (lumens) than a 4-inch light. This means you can typically space 6-inch lights further apart than 4-inch lights to achieve similar coverage. For general room illumination, 6-inch lights are very common.
Conclusion
Spacing recessed lighting might seem daunting at first, but by understanding the key factors like ceiling height and beam spread, and by following a systematic approach, you can achieve a beautifully lit space. Remember the “half the ceiling height” rule as your starting point for wall distance, and then calculate your in-between spacing to ensure even, overlapping light coverage. Don’t forget to consider the specific needs of each room, especially in areas like kitchens where task lighting is crucial. With careful planning, the right tools, and a bit of patience, you’ll be enjoying your professionally-looking, perfectly lit home in no time. Happy lighting!