How to Remove a Recessed Ceiling Light (Can vs. Canless)
A recessed ceiling light comes out by cutting breaker power, releasing the trim’s clips or screws, then disconnecting the wire nuts — canless LED discs release with a squeeze, while can-style housings often need attic access to unbolt the mounting bars. Skip the voltage-tester check and you risk a 120V shock or a cracked ceiling from forcing a stuck can. This guide covers can vs. canless removal, patching the hole, and what to do when the fixture won’t budge.
Quick Answer
To remove a recessed ceiling light: cut power at the breaker and confirm with a non-contact voltage tester, pull the bulb, release the trim’s clips or screws, disconnect the wire nuts, then lower the housing. Canless LED discs unclip with a squeeze of the spring arms; older can-style housings may need attic access to release the mounting bars before they’ll drop free.
What Is a Recessed Ceiling Light?
A recessed ceiling light is a light fixture tucked into your ceiling. It sits flush, giving a clean, modern look. These lights are common in kitchens, living rooms, and bathrooms. They’re great for bright, even lighting but can be tricky to remove if you don’t know how. Understanding their parts—like the bulb, trim, and housing—helps make removal simple and safe.
Why Remove a Recessed Ceiling Light?
Most homeowners remove a recessed light to replace a burnt-out bulb, swap the housing for a newer LED unit, or change the fixture entirely during a remodel. Others are removing recessed lighting altogether to refresh a room’s look with a flush-mount fixture instead. Whatever the reason, removal is easier than it looks with the right steps and tools.
Tools and Materials You’ll Need
To remove a recessed ceiling light, gather these basic tools:
- A flathead or Phillips screwdriver (depending on your fixture).
- A step ladder to reach the ceiling safely.
- A non-contact voltage tester for safety.
- Gloves to protect your hands from sharp edges.
- A replacement bulb or fixture (if needed).
These tools are affordable and easy to find at hardware stores. A basic screwdriver costs about $5-$10, and a voltage tester is around $15-$25. Check your fixture’s manual (if you have it) for specific screw types.
Table 1: Tool Cost Comparison
| Tool | Estimated Cost | Where to Buy |
|---|---|---|
| Screwdriver | $5-$10 | Hardware stores |
| Voltage Tester | $10-$25 | Hardware stores, Amazon |
| Step Ladder | $20-$50 | Hardware, home stores |
| Caption: Affordable tools make removing recessed lights easy and safe. |
Best Voltage Tester Pick
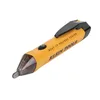
Klein Tools NCVT1P Non-Contact Voltage Tester – $16.94
This is the exact style of non-contact tester this guide recommends for confirming the breaker actually killed power before you touch a single wire nut — clips in a pocket and beeps on contact.
- Best for: Confirming power is off before touching trim clips or wire nuts
- Why we picked it: 50-1000V detection range covers household recessed light circuits, matches Step 1 of this guide
- Main drawback: Non-contact testers can occasionally false-positive near other live wiring — always double-check with a second method if unsure
Compare more recessed light removal options
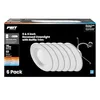 Option 1 Feit Electric LED Recessed Downlight Retrofit Kit – $39.97
|
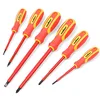 Option 2 HORUSDY 1000V Insulated Precision Screwdriver Set – $15.99
|
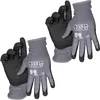 Option 3 Klein Tools Cut-Resistant Work Gloves – $15.98
|
As an Amazon Associate we earn from qualifying purchases.
Step-by-Step Guide to Removing a Recessed Ceiling Light
Here’s a simple guide to safely remove your recessed ceiling light. Follow these steps carefully to avoid damage or injury.
Step 1: Turn Off the Power
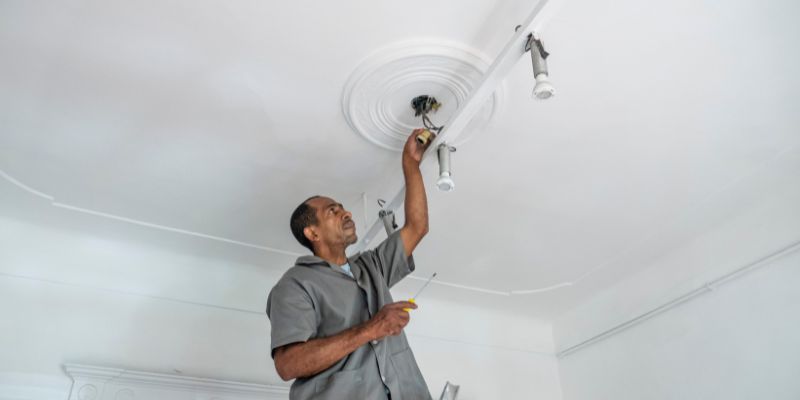
Safety first! Turn off the power to the light at your breaker box. Use a non-contact voltage tester to confirm the power is off. This prevents shocks or accidents.
Step 2: Remove the Light Bulb
Let the bulb cool down if it was recently on. Gently twist or pull the bulb out, depending on its type (e.g., halogen, LED). Check the bulb’s base to see if it’s a twist (bayonet) or pull (bi-pin) style.
Step 3: Remove the Trim
The trim is the decorative ring around the light. Look for small screws or clips holding it in place. If paint or caulk seals the trim to the ceiling, score along the edge with a utility knife first so pulling it doesn’t chip the drywall. Use your screwdriver to loosen screws or gently pull clips to release the trim — if it’s stuck, a putty knife slipped along the edge helps pry it loose without cracking the ceiling.
Step 4: Access the Housing (Optional)
The housing is the metal can in the ceiling. You usually don’t need to remove it unless replacing the entire fixture. If needed, unscrew or unclip the housing carefully, watching for wires.
Step 5: Disconnect Wires (If Removing Fixture)
If replacing the fixture, disconnect the wires after confirming the power is off. Twist off wire nuts and gently pull wires apart. Take a photo of the wiring for reference when installing a new fixture — if you’re rewiring for a different fixture type, see our guide to wiring recessed lighting for the 14/2 vs. 12/2 breakdown.
Step 6: Patch or Replace
If you’re not replacing the light, patch the ceiling hole with drywall compound. If installing a new fixture instead, follow the manufacturer’s instructions to connect wires and secure it — our recessed lighting installation guide covers IC-rated housing requirements if you’re starting fresh.
- Tip 1: Wear gloves to avoid cuts from sharp metal edges.
- Tip 2: Label wires with tape to remember their connections.
- Tip 3: Test the new bulb before securing the trim to save time.

Canless vs. Can-Style Recessed Lights: What’s Different When Removing Them
A canless recessed light is a slim, all-in-one LED disc that mounts directly to the ceiling with spring-loaded retainer clips instead of sitting inside a separate metal can. Squeeze the spring arms through the ceiling cutout and the whole disc drops free once the wire nuts are disconnected — there’s no separate housing to unbolt. A can-style fixture, by contrast, has a metal housing set into the ceiling (or attic) with mounting bars, so removing the housing itself — not just the trim and bulb — usually means pushing up into the can from below or reaching it from the attic.
Do You Need Attic Access to Remove a Recessed Light?
No — not for most removals. Pulling the bulb, trim, and disconnecting the wire nuts is all done from below, and that’s enough if you’re just capping the fixture or swapping in a retrofit LED kit. Full housing removal is where attic access matters: remodel-style cans typically release from below via screw-activated clips, but new-construction cans are nailed to joists with mounting bars, and getting those out usually means either attic access or cutting a small drywall access panel around the fixture.
Benefits and Challenges of Removing Recessed Lights
Removing recessed lights is straightforward and can save money on electrician fees, which typically run $100-$200 per fixture. It also lets you upgrade to energy-efficient LEDs. However, challenges include tricky clips, tight spaces, or old fixtures that are stuck. Patience and the right tools make it manageable.
📊 ENERGY STAR-certified LED recessed fixtures use up to 90% less energy than comparable incandescent lighting — Source: ENERGY STAR, Light Fixtures (Downlights), 2026
Alternative Options
Instead of removing the entire fixture, consider these options:
- Replace the bulb with an LED for better efficiency.
- Use a retrofit kit to upgrade without removing the housing.
- Cover the light with a decorative plate if you’re not replacing it.
Table 2: Bulb Type Comparison
| Bulb Type | Pros | Cons |
|---|---|---|
| Halogen | Bright, affordable | Hot, short lifespan |
| LED | Energy-efficient, long-lasting | Higher upfront cost |
| CFL | Energy-saving | Contains mercury |
| Caption: Choosing the right bulb can save money and energy. |
My Personal Tips for Success
When I first removed a recessed light, I struggled with a stuck trim. Gently wiggling it while pulling down worked like magic. Always double-check the power is off—I learned this the hard way with a small spark! Keep a flashlight handy for dark ceilings, and take your time to avoid breaking clips. These small steps make the process smooth and stress-free.
“Gently wiggling a stuck trim while pulling down released it without cracking the drywall — and double-checking the voltage tester first is what caught a live wire before it caught us.”
Table 3: Common Mistakes to Avoid
| Mistake | Solution |
|---|---|
| Forgetting to turn off power | Always use a voltage tester |
| Breaking trim clips | Pull gently, use correct screwdriver |
| Losing small screws | Keep screws in a small container |
| Caption: Avoid these mistakes for a smooth removal process. |

Frequently Asked Questions
How do I know if the power is off?
Use a non-contact voltage tester to check the fixture. It beeps or lights up if power is present. Always turn off the breaker first. This keeps you safe from shocks.
What if the trim won’t come off?
Check for hidden screws or clips. Gently wiggle the trim while pulling down. If it’s stuck, use a flathead screwdriver or putty knife to pry it carefully without cracking the ceiling.
Can I replace just the bulb?
Yes! Most recessed lights only need a new bulb. Check the bulb type (e.g., LED, halogen) and twist or pull it out carefully.
How much does it cost to remove a recessed light?
DIY removal costs $15-$50 for tools. Hiring an electrician costs $100-$200 per fixture. LEDs save money long-term by cutting energy use.
What if I don’t want to replace the light?
Patch the ceiling hole with drywall compound. Sand and paint to match your ceiling. It’s an easy fix for a clean look.
Are recessed lights safe to remove?
Yes, if you turn off the power and follow steps carefully. Wear gloves and use a voltage tester to avoid shocks or cuts.
Can I upgrade to LED without removing the fixture?
Absolutely! Use an LED retrofit kit to upgrade easily. It screws into the existing socket and saves energy.
Can you remove recessed lighting without attic access?
Yes, for the trim, bulb, and wiring — those all come out from below. Full housing removal on new-construction cans is the part that usually needs attic access or a small drywall access cut, since those housings are nailed to the joists.
Conclusion
Removing a recessed ceiling light is a manageable project with the right tools and steps. You can save money, upgrade your lighting, or refresh your home’s look. Follow the steps, stay safe, and don’t rush a stuck can — forcing it is how ceilings crack. Try removing a light this weekend, and check ENERGY STAR for more on LED retrofit savings.
Sponsored / affiliate links. As an Amazon Associate I earn from qualifying purchases. I may earn additional commission from eligible campaigns.
 ASD 2 Inch Trimless LED Recessed Ceiling Light Fixture, Mud-in Canless Downlight with Junction Box, 5CCT Selectable 2700K-5000K, 8W 643 Lumens, CRI90+, Anti-Glare, Dimmable, IC & Wet Rated, ETL
 ASD 6 Inch Trimless LED Recessed Ceiling Light Fixture, Mud-in Canless Downlight with Junction Box, 5CCT Selectable 2700K-5000K, 24W 2075 Lumens, CRI90+, Anti-Glare, Dimmable, IC & Wet Rated, ETL